Hello! I’m Jooyoung Kim, a mixing engineer and music producer.
Today, I’d like to introduce you to the affordable Lifeline Module plugins from Excite Audio.
Since there are quite a few plugins to cover, I’ll split this into two parts.
(If you purchase through the links provided, I’ll receive a small commission, which greatly helps with running this blog. Thank you! 😊)
Before we dive in, I want to mention something.
Personally, I highly recommend these simple plugins.
They have low latency and don’t consume much CPU, so they’re easy to use without burdening your system.
Especially when working on large mixes with over 100 tracks, it can be frustrating when plugins start causing delays.
Before upgrading to a Mac Studio, managing resources was both crucial and challenging.
This was especially true with DAWs like Logic that only support buffer sizes up to 1024. It could be quite limiting!
While these plugins aren’t blazing fast, they’re definitely quick and reliable enough for most tasks.
For instance, I found that the Lifeline Comp performs about twice as fast as the CLA-2A, with latency under 7ms.
As with the previous plugins, these were provided by Plugin Boutique under NFR (Not for Resale) terms.
Let’s get started!
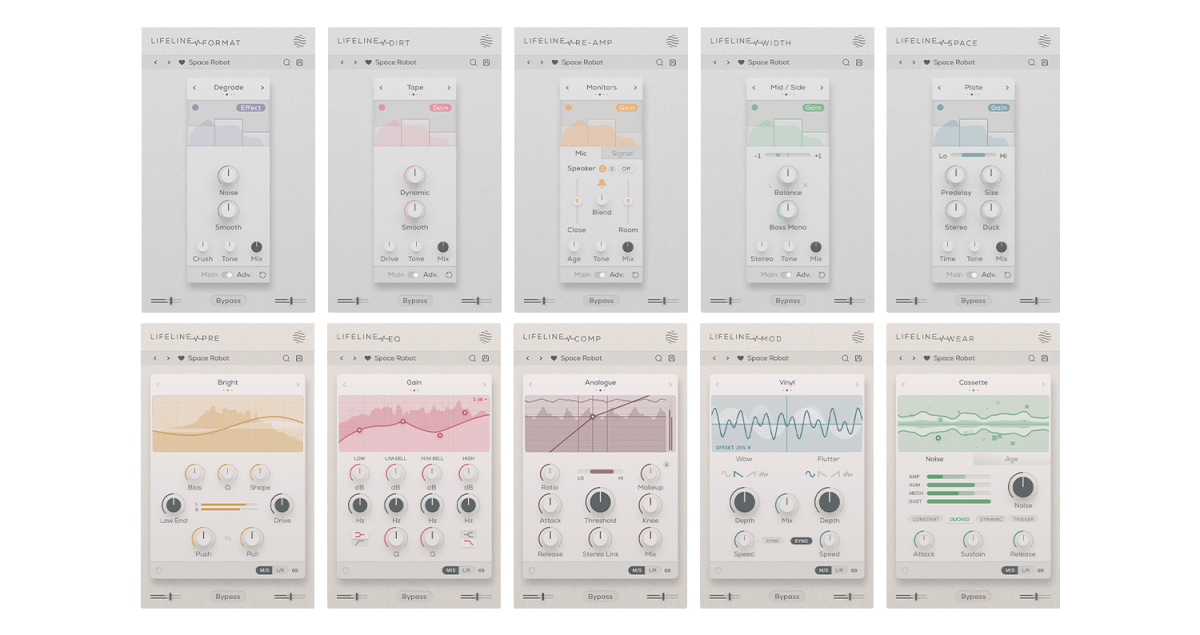
There are 10 Lifeline Modules in total, and the Lifeline Console includes 5: Preamp, EQ, Compressor, Modulation, and Wear.
When you purchase either the Console or Expanse, the respective modules are also provided as individual plugins, and you can buy each module separately.
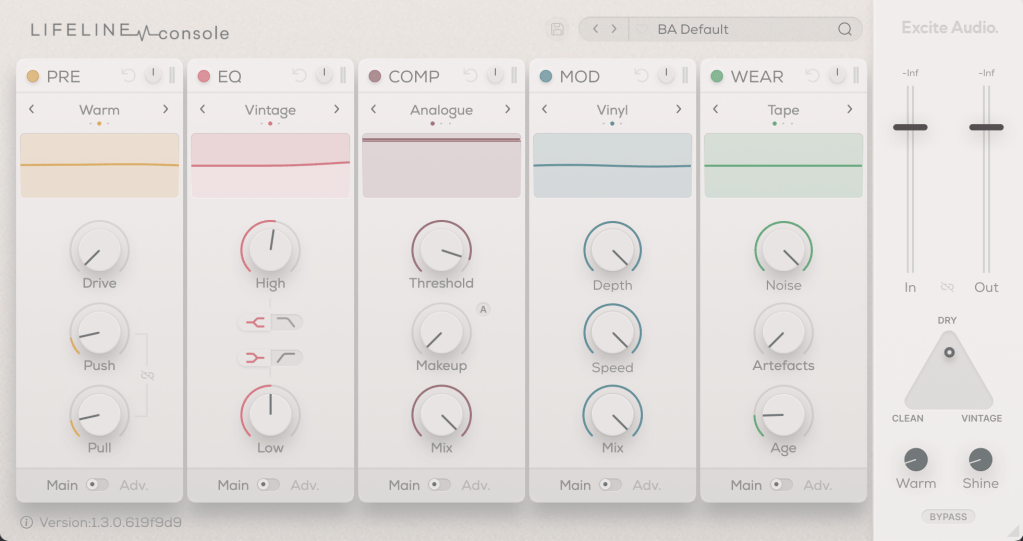
Let’s start by looking at the Console window with the included modules.
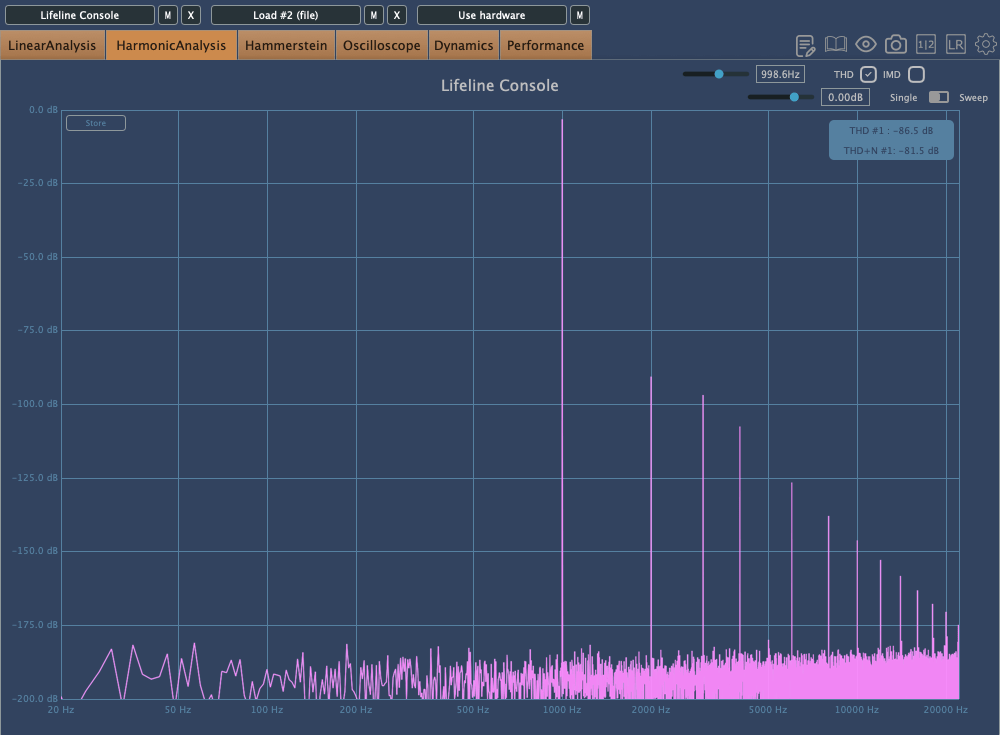
Even if you bypass all the modules, the Clean, Vintage, Warm, and Shine settings still affect frequency response and harmonic distortion. It’s fair to think of it as a type of saturator.

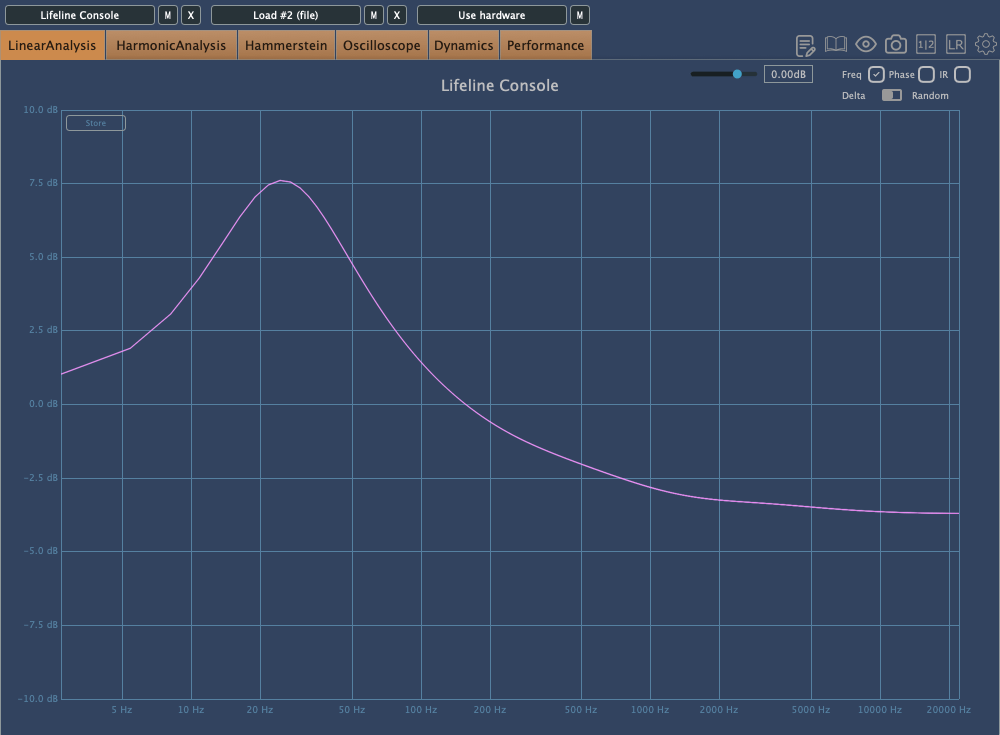
The photo above shows the frequency response graph when Clean is set to 100%. There’s no visible harmonic distortion in Clean mode, so I’ve skipped that image.
Here’s the frequency response and harmonic distortion in Vintage mode.
You can see how the Console lives up to its name.
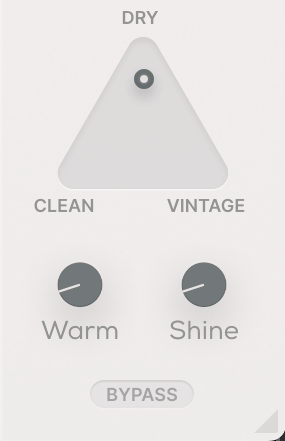
When set to Dry, the Console’s saturation is bypassed, and only the module effects are applied. Warm and Shine are shelving filters that boost the low and high frequencies, respectively.
That should cover the basics of the Console’s utility. Now, let’s take a closer look at the modules.
Preamp

The Preamp module offers three tonal options: Bright, Warm, and Dark. As the names suggest, Bright boosts the highs, Warm enhances the mids, and Dark emphasizes the lows while reducing the highs.
Increasing the Push will amplify these frequency changes, while Pull will reverse them. The Bias setting also alters the response.
Raising the Drive introduces some harmonic distortion, and if the signal gets too strong, limiting occurs.
The Q value works similarly to an EQ’s Q, adjusting the bandwidth of the frequency response, and the Shape control allows you to modify the frequency response curve.
Think of the Preamp module as a tool for saturation and filtering.
EQ
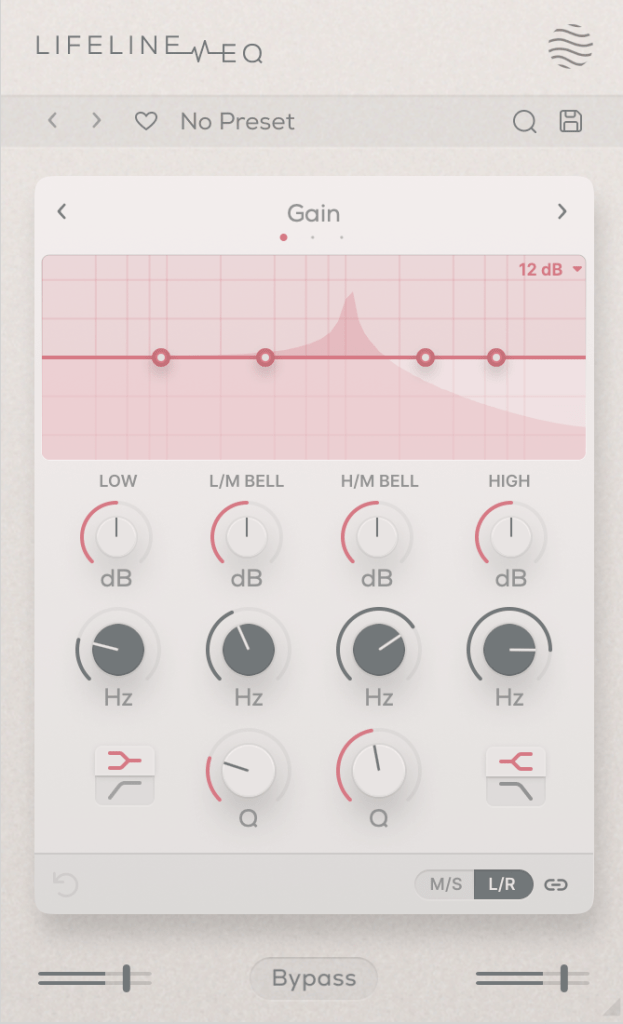
The EQ is, well, an EQ!
However, it’s not just a basic EQ—both Vintage and Dirty modes introduce harmonic distortion.
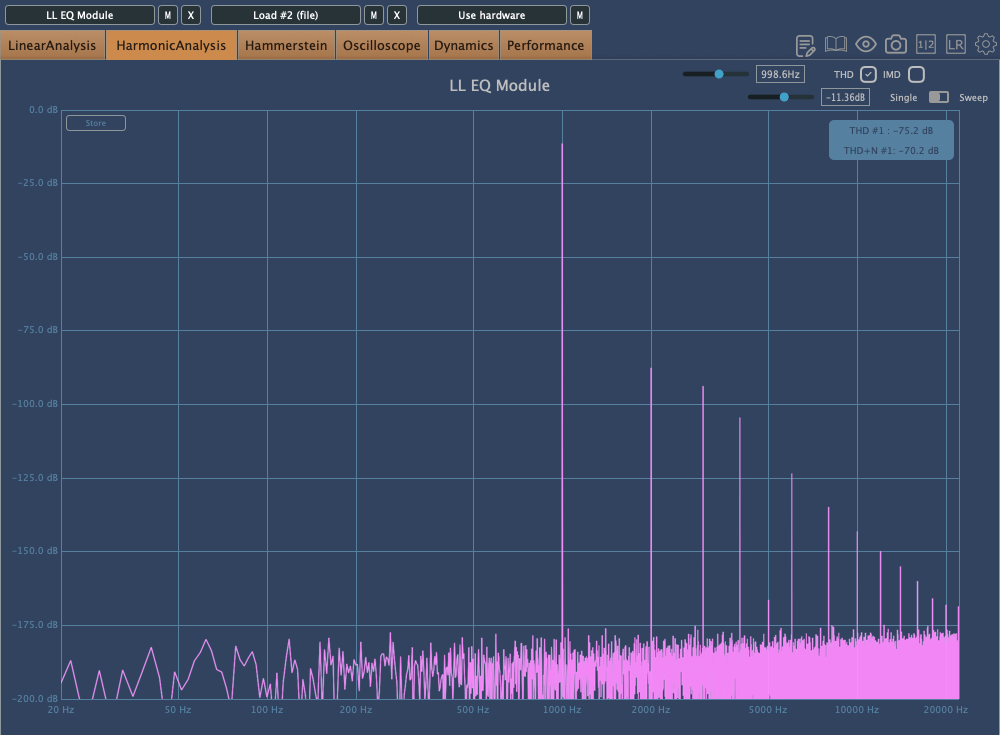

First: Vintage Mode, Second: Dirty Mode
Interestingly, in Dirty mode, the amount of harmonic distortion increases as you make more adjustments.
Comp

The Comp is a simple compressor with three saturation options: Analog, Transparent, and Variable.
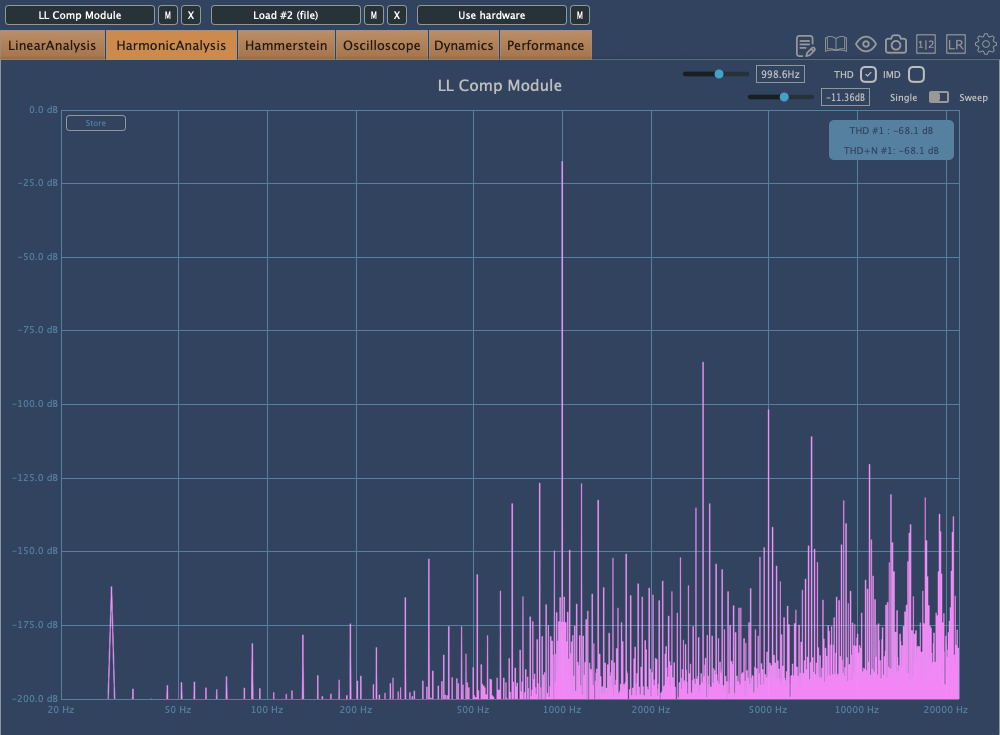

In order: Analog, Transparent, Variable
The Lo-Hi control functions as an internal sidechain, similar to the Pre-Emphasis knob on the LA-2A.
The A button above the Makeup Gain is for auto-gain, but it’s a bit unique. It measures the audio over a short period and then locks the value. Normally, auto-gain on compressors is best avoided, but this type of fixed auto-gain might be worth trying out.
The other settings are standard for most compressors, so I won’t go into detail here.
Mod
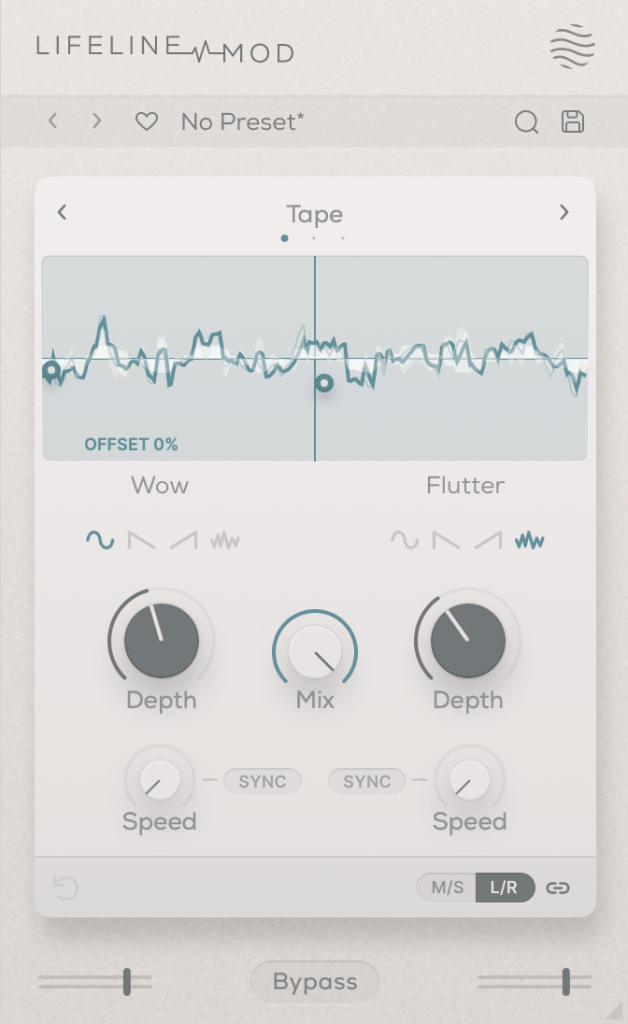
The Mod module simulates Wow/Flutter noise with three options: Tape, Vinyl, and Cassette.
Simply applying it with the Mix set to 100 won’t change anything; you need to adjust the Depth controls on either side to affect the sound. It’s useful for creating that unstable, lo-fi tone.
Wear
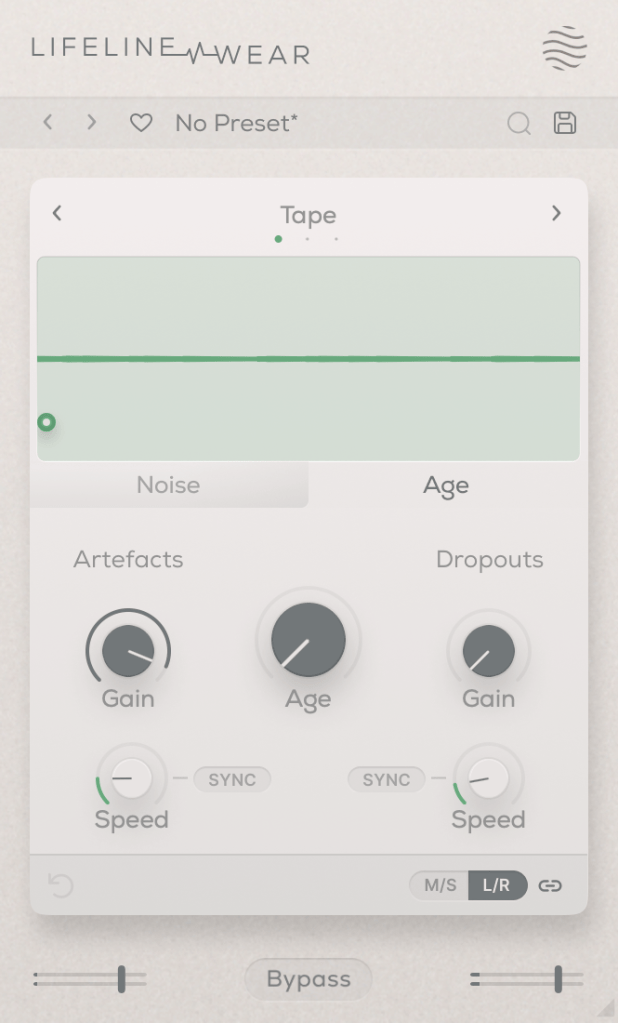
The Lifeline Wear module alters the sound as soon as it’s applied.
Especially with the Age setting, the frequency response changes, and harmonic distortion increases.
These changes depend on whether you’re using the Tape, Vinyl, or Cassette mode.
Artefacts refer to the clicks and pops you hear on tape, LPs, or cassettes,
and Dropout simulates the sudden loss of sound.
It could be fun to use these for ducking or adding rhythm.
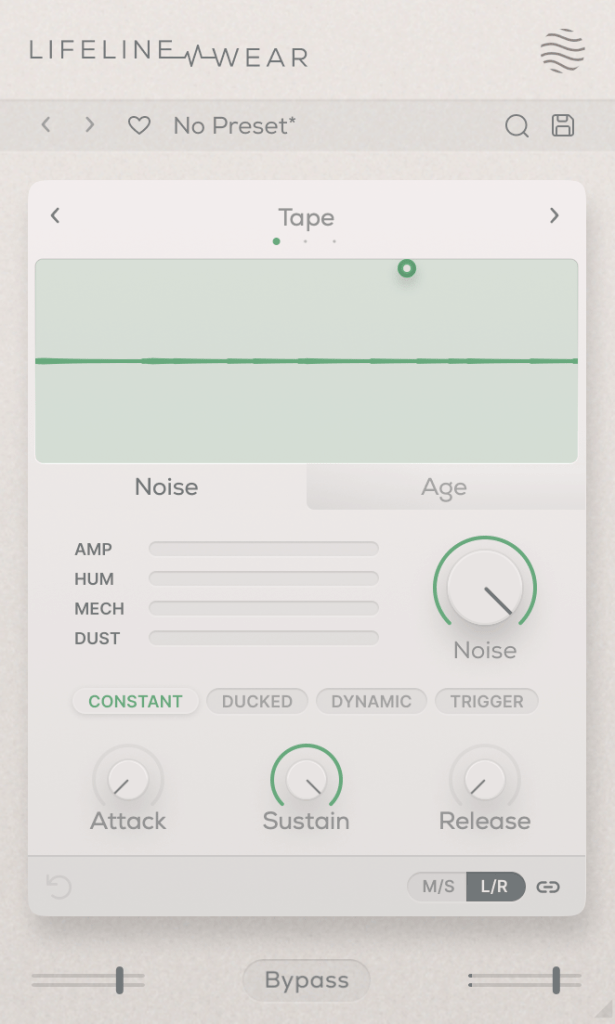
You can also select the type and amount of noise. You can listen to the noise types, but let me briefly explain the terms in the middle:
- Constant: Keeps the noise playing even when the source is silent.
- Ducked: Ducks the noise in sync with the source audio.
- Dynamic: Plays noise along with the source audio.
- Trigger: Suppresses the source audio and only plays noise in sync with it.
The Attack, Sustain, and Release settings below control the noise’s envelope.
Each Lifeline module is quite affordable, priced around $11 each. If I had to pick just one, I’d go for Wear.
There are many third-party plugins that can replace the others, but nothing quite like Wear. 😊
These plugins are also great for those who don’t own many third-party plugins.
Additionally, if you purchase any plugins from Plugin Boutique this month,
you can get either the Pyros distortion plugin or the Bloom Vocal Aether Lite plugin for free.
So, if you’re thinking of buying a few modules or considering the Expanse in addition to the Console, I recommend purchasing them separately to get both free products!
I’ll see you in the next post! 😊
