Hello, everyone! This is Jooyoung Kim, a mixing engineer and music producer.
Today, I’d like to share the story of an EP project called Miwha, which I worked on with a friend this past summer.
The EP was released on November 8th, so it’s already been nearly a month! I kept meaning to write about it here but had too much going on. Finally, I’ve found some time to share it with you.
About the Artist
The artist, originally known by his Korean name, Hanseong Kim, has been an indie band musician. For this project, he rebranded himself as Danny Boy and wanted to explore a new musical style.
He came across some of my past work and asked me to handle the production for this EP. We ended up working on a total of four tracks together.
The Production Process
Initial Submission: The artist sent me rough Logic projects with basic piano chords, vocals, and song structures.
Arrangement: I added instrumental arrangements.
Recording: We recorded vocals.
Final Touches: I handled vocal tuning, mixing, and mastering.
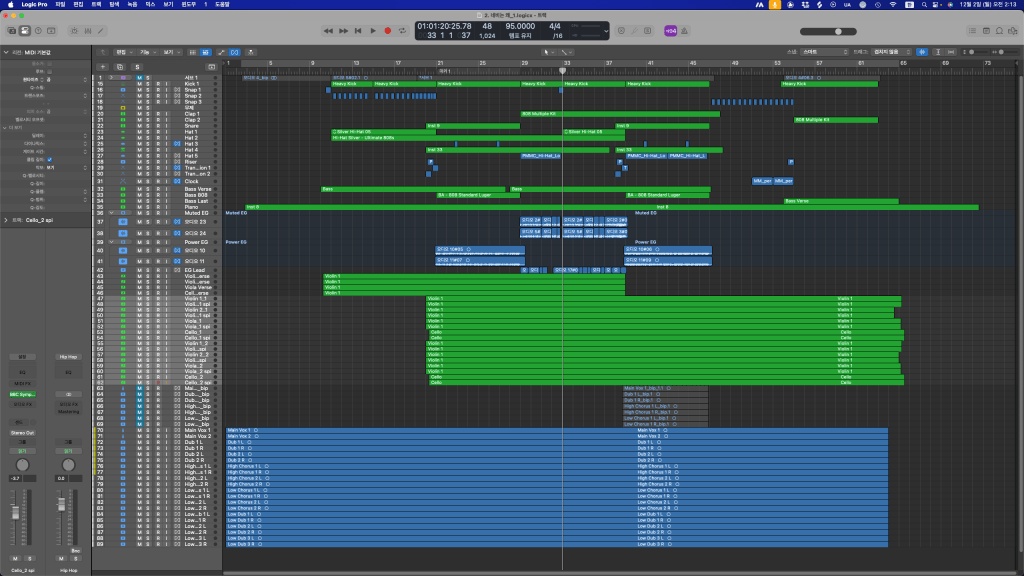
Initial Logic Project
Arranged and Mixed Project
Track Breakdown
Track 1. 귀엽게 입었어 (Dressed Cute)
The artist originally used Logic’s built-in Fender Rhodes virtual instrument for the comping, which matched the vibe perfectly. I decided to use Arturia’s Stage 73 V for the main tone.
Since the lyrics were playful, I kept the arrangement simple rather than overcomplicating it. Initially, I considered layering lots of vocal harmonies but ended up scaling back for a cleaner feel.
Recording went smoothly, and everything came together nicely.
Track 2. 네비는 왜? (Why GPS?)
This is my favorite track on the EP. 😊
The initial demo was a simple four-chord loop. To match the melody, mood, and tempo, I opted for a Japanese-style arrangement, breaking up the chords and adding more complex instrumentation.
I used string libraries like Musio and mixed it with either LASS or BBCSO for texture.
The artist gave me free rein with this one, so I even modified the song form. It was a lot of fun but also very time-consuming.
The vocal recording was particularly tricky. The artist’s voice had some harsh resonances in the high-energy parts, so I had to use a notch filter—something I rarely do for vocals.
Track 3. 미화 (Miwha)
This track was the hardest to arrange.
I wanted to add subtle swing or groove with 16th-note drums, but the artist preferred a straight 8th-note drum feel, so we stuck with that.
The song features both electronic and acoustic drums:
Trap-style electronic drums for the rap sections.
Acoustic drums for the chorus.
The artist had sketched out the basic chords with Logic’s built-in Wurlitzer piano, so I replaced it with Arturia’s Wurli V2.
The Bye Bye vocal chop in the intro was a fun accident—it was originally just a vocal ad-lib that sounded like “Bye” after pitch-shifting. It worked so well we decided to keep it.
The rap recording had its challenges since it was the artist’s first time rapping, but we made it work!
Track 4. 그럼에도 (Nevertheless)
This ballad-style track was relatively straightforward in terms of arrangement but took the longest to record.
With its slow tempo and vocally-driven melody, every line had to be carefully sung, especially since the lyrics in the first and second chorus differed.
Recording all the vocal parts left both me and the artist completely drained. We started recording at around 2 or 3 PM and finished the final track around 1:30 AM. This particular song alone took over three hours to complete!
Final Thoughts
The project spanned about two and a half months, from early July to mid-September. It was a whirlwind of a summer.
Since we were working on a tight budget, I handled most of the production solo. For the recordings, a director friend lent us his studio, where I used:
Preamp/EQ: HA-73EQ
Microphone: Peluso P87
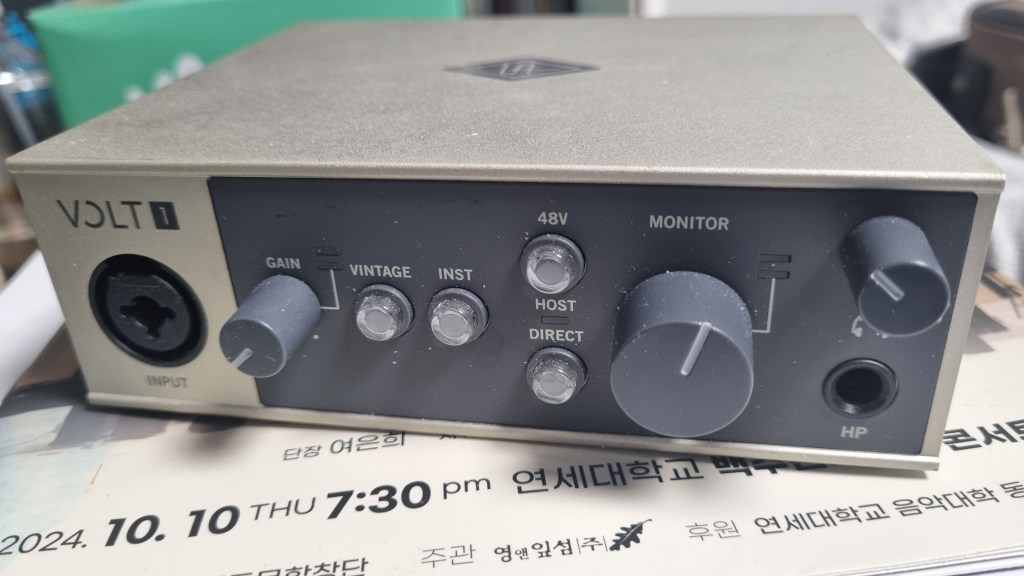
Audio Interface: UA Volt1
I also brought my Nero monitor controller, reflection filter, stands, cables—pretty much everything. Looking back, I should’ve taken more photos of the setup.
This experience reaffirmed that even with an affordable interface, good input gear and recording conditions make all the difference. Honestly, in most cases, something like a Focusrite Clarett should suffice if the rest of the chain is solid.
That said, I understand why studios lean toward higher-end gear for versatility and reliability. If it weren’t for my summing mixer, I’d probably use simpler equipment too.
I had so many thoughts during the production process that I wanted to write down, but now that I’m finally writing this, it’s hard to recall everything.
Anyway, that’s it for today! See you in the next post. 😊
Hello, this is Jooyoung Kim, mixing engineer and music producer!
For this year’s Black Friday deals, I believe the best bang-for-the-buck offer is IK Multimedia’s Total Studio 4 Max. Let me introduce it in detail for those who are curious!
This product was provided to me by Plugin Boutique in an NFR (Not For Resale) format. If you purchase using the links provided in this article, I’ll receive a small commission that helps me greatly. (Rest assured, buying through these links doesn’t cost you more than purchasing directly from Plugin Boutique!)
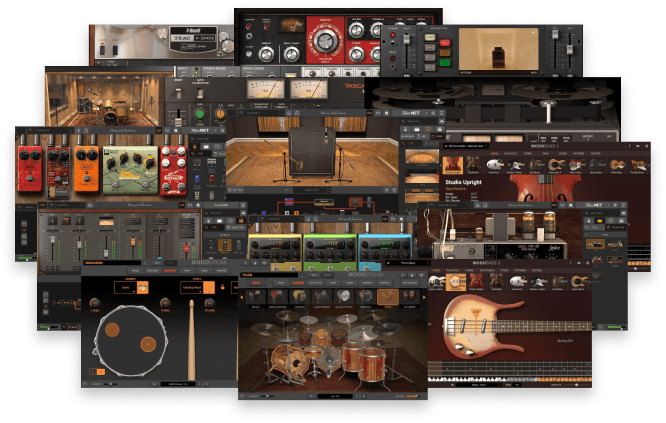
What is Total Studio 4 Max?
Total Studio 4 Max is a comprehensive music production suite containing 170 plugins across multiple categories. Below is a neatly organized overview of the included plugins:
Virtual Instruments
Product
Description
SampleTank 4 MAX v2
Comes with 34 expansion libraries, offering diverse loops, sounds, and effects such as Beat Machines, Bionic Drums, and Salsa Percussion.
Syntronik 2 MAX v2
A hybrid sampled and modeling engine synthesizer featuring 34 synths and over 5,000 presets.
Miroslav Philharmonik 2
A sample-based workstation for classical symphonic instruments, including rich strings and brass.
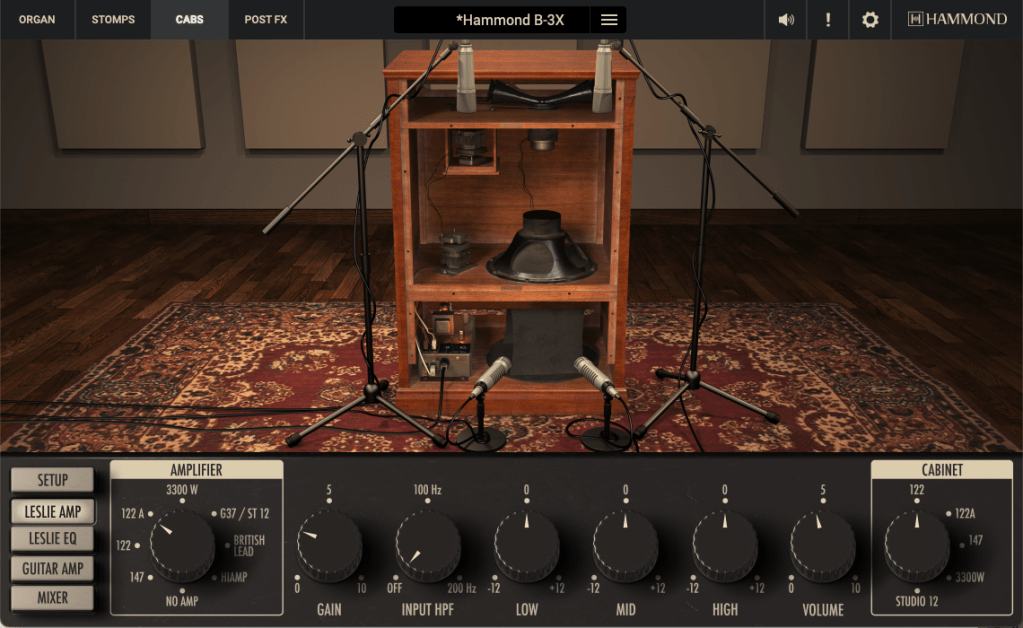
Hammond B-3X
Accurately recreates the legendary Hammond B-3 organ sounds, perfectly integrated with AmpliTube Leslie for authentic organ tones.
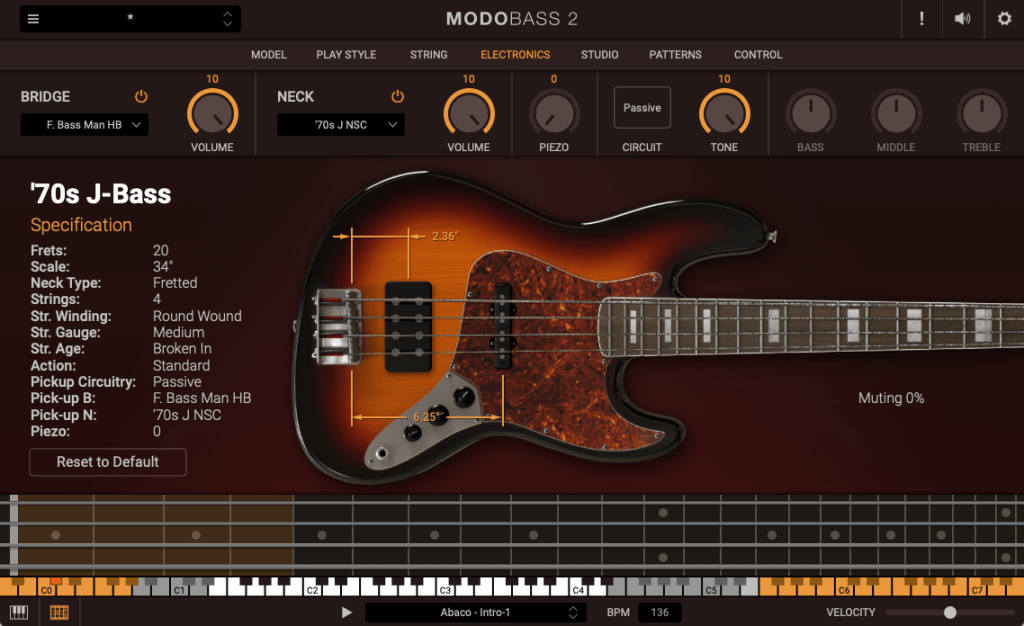
MODO BASS 2
Adds fretless and upright basses, totaling 8 additional instruments with advanced performance controls for lifelike realism.
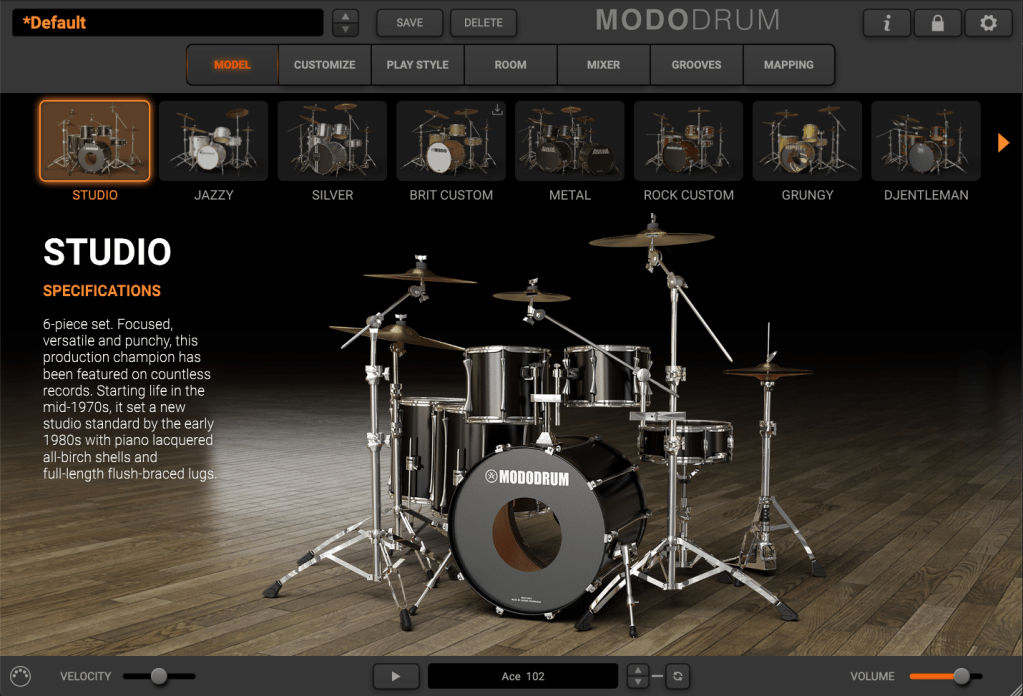
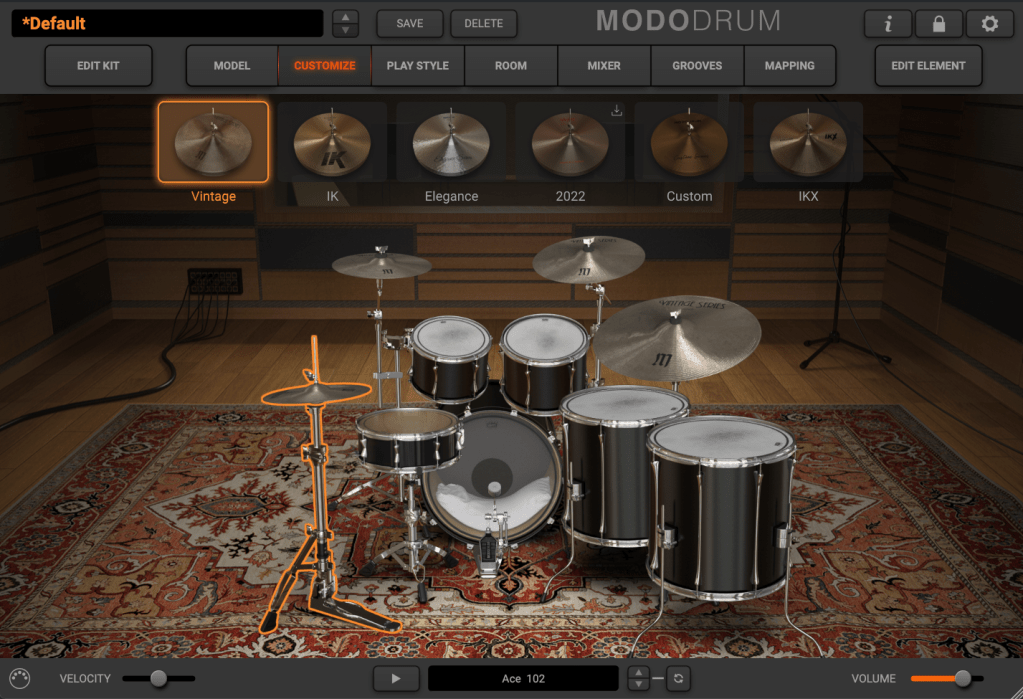
MODO DRUM 1.5
Provides 13 customizable drum kits with modal synthesis and advanced sampling technology for realistic, flexible drum tracks.
Guitar & Bass Tones
Product
Description
AmpliTube 5 MAX v2
Includes 18 brand/artist collections with 435 gear models and thousands of AmpliTube presets.
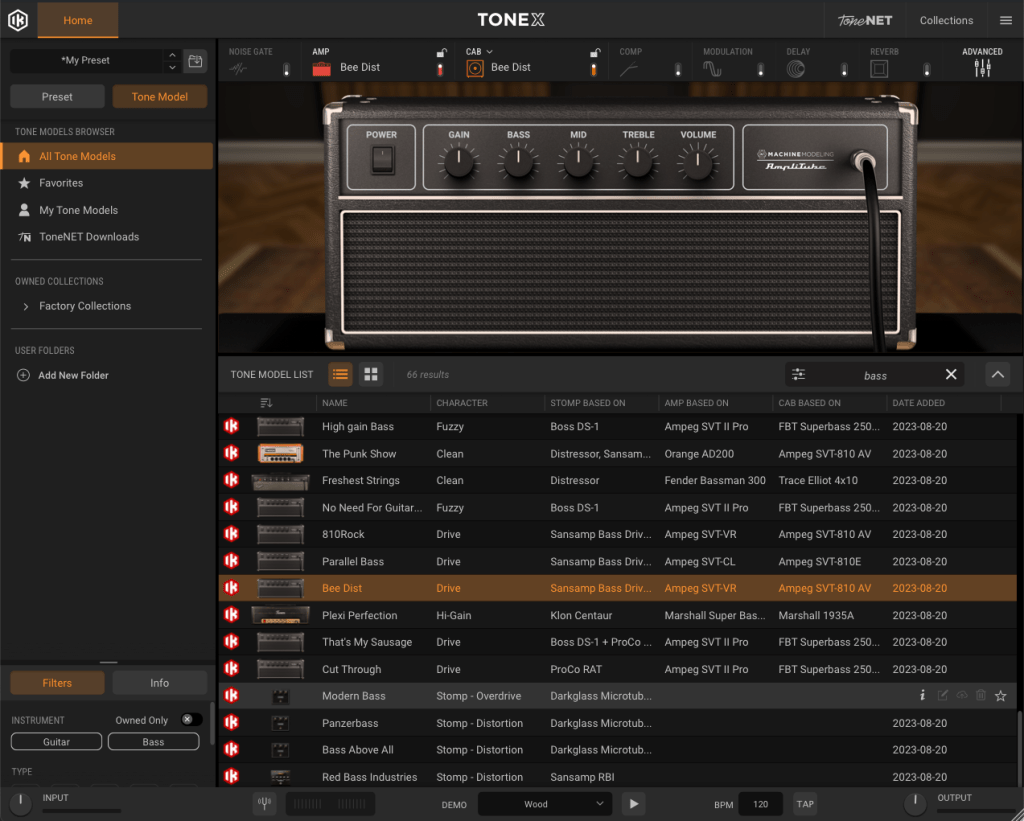
AmpliTube TONEX MAX
Utilizes AI Machine Modeling™ technology to model amps, cabinets, and pedals, offering 1,100+ tone models with options for user-created tones.
Mixing & Mastering
Product
Description
T-RackS 5 MAX v2
Adds 15 new processors on top of 38 existing ones, supporting album creation and project finalization.
ARC 3.5
Features 3D analysis and correction algorithms to minimize acoustic issues in your room and provide natural sound correction.
MixBox
Offers 72 mixing processors and creative effects, enabling custom channel strips and multi-FX chains with over 600 presets.
Lurssen Mastering Console
Reproduces the mastering chain and setup of GRAMMY-winning mastering engineer Gavin Lurssen for various genres.
My Personal Favorites
Out of all these fantastic plugins, my personal top five favorites are:
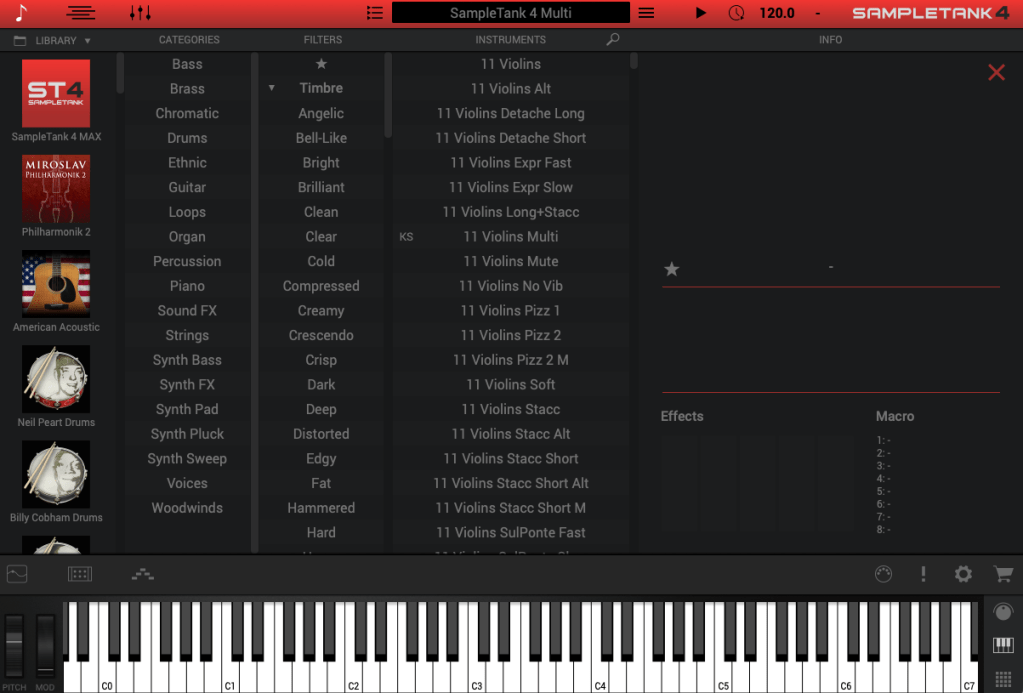
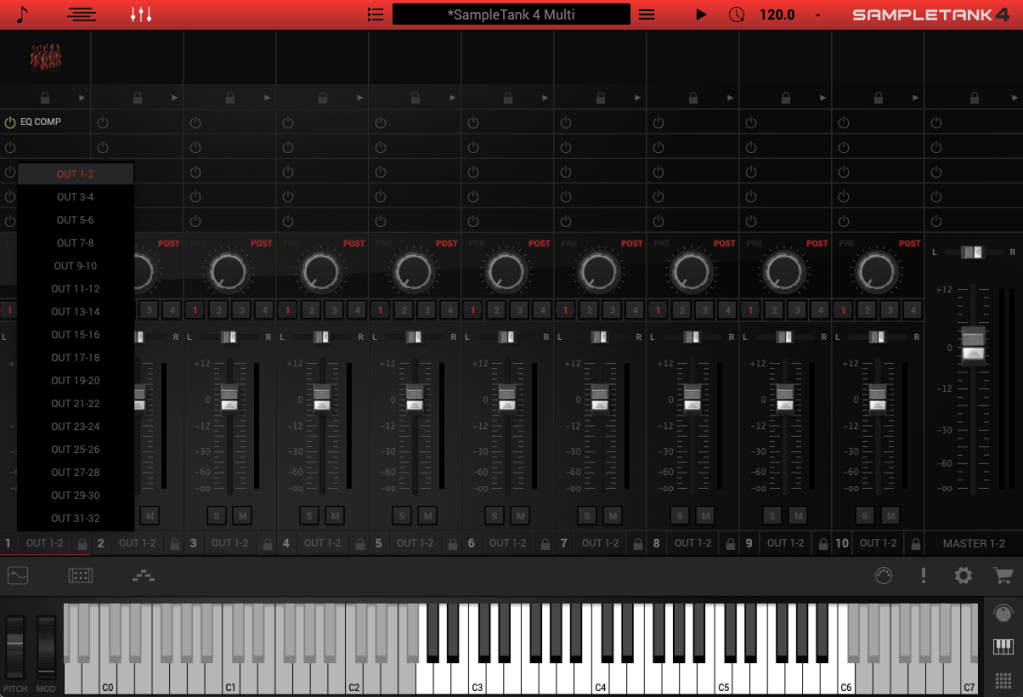
SampleTank 4 MAX v2 functions similarly to Native Instruments’ Kontakt, serving as an engine to load virtual instruments. While the orchestral library Miroslav Philharmonik 2 has its own standalone engine, it can also be loaded into SampleTank for convenience.
Like other sample-based virtual instrument engines, SampleTank allows individual output assignments and offers a built-in mixer, making it incredibly versatile. With a massive library of 88 virtual instruments and over 600 GB of content, it offers plenty of material for any production.
During initial tests, many instruments provided high-quality sounds. However, keep in mind that IK Multimedia often includes preset effects within their mixer. To fully understand and adjust the raw sound, it’s best to turn off these effects and listen without additional processing.
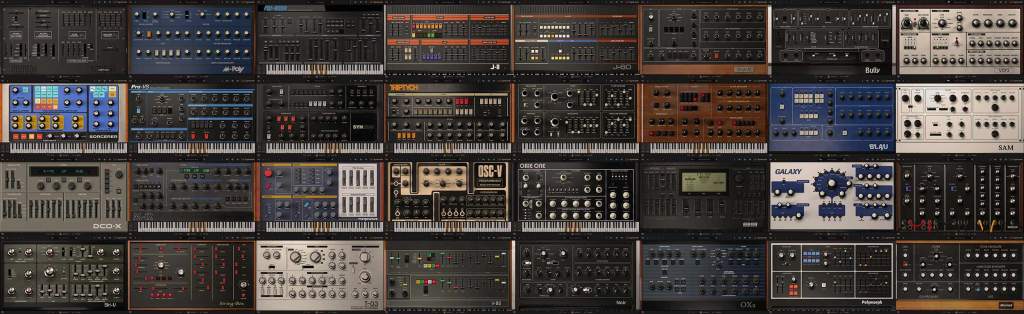
2) Syntronik 2 MAX v2
Syntronik 2 MAX v2 is a sample-based virtual synthesizer that recreates 34 legendary synthesizers. Instead of listing every model, the variety is extensive—just imagine the classics.
As a sample-based instrument, Syntronik requires significant storage space, similar to SampleTank. While it doesn’t offer the sonic flexibility or dynamic textures of physically modeled synths like those from Arturia, its affordability in this bundle makes it an appealing option.
Despite its limitations, Syntronik delivers excellent value, particularly for its breadth of iconic sounds. It’s an easy recommendation if you’re looking for an all-in-one solution for synth-based tones.
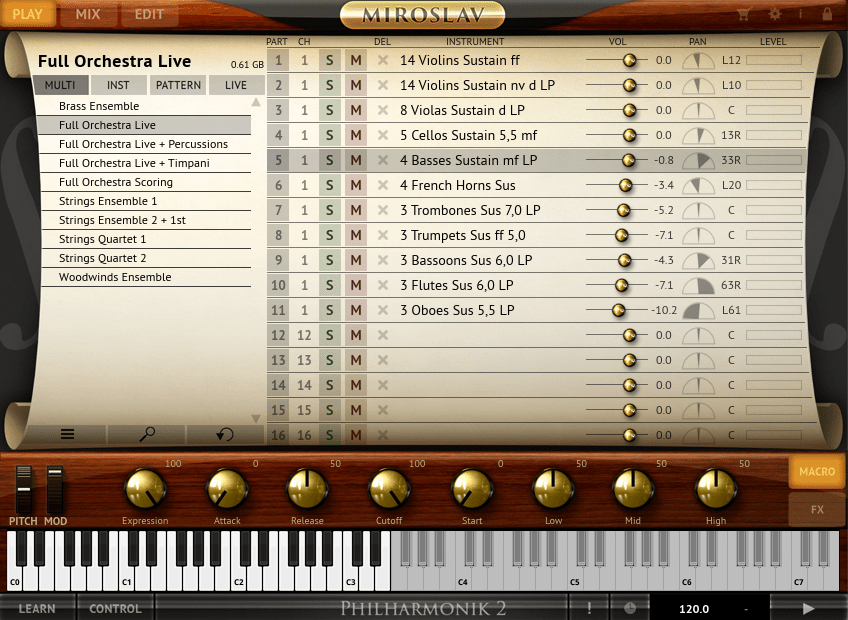
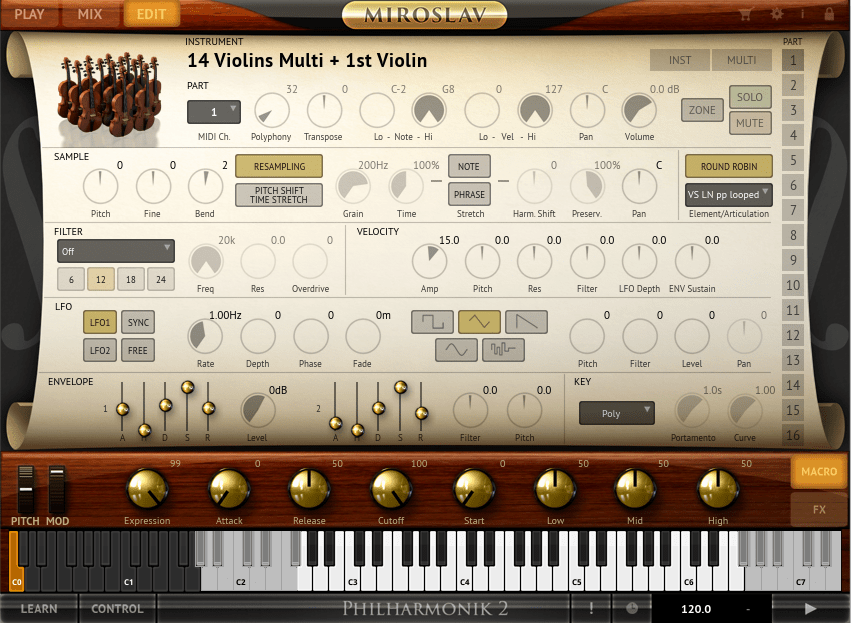
3) Miroslav Philharmonik 2
Miroslav Philharmonik 2 is IK Multimedia’s orchestral virtual instrument. At first listen, its sound might strike you as overly classical and dated. However, by tweaking the Filter setting in the Edit window (turning it Off), you can bring back a brighter, more balanced tone.
Another key feature is its Velocity-based attack nuances, which might confuse users expecting modulation-based dynamics. By linking the Expression parameter to your modulation wheel via the LEARN function, you can gain better control and make the instrument much more expressive.
Though its presets may initially seem underwhelming, with some adjustments, Miroslav offers an enjoyable orchestral experience perfect for adding traditional textures to your compositions.
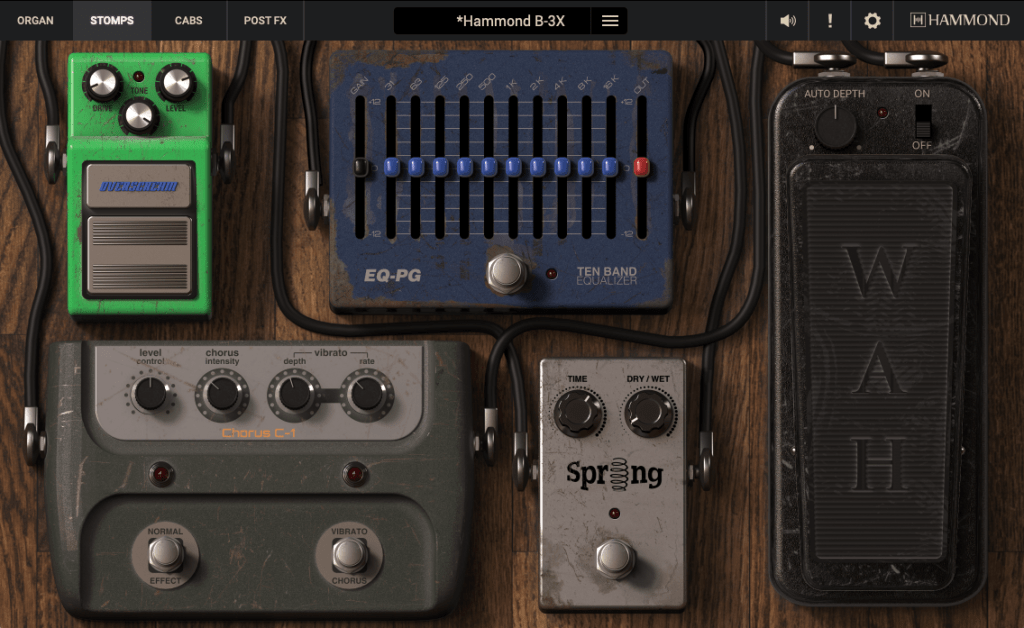
4) Hammond B-3X
Hammond B-3X is a must-have for any producer seeking the iconic tone of a Hammond organ. Officially licensed by Hammond, this virtual instrument perfectly captures the authentic character of the B-3.
In addition to replicating the organ itself, the B-3X includes Leslie rotary speaker simulations, as well as various effects to refine and customize your sound. These features make it more than just a simple organ plugin—it’s a complete tone-shaping toolkit.
Having compared it to Arturia’s B-3 V2, Logic Pro’s Vintage B-5, and NI’s Vintage Organs, Hammond B-3X stands out as one of the most well-crafted virtual organs available. If you’re looking for unparalleled realism combined with extensive customization, this plugin is a fantastic choice.
MODO Bass 2 uses physical modeling technology to recreate the physical structures and sound characteristics of various bass guitars. Unlike sample-based instruments, MODO Bass is incredibly lightweight yet still provides rich, realistic tones.
This plugin allows you to customize nearly every aspect of a bass guitar—pickup type and position, playing style, fret position, number of strings, and more. The sound quality holds up impressively, even with these vast customization options.
Its wide array of features makes it an excellent choice for both beginners and professionals. Whether you’re fine-tuning grooves or crafting intricate basslines, MODO Bass provides the flexibility and performance needed for any project.
MODO Drum 1.5 is another physical modeling-based instrument, this time focused on acoustic drum kits. Its smaller file size compared to sample-heavy libraries reflects its modeling-based architecture.
When working with acoustic drum plugins, multiple factors must be considered:
Kit configuration: Decide on the instruments and arrangement.
Tone and timbre: Adjust parameters like attack, release, tuning, cymbal size, and stick type.
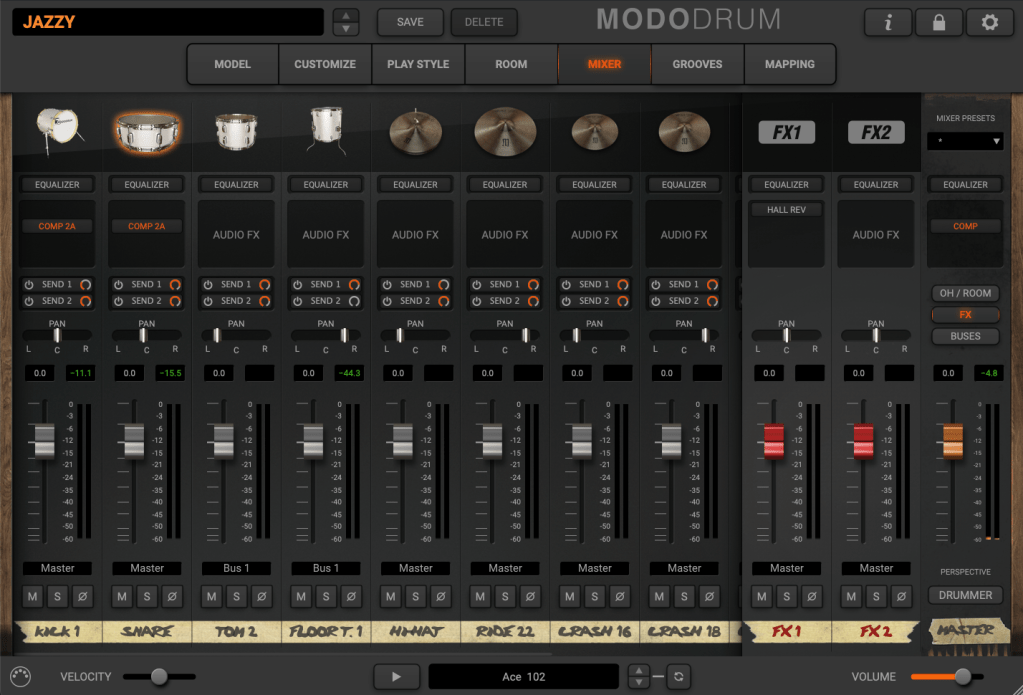
Mic placement: Balance close mics, overheads, and room mics for optimal sound.
MODO Drum simplifies mic placement by limiting multi-mic setups, which speeds up the process. It also allows real-time kit customization, such as altering kick or snare drum shapes to achieve desired tones.
While its presets may not be particularly inspiring, starting from scratch often yields better results. Customizing your own kits and settings within MODO Drum can help you create highly personalized and professional drum tracks.
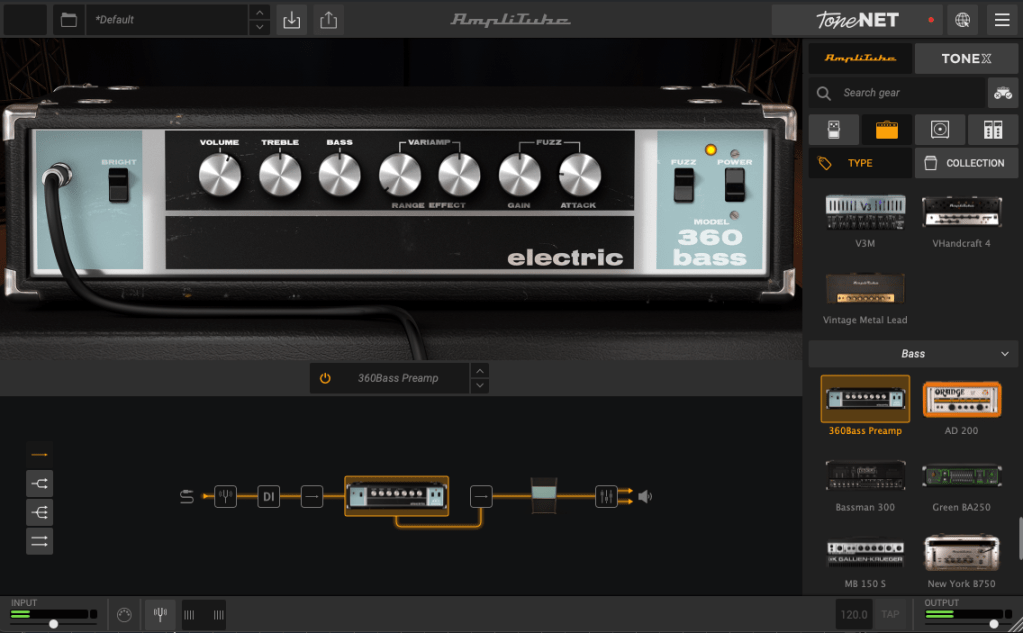
Amplitube 5 MAX v2 is already widely known and needs little introduction. In my opinion, it’s one of the most user-friendly and intuitive guitar effect and amp simulators available. Although I’m not a particularly skilled guitarist and primarily play acoustic rather than electric, I’ve found Amplitube 5 MAX v2 more than sufficient for creating tracks without any significant limitations.
It’s also great for bass amp and effect purposes, and pairing it with Modo Bass can deliver very satisfying results. Since it’s packed with so many features, it’s hard to go into detail about each one, but guitarists who are familiar with their gear will likely find everything they need here.
For bass users who might feel unsure about their setup, a simple configuration with a compressor in front and a preferred Ampeg amp model can often yield excellent tones.
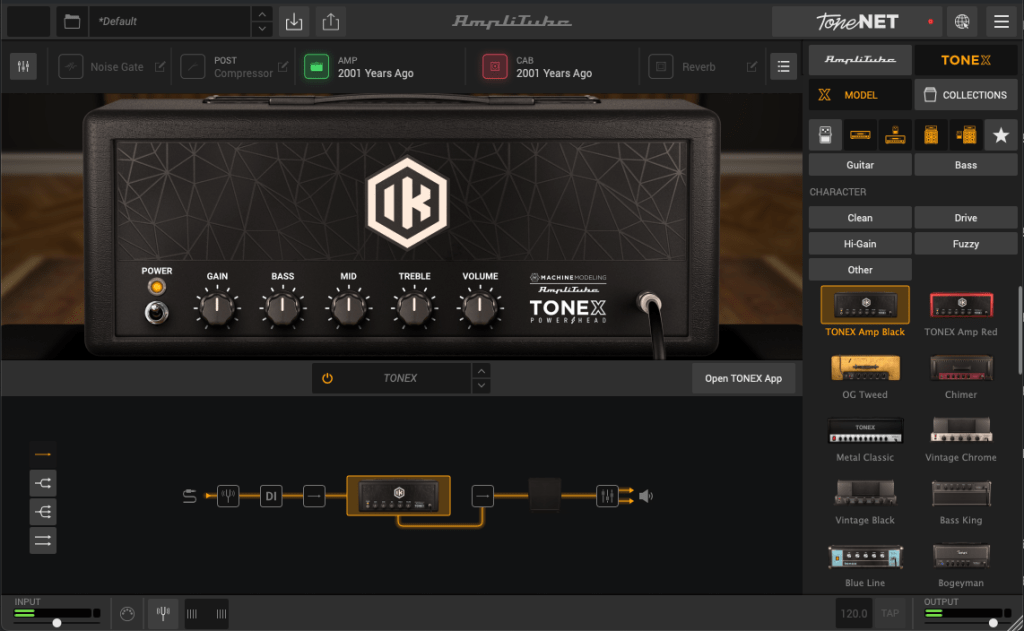
2) Amplitube TONEX MAX
Amplitube TONEX MAX utilizes AI-driven machine modeling to replicate the sound of real amps, cabinets, and pedals. It integrates seamlessly with Amplitube 5 and also has a mobile app (TONEX App) for additional compatibility. In addition to the 1,150 professionally modeled tones offered by IK Multimedia, users can capture their own gear and upload it to ToneNET, where others can download and use it.
While the standalone TONEX plugin might feel slightly inconvenient or less streamlined, using TONEX within Amplitube 5 makes it much more accessible and easier to explore the diverse range of modeled tones available. For those willing to invest time into exploring and experimenting, it can be a powerful addition to their setup.
I’ve reviewed T-RackS 5 MAX v2 before and found it to be a solid mixing suite with many impressive tools. Over time, I’ve been particularly impressed by its tape simulation, which stands out for its quality. If you’re considering the Total Studio 4 MAX bundle, the mixing plugins alone make it a great value and justify the purchase. The wide array of features and tools in T-RackS 5 MAX v2 can significantly enhance your workflow and results.
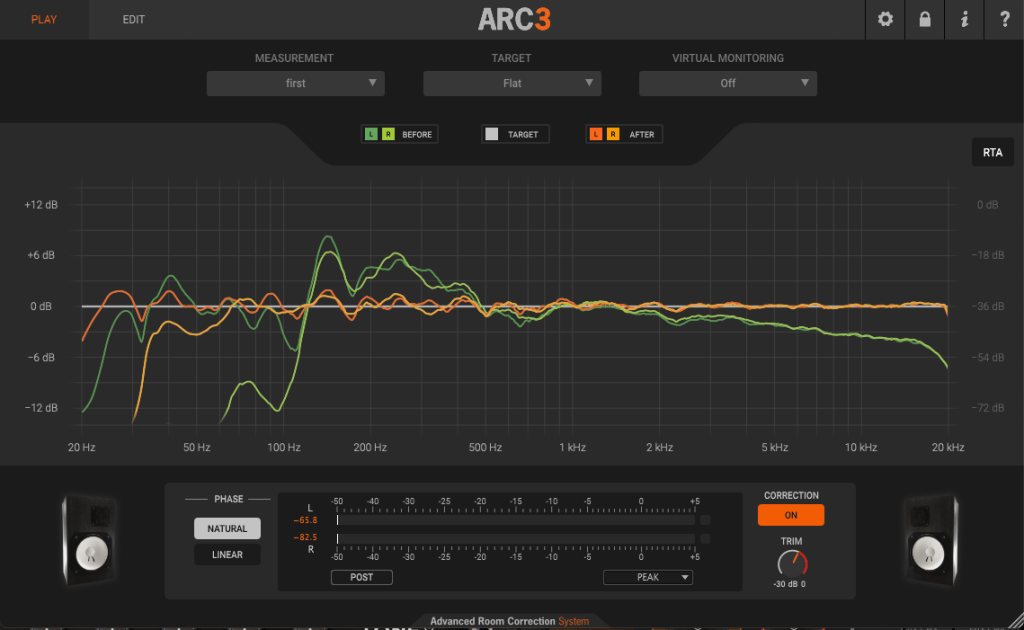
2) ARC 3.5
ARC 3.5 is a room correction tool designed to optimize your monitoring environment. To use it, you need to perform measurements with a calibration microphone. While there are budget options like the Behringer ECM8000, I’d recommend the UMIK-1 or IK Multimedia’s own microphone for more accurate results, as these come with calibration files.
The measurement process involves capturing data across three layers (low, mid, high) with seven measurements per layer, which takes roughly 10 minutes in total. Once completed, the results can be saved and loaded into the ARC plugin within your DAW. For 2-way speaker setups, ARC 3.5 offers a straightforward and effective way to enhance your monitoring accuracy, though multi-subwoofer setups may require additional fine-tuning.
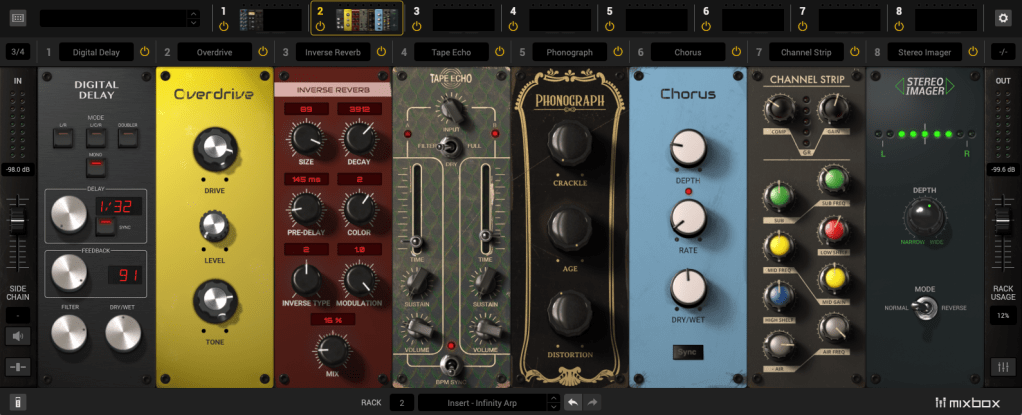
3) MixBox
MixBox is a plugin that consolidates 72 effects derived from T-RackS, AmpliTube, and SampleTank into a streamlined interface modeled after a 500-series rack. It allows you to build custom signal chains without needing to open multiple plugin windows, offering a more efficient and intuitive workflow for sound shaping.
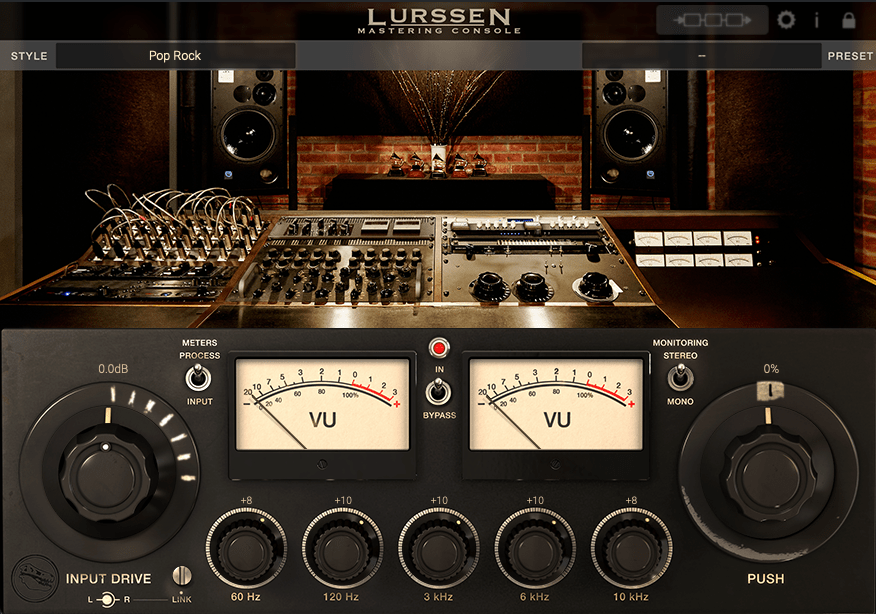
4) Lurssen Mastering Console
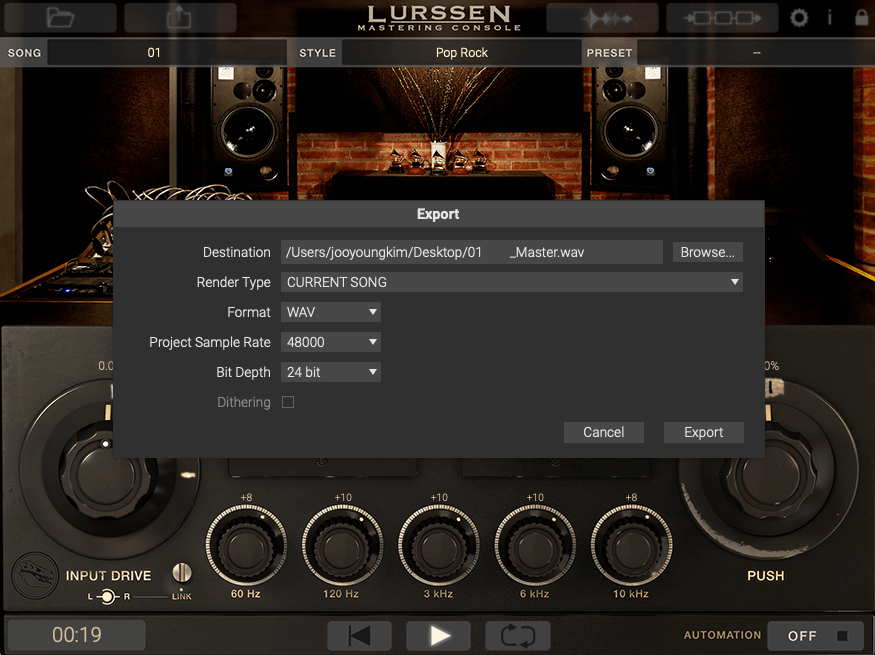
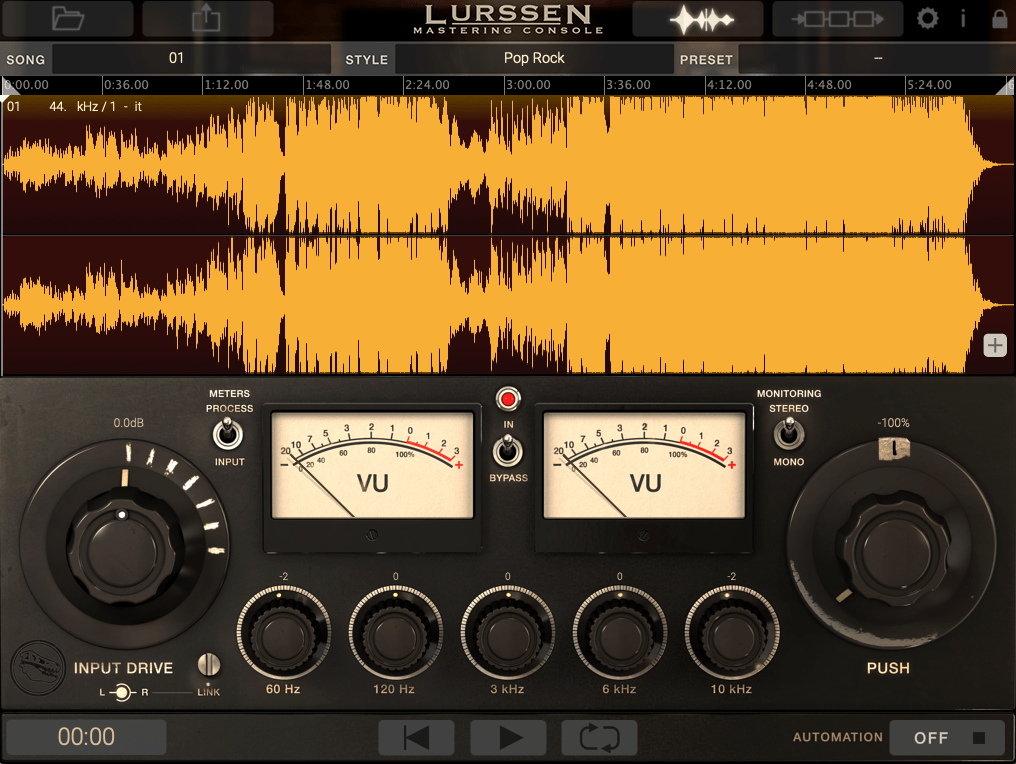
The Lurssen Mastering Console, developed in collaboration with Grammy-winning engineer Gavin Lurssen, is a mastering-focused plugin that combines multiple processes like compression, EQ, and saturation into a simplified interface. While it appears minimalistic, all essential parameters are working in the background, which can be confirmed via the signal chain view.
Interestingly, it also includes a standalone mode with automation support, effectively functioning as a dedicated mastering DAW. It’s a unique tool that’s easy to use yet capable of delivering professional results, making it a valuable addition for anyone focused on mastering.
This wraps up my introduction to IK Multimedia’s Total Studio 4 MAX bundle. It’s one of the best deals I’ve encountered recently, offering tools for everything from tone creation to mixing and mastering. I hope this overview helps you explore these plugins effectively—until next time!
As previously mentioned, modulation effects involve altering a parameter over time. Tremolo specifically modulates volume over time.
When applied heavily, it can create a pulsing effect, and it’s also useful for adding an artificial groove to your track.
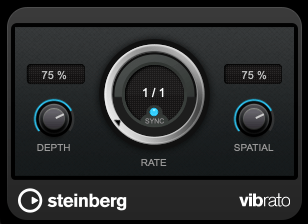
2) Vibrato
Vibrato, unlike tremolo, modulates pitch instead of volume.
Pretty simple, right?
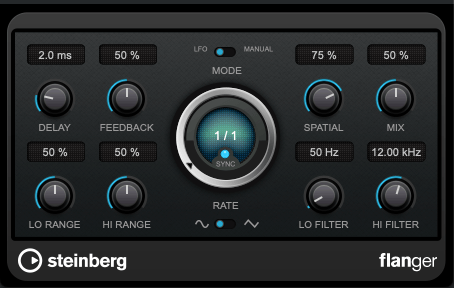
3) Flanger
The flanger effect has roots tracing back to Christiaan Huygens, the Dutch mathematician, physicist, and astronomer. (For those familiar with physics, you might recall Huygens’ Principle from studying waves!)
Flanger works by duplicating the original sound and playing the copy after a very short delay, creating what’s known as a comb filter effect.
By adjusting the delay time, the peaks and troughs in the frequency response created by the comb filter shift back and forth.
This may sound complex, but experimenting with it will make the concept much clearer. It’s this shifting comb filter effect that produces the signature whooshing or “rocket-like” sound of flanging.
4) Chorus
Chorus is similar to flanger but has a few key differences.
In chorus, the original sound is copied and delayed (often with multiple copies), but the delay time is longer than in flanging. Additionally, chorus effects often include adjustments to panning and pitch, creating a richer and fuller sound.
5) Phaser
Phaser is another modulation effect that shares similarities with flanger but operates differently. Instead of applying a short delay like flanger, a phaser uses an all-pass filter to manipulate the phase of the sound.
This phase-shifted sound is then blended with the original, resulting in a comb filter effect, just like flanger. However, the method of achieving this effect gives phasers their unique, swirling sound.
If you look at the waveforms, you’ll notice the phase shifts caused by the phaser. While the subtle changes in pitch can also be observed in the waveform, it’s tricky to capture it perfectly in a screenshot.
Final Thoughts
Understanding the principles behind these effects can help, but hands-on practice is essential to mastering their use. Spend time experimenting with these effects to familiarize yourself with their unique sounds and applications.
Both theoretical knowledge and practical experience are crucial, so try to balance learning with experimentation!
Hello, I’m Jooyoung Kim, a mixing engineer and music producer.
This post is Part 3, focusing on other plugins (mixing tools or those that don’t fit neatly into earlier categories but are still highly recommended).
As with previous posts, I’ve partnered with Plugin Boutique, so plugins available on their platform will be linked accordingly. If you purchase through these links, I’ll earn a small commission, which helps me a lot. Thank you for your support!
Let’s dive right in!
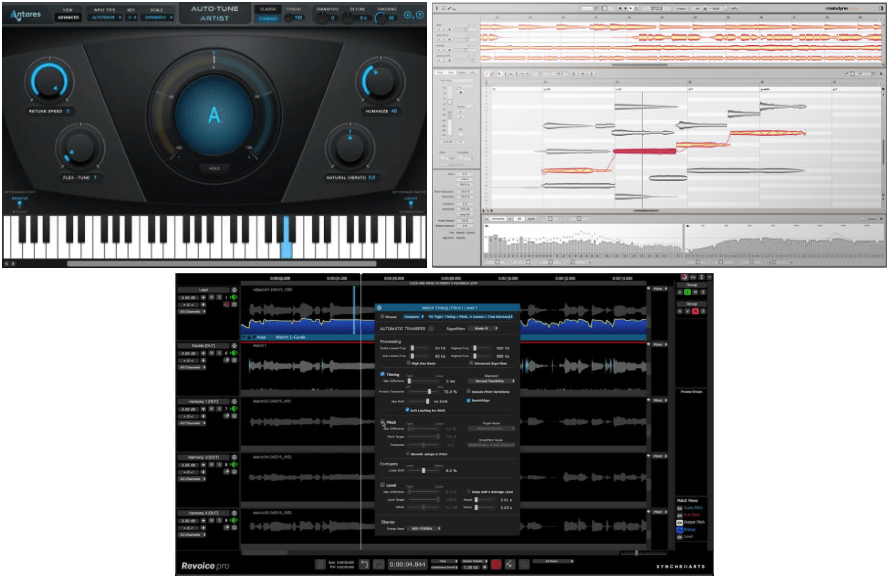
1) Vocal Tuning Tools
Three industry-standard vocal tuning tools dominate the market:
Antares Auto-Tune Pro 11 ($252.45): A powerful tool for manual pitch correction. With skilled adjustments, this plugin delivers highly natural-sounding results. Antares also offers various vocal processing plugins worth exploring.
Celemony Melodyne 5: Highly intuitive and fast for general tuning needs, though it lacks graphical pitch drawing capabilities. It’s my go-to plugin for vocal tuning. Multiple versions are available, but eventually, you’ll want the Studio edition. If you own a previous version, upgrading ($31.90) is most affordable. Otherwise, take advantage of the Black Friday deal ($327.80). Alternatively, you can start with Melodyne Essential ($53.90) and upgrade to Studio ($273.90) for the same cost.
Synchro Arts Revoice Pro 5 ($275): With an improved UI in version 5, it excels at aligning chorus and lead vocals, as well as matching timing and volume. It might take some getting used to, but it’s indispensable once mastered. Revoice’s specialized tools, Vocalign 6 Standard ($97.9) and Vocalign 6 Pro ($229.9), are also great for vocal alignment. Among the three, I recommend Revoice Pro 5 the most.
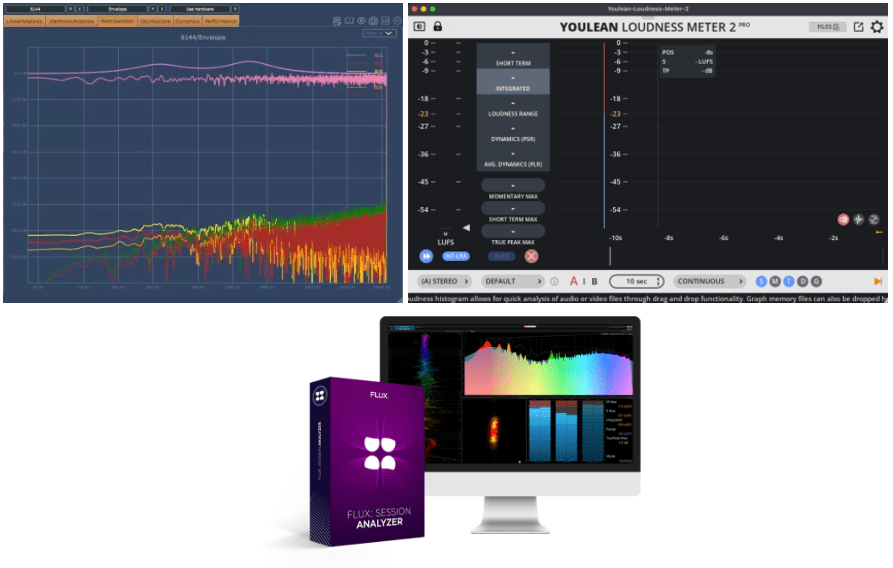
2) Analyzers & Plugin Diagnostic Tools
DDMF Plugin Doctor (~$30): An invaluable tool for analyzing and testing plugins or hardware. It helps you make informed decisions when buying plugins.
Yolean Loudness Meter ($29.7): A fantastic analyzer for measuring LUFS values. The free version is solid, but the paid version allows file-based loudness analysis. A reliable reference tool for mastering engineers.
Flux:: Session Analyzer (Studio Session Pack, ~$70): A versatile tool for analyzing multiple metrics simultaneously. It’s more cost-effective to buy the Studio Session Pack than individual tools. For advanced users, consider the Analyzer Essential ($478.8), which supports offline analysis and multichannel setups.
(Unfortunately, iZotope Insight 2 isn’t discounted yet, but it’s another excellent choice.)
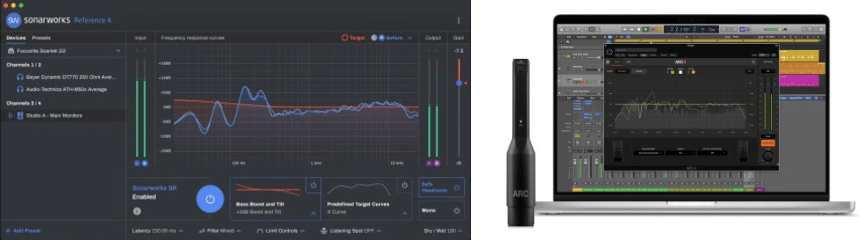
3) Filters and Creative Effects
Moog MoogerFooger ($163.9): Moog is known for both synths and filters. This plugin bundle emulates the MoogerFooger pedals beautifully. If the full bundle feels expensive, consider smaller bundles: 4 plugins ($108.9) or 2 plugins ($60.5). I highly recommend the MF-101 Lowpass Filter ($31.9) as a must-have.
Denise Audio: Known for tools like the Motion Filter ($42.9) and other effects such as enhancers, gates, and saturators. The Motion Filter stands out for its unique capabilities.
Sonarworks Reference 4: Adjusts frequency responses for speakers and headphones. While the bundled mic (Behringer ECM8000) has its critics, it’s still a useful tool for improving your monitoring environment.
Other tools like Dirac Live and Trinnov Audio Optimizer are popular in the hi-fi world, but they’re on the pricier side. Personally, I use an Earthworks M30 measurement mic with a routing program (Audio Storm LiveProfessor) to manage my dual subwoofer setup.
I’ve compiled as much information as I could over the past two days. There may be additional discounts on the actual day, so I’ll update this post if needed.