Hello, I’m Jooyoung Kim, an audio engineer and music producer.
For a while now, I’ve been wanting to have more control over certain articulations, like sliding, vibrato, and slap techniques. That led me to decide that I should start playing the bass myself.
Since I’ll be using it for music production, I didn’t want to settle for a cheap, entry-level instrument. At the same time, I didn’t have the budget for a high-end one…
This is where a solid domestic brand comes in handy!
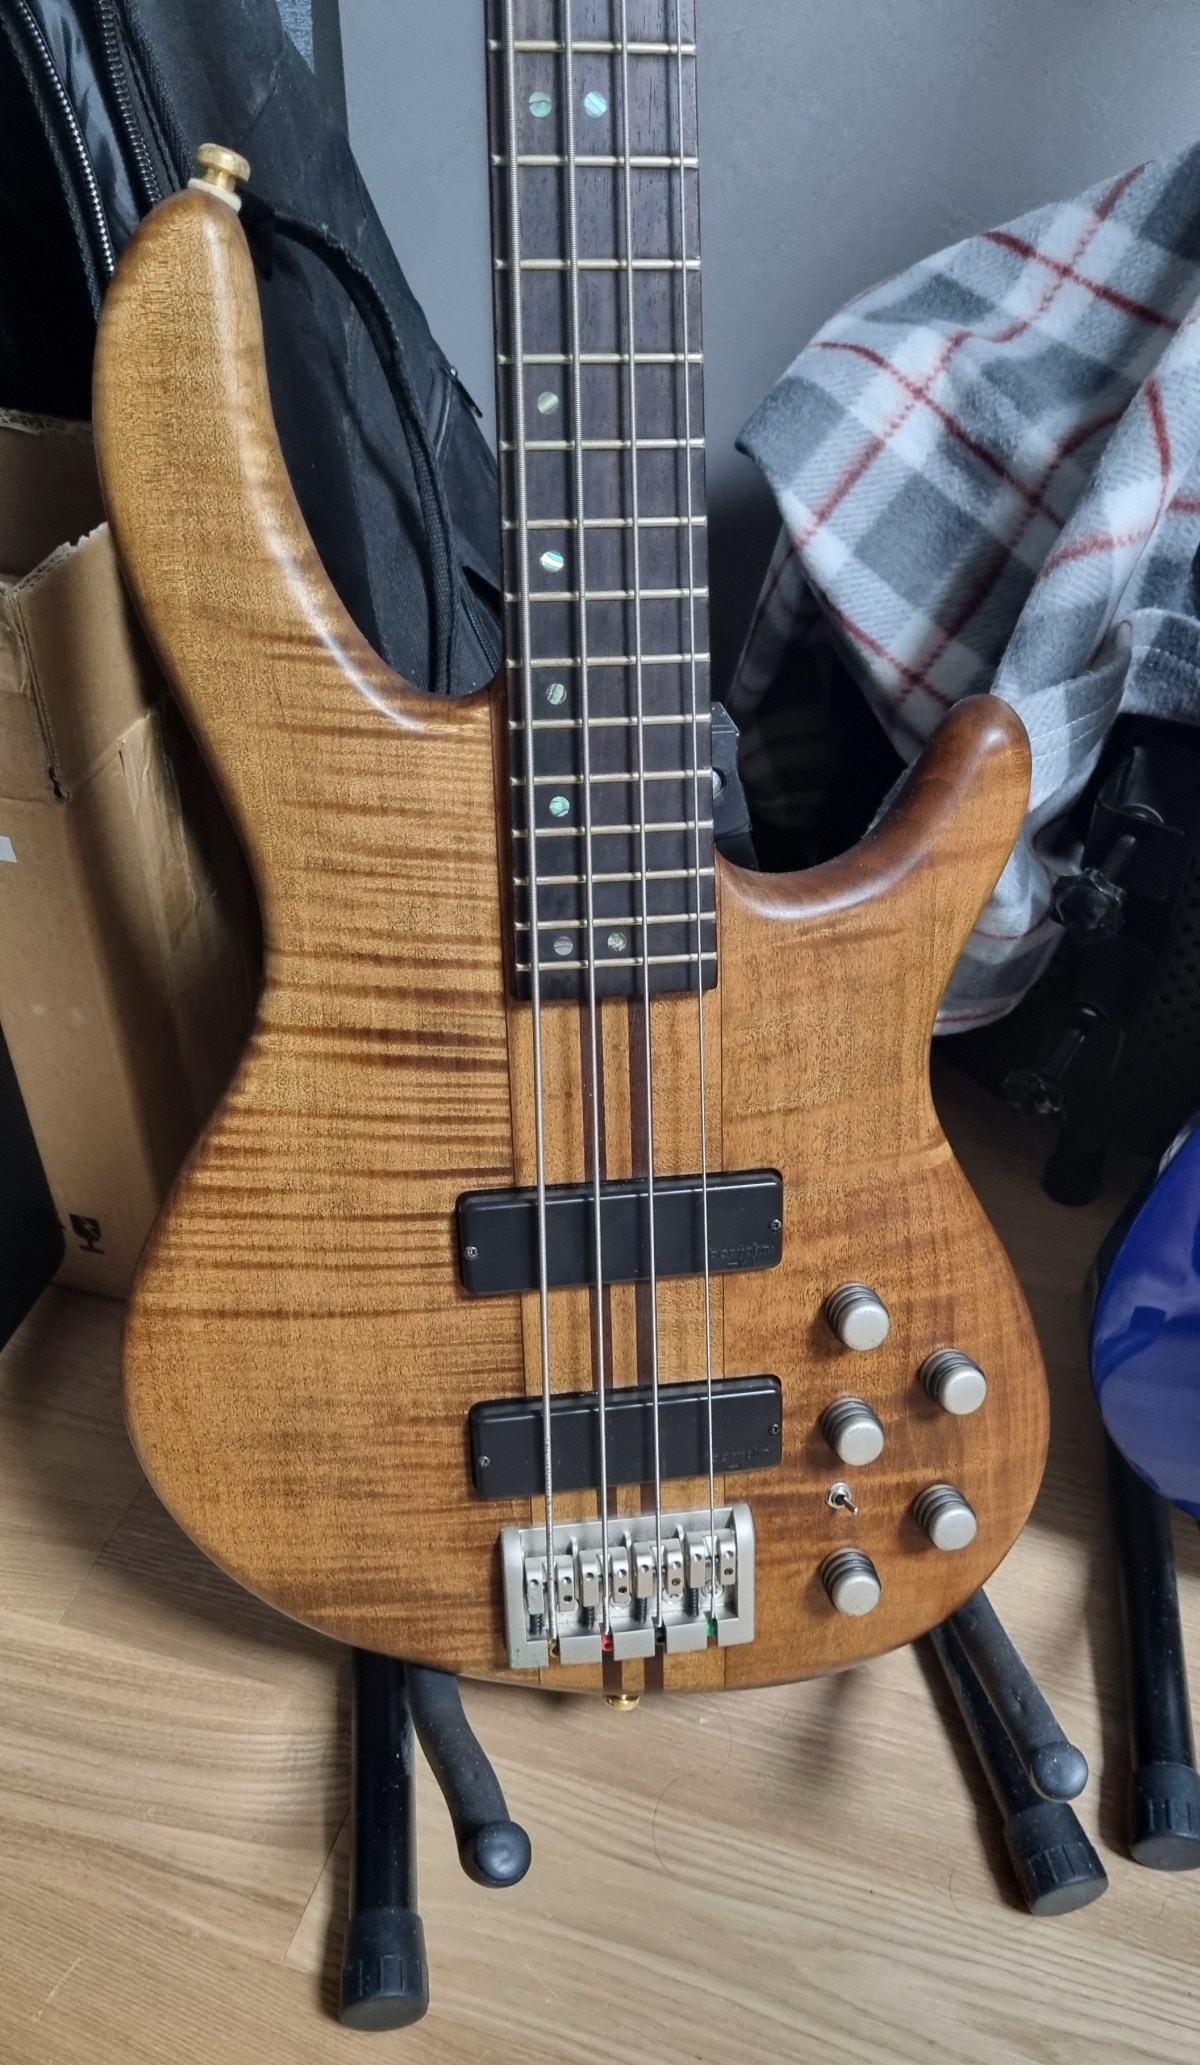
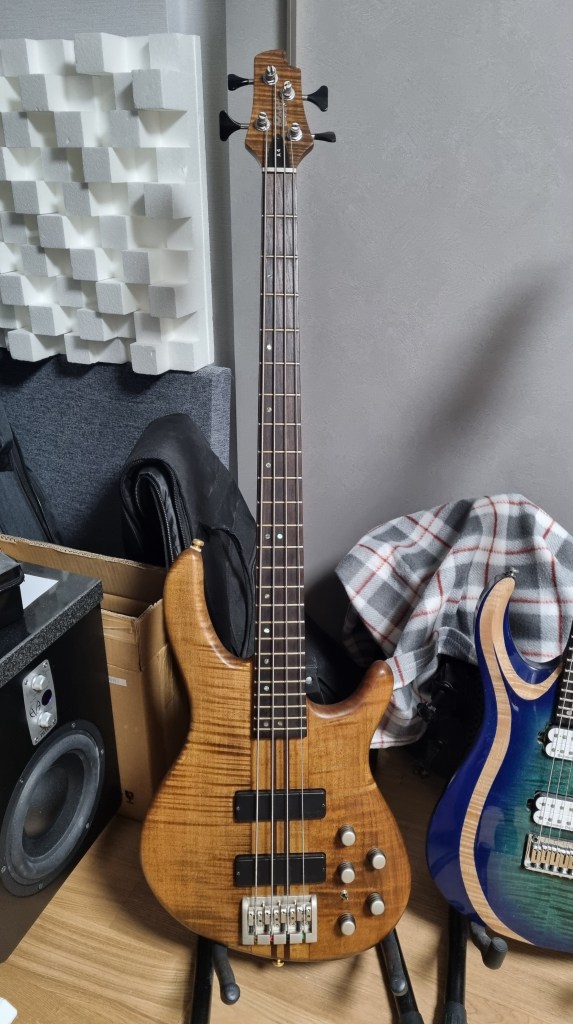
Yes, I’m talking about Cort. My electric guitar is Cort, and now my bass is too.
It’s an older model, so unfortunately, it only works in active mode with no option to switch to passive. There’s also some rust on the knobs and bridge, which is a slight drawback. However, after trying it out, I really liked the sound—it’s exactly what I was looking for.
I had borrowed a Squier bass from an older friend for a few days (though I’m not sure what model it was), and I have to say, this Cort bass feels way more comfortable in my hands.
The strings are a bit old, so I’m curious how it will sound once I change them.

Then I thought about adding a switch for active/passive mode and took a look inside the back panel.
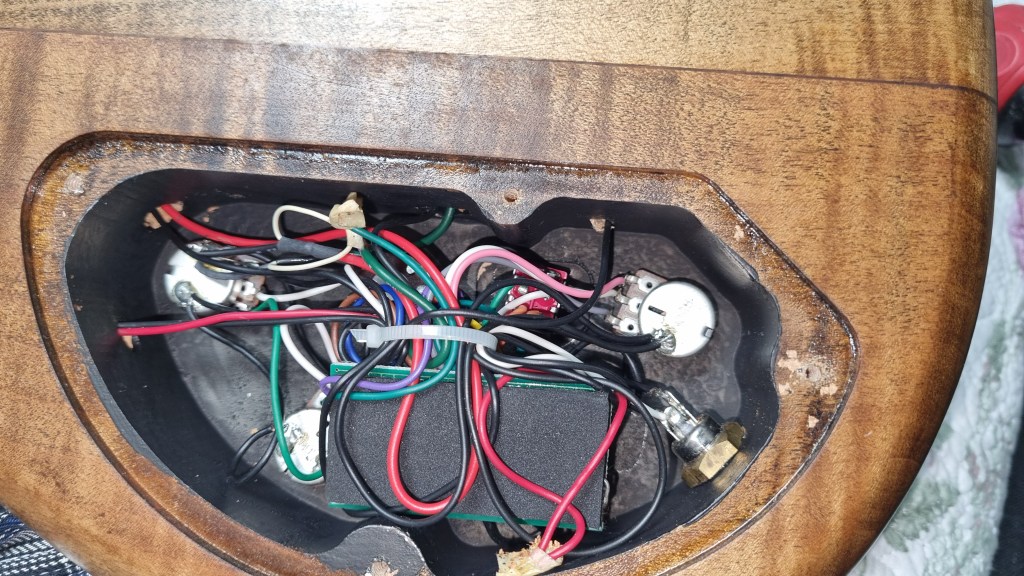
The wiring looks like a bit of a mess, so I’ll have to think it over when I get more time.
The goal is to practice more and eventually record most of the bass parts myself! But honestly, I feel like I might end up buying a Precision bass too… It never ends!
I’ve also been wanting to learn drums—am I becoming a one-man band? Haha.
See you in the next post!