Hi everyone! This is Jooyoung Kim, a mixing engineer and music producer.
Today, I want to talk about modulation effects, which are often overlooked during mixing.
(These concepts are based on my book Basics of Mixing, published in Korea.)
What are Modulation Effects?
In simple terms, modulation effects involve changing certain parameters over time.
Do you frequently use modulation effects when composing or mixing?
Do you ever have tools like these but rarely touch them?
I believe modulation effects, along with reverb and delay, are crucial in determining the quality of a track. However, even if you understand the theory behind these effects, you might hesitate to use them if you’re unfamiliar with how they sound in practice.
That’s why I encourage you to experiment with modulation effects regularly, even if it feels forced at first.
Types of Modulation Effects
Let’s break down some common modulation effects:
Tremolo
Vibrato
Flanger
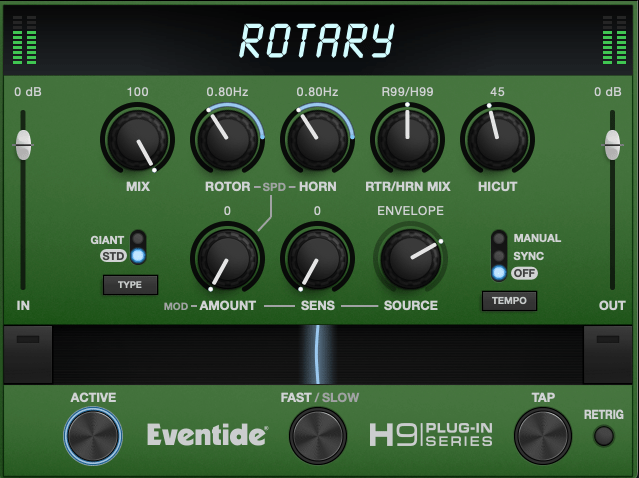
Phaser
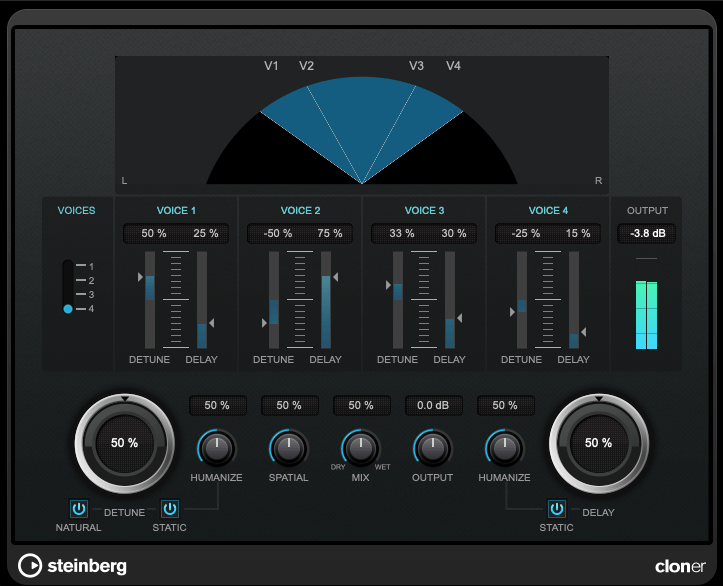
Chorus
Before diving into these, we need to discuss two foundational concepts: the All-Pass Filter and the Comb Filtering Effect.
All-Pass Filter
An all-pass filter allows all frequencies to pass through unchanged. But why would we use such a filter?
The answer lies in phase.
When a signal passes through an all-pass filter, the phase shifts depending on the frequency. Combining this filtered signal with the original creates unique sounds due to constructive and destructive interference at different frequencies.
For more details on phase and interference, check out “Basics of Mixing – 2.2 Phase and Interference.”
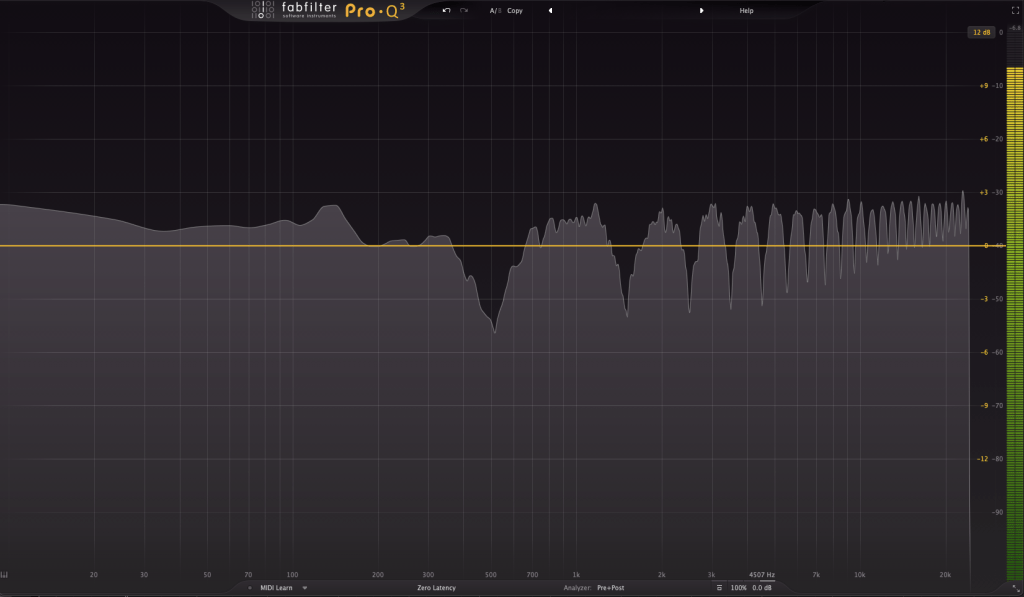
Comb Filtering Effect
The comb filtering effect occurs when an original signal is combined with a delayed version of itself. This results in a frequency response that looks like the teeth of a comb.
It’s easy to understand this concept through simple experiments.
When every frequency in a signal is delayed by the same amount, some frequencies cancel out (destructive interference), while others amplify (constructive interference). This creates the characteristic comb-like frequency response.
Effects like flanger, phaser, and chorus are built on these principles of phase manipulation.
That’s all for now! In the next post, I’ll delve deeper into each modulation effect.
(Disclaimer: I received the product from Plugin Boutique in NFR (Not for Resale) format. If you make a purchase through the links provided, I’ll receive a small commission, which greatly helps me keep my head above water… Thanks for your support!)
Shall we dive in?
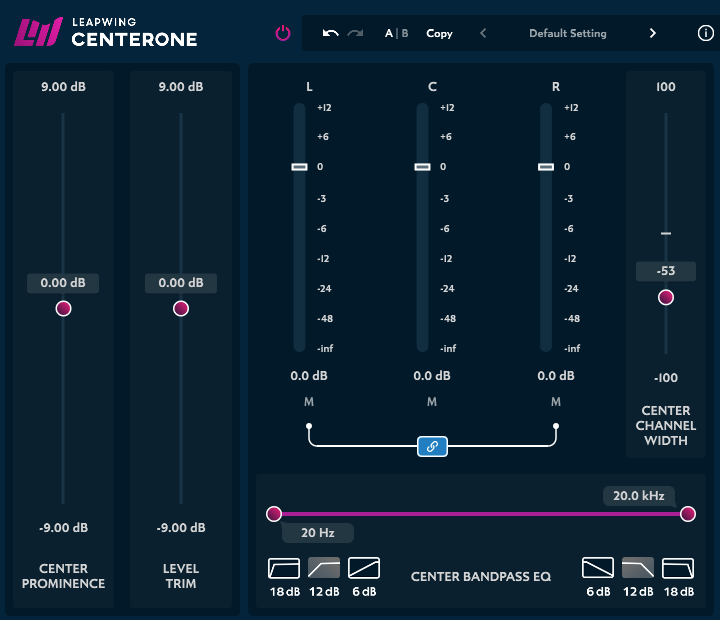
Leapwing Audio’s Center One is, as the name suggests, a plugin that separates the center and side channels.
When it comes to MS (Mid/Side) separation tools, some popular alternatives to Center One include:
Waves S1 MS Matrix
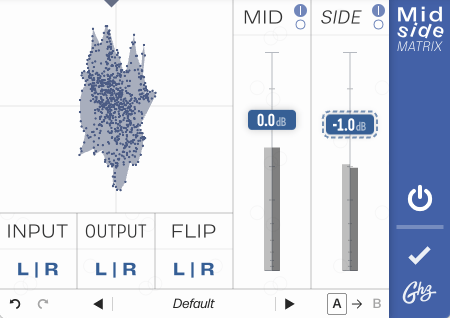
Goodhertz Midside Matrix
The Waves plugin differs slightly in that it converts Mid and Side into Left and Right channels. As for Goodhertz, it’s an excellent tool, but since it’s free, it lacks some of the more detailed control features, which can be a bit limiting.
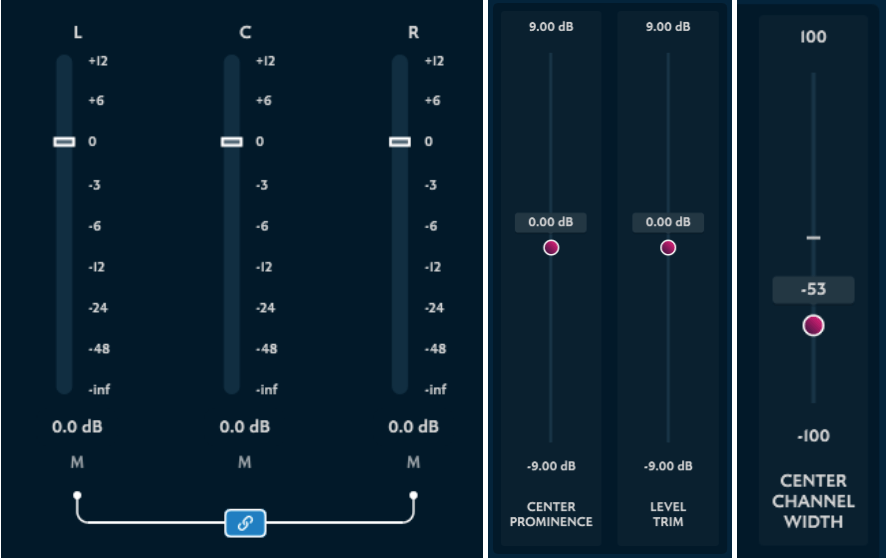
However, Center One goes beyond simple M/S separation—it can divide audio into L/C/R (Left, Center, Right).
Additionally, before splitting the center channel, you can adjust the Pan Law to modify the presence of the phantom center.
You can also customize the stereo width of the center channel, and…
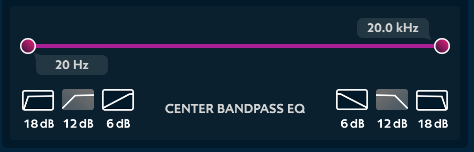
…apply filters specifically to the center portion.
The interface is intuitive and simple, yet the plugin is incredibly well-designed.
After trying it out on one of my tracks, I was impressed by its solid foundational performance. This is also evident in the official demo video:
(It’s just over a minute long, so I recommend giving it a quick watch!)
Center One seems particularly useful for mastering or when dealing with dense multi-instrument tracks. It could also work well for live recordings, 2-track recordings, and even remastering projects.
Though it’s a bit pricey, there aren’t many plugins out there that can fully replicate its functions. If you’ve been waiting for a good deal, now’s the time to grab it!
This month, Plugin Boutique is offering a free bonus with every purchase: choose from UJAM VICE, Native Instruments Monark, or Mastering the Mix Advanced Mastering Course.
You’ll get one freebie per purchase, so if you plan on buying multiple items, I recommend splitting them into separate transactions to maximize the freebies.
Hello, I’m Jooyoung Kim, a mixing engineer and music producer!
Today, I’ll be discussing a product I’ve owned for some time—this post is not sponsored. However, I was asked by Plugin Boutique to introduce the UAD 1176 Collection.
The links provided direct to Plugin Boutique, and if you make a purchase through them, I’ll receive a small commission, which is a huge help in supporting my work. 😊
While preparing this post, I realized I’ve never delved into the history of the 1176 compressor on my blog. So, let’s take a journey through its legacy! (Historical references are drawn from the UA website, the UAD 1176 manual, and my book The Basics of Mixing.)
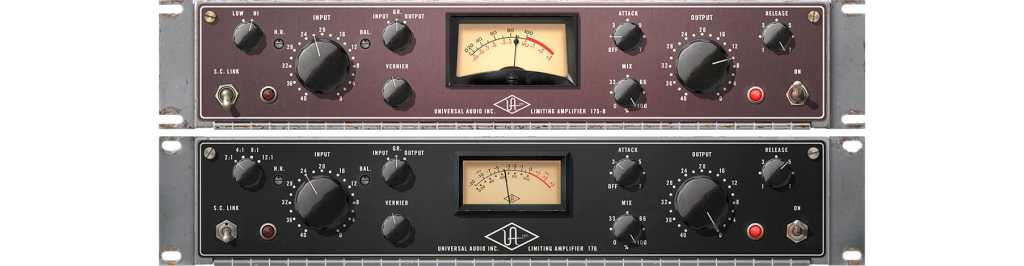
Before the 1176, there were the 175B and 176 tube-based compressors.
175B: A fixed ratio limiter with a 12:1 ratio.
176: Offered selectable ratios of 2:1, 4:1, 8:1, and 12:1.
With the advent of transistors, most tube circuits transitioned to transistor-based designs. The 1176 emerged during this transitional period, replacing the 175B and 176’s tube circuits with FET (Field Effect Transistor) technology. Notably, it features an ultra-fast attack time (20–800 μs).
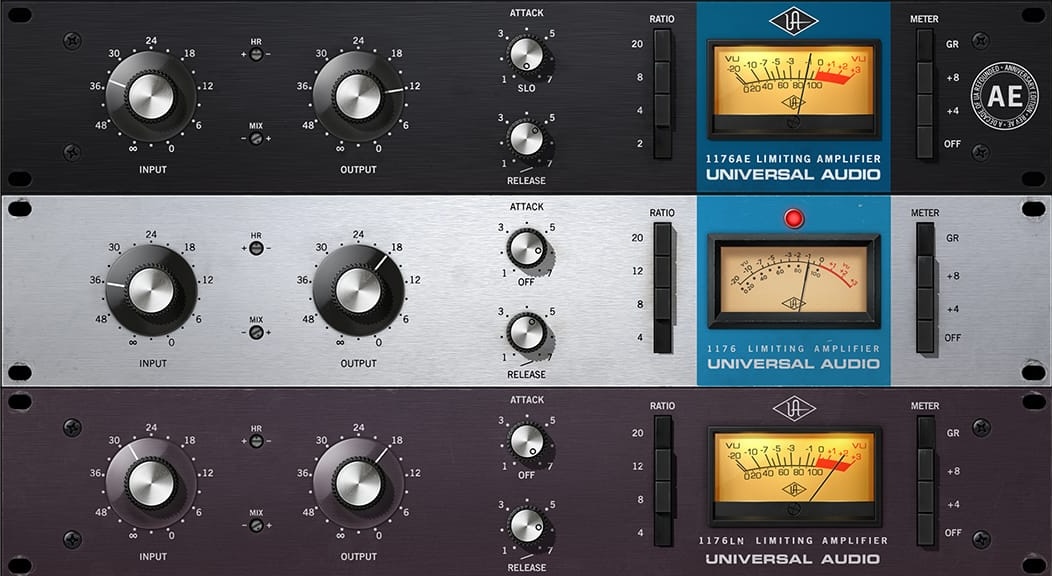
Since its initial release, the 1176 has evolved through 11 versions: A, AB, B, C, D, E, F, G, H, LN (Low Noise), and AE (Anniversary Edition).
We can categorize these versions into four groups:
A, AB, B, AE
C, D, E, LN
F, G
H
(Fun fact: The LN and AE versions were developed after Universal Audio’s revival under the founder’s son.)
1176 Rev A, Rev AB, Rev B, AE (Anniversary Edition)
Rev A, AB, and B have the same external design.
The 2008 Anniversary Edition of the 1176
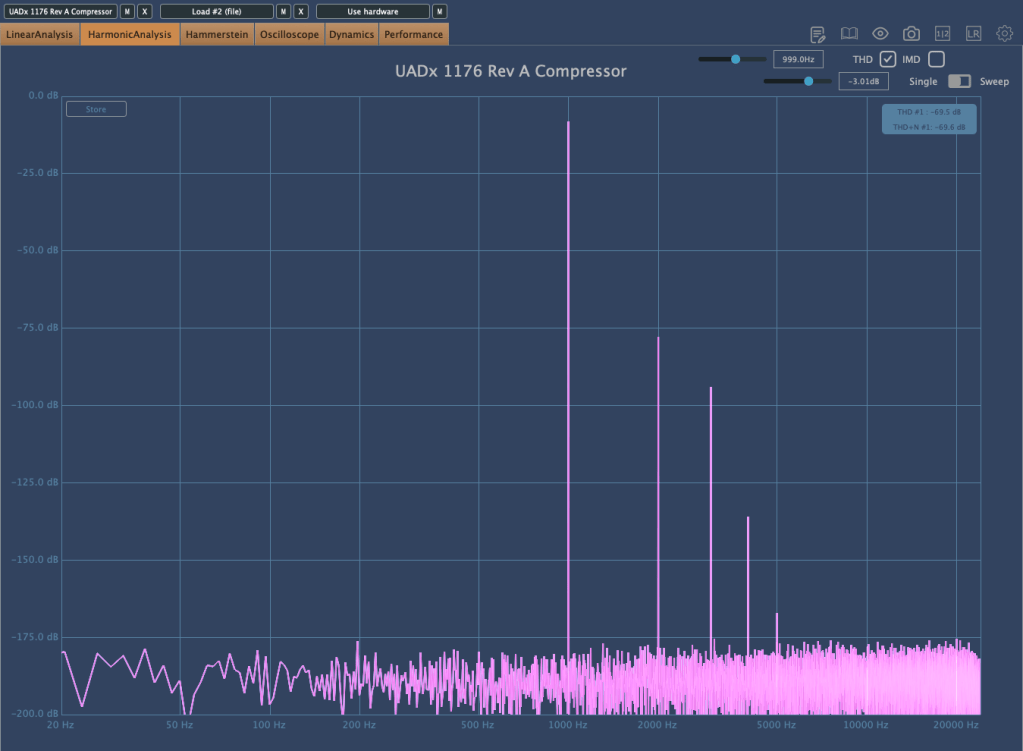
These versions are known for their aggressive sound, distortion, and higher noise levels. Key characteristics include:
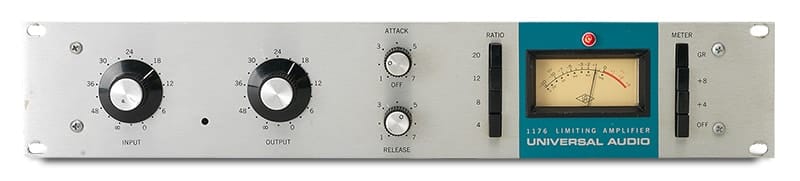
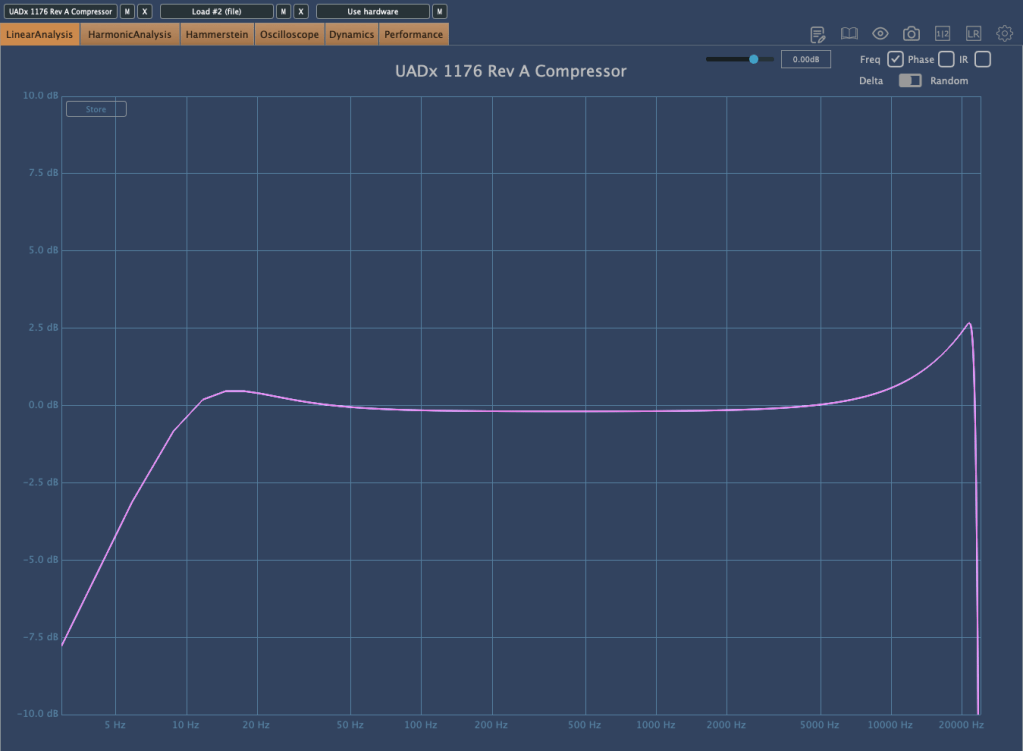
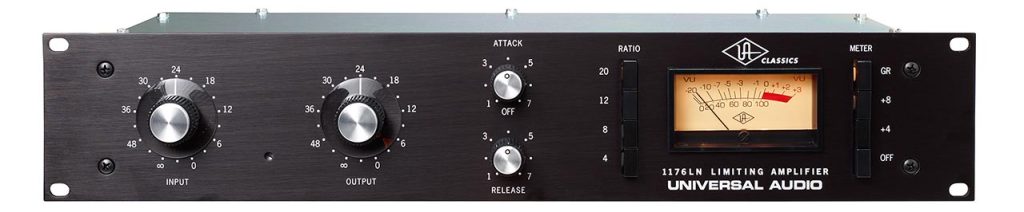
Rev A: The original 1176, often referred to as the “Blue Stripe.” Features a Class A circuit.
Rev AB & Rev B: Improved versions of Rev A with slight modifications, retaining the Class A circuit.
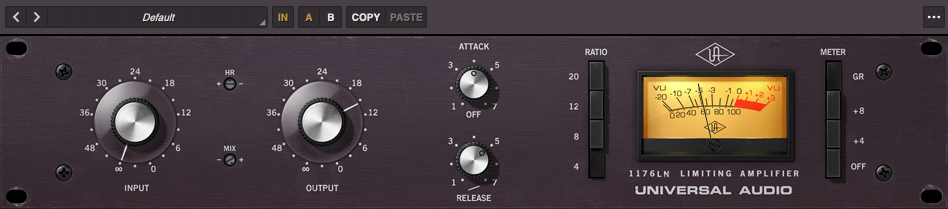
AE (Anniversary Edition): A modern recreation of the classic 1176 sound, combining the sonic character of the A/B versions with LN’s low-noise design.
The AE version plugin offers unique features, such as a 2:1 ratio instead of the usual 12:1. It also includes a slow attack mode (10 ms), the slowest in the 1176 series.
The plugin emphasizes low-end frequencies and adds significant harmonic saturation, making it a great alternative to Rev A for saturation.
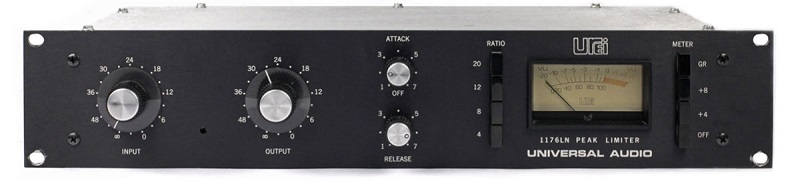
1176 Rev C, Rev D, Rev E, LN
1176 Rev E
The modern reissue of 1176LN
These versions introduced a blackface design. The biggest change was adding a low-noise (LN) circuit. Rev D also marked the branding transition to “Urei.”
The current reissue, 1176LN, is still available as hardware.
Compared to earlier versions, these are more controlled and less aggressive.
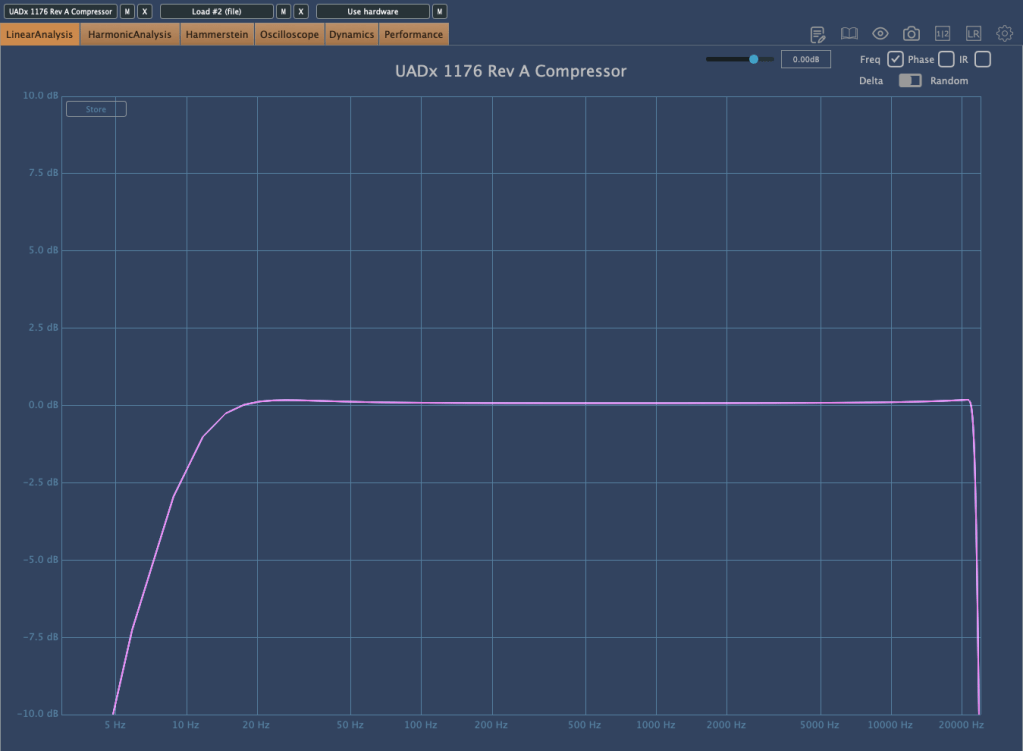
UAD recreated the 1176LN Rev E as a plugin. Frequency response tests show that it’s less excitable in the high frequencies compared to Rev A, even at high input levels.
For harmonic content, it’s somewhat similar to Rev A but serves a different purpose. I use it when I don’t need the intense vibe of Rev A or the smoothness of LA-2A. It occupies a unique sonic space that occasionally fits perfectly.
1176 Rev F, Rev G
1176 Rev F
Rev F switched to a Class A/B circuit, differing significantly from earlier models. The output preamp changed from 1108 to 1109 for increased output. Rev G replaced the input transformer.
1176 Rev H
1176 Rev H
The final version before discontinuation, Rev H, featured a new design but retained the core sound.
“All Button Mode”
One iconic feature of the 1176 is the “All Button Mode,” where all ratio buttons are engaged simultaneously. This creates a unique and highly distorted sound engineers love for parallel processing. I use it sparingly to add saturation while emphasizing key elements.
The plugin collection, including Rev A, AE, and Rev E, is currently available on Plugin Boutique for $31.90 during the Black Friday sale.
As someone who’s invested heavily in UAD plugins and hardware like UA Satellite and Apollo interfaces, seeing these discounts is bittersweet. 😅
Plugin Boutique also offers a free plugin with every purchase—this month’s options include Ujam’s Beatmaker VICE, Native Instruments’ Monark, or a mastering tutorial.
Don’t miss out! Hope you found this post helpful, and I’ll see you in the next one.
In previous posts, we explored why certain hardware adds color to the sound.
Software emulations of hardware are programmed to replicate these tonal characteristics. However, due to a phenomenon known as aliasing in digital audio, the results aren’t always identical.
Thus, software can’t completely replace hardware. In fact, it’s better to consider them as entirely different tools.
Even hardware units of the same model have subtle variations, and software characteristics differ depending on the developer.
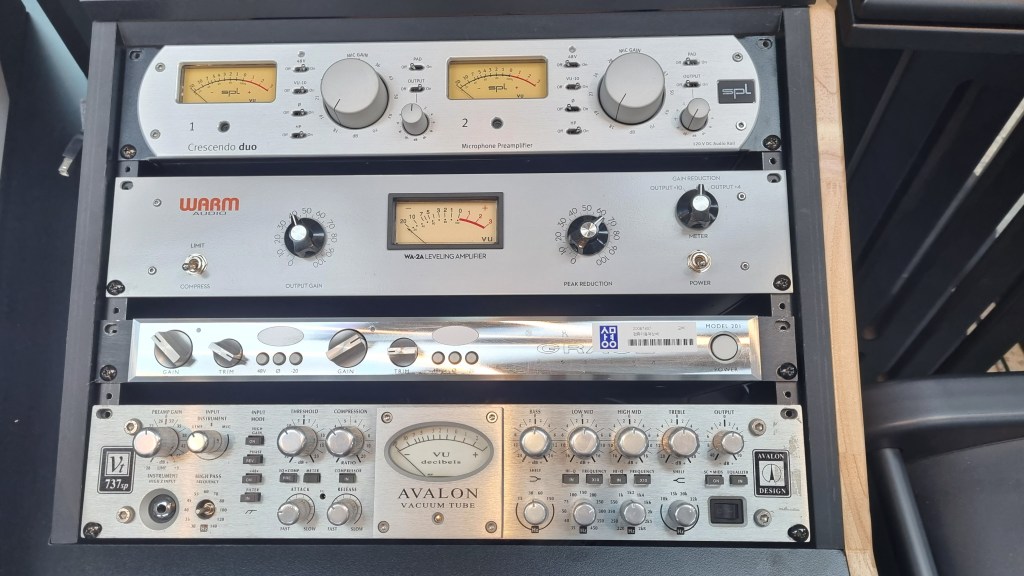
During a recent visit to my professor at Yonsei University’s music department recording studio, I noticed they’d added a Millennia Preamp and CL-1B to their Avid MTRX Studio setup. Quite the setup—if only I could afford it!
Mixing engineers often own multiple emulations of the same hardware for this reason.
For instance, I use several LA-2A emulations, each with its unique character:
UAD – For adding sparkle to the high end
Waves – To slightly lower the position and soften the tone
IK Multimedia – For a more transparent sound
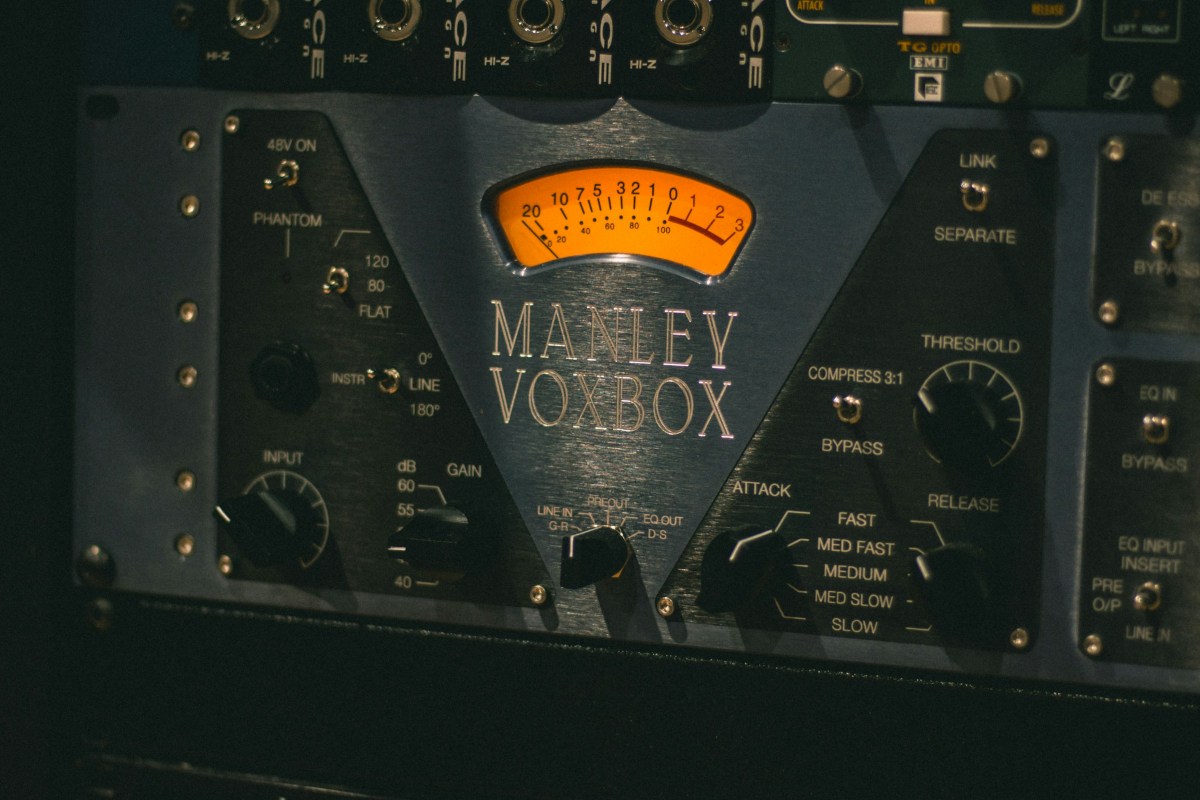
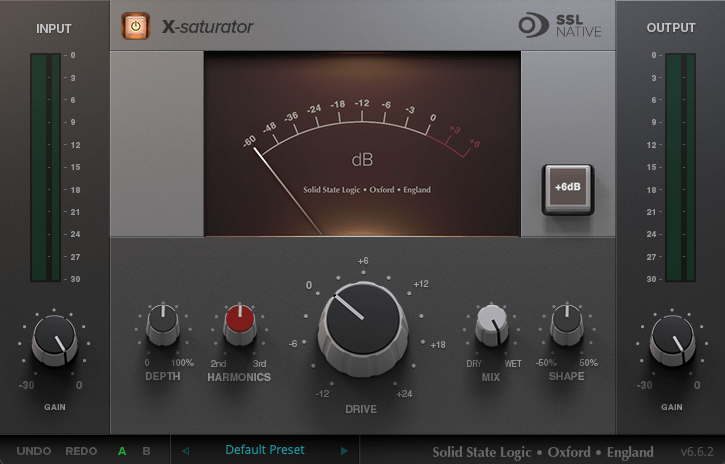
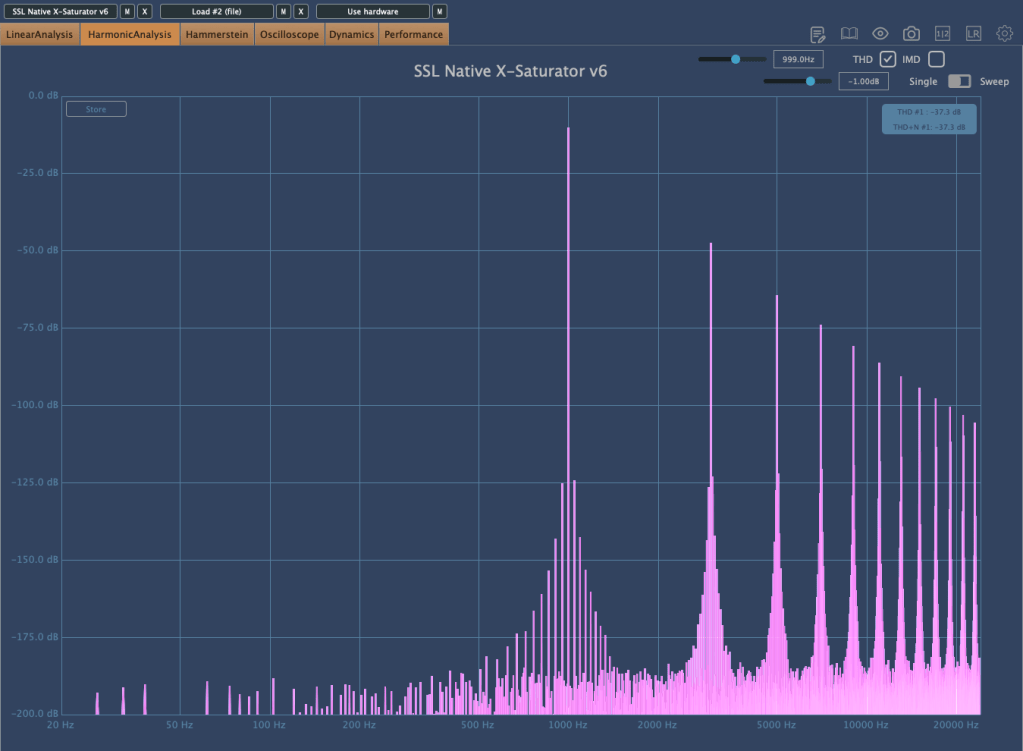
Some SSL hardware includes knobs labeled 2nd Harmonics and 3rd Harmonics to add harmonic saturation.
The SSL X-Saturator plugin replicates these features, allowing users to add harmonics independently.
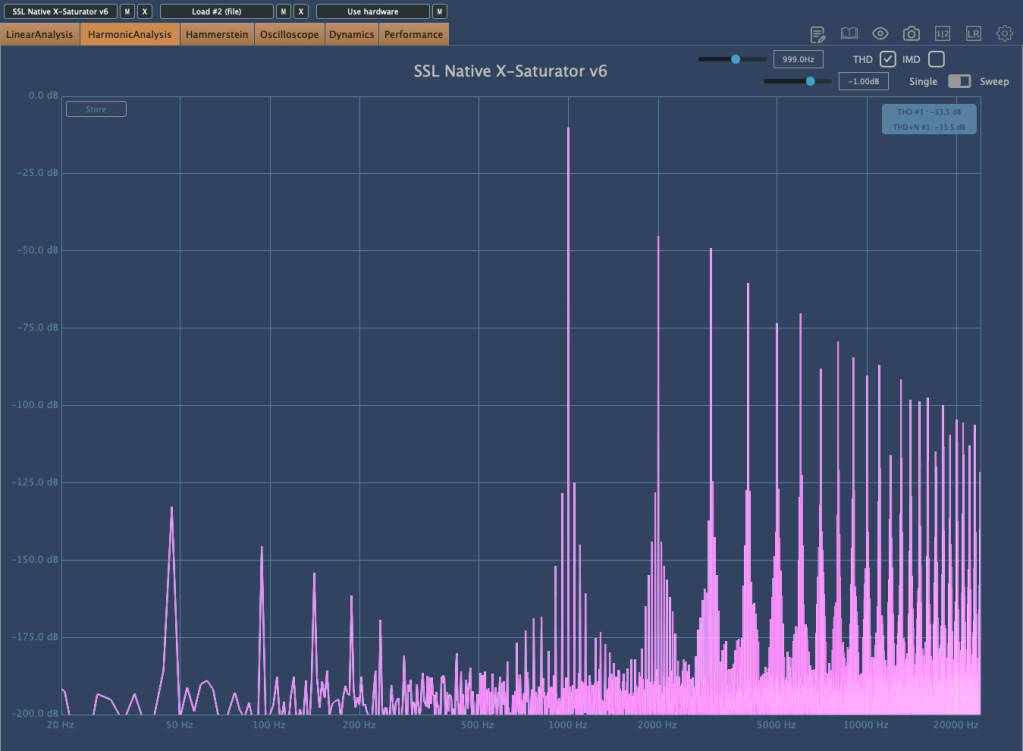
Upon analysis, the plugin shows that:
2nd Harmonics boosts both odd and even harmonics
3rd Harmonics emphasizes odd harmonics only
The same logic applies to microphones and mic preamps.
Neve and API preamps are beloved for their bold color.
Grace Design and Millennia preamps are praised for their clean, subtle coloration.
While minimal coloration is ideal for playback systems, some listeners still prefer the warmth of analog mediums like LPs and tape.
Similarly, tube amplifiers were standard before transistors and remain popular for their unique sound, even in speakers.
Though such choices aren’t ideal for professional engineering work, understanding consumer preferences is important point too.
Conclusion
Understand how each piece of gear applies saturation to your source.
Think about how to use that saturation effectively in your mix.
Hope this post clarified things for you. See you in the next one!