Basics of Mixing – 8.2 The History and Types of Reverb

Hello, this is Jooyoung Kim, music producer and audio engineer. Today, I’ll be discussing the history and various types of reverb.

Shall we dive in?

Valiere, Jean-Christophe & Palazzo-Bertholon, Benedicte & Polack, Jean-Dominique & Carvalho, Pauline. (2013). Acoustic Pots in Ancient and Medieval Buildings: Literary Analysis of Ancient Texts and Comparison with Recent Observations in French Churches. Acta Acustica united with Acustica. 99. 10.3813/AAA.918590.

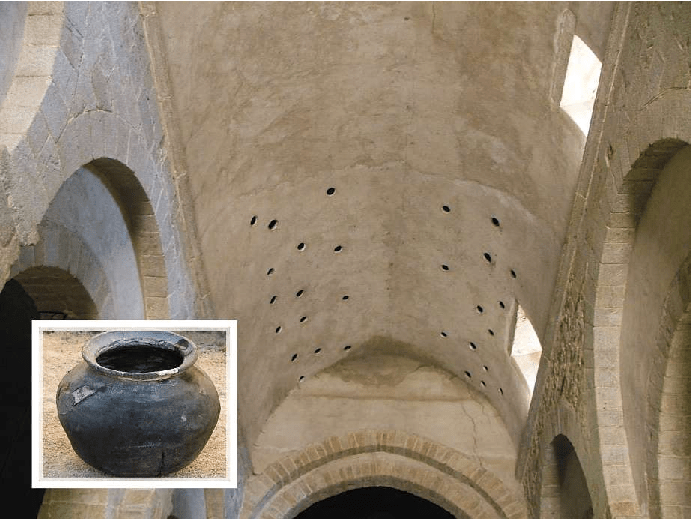
The image above is from a paper on “Acoustic Pots” found in ancient and medieval architecture. These pots were embedded in walls to function as a type of Helmholtz Resonator.

That might sound too technical, but a Helmholtz resonator is essentially a device that reduces specific frequencies. Modern-day applications include using this concept in car design, though that’s a more recent development.

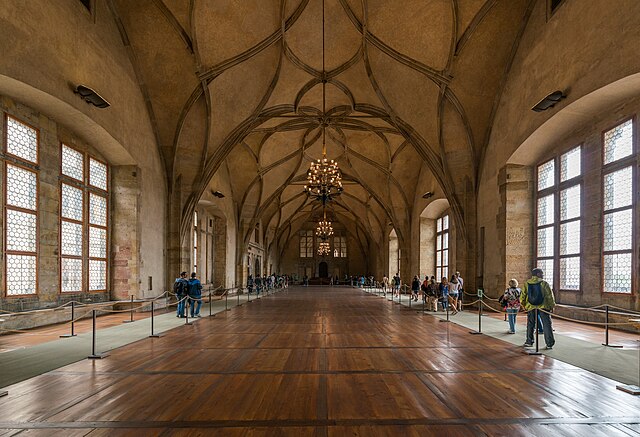
In ancient times, the Aztecs built temples like Kukulkan Temple, which used echo to create fascinating sounds.

The Greeks also designed spaces with excellent acoustic properties, enabling sound to be heard clearly from specific spots.

Back then, without microphones, these architectural advances allowed sound to be projected effectively, and this often included reverb.

Moving to the Modern Era

In the modern era, Bill Putnam, the founder of Urei, which later became Universal Audio, was the first to experiment with reverb. He used it in the song “Peg o’ My Heart” by the Harmonicats.

For this track, they recorded instruments, played the sound in a studio bathroom, and re-recorded it to capture the reverb. If you’ve ever sung in the shower, you’ll know exactly the kind of reverb I’m talking about! This was the earliest form of what we now call an echo chamber.

Echo Chamber (Chamber Reverb)

Inspired by this, studios started building dedicated rooms for reverb, known as echo chambers.

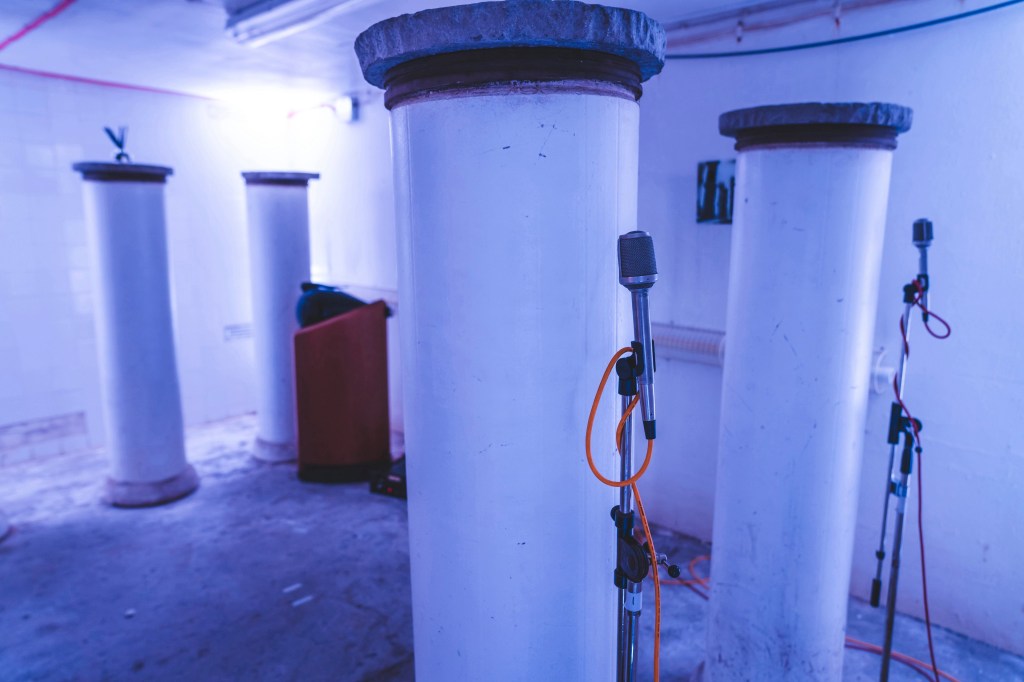
The image above shows one of the echo chambers at the famous Abbey Road Studio. For those familiar with plugins, this might ring a bell.

Waves created a plugin called Abbey Road Chambers, which is based on impulse responses (IR) from these very rooms. Notice the tile walls—similar to bathroom tiles—used to reflect sound. The process involves playing sound through speakers and capturing it with microphones.

By the way, the classic speakers you see in that plugin are B&W 800D speakers. The 800 series is a dream for many, though the price is quite steep, even second-hand. Hopefully, I’ll own a pair of 801D4s someday…

Anyway, there are plenty of plugins that emulate these echo chambers. While the sound quality is great, the cost of building these rooms is astronomical.

Imagine dedicating an entire room just for reverb—it’s quite an investment! Unless, of course, money is no object…

Plate Reverb

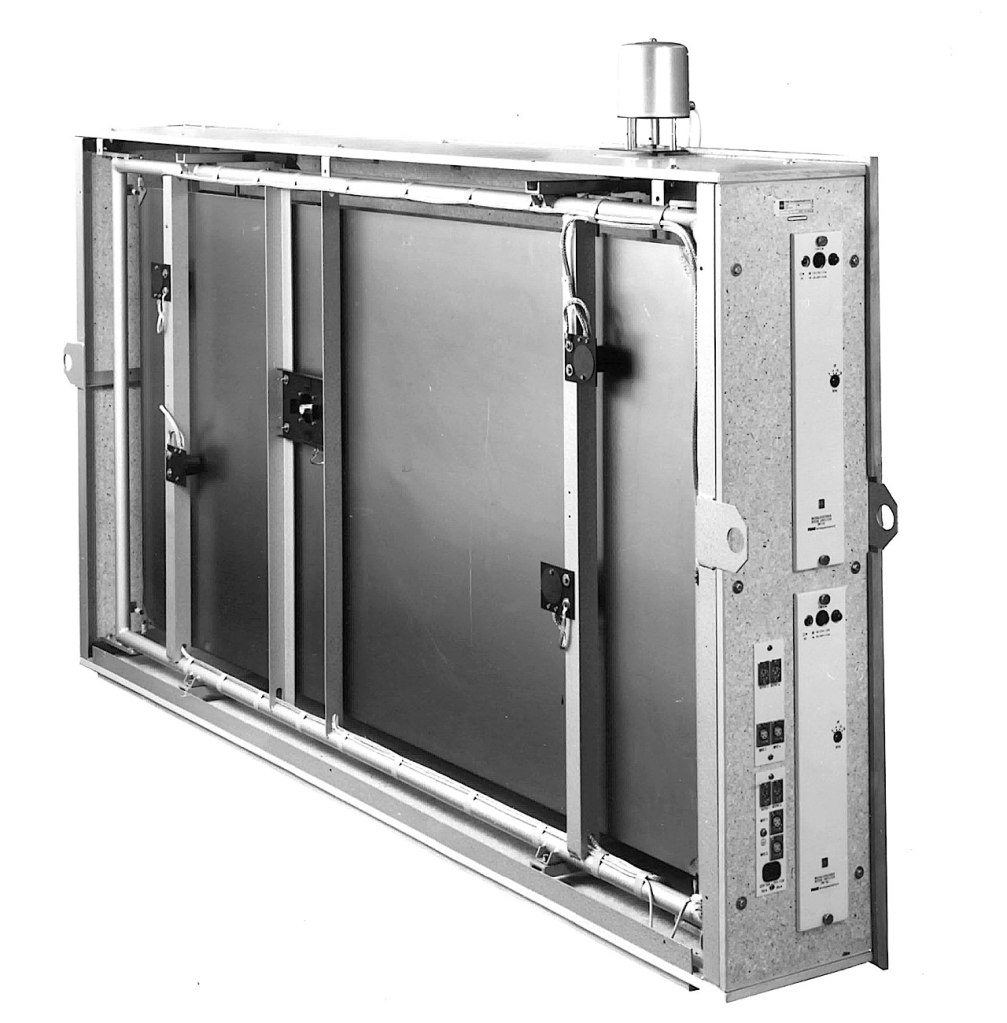
Plate reverb was developed as a more cost-effective alternative to the echo chamber.

This type of reverb works by vibrating a metal plate, with microphones attached to capture the sound. The tone varies depending on the type of metal used, giving plate reverb its distinctive sound.

While these units could weigh up to 250kg and were still quite expensive, they were far more affordable than building a dedicated reverb room.

Digital Reverb

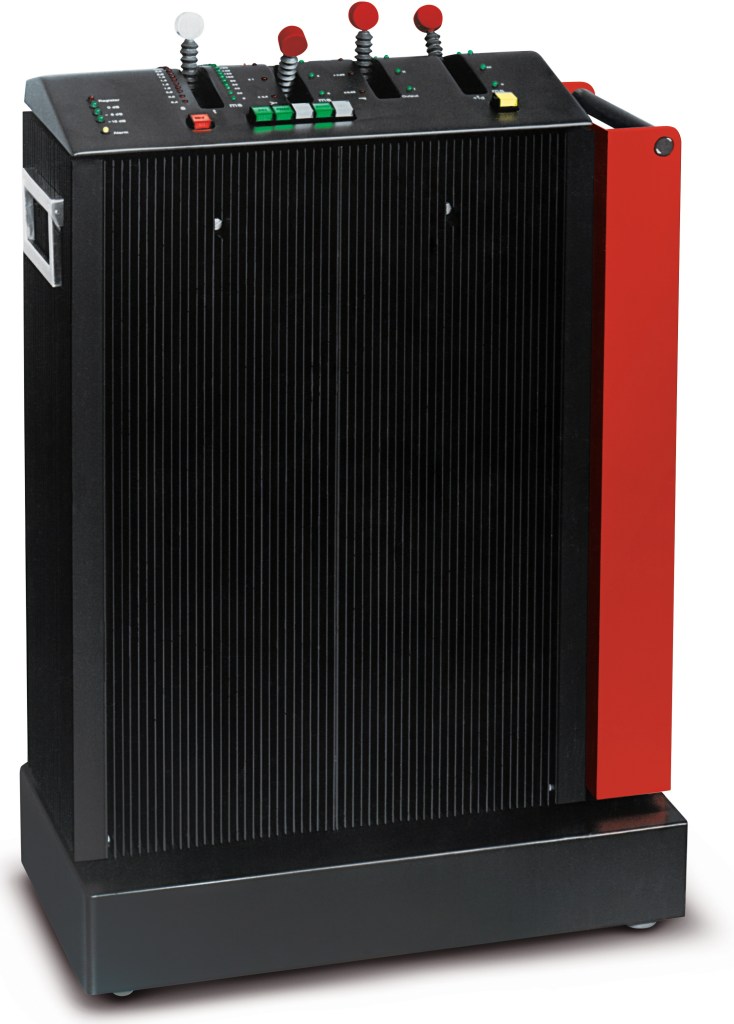
To reduce the size and cost further, digital reverb was invented. The image above shows the first commercial digital reverb, the EMT 250.

Spring Reverb

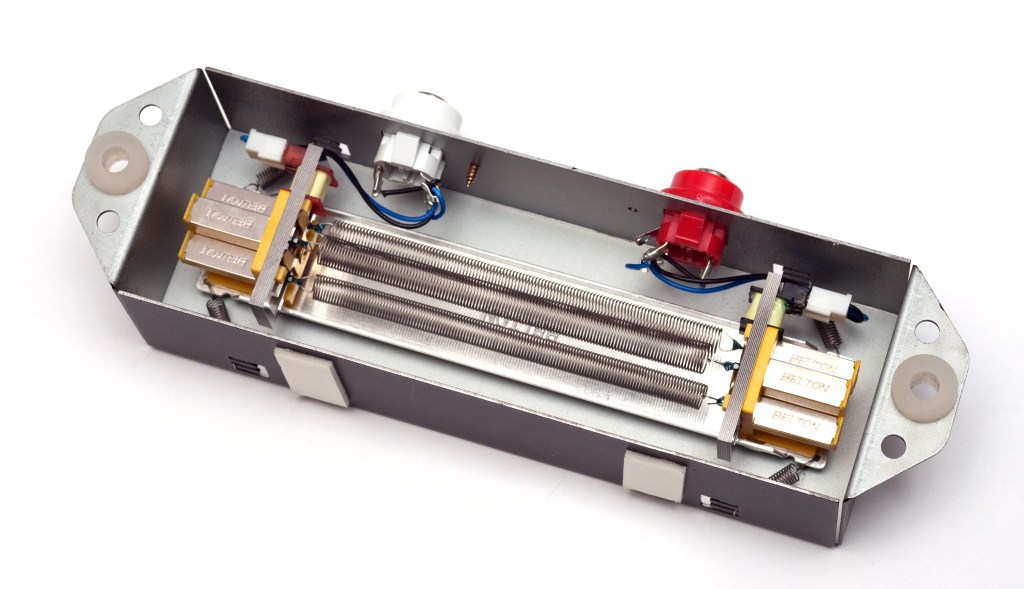
Spring reverb was originally developed for use in Hammond organs to create reverb effects.

The technology was later licensed to Fender, leading to the inclusion of spring reverb in Fender guitar amps. Its function is similar to plate reverb, and because it’s been embedded in guitar amps for so long, it has a familiar and pleasant sound when used with guitars.

Shimmer Reverb

Shimmer reverb adds pitch modulation to the reverb, producing a characteristic shimmering effect. It’s perfect for when you want that lush, expansive sound.

Hall, Studio, and Other Reverbs (Convolution Reverb)

Reverbs like hall or room reverb are actually quite tricky to classify. These reverbs are generated using an impulse response (IR) of real spaces through a process called convolution.

Let me briefly explain what an impulse is: it’s a very short, high-amplitude signal. Mathematically, it’s known as a Dirac delta function, where:

  • if x = 0, y = ∞
  • if x ≠ 0, y = 0
  • and its integral from -∞ to ∞ equals 1.

This impulse can be used to measure the frequency response of speakers. When measuring a space, we use a signal known as a sine sweep, which is recorded and mathematically transformed through deconvolution to generate the impulse response.

While this might sound complicated, you can think of it as recording a sine sweep in WAV format and using it to create a reverb through calculation.

With IR reverbs, you can also use other sounds like snare hits or kick drum samples as IR files to create unique effects.

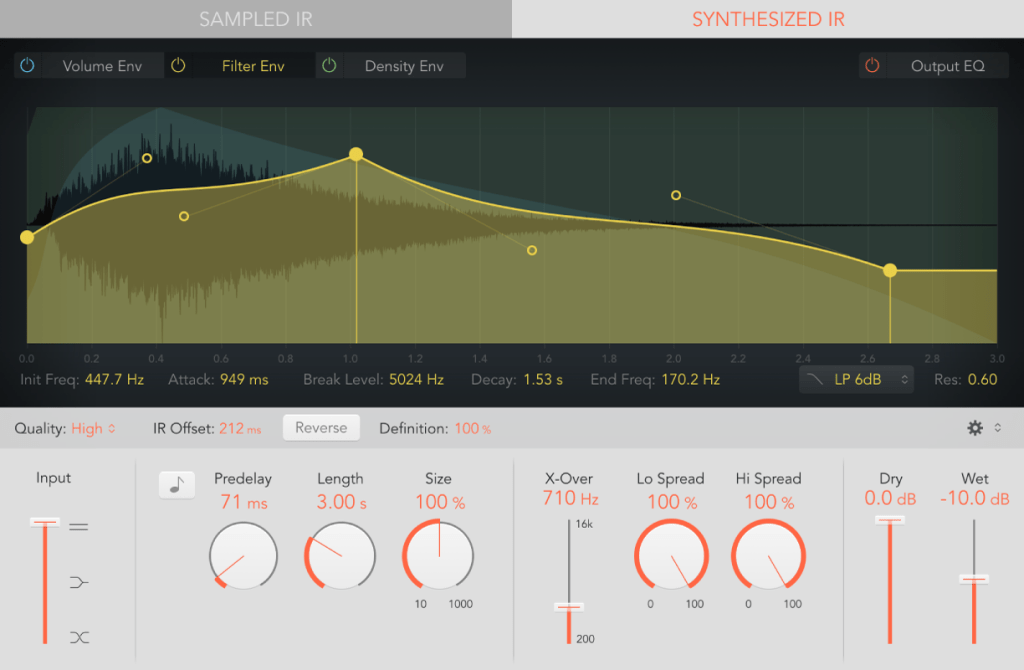
Logic has its Space Designer plugin for this,

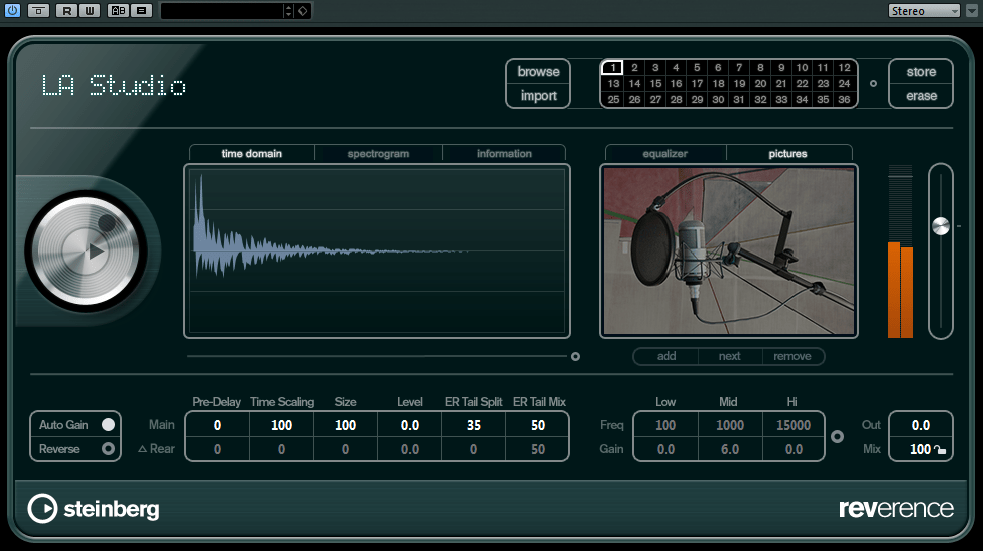
Cubase uses Reverence,

and Pro Tools has Space.

In the end, the reverbs we use on our computers can be divided into two types: algorithmic reverb and convolution reverb.

Conclusion

That covers the history and types of reverb. I may have gone off on a tangent at times, but if some of it was too complex, don’t worry! You don’t need to fully understand every detail—music is all about what sounds good, after all.

On a different note, I finally received permission from Universal Audio to use some photos for my book. I’ll post an update when the book is ready!

See you in the next post!

Basics of Mixing – 6.7 Limiters and Clipping

Hello, I’m Jooyoung Kim, an engineer and music producer.

We’ve discussed various processors that control dynamics. Today, let’s talk about limiters and clipping.

Let’s dive right in!

Limiters

A limiter is a type of compressor. Generally, when the ratio exceeds 10:1, we call it a limiter. When it reaches ∞:1, it’s often referred to as a brickwall limiter.

Limiters are processors that aggressively compress sound to prevent it from exceeding a certain volume level. A simple example of this would be guitar effects like distortion or overdrive, which are types of limiters. In mastering, limiters are used at the final stage to ensure the volume doesn’t exceed a certain level.

Any limiter, when viewed on a waveform, shows the top and bottom parts being cut off. This truncation introduces strong harmonic distortion, known as clipping, which we can perceive as a distorted sound.

Distortion-type limiters result in noticeable clipping, producing a heavily distorted sound. To minimize such distortion, some compressors/limiters include a feature called soft clipping.

Clipping / Soft Clipping

Elysia Alpha Compressor with Soft Clipping Function

Soft clipping gently smooths out the sharp edges of clipping. When a sine wave undergoes limiting with soft clipping, the result is a waveform that doesn’t have the abrupt cuts seen in regular clipping.

While soft clipping still introduces distortion, the sound is smoother compared to hard clipping. Using limiters or soft clipping helps to increase the overall loudness of a track. The reason for boosting volume is that people tend to perceive louder music as higher quality. However, equal LUFS (Loudness Units relative to Full Scale) values do not always mean the perceived volume is the same. For example, in vocal music, if the vocals are prominent, the music may seem louder even with similar LUFS values.

Even if you’re not mastering your own tracks, considering these aspects during mixing can help you create better productions.

Next time, I’ll explore reverb effects like delay. See you then!

Basics of Mixing – 6.5 Decompressor, Expander, Gate

Hello everyone, this is Jooyoung Kim, an audio engineer and music producer.

Today, I’d like to talk about some friends that, like the compressor, help us control dynamics: the Decompressor, Expander, and Gate.

Decompressor

A decompressor works in the opposite way to a compressor, making sounds above a set threshold louder.

You might wonder, “Why would anyone use this?” Occasionally, it can be used to force a groove or to emphasize transient parts.

Expander and Gate

An expander decreases the volume of sounds below a certain threshold. When the ratio is increased, it starts to function as a gate.

Think of the relationship between an expander and a gate as similar to that between a compressor and a limiter. The parameters for these tools are similar to those of a compressor. If you understand how a compressor works, you can easily use these tools as well.

These effects can be particularly fun when used with sidechain.

For example, you can apply a gate to a track with white noise and use sidechain so that the white noise only plays when the hi-hats come in. Or, you can apply a decompressor to a track and use sidechain to make the instruments louder only when the snare hits.

There are countless creative ways to use these effects if you let your imagination run wild.

If you’re a songwriter, try applying these effects not only to your mixes but also to your instruments. They can be very effective.

That’s all for today. In the next post, we will look at other effects that have compressor-like functions. Stay tuned!

Basics of Mixing – 6.4 Analyzing Compressors

Hello! I’m Jooyoung Kim, a mixing engineer and music producer.

Today, I was initially planning to talk about historically famous compressors. However, I realized that discussing the characteristics of these famous compressors might not be as effective since many of their plugin emulations don’t faithfully reproduce the original characteristics.

You might wonder how I can make such a claim without trying every famous compressor. Well, simply measuring their frequency response often shows no changes, and many plugins are designed to produce only odd or even harmonic distortions, which is unrealistic given the nature of tubes and transistors.

Instead of delving into the history of famous compressors, I decided it would be more beneficial to explain how to analyze compressors, whether they are plugins or hardware, once you purchase them.

1) Understanding Frequency Response

To measure this, you’ll need a program called Plugin Doctor by DDMF. Unfortunately, I couldn’t find any viable alternatives.

With this program, you can immediately see how the frequency response changes when a plugin or hardware is applied. Experienced mixers and producers might already have a feel for the frequency response just by listening, but visual aids can be incredibly helpful for study purposes.

For example, some plugins alter the frequency response depending on how the input gain is set.

The above graph shows the frequency response of the UAD 1176 Rev A compressor. The left side shows the response with no changes, and the right side shows the response after increasing the input gain and adjusting the output gain.

Even a quick glance reveals significant differences.

2) Analyzing Phase Changes

Phase changes can greatly assist in identifying affected frequency bands. The graph below illustrates the phase changes of a tape machine emulation, indicating substantial alterations across the spectrum.

This graph shows the frequency response and phase changes of the White 2A compressor by IK Multimedia, which emulates the LA-2A.

From the frequency response, you can infer a low-cut filter was applied. The phase change graph suggests a π/2 shift, indicative of a -6dB/oct low-cut filter.

3) Assessing Harmonic Distortion

Harmonic distortion often refers to the presence of even and odd harmonics. Even harmonics tend to create a more pleasant sound due to their consonant nature, while odd harmonics can introduce dissonance and sound harsher.

By measuring and listening, you can identify whether a compressor produces more even or odd harmonics and how it affects your perception.

For example, I find the White 2A compressor somewhat dull, whereas the UAD LA-2A Silver feels richer in color.

This perception might be influenced by its slight high-frequency boost and the more complex harmonic distortion it introduces.

However, it’s important to note that more harmonic distortion doesn’t necessarily mean a better plugin. It simply provides insights into how and where to use it effectively.

4) Evaluating Attack and Release

Although many plugins specify their attack and release times, some do not, necessitating manual measurement.

Using Plugin Doctor, you can visualize attack and release times with an oscillator. However, it doesn’t precisely indicate the time, which can be inconvenient.

A free tool called CMT can help here. You can download it from the description in a related YouTube video.

Knowing attack and release times is crucial because they influence how the compressor affects the source material’s groove and dynamics. Fast attacks can flatten a track’s groove, while fast releases can cause pumping effects.

Conversely, slow attacks may fail to control loud transients, and slow releases can cause continuous compression, making the sound feel squashed.

5) Examining Ratio Curves

Ratio curves reveal whether a compressor uses a soft or hard knee. A soft knee compressor starts compressing gradually before the threshold, resulting in smoother compression.

Manuals often don’t specify the knee type, so you might need to measure it yourself.

Understanding the knee type helps in grasping the compressor’s behavior and its suitability for different sources.

6) Soft Clipping in Mastering Compressors

Some mastering compressors offer a soft clipping feature, which we’ll cover in detail later. Soft clipping changes harmonic distortion and waveform shape, as shown below.

Soft clipping rounds off waveform peaks, introducing non-linear harmonic distortion. The more it resembles hard clipping, the more noise-like it becomes.

Think of a guitar distortion pedal for hard clipping and an overdrive pedal for soft clipping to understand the concept better.

Conclusion

Understanding these aspects will give you a solid grasp of a compressor plugin or hardware. Remember, you don’t need to memorize these values.

The key questions are:

  • How does it sound when applied?
  • How can it be used musically?

Measure and analyze your plugins/hardware, and listen to how they affect various sources. This combination of measurement and auditory experience will solidify your understanding.

Pay attention to how the source moves (up/down as discussed in Mixing Basics 2.4), how the tone changes, and how the compression feels. Being able to describe these in your own terms is a significant achievement.

I continue to buy and use hardware because of these nuanced changes. Emulation plugins often lack the detailed frequency response and harmonic distortion of their hardware counterparts due to digital reproduction limitations.

However, using hardware doesn’t automatically improve your tracks. The key lies in understanding and using these changes appropriately to enhance your mixing and sound design.

Mixing is always challenging, as each track requires a different approach. With numerous plugins at your disposal, the choices can be overwhelming.

That’s it for today. See you in the next post!