Baby Audio Smooth Operator Pro Sale (Until 6/1)

Hey everyone! I’m Jooyoung Kim, a mixing engineer and music producer.

So, two days ago, a paper I submitted to AES got rejected… 😢 I’d already been turned down by ASA, poured my heart into revising it, and still came up short. Haha… oh well.

One reviewer seemed pretty positive, but another tore it apart. Some of the criticism left me scratching my head—like, “Hmm… really?”—but there were common points both raised, so I’m running extra experiments now. It’s tough, both mentally and physically, but I’ve got to push through… right? Haha.

Next up, I’m eyeing IEEE Transactions or Elsevier journals, but man, the road just keeps getting steeper…

Anyway, enough of that! Today, I’m here to talk about Smooth Operator Pro from Baby Audio, which is currently on sale.

I received this plugin as an NFR (Not for Resale) copy from Plugin Boutique. If you buy through the links in this post, I’ll earn a small commission that seriously helps me keep going—thanks so much for the support!

Let’s get into it!


What’s Smooth Operator Pro?

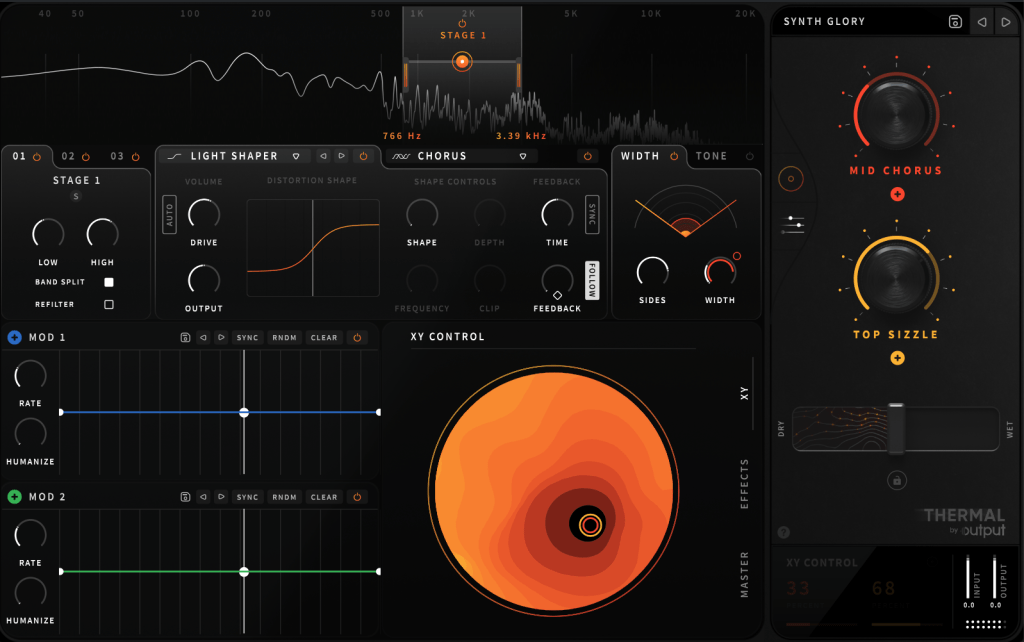
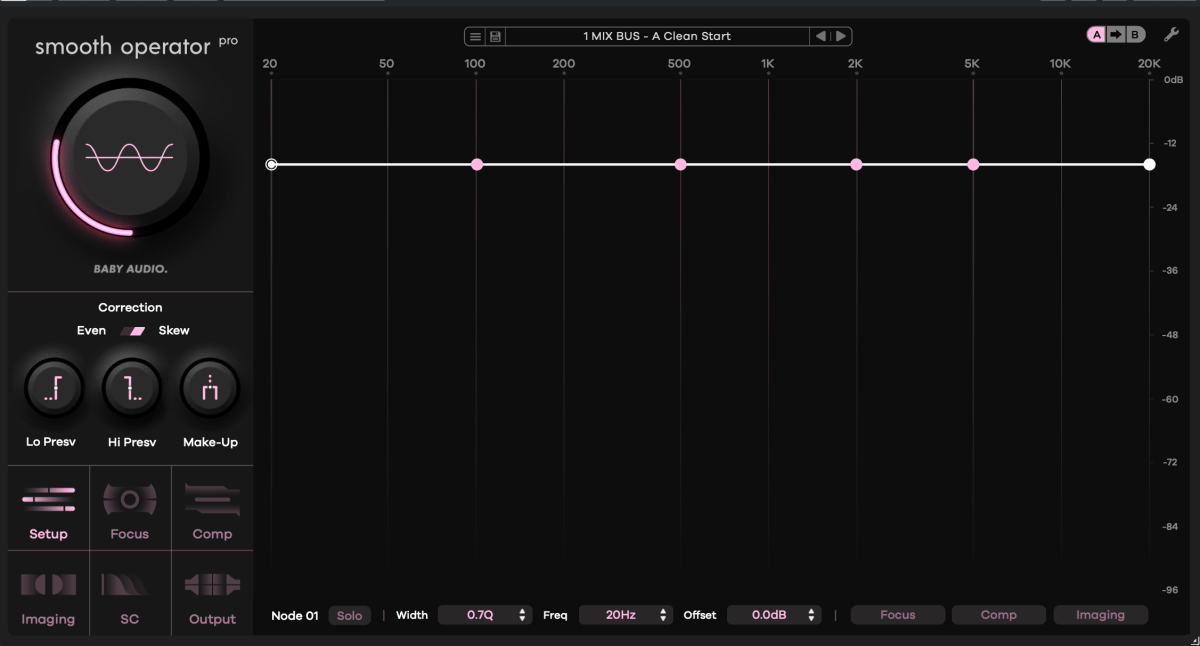
After poking around with it, I can say this plugin is fascinating. At first glance, it looks like an EQ—but it’s not. It kinda resembles a multiband compressor—but it’s not your typical one either.

Think of it as “a multiband compressor where you can tweak reaction and behavior per frequency.” That’s the vibe. It’s got six key features:

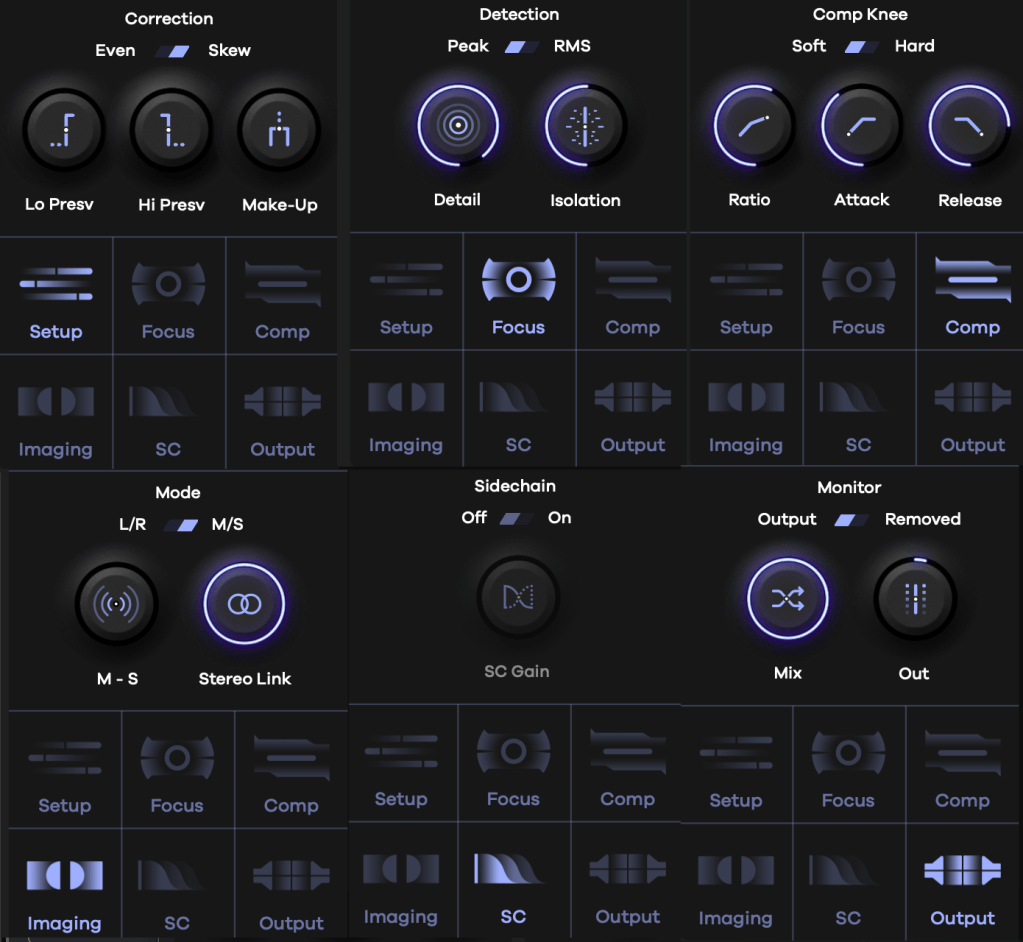
  1. Correction: Sets how frequencies are detected and the range of compression.
    • Lo Presv / High Presv: Exclude low or high frequencies from processing.
    • Even: Applies the effect evenly across all frequencies.
    • Skew: Adjusts the effect based on human hearing perception.
  2. Detection: Controls how peaks are spotted.
    • Peak/RMS: Choose between peak or RMS loudness detection.
    • Detail: Low for broad, smooth detection; high for tight, aggressive targeting.
    • Isolation: Sets how wide the effect spreads around detected frequencies.
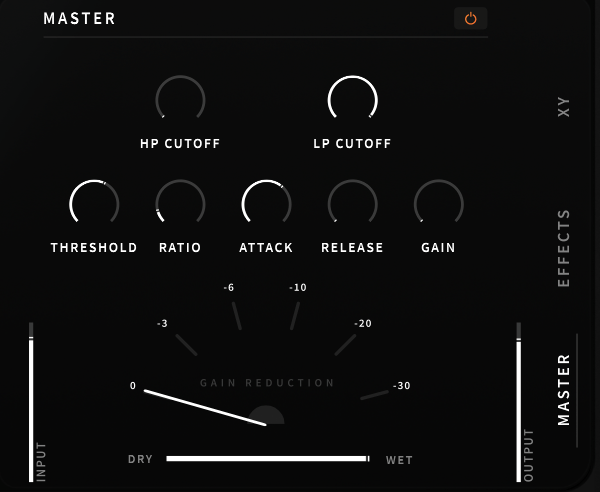
  3. Comp Knee: Toggle between Soft or Hard Knee compression.
    • All the sub-parameters here are classic compressor controls.
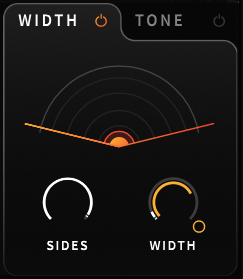
  4. Mode: Stereo processing options—choose between L/R or Mid/Side.
  5. Sidechain: Pick a sidechain signal to trigger compression.
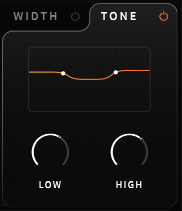
  6. Monitor: Compare pre- and post-processing audio, tweak Mix and Output Gain.

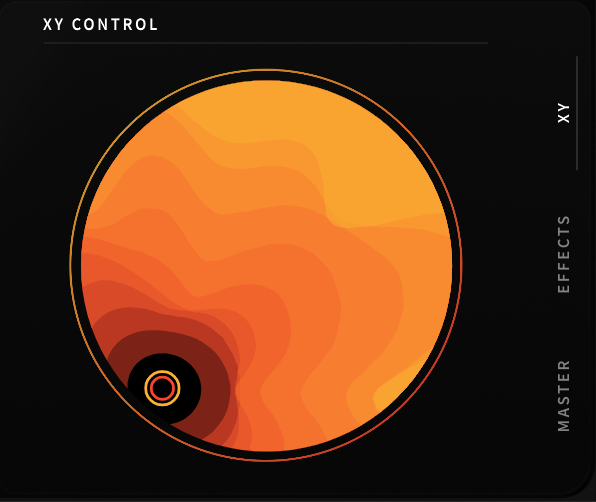
Activate the bottom-right toggle, and you can tweak Focus, Comp, and Imaging settings for each node individually.

The big central knob adjusts the overall threshold—up or down across all frequencies.

It might look tricky at first, but once you play with it, it’s pretty straightforward. Toss in some sidechaining, and you could whip up some wild sounds for electronic tracks. I’m already picturing the possibilities!

Baby Audio has a knack for blending tons of parameters into creative plugins like this.


Why It’s Worth Checking Out

Smooth Operator Pro is on sale right now, so if you’re curious, it’s a great time to take a look. It’s not just a tool—it’s a playground for shaping sound in ways that feel fresh and intuitive.

That’s all for now—catch you in the next post! 😊

Output Thermal Distortion Plugin FX 49% Off (Until 8/16)

Hello everyone, I’m mixing engineer and music producer Jooyoung Kim.

Today, following my previous post on the Portal plugin and its discount, I’m excited to introduce Output’s Thermal plugin.

As mentioned in the previous post, Plugin Boutique has provided the plugin under Not for Resale conditions, allowing me to write this review.

Let’s get started!

Thermal is one of Output’s flagship effect plugins, specializing in various types of distortion. Its basic UI is similar to that of Portal.

Opening the settings panel, you’ll find two Macros on the right and two LFOs labeled as MOD, allowing modulation of parameters with four values.

On the left, you can select the area to adjust through Stages, enabling you to control three different frequency ranges separately.

Does this remind you of anything? If you’ve used many plugins, Fabfilter’s Saturn might come to mind.

Unlike Saturn, which is for coloring with Tube or Tape settings, Thermal lets you choose from 19 ways to distort the waveform.

You can adjust how it transforms through parameters like Drive, Shape Depth, and Frequency. The Clip function provides a clipping effect, and you can control Feedback Time and amount.

There are nine effects, similar to Portal, applied only to the selected Stage.

Width and Tone are also applied per Stage.

The Modulation section works like a synthesizer’s LFO. Clicking the + button and assigning it to a parameter creates a small circle that you can adjust up and down to control the amount of modulation.

In the lower right section, you can adjust Macros with the mouse, apply the overall effect, or tweak EQ/Compression in the master section.

These parameters can also be modulated using Macros or LFOs.

This kind of plugin is great when you want intense saturation or when basic distortion isn’t enough, and you want to experiment with sound transformation.

Using automation, you can alter the XY Macros with your mouse to break away from monotonous sounds.

It’s challenging to describe these transformations in words, so check out the official Plugin Boutique video above to hear it in action.

I started with just an acoustic guitar, but as I continued making music, I began exploring plugins like this.

Though it might be too bold for mixing external projects, it can be a valuable tool to add edge to your compositions and arrangements.

I believe this is one of the best discounts ever offered. Output plugins are 50% off until August 16th, so it’s worth considering.

Additionally, when you purchase a plugin from Plugin Boutique, you get a free plugin.

This month, you can choose between:

The VCA Compressor, a recreation of the dbx160 by Softube, or

The K7D Delay by Imagine Audio.

If you don’t have a dbx160-style plugin, I recommend the VCA Compressor. For those who need a versatile delay for instruments and mixing, the K7D Delay is a great choice.

See you in the next post~:)