Hello! This is Jooyoung Kim, an audio engineer and music producer.
It seems like more companies are starting their sales earlier, even before Black Friday.. 🙂
There’s a mountain of tools I want to introduce (and need to introduce).. haha
Around the week after next, I’ll prepare a comprehensive list of Black Friday deals on everything from virtual instruments to mixing/mastering plugins.
Anyway, today I’ll be introducing two plugins: Vocalign and Revoice Pro, specialized tools for audio timing and pitch alignment.
When I was using Revoice Pro 4, this tool dramatically sped up my workflow, making it one of the software I personally recommend the most.
As with my previous posts, I was provided with an NFR (Not for Resale) code from Plugin Boutique to write this article.
Also, if you purchase the plugin through the links provided in the post, I’ll receive a small commission, which greatly helps with the blog’s operation (and my living expenses)… It’s been tough lately.. ^^;;
Thank you so much to everyone who supports me!
Now, let’s dive into Vocalign first.
Vocalign 6

Synchro Arts first developed Vocalign back in 1995.
Initially, it was targeted at syncing ADR (Automated Dialogue Replacement) to live-recorded performances in film and TV environments.
However, when it was used in music to align doubling/chorus tracks with the main vocal, it worked so perfectly that it became widely used in music production as well.
Vocalign 6, as the name suggests, is the sixth iteration of Vocalign, and it’s excellent at aligning vocals and choruses.
How to Use
Using a vocal alignment example:

- Insert the Vocalign plugin on the doubling/chorus track.
- Use sidechain input to set the guide (main vocal) track.
- Click Capture, similar to other pitch correction plugins, to record the section you want to align.
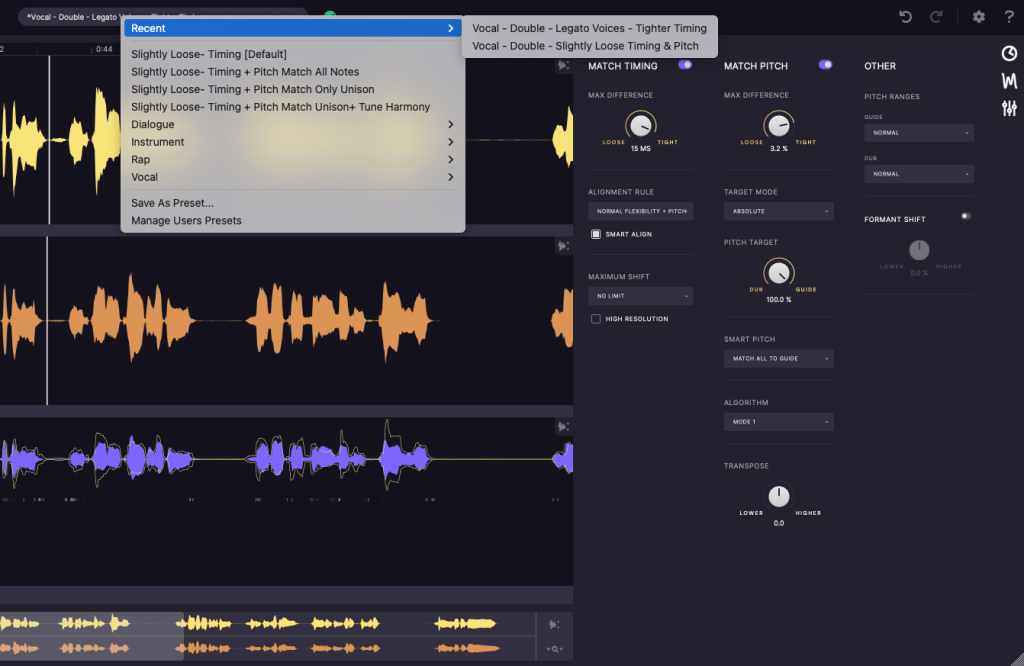
Next, you can decide how to align timing and pitch through the presets above or use the icons on the right (clock icon, waveform icon, settings icon) to adjust timing, pitch, and other settings.

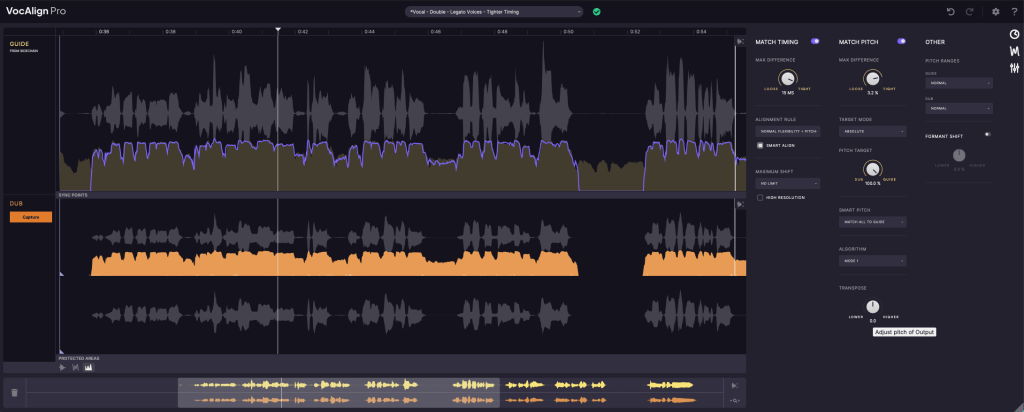
Once configured, you’ll see how the pitch, volume, and timing of the two sources align.
That’s it! The effect is so dramatic that I’d love to demonstrate it for you, but recording and editing videos is quite labor-intensive for me.. haha.
Here’s an official demo video instead:
I’ve set the timestamp, so just listen from here.
Standard vs. Pro Versions
There are two versions: Standard and Pro. Below are the Pro-exclusive features:
Pro-only Features:
- Pitch Alignment – Align pitches.
- SmartPitch – Intelligent pitch alignment feature.
- Process Groups – Align groups of tracks simultaneously.
- Formant Shifting – Adjust formants (a more advanced concept in phonetics).
- Transpose Shift – Change pitch intervals.
- Sync Points & Protected Area – Set specific sync and protected zones.
- SynchroLink – Integrate with RePitch for enhanced functionality.
For basic timing alignment, the Standard version should be sufficient. However, if you want faster workflow with pitch alignment, the Pro version is a great choice.
Revoice Pro 5
After Vocalign proved highly useful in music, Synchro Arts developed Revoice Pro in 2012 by adding pitch modification capabilities.
From the materials I’ve found, the first product name was RVP2 (Revoice Pro 2). Perhaps they started the numbering from 2 to signify it as the successor to Vocalign..? haha
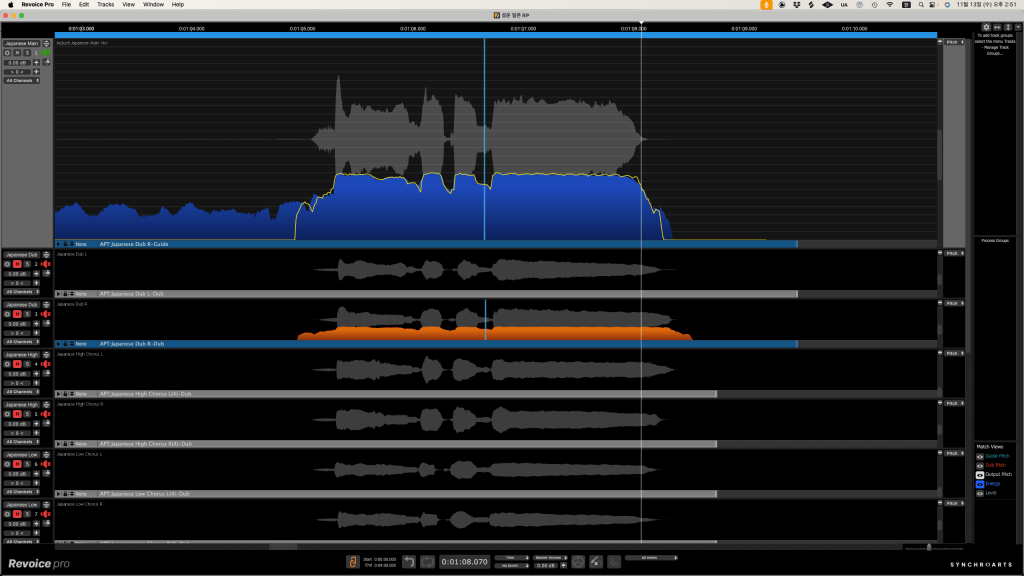
Revoice Pro allows you to create doubles from recorded sources or sync them with the main source. It also includes pitch and timing adjustment features similar to Melodyne or Auto-Tune.
Compared to Vocalign, it offers more detailed control.
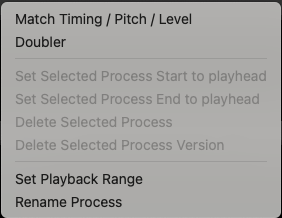
After importing audio files, you can right-click to choose whether to generate doubles, adjust pitch, timing, or level.

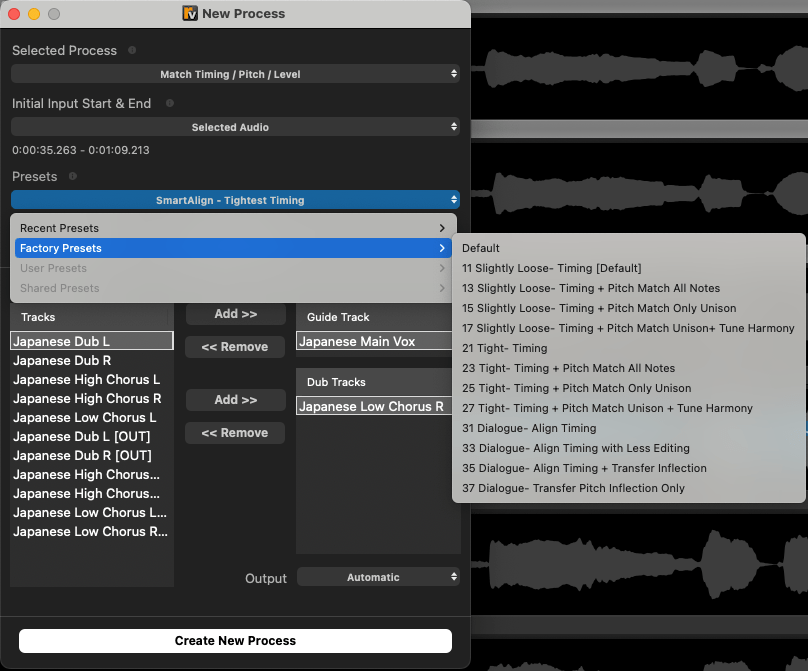
Wow, compared to version 4, this is much more convenient. You can now adjust timing, pitch, and level simultaneously, which was previously a separate process in version 4.
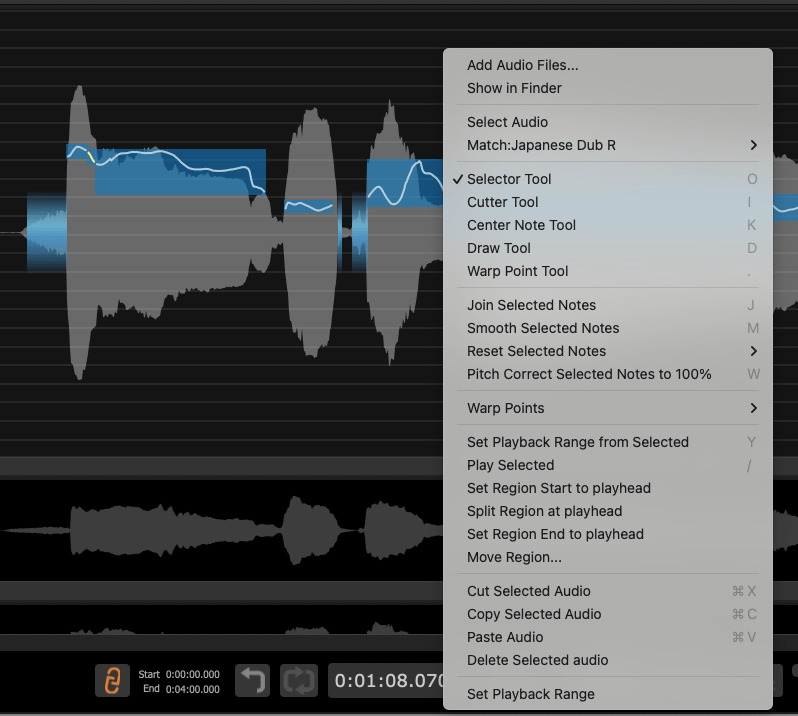
If the result isn’t to your liking, you can right-click and use various tools to fine-tune timing or pitch, just like you would in Melodyne or Auto-Tune.
Version 4 was less intuitive, making the initial learning curve steep. Fortunately, version 5 has a much more intuitive click-and-scroll interface.
When I used version 4, I thought, “The features are great, but the UX could be better.” Thankfully, version 5 addresses that.
If you don’t have any pitch correction software yet, I’d highly recommend starting with this one.
That’s it for today’s post!
See you in the next article~ ^^