Introducing United Plugins DarkFire Plugin and 78% Discount (Until 1/5)

Hello! I’m Jooyoung Kim, a mixing engineer and music producer.

Today, I’d like to introduce a new product, DarkFire, recently launched by United Plugins, which I’ve been using quite often.

This plugin was provided as an NFR (Not for Resale) license through Plugin Boutique. If you purchase it via the links in this post, I’ll earn a small commission, which helps me greatly. 😊
Let’s dive in, shall we?


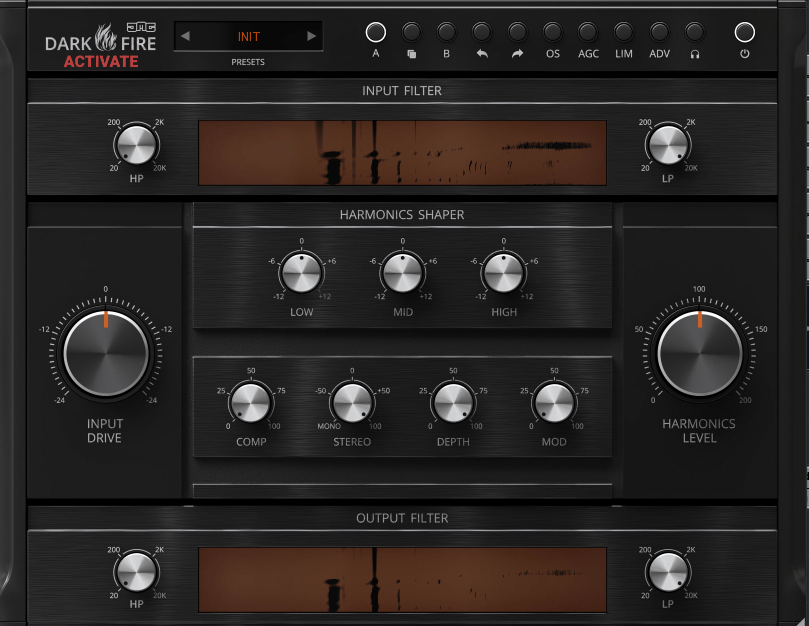
DarkFire is a versatile all-in-one plugin that can essentially be categorized as a saturator.
Plugins with such multifunctionality are usually used on buses or the master channel.

At the top of the interface, you’ll find the OS (Over Sampling) button, which enables up to 8x oversampling.

  • AGC stands for Auto Gain Compensation, automatically matching input and output gain levels.
  • LIM acts as a limiter to ensure the signal doesn’t exceed 0dB.
  • ADV allows deeper parameter adjustments.
  • The headphone button lets you isolate and listen to only the harmonics.

In addition, the HP/LP (High Pass and Low Pass), EQ, and compressor functions operate as you’d expect.

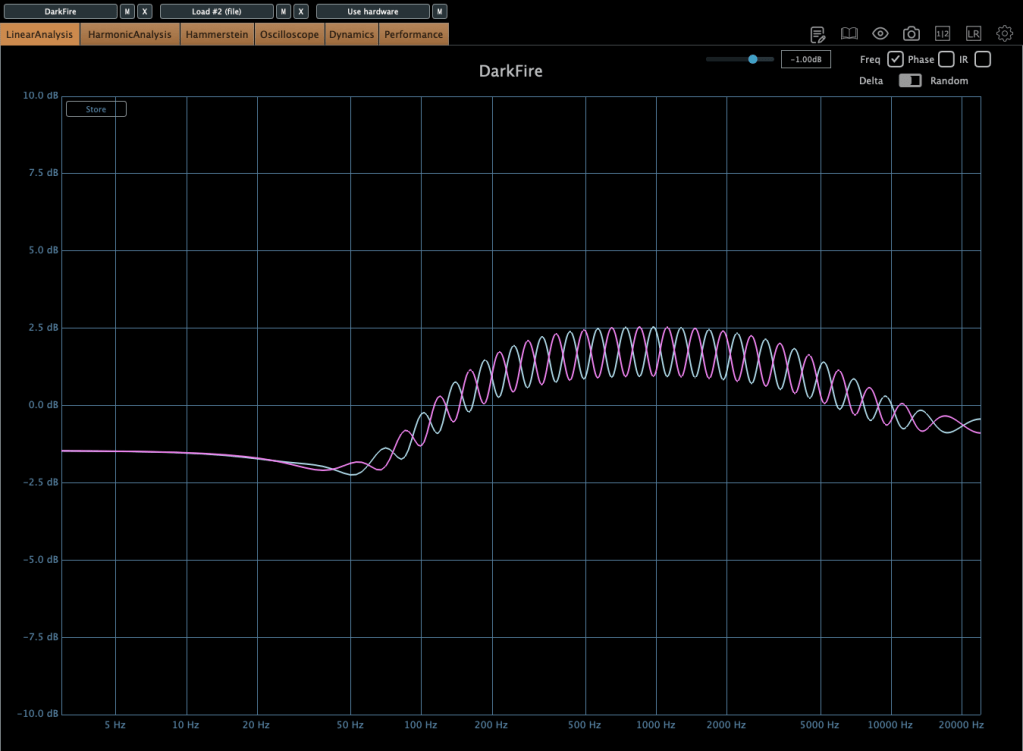
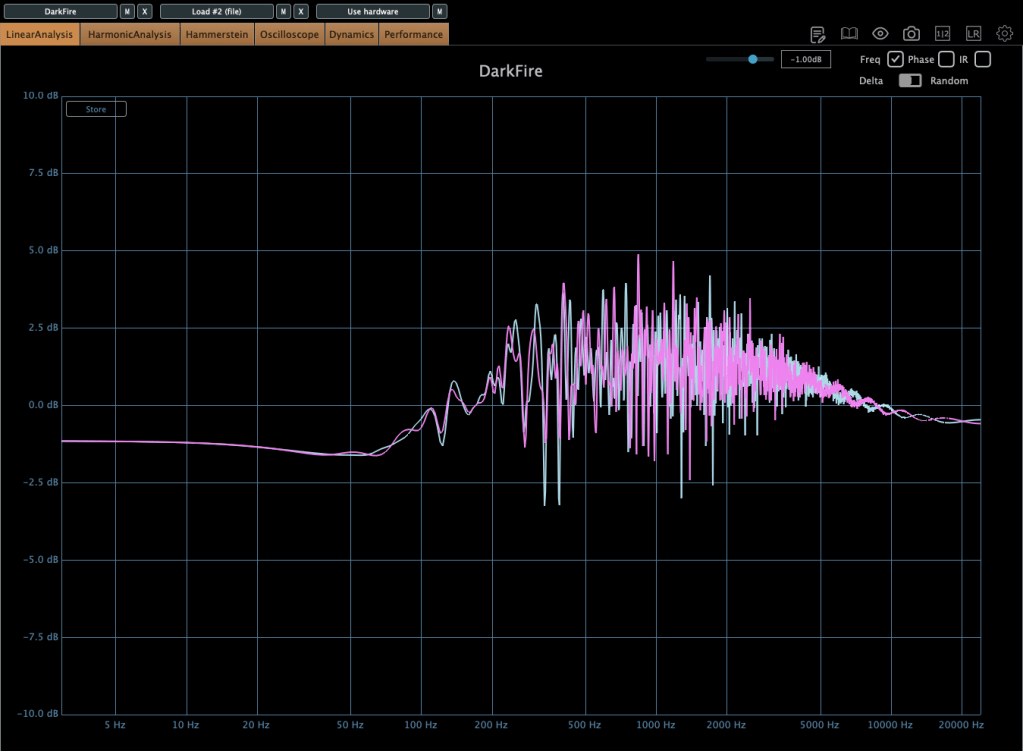
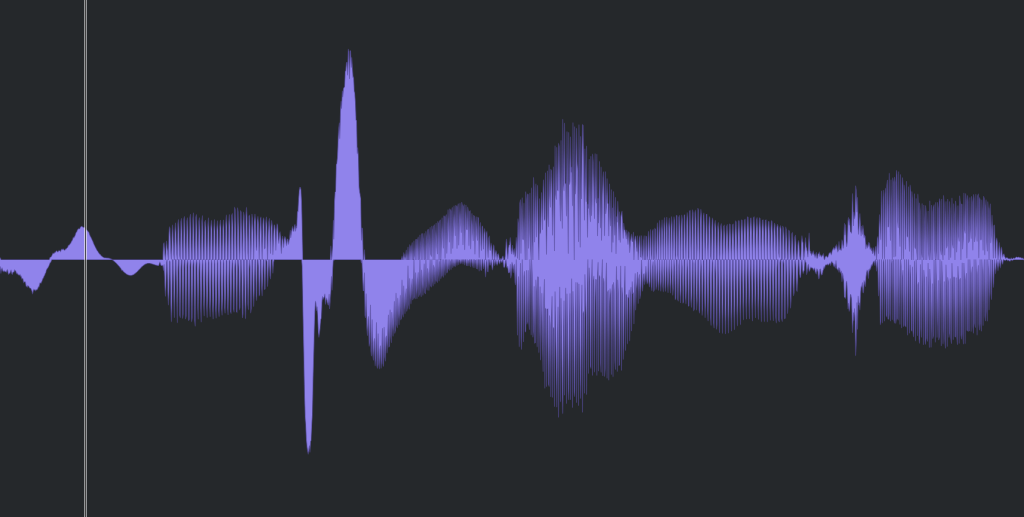
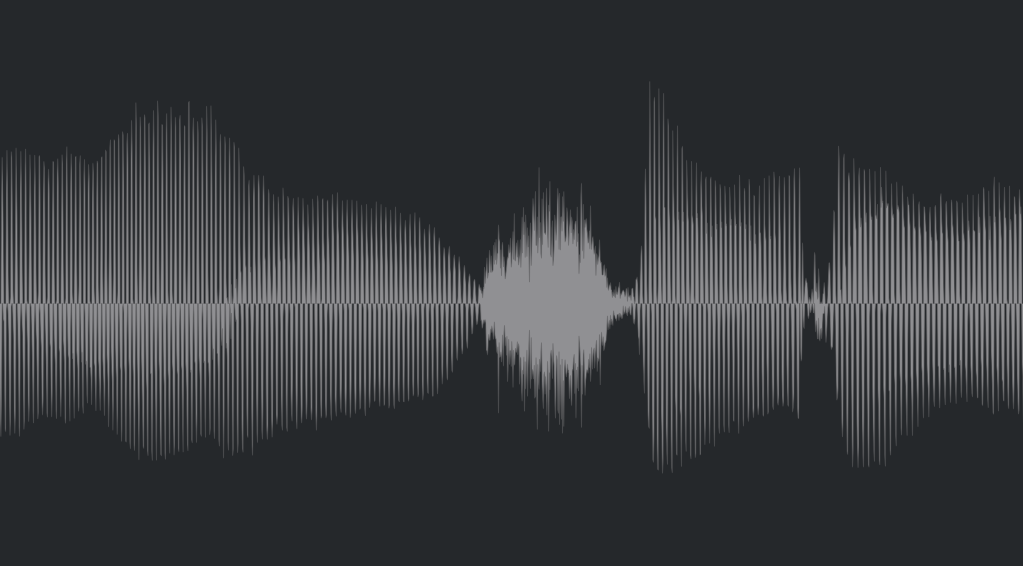
The first image above shows when the Stereo knob is set above 0, and the second shows the Depth knob also turned up.

  • The Stereo knob adjusts stereo imaging by manipulating left-right EQ differences.
  • The Depth knob creates a sense of front-back space using short delays.

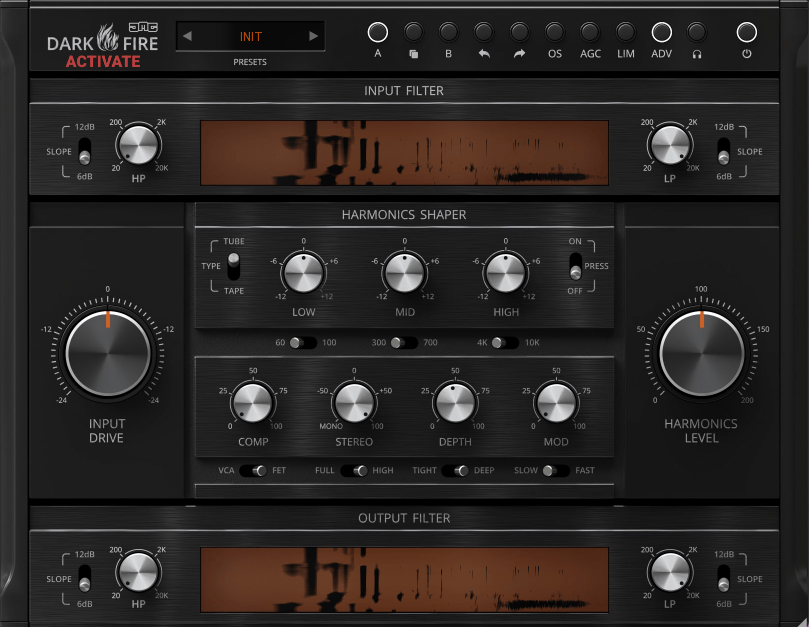
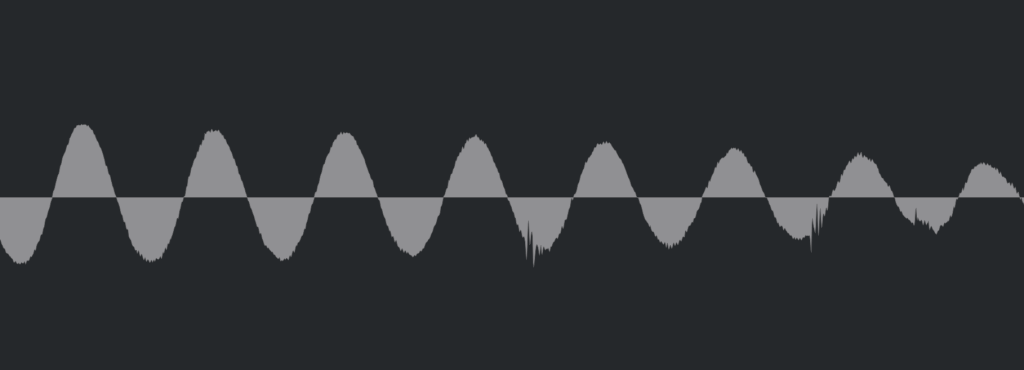
Personally, what stands out the most is the Type option that appears to the left of Harmonics Shaper when the ADV button is activated.
Here, you can select between Tube and Tape saturation types.
The default setting is Tape, but I personally prefer the Tube option.

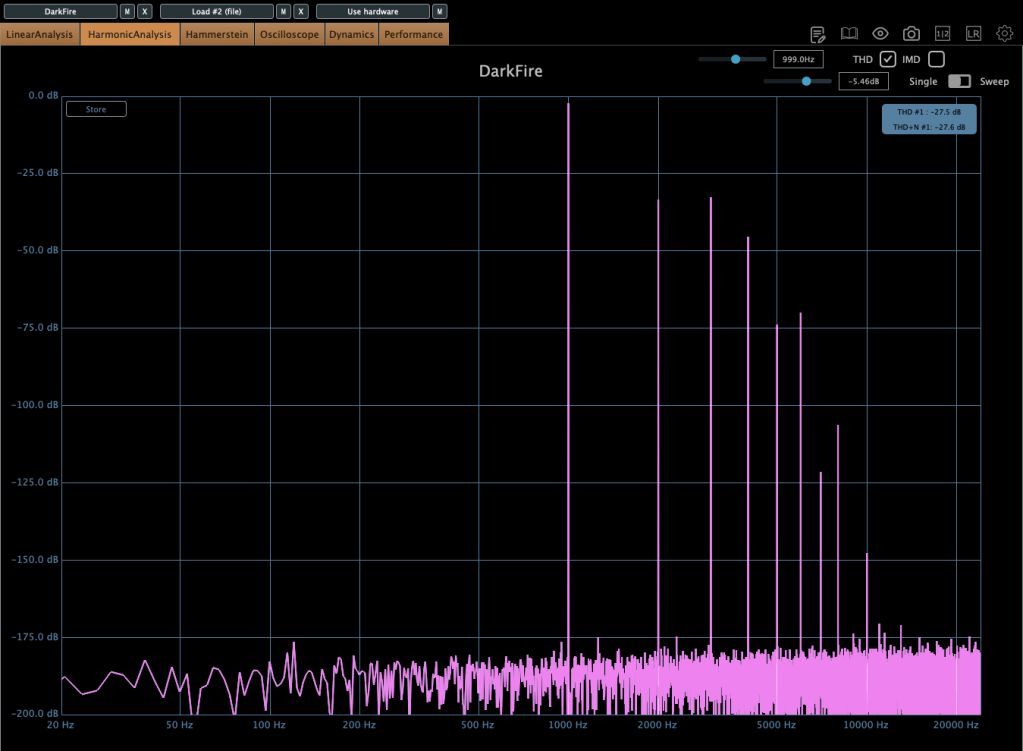
The harmonic patterns differ significantly between the two.
The first image shows the Tube mode, while the second shows the Tape mode, which only generates odd-order harmonics.

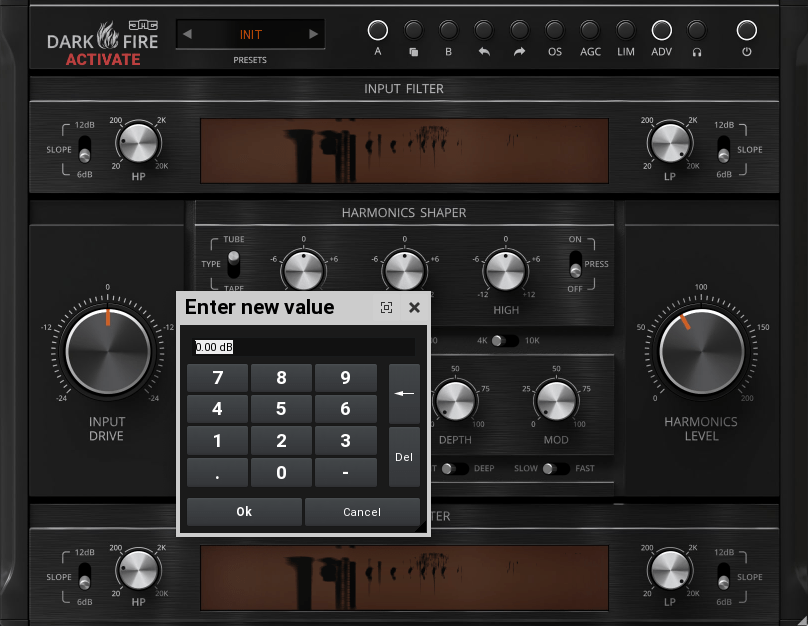
You can also double-click on parameters to adjust them to exact values.
I believe you can never have too many saturator plugins, as each one offers unique characteristics that are hard to replicate!
At its current price of $17.60, this plugin is an affordable option worth testing.

United Plugins also offers many cost-effective and practical plugins. With discounts running until January 5, it’s a great time to explore their offerings.

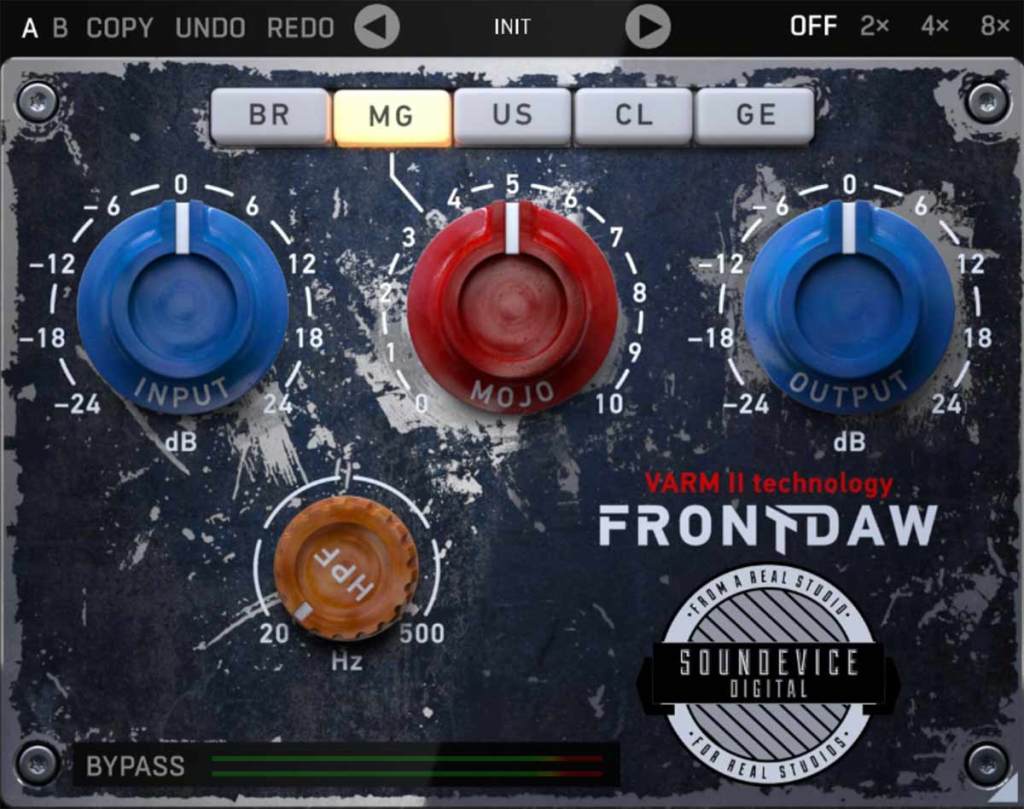
One plugin I highly recommend is FrontDAW, which emulates various console preamps. I’ve been using it regularly since 2019, and it’s been incredibly handy!

Additionally, Plugin Boutique is running a promotion this month where you can get one of the following plugins for free with any purchase:

  • UAD Oxide Tape
  • Karanyi Sounds Vapor Keys
  • iZotope Nectar Elements
  • Pitch Innovations Rhythm Box

Among these, I personally recommend UAD Oxide Tape, as it delivers decent quality for a tape emulation plugin.

That wraps up today’s post. See you in the next one! 😊

Basics of Mixing – 12.1 How to Solve The Problems of Recording Source

Hello! This is Jooyoung Kim, a mixing engineer and music producer.

Today, I’d like to say about the problem of recording source and how to solve. This article is based on my book “Basics of Mixing” released at South Korea.

Let’s dive in!


1) Noise Floor

If you use analog hardware, electricity causes certain noise across all frequency range. We call this “Noise Floor”.

So if you recording with microphone pre-amplifier or use outboards, you have to recognize and keep in mind it. Although you can’t hear the noise in mixing step, but it could make problem in mastering step .

This matter could be fixed with plug-ins like iZotope’s RX bundles(Spectral De-Noise). But when the source processed, you will hear High Frequency & Low Frequency loss. So I don’t use it often until have no choice.


2) Popping Noise

Popping Noise, A.K.A pop noise, is caused by popping sound. If you look closely upper picture, could understand it’s usually belong low frequency. So it could solved with low cut(high pass) filter.

However when you record voice, use pop filter is best method to prevent popping noise.


3) Sibilance

Sibilance is hissing sound when you pronounce like “S”. This high frequency sound can be perceived as louder than other frequencies due to the equal loudness contour.

You able to use De-Esser plug-ins or EQ to solve this problems. Another method involves cutting the sibilant peaks and adjusting the gain of the affected clip.


4) Click Noise

When you check the records, you could find click sounds frequently. In vocal records, lips make those noise. Drawing waves with pencil tools will solve this problem.

There have another way, use De-Click plug-ins. However I don’t like this method. It makes high frequency loss.


5) Clipped Noise, Distortion

If the recording is distorted like this from the beginning, the best solution is simply to re-record it.

You might want to ask the client to double-check their export/bounce to see if the distortion originated there.

If the recording is distorted and re-recording is impossible, you can try to fix it with plugins like De-Clip, although you’ll have to sacrifice some audio quality.


6) Ambience

In the past, there was no way to fix recorded ambience. However, nowadays, there are many plugins that remove reverb and ambience from companies like Waves, UAD, and Izotope, so it’s not as big of a problem anymore..


7) Ambience

You can consider most other issues beyond these as unresolvable. If noise is caused by electrical issues and is consistently present, you can address it by dealing with the noise floor. However, if it appears intermittently, it’s impossible to fix.

Similarly, if a problem occurs consistently, there’s a good chance it can be fixed. But things like construction noise from nearby or the ticking of a clock are difficult to remove.


In this post, we discussed various problems with recorded audio and how to solve them.

The next chapter was originally going to be about groove and sidechaining. However, This is one of the key topics in my book, so I’ve decided not to cover it on the blog.. I don’t want to give away all the content for free and be unfair to those who purchase the book. I hope you understand.

From the next post onwards, I’ll be talking about outboard gear.

See you in next post! 🙂

Basics of Mixing – 11.1 Enhancing Highs and Lows

Hello, everyone! This is Jooyoung Kim, mixing engineer and music producer.

If you’ve been following along with the previous posts, you already have enough knowledge to start mixing. The rest comes down to practice.

I skipped over automation because it’s something you really need to experiment with hands-on. Whether it’s volume automation or parameter automation, try as many creative approaches as possible!

Starting from Chapter 11, we’ll move into more advanced applications.

Today, let’s talk about enhancing the highs and lows in a mix. This content is based on my book Basics of Mixng.

Shall we dive in?


Enhancing the Highs

Boosting the highs? It’s pretty simple—just use an EQ, right?

But have you ever thought about which EQ, which frequency range, and how you should boost?

The image above shows the frequency response when using Slate Digital’s Fresh Air. It’s a popular tool for adding “airiness” to vocals.

The Maag EQ4, on the other hand, offers a different character.

Each EQ introduces varying amounts of harmonic distortion, which impacts how and when they’re used.

For example, the Air Band on the Maag EQ4 reaches up to 40kHz, a frequency far beyond the human hearing range (20Hz–20kHz).

Why does this matter if we can’t hear it?

Research dating back to 1991 suggested that sounds beyond the audible range can influence brain activity.

  • 1991 Study: High-Frequency Sound Above the Audible Range Affects Brain Electric Activity and Sound Perception.
  • 2014 Study: Frequencies of Inaudible High-Frequency Sounds Differentially Affect Brain Activity: Positive and Negative Hypersonic Effects.

The latter found that frequencies above ~32kHz significantly increased alpha-2 EEG activity (associated with a calm mental state).

Even if your session’s sample rate is 48kHz or 44.1kHz, boosting ultra-high frequencies can indirectly affect the audible range based on the Q-factor.

Of course, you won’t always need to get this scientific about it—experience is the best teacher here!

While boosting highs can create pleasing clarity, it’s important to avoid overdoing it. Excessive use can result in a mix that feels “floaty” and leaves no lasting impact after the song ends. Use it judiciously.


Enhancing the Lows

For the low end, you can use EQ, but there’s another option: the subharmonic synthesizer.

This tool generates ultra-low frequencies by synthesizing them based on an incoming signal. It’s often triggered by kick drum signals to reinforce their sub frequencies.

Personally, I’m not a big fan—it’s challenging to perfectly match the kick’s attack and timing.

Popular plugins include Waves’ Submarine, Brainworx’s Subsynth and Subfilter, and UAD’s Voice of God.

Hardware options like the dbx510 are also available, but if you’re on a budget, the free Bark of Dog plugin by Boz Digital Labs is a fun alternative.

While it’s best to start with well-recorded source material, subharmonic synthesis can be a lifesaver when the source lacks sufficient low-end.


That’s all for today. See you in the next post! 😊

The Basics of Mixing – 10.1 Modulation Effects (Part 2)

Hello, this is Jooyoung Kim, a mixing engineer and music producer!

Continuing from my previous post, today we’re diving deeper into modulation effects.

This content is based on my book, The Basics of Mixing, which I wrote in Korea.

Let’s get started!


1) Tremolo

As previously mentioned, modulation effects involve altering a parameter over time. Tremolo specifically modulates volume over time.

When applied heavily, it can create a pulsing effect, and it’s also useful for adding an artificial groove to your track.


2) Vibrato

Vibrato, unlike tremolo, modulates pitch instead of volume.

Pretty simple, right?


3) Flanger

The flanger effect has roots tracing back to Christiaan Huygens, the Dutch mathematician, physicist, and astronomer. (For those familiar with physics, you might recall Huygens’ Principle from studying waves!)

Flanger works by duplicating the original sound and playing the copy after a very short delay, creating what’s known as a comb filter effect.

By adjusting the delay time, the peaks and troughs in the frequency response created by the comb filter shift back and forth.

This may sound complex, but experimenting with it will make the concept much clearer. It’s this shifting comb filter effect that produces the signature whooshing or “rocket-like” sound of flanging.


4) Chorus

Chorus is similar to flanger but has a few key differences.

In chorus, the original sound is copied and delayed (often with multiple copies), but the delay time is longer than in flanging. Additionally, chorus effects often include adjustments to panning and pitch, creating a richer and fuller sound.


5) Phaser

Phaser is another modulation effect that shares similarities with flanger but operates differently. Instead of applying a short delay like flanger, a phaser uses an all-pass filter to manipulate the phase of the sound.

This phase-shifted sound is then blended with the original, resulting in a comb filter effect, just like flanger. However, the method of achieving this effect gives phasers their unique, swirling sound.

If you look at the waveforms, you’ll notice the phase shifts caused by the phaser. While the subtle changes in pitch can also be observed in the waveform, it’s tricky to capture it perfectly in a screenshot.


Final Thoughts

Understanding the principles behind these effects can help, but hands-on practice is essential to mastering their use. Spend time experimenting with these effects to familiarize yourself with their unique sounds and applications.

Both theoretical knowledge and practical experience are crucial, so try to balance learning with experimentation!

See you in the next post! 😊