Hey there! I’m Jooyoung Kim, a mixing engineer and music producer.
I’m thrilled to share that a new plugin, the Weiss Exciter, has just dropped in the Softube Weiss series, which I absolutely love!
Thanks to Plugin Boutique, I’ve got a 365-day demo to try it out and give you the lowdown.
If you purchase the plugin through the link on my blog, I’ll earn a small commission, which honestly helps me keep the lights on and means the world!
Ready to dive in? Let’s go!
What’s an Exciter?
An exciter is a plugin that adds harmonics and tweaks dynamics by frequency band to make sounds more vibrant and exciting. The most famous ones? Aphex’s legendary exciters, of course!
Weiss is known for its super-clean digital hardware and plugins, and the Weiss Exciter lives up to that reputation, delivering a remarkably polished effect compared to others in its class.
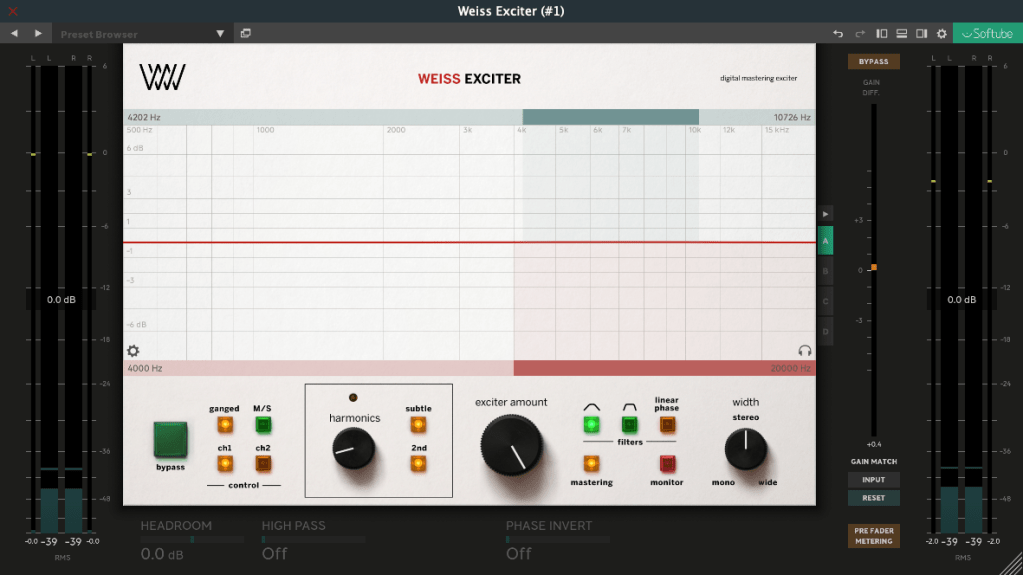
Key Parameters

The controls are straightforward:
- Top Blue Section: Set the High-Pass and Low-Pass frequencies for the input filter to choose the frequency range where harmonics will be applied.
- Bottom Red Section: Output filter to shape the frequency range of the generated harmonics.
- Harmonics: Choose between Subtle (finely tuned odd harmonics) or 2nd (includes even harmonics).
- Exciter Amount: Dial in how much of the effect you want.
- Width: Adjust the stereo width of the effect.
- Mastering: A button to keep the frequency response as flat as possible.
There are additional parameters in the left, right, and bottom menus for deeper tweaking, but these six are more than enough to get you rocking this plugin!
How It Sounds
This exciter is great for final mix or mastering stages. Worried about phase issues? Hit the Linear Phase button to keep things aligned and smooth.
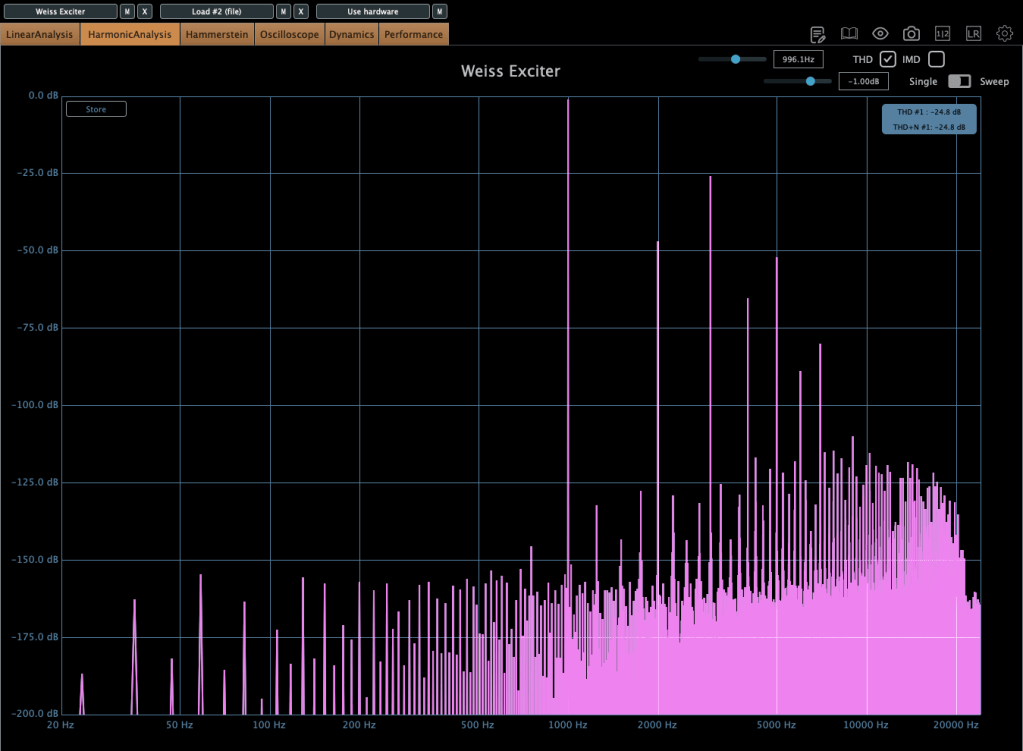

The saturation is punchy, and at higher levels, it subtly compresses like a soft limiter. The sound? Harmonics pop up clean and crisp—super satisfying.
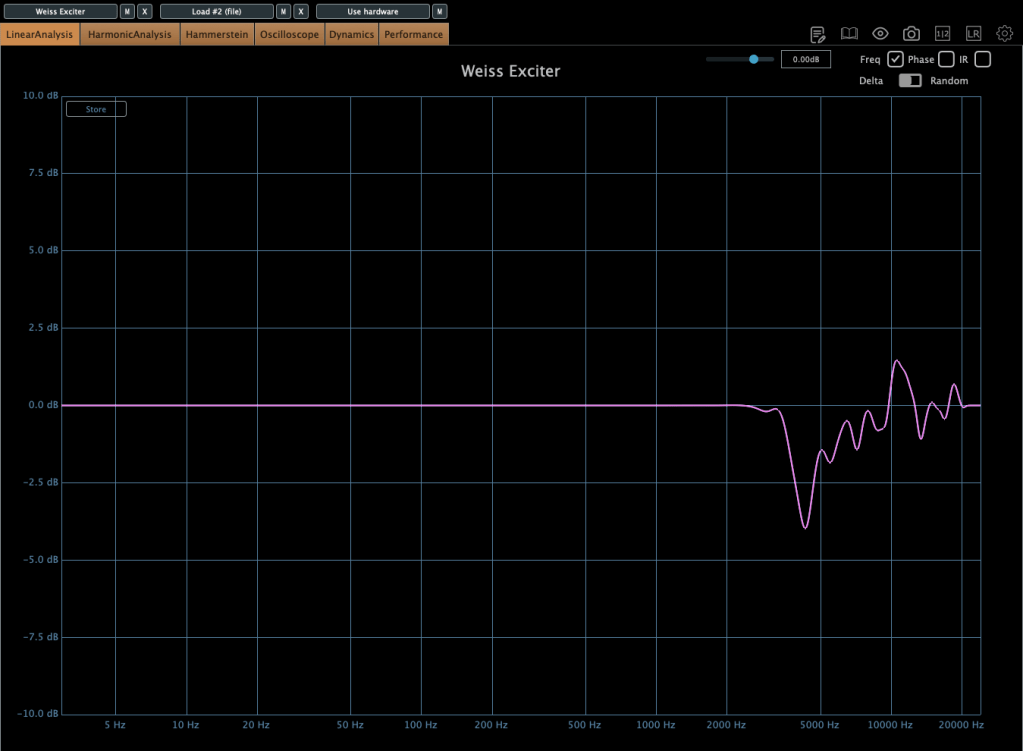
The frequency response shifts depending on the harmonic amount and filter settings, so graphs aren’t the full story. But generally, expect a lift in the mid-to-high frequencies, with the low end staying untouched.
This exciter adds harmonics in a way that feels good, making it perfect for mix bus or mastering duties. It’s also a solid pick for sources that need a harmonic boost.
If you’re hunting for a harmonic exciter plugin, I highly recommend giving this one a spin.
Bonus Deal!
This month, if you grab any plugin from Plugin Boutique, you’ll get Wave Alchemy’s Pulse—a faithful recreation of the Lexicon PCM-60 reverb—for free! It’s a one-purchase, one-free deal, so don’t miss out.
That’s all for now! Catch you in the next post~ 🙂