Hello! This is Jooyoung Kim, a mixing engineer & music producer.
Today, I’d like to talk about some plugins from Brainworx’s Bettermaker lineup:
- Bus Compressor DSP – Compressor
- C502V – Compressor
- EQ232D – EQ
- Passive Equalizer – EQ
- BM60 – Reverb
I originally planned to introduce these plugins last month when they were on sale, but things got a bit hectic, and now I’m sharing them when they’re not discounted… oops! 😅 Still, after testing them out, I can confidently say they’re really well-crafted plugins. If you’re interested, it’s worth keeping an eye out for a sale.
These plugins were provided to me by Brainworx via Plugin Boutique in NFR (Not For Resale) format. If you purchase through the links I’ll include later, I’ll earn a small commission, which genuinely helps me keep doing what I do. 😊
Ready? Let’s dive in!
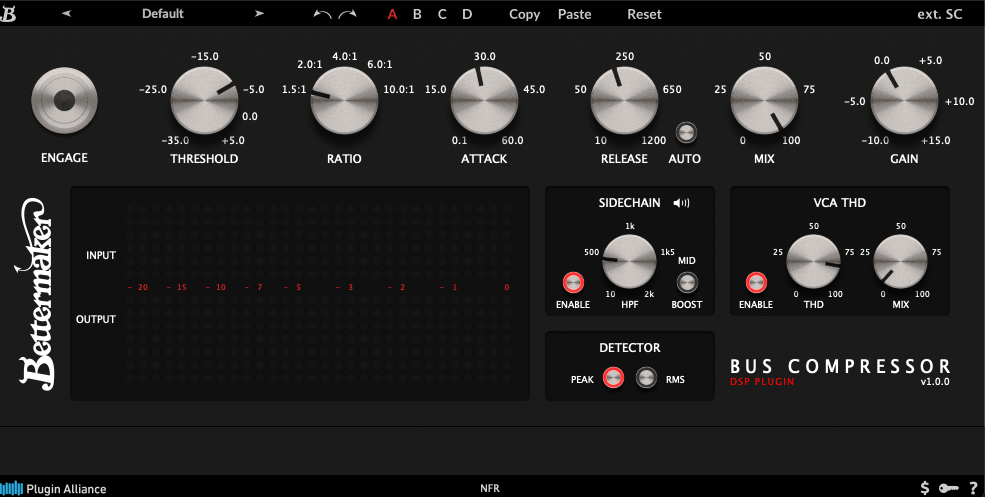
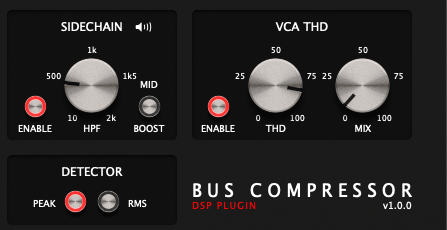
1) Bettermaker Bus Compressor DSP
The Bettermaker Bus Compressor is a plugin recreation of Bettermaker’s hardware Bus Compressor. The original hardware allows digital recall and adjustments, and the plugin’s interface mirrors that design pretty closely.
The plugin’s parameters are similar to most compressors, but a few features stand out:
- You can listen to the sidechain.
- You can choose between Peak Level or RMS detection.
- You can dial in the amount of THD (Total Harmonic Distortion).
These three features are the heart of the Bettermaker Bus Compressor DSP. The sidechain splits the incoming signal, applies a filter, and uses the filtered signal as the key—pretty standard for bus compressors, but super useful.
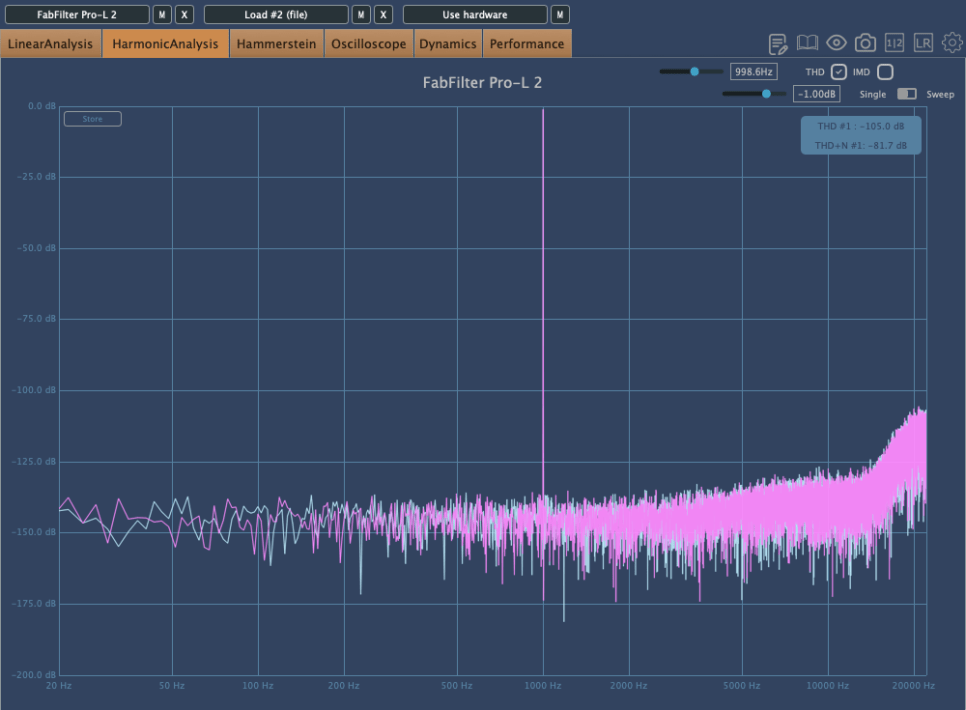
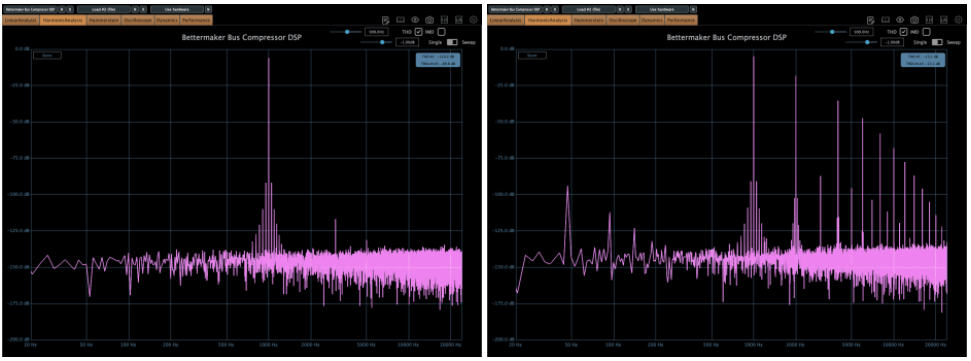
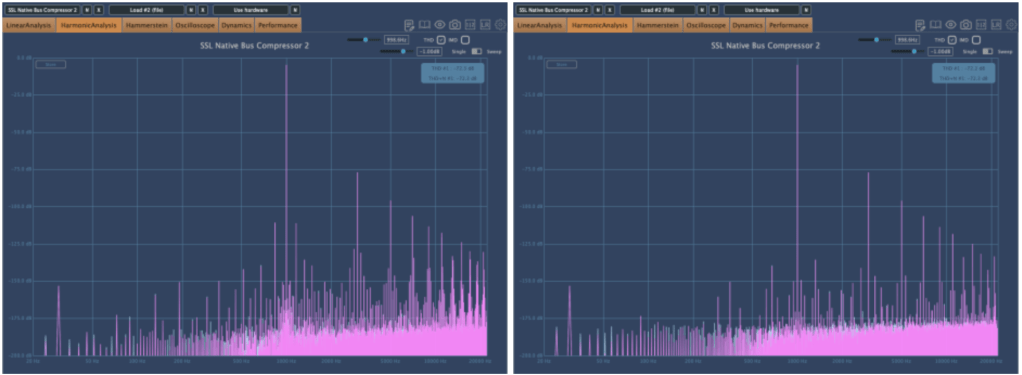
The VCA THD feature adds harmonic distortion.
On the left, you’ve got the clean signal; on the right, it’s with THD applied. Looking at an oscilloscope, you’ll notice more changes—sonically, it starts to feel very mechanical. A subtle touch adds an edgy vibe, but crank it too much, and it feels overly distorted.
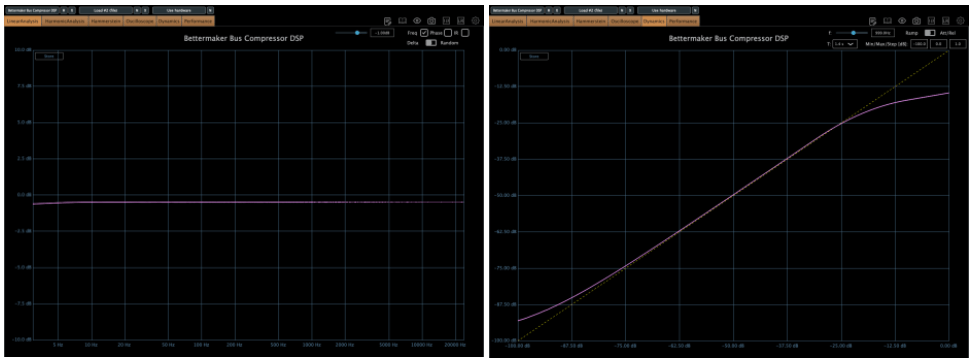
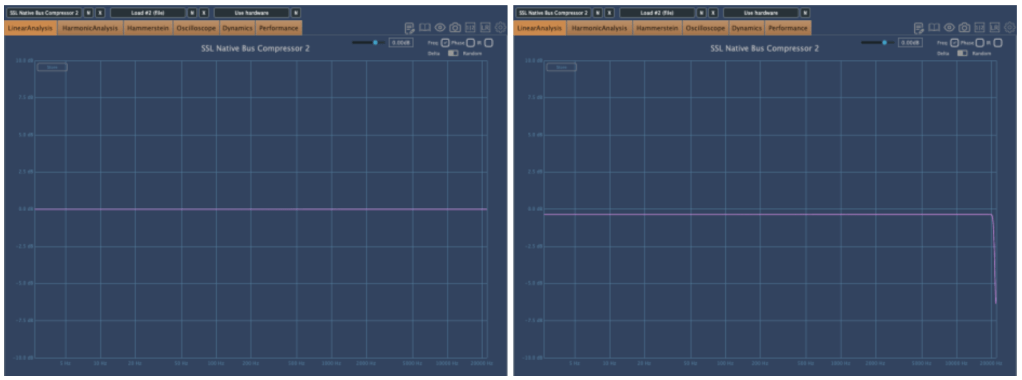
The frequency response is flat except in the ultra-low end, and the compression curve is smooth as butter. After messing around with it, I think it’s an incredibly well-made bus compressor. SSL-style compressors sometimes smear the low end or feel a bit hollow, but this one keeps the lows tight and solid without eating them up.
This one’s a winner. Out of the five plugins I’m covering today, it’s my favorite. It’s usually a steal during sales (probably around $29, so I’d recommend testing it out and grabbing it when it’s discounted.
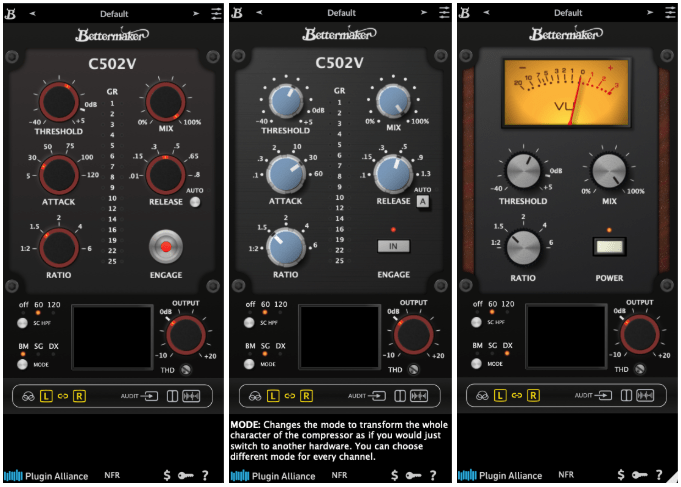
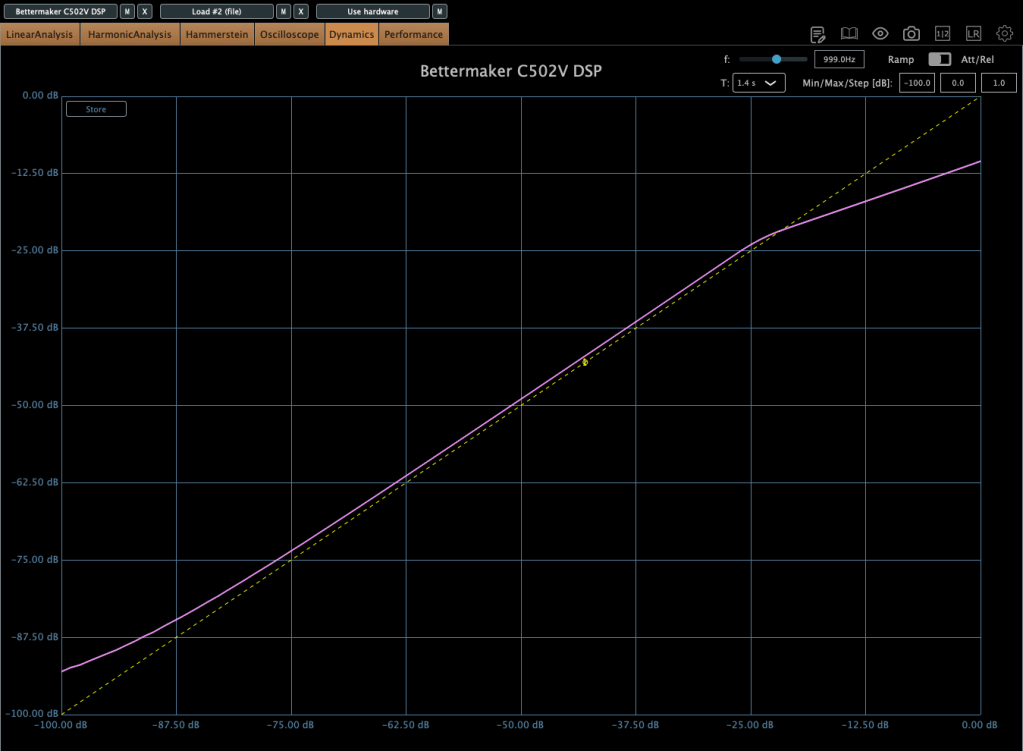
2) Bettermaker C502V
This is another plugin modeled after Bettermaker’s C502V hardware. It offers three modes:
- BM – Bettermaker Compressor
- SG – SSL G-Compressor
- DX – dbx 160 Compressor
Switching modes even changes the UI, which is a nice touch.
After testing, I could hear what each mode was going for. The SSL mode feels clean and polished, while the dbx mode has that signature gritty snap. The Bettermaker mode, though, sounds a bit different from the Bus Compressor DSP—it’s more forward and punchy, at least to my ears.
Here’s the harmonic distortion in BM mode with THD maxed out.
First is BM mode, second is SG, and third is DX. The differences in harmonic distortion and compression curves explain why this plugin sounds distinct from the Bus Compressor DSP. The C502V has a steeper knee, and it varies by mode.
I’d recommend this one too—it’s like having three compressor flavors in one. I especially liked the BM and DX modes. If you don’t already own a dbx-style compressor, this could be a solid solution.
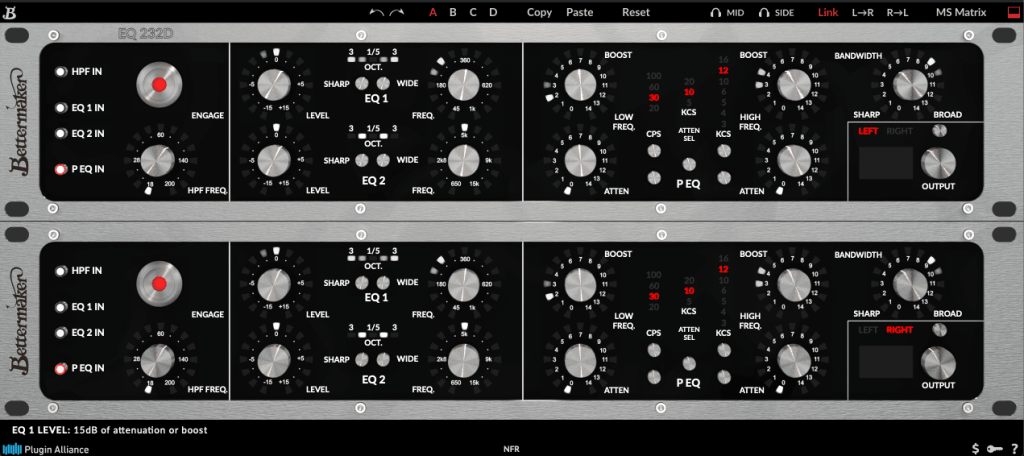
3) Bettermaker EQ232D
This plugin recreates Bettermaker’s EQ232P MKII hardware—a super clean EQ with no THD, just pure frequency shaping.
It’s split into sections:
- A high-pass filter (HPF) for cutting lows.
- EQ 1, handling lows to mid-highs.
- EQ 2, covering mid-highs to ultra-highs.
- A P EQ section with Pultec-style frequency response.
Think of it as a mastering EQ (sections 1–3) plus a Pultec-inspired EQ combined into one.
On the left, I activated just the P EQ section and tweaked it a bit. The curve is as complex as you’d expect from a Pultec-style EQ. Harmonic distortion is pristine, and there’s no compression curve to speak of—it’s just an EQ, plain and simple.
It’s perfect for mastering when you need something ultra-clean. Definitely worth checking out.
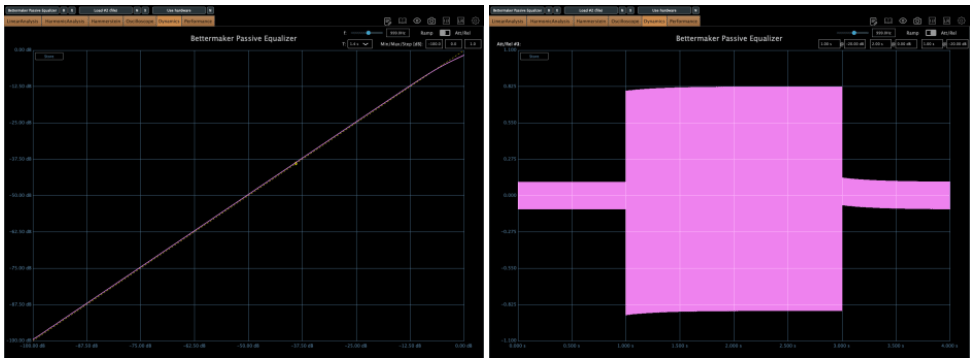
4) Bettermaker Passive Equalizer
This one looks like a Pultec clone at first glance, but it’s actually Bettermaker’s unique take on a valve-based passive EQ, turned into a plugin. The hardware allowed computer-based recall, and the plugin follows suit with a similar UI.
The frequency response is close to the Bus Compressor DSP.
But as a valve design, the saturation is intense! Left is the default state; right is with Heat engaged.
Looking at the compression curve and oscilloscope, it’s far from flat.
Honestly, it feels more like a saturation box with EQ tacked on than a pure EQ. And as a saturation tool, it’s got charm—the Heat setting is pretty tasty.
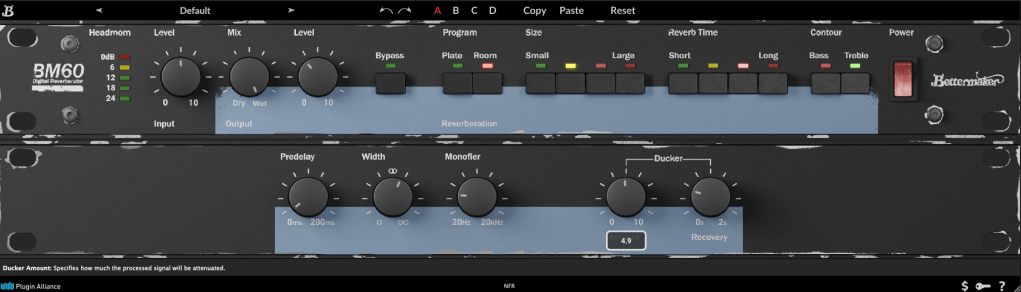
5) Bettermaker BM60
The BM60 is a reverb plugin based on the Lexicon PCM 60. The original hardware had intuitive controls, and this plugin adds extras like Predelay, Width, Monofilter, and a Ducker, making it really versatile.
It offers two reverb types—Room and Plate—with Size and Reverb Time split into four steps. The parameters are straightforward, and the sound feels just as intuitive.
It’s great for light, easy reverb duties. Reverbs and delays are tough to describe with numbers, but I’d recommend this one as much as the Bus Compressor DSP.
They’re not on sale right now, but I’ve left a link to Brainworx’s plugins for future reference. Take a look when you get a chance!
Bonus: This month, if you buy anything from Plugin Boutique, you can snag either Audiomodern’s Freezr (a freeze sequencer plugin) or Heavyocity’s MicroFX Refiner (a bus processor plugin) for free. Don’t miss out when you shop!
That’s it for now—see you in the next post! 😊