Excite Audio Lifeline Modules Plugin Sale (until 9/30) and Review Part 2: Lifeline Expanse

Hello, this is Jooyoung Kim, a music producer and audio engineer.

Following the previous review on Lifeline Console, today I’ll introduce you to the plugins included in Lifeline Expanse.

As I mentioned in my previous post, these plugins are not resource-heavy on your computer. They’re affordable, high-quality, and come with a clean, intuitive UI, making them a solid option if you’re considering basic third-party plugins.

Lifeline Expanse is also being reviewed with NFR (Not for Resale) codes provided by Plugin Boutique.

Let’s dive into Lifeline Expanse!

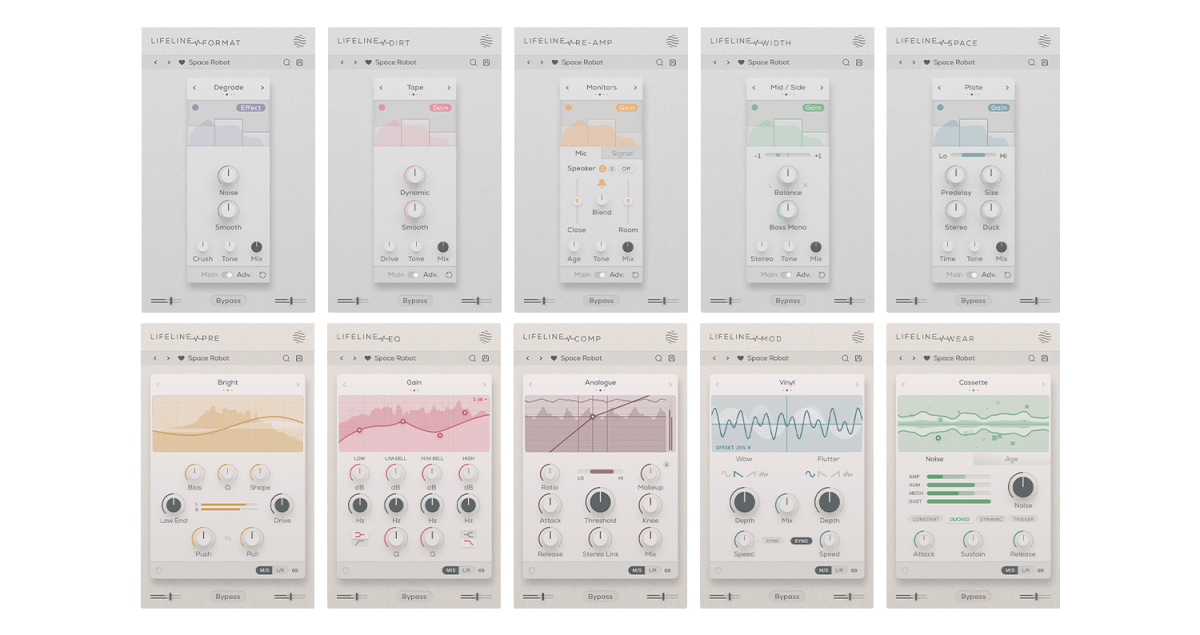
Lifeline Expanse includes five modules: Format, Dirt, Reamp, Width, and Space.

The Lo and Hi options in Expanse are simple cut-off filters, so I’ll skip explaining them.

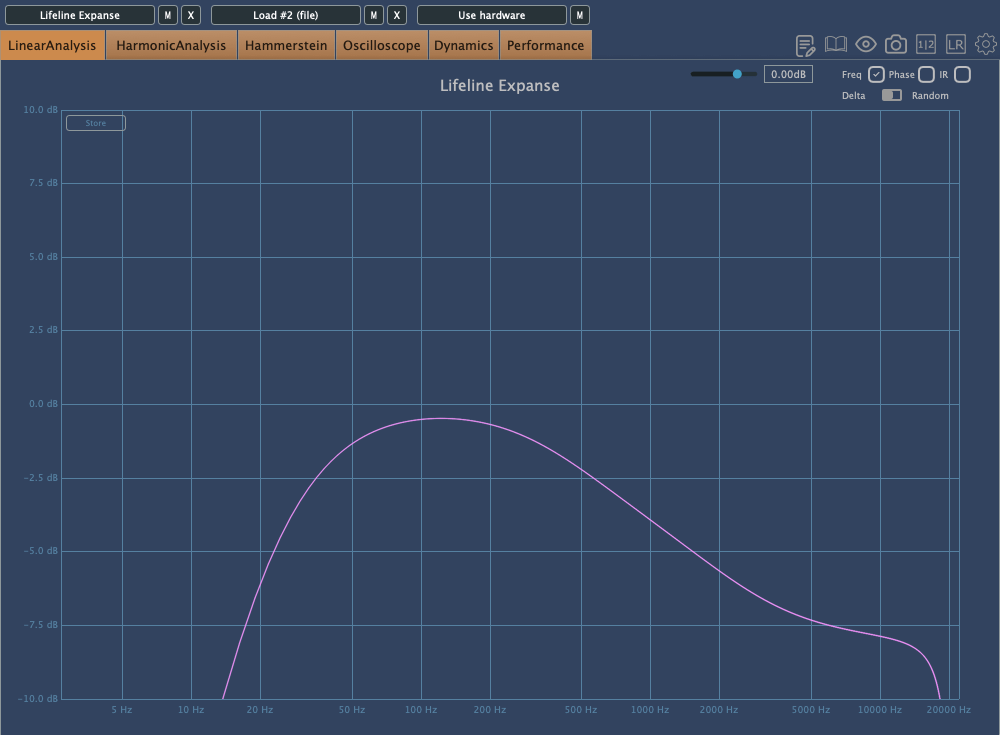
The waveform on the left shows a de-esser-like effect where high frequencies are attenuated based on the incoming signal, while the shield in the middle acts as a limiter.

Unlike Console, Expanse doesn’t add various types of saturation, but even with the filter range maxed out, it still introduces tonal changes. Now, let’s take a closer look at the individual modules.

Format

click image to buy Lifeline Format

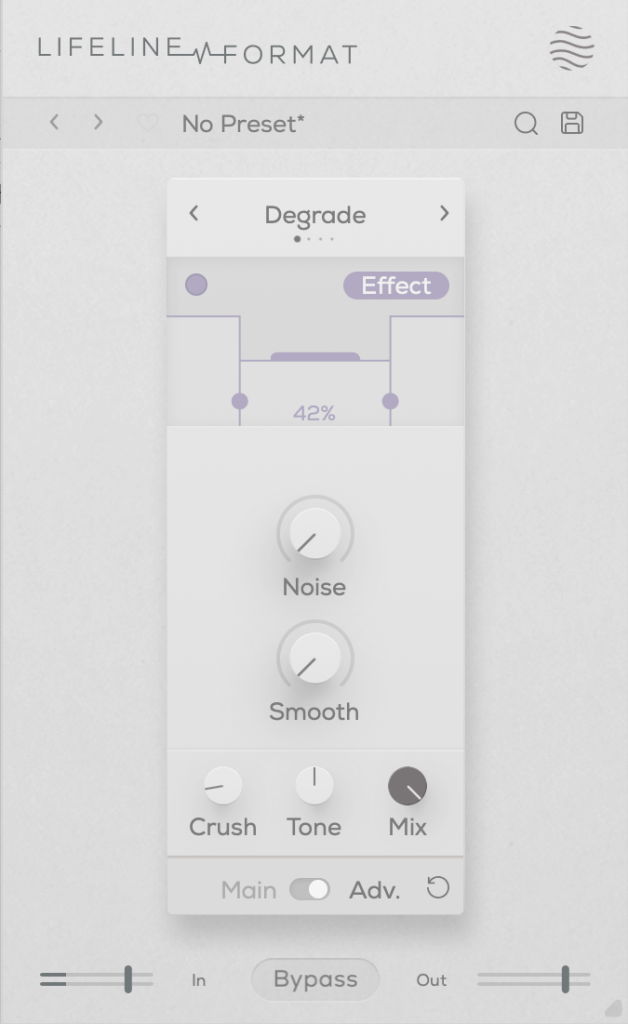
The concept of Format is “digital distortion.”

This plugin adds a characteristic digital distortion to your source.

In the Advanced window, you can split the frequency range into three bands, adjust their volume, and even add noise. The Smooth option can make the changes less harsh.

Other key controls include Crush, which adds the distortion, and Tone, a tilt EQ centered around 650Hz.

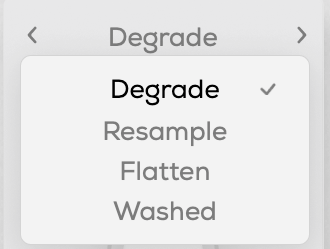
There are four modes:

  • Degrade: Reduces the bit depth of the incoming audio, creating digital distortion.
  • Resample: Lowers the sample rate of the audio, adding digital artifacts.
  • Washed: Simulates the sound of a degraded, low-quality MP3, creating an underwater-like effect.
  • Flatten: Combines gating and bitcrushing, reducing the resolution of the audio.

Let’s take a closer look.

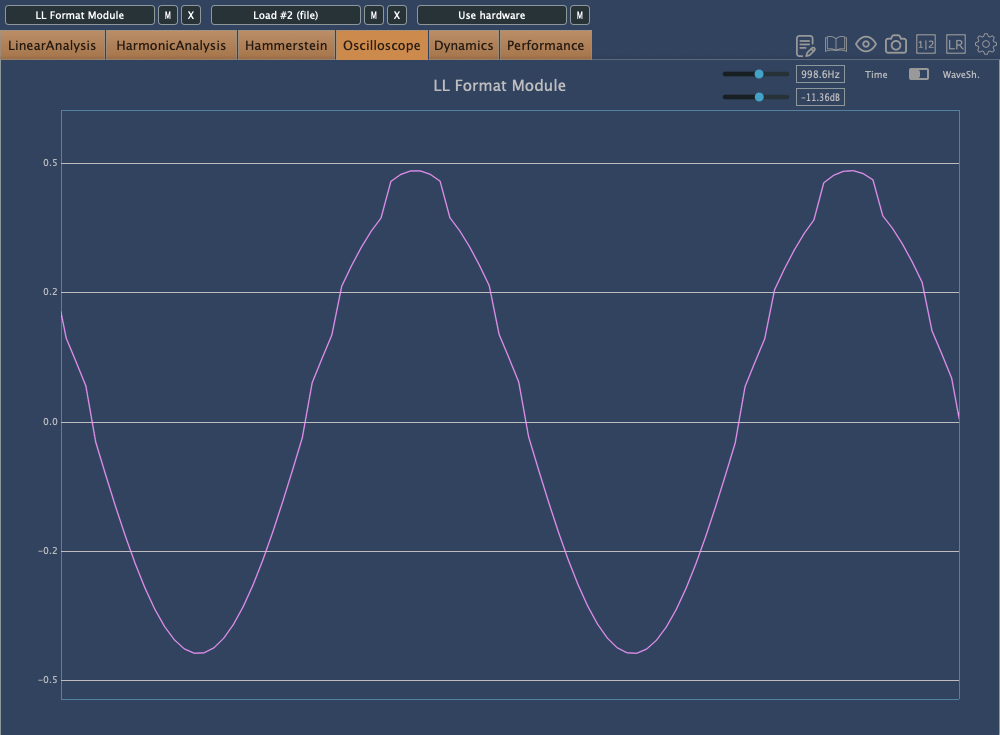
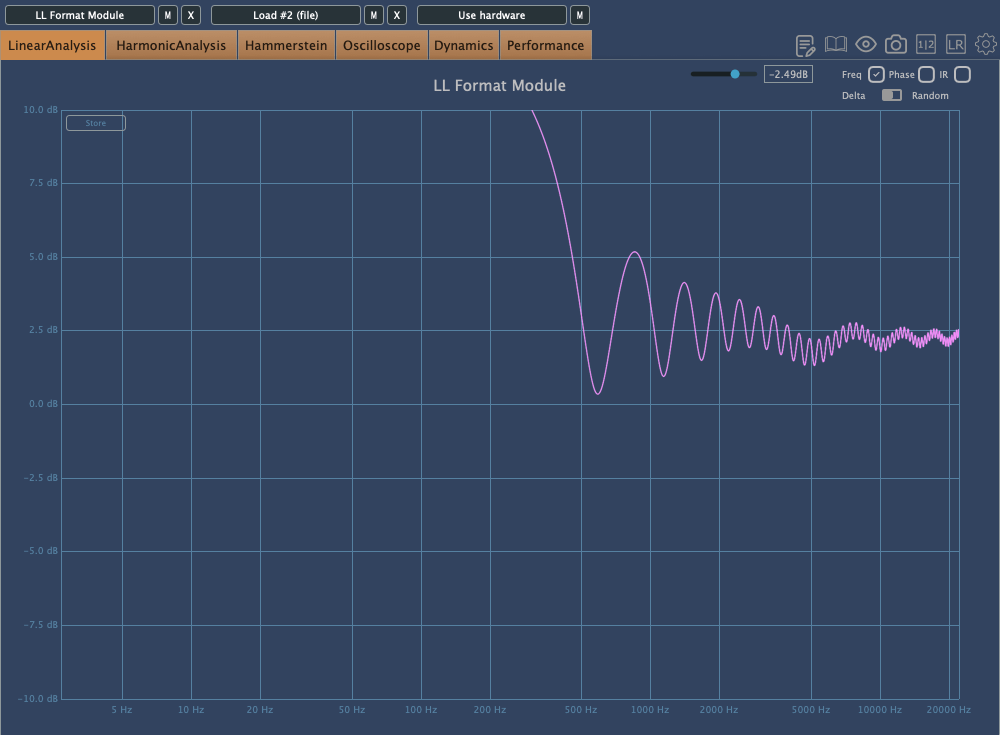
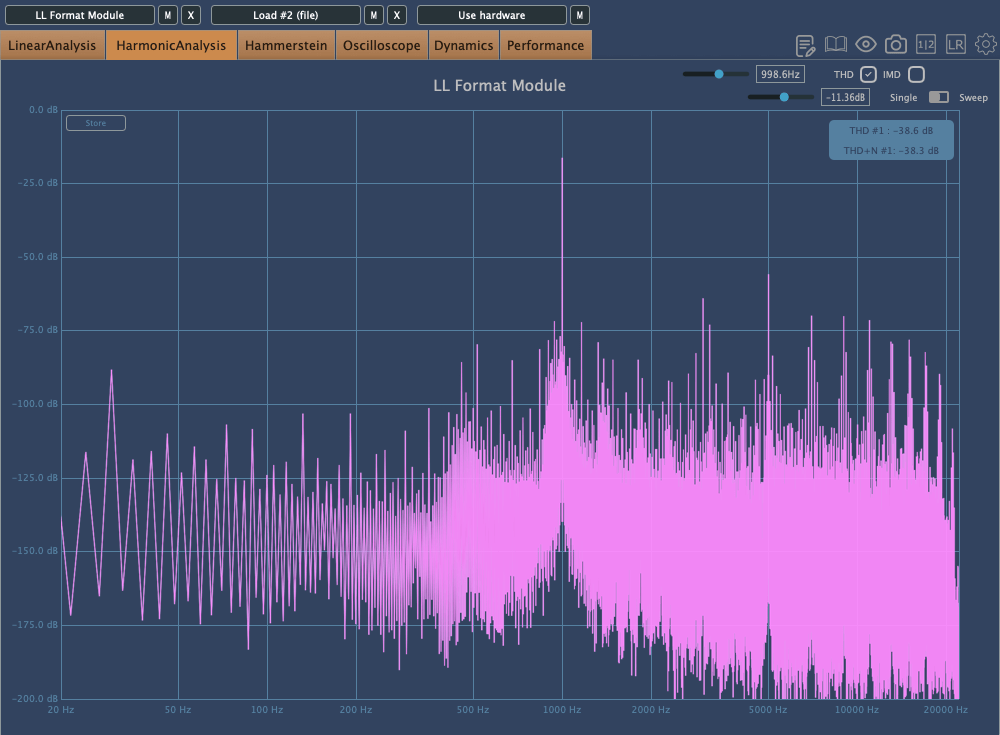
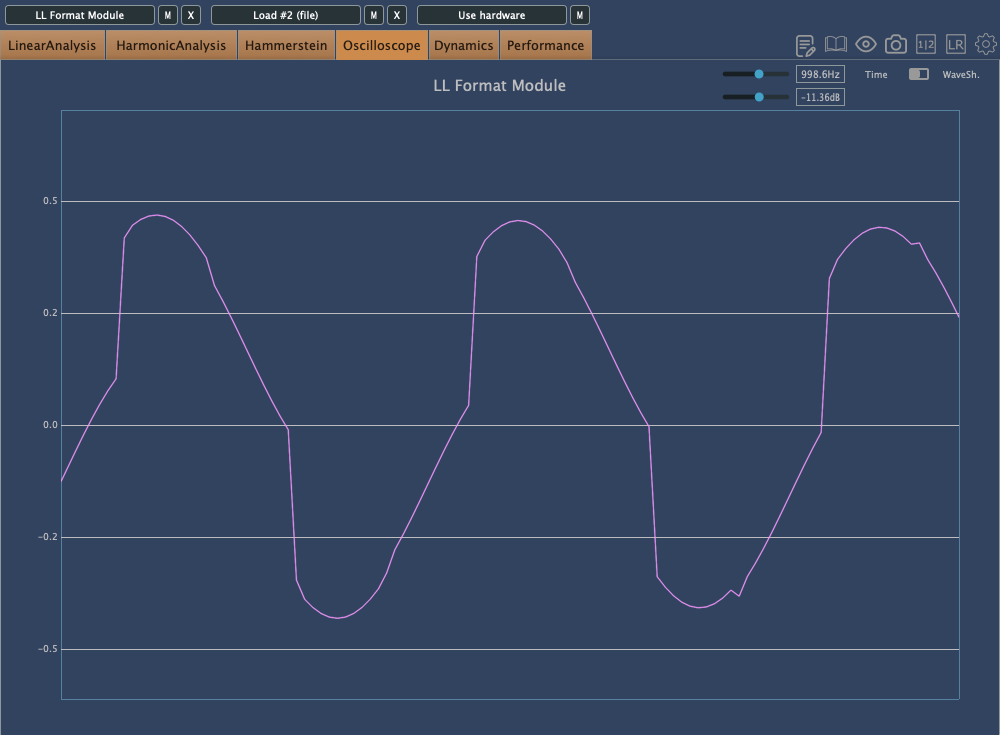
This is Degrade mode, where reducing the bit depth makes the waveform appear choppy in the oscilloscope.

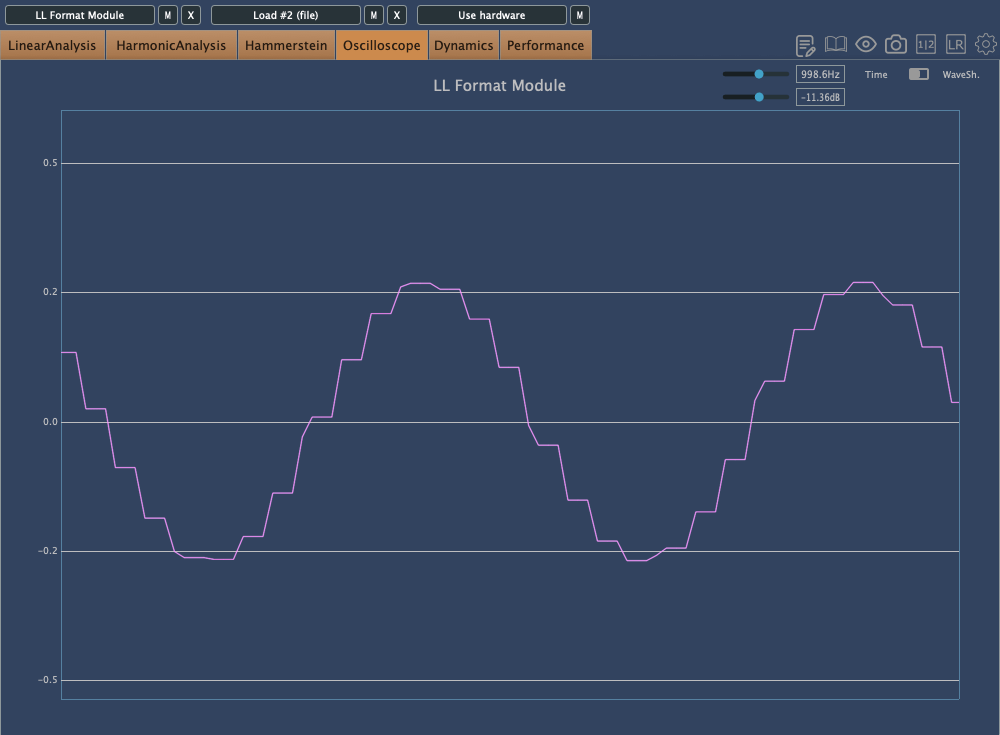
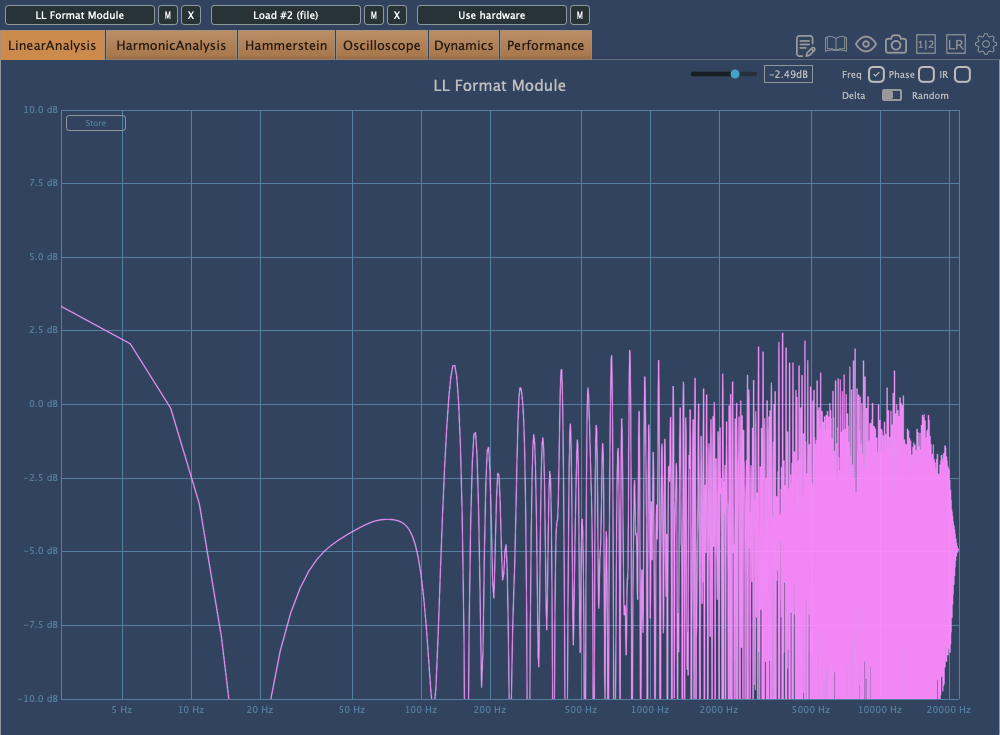
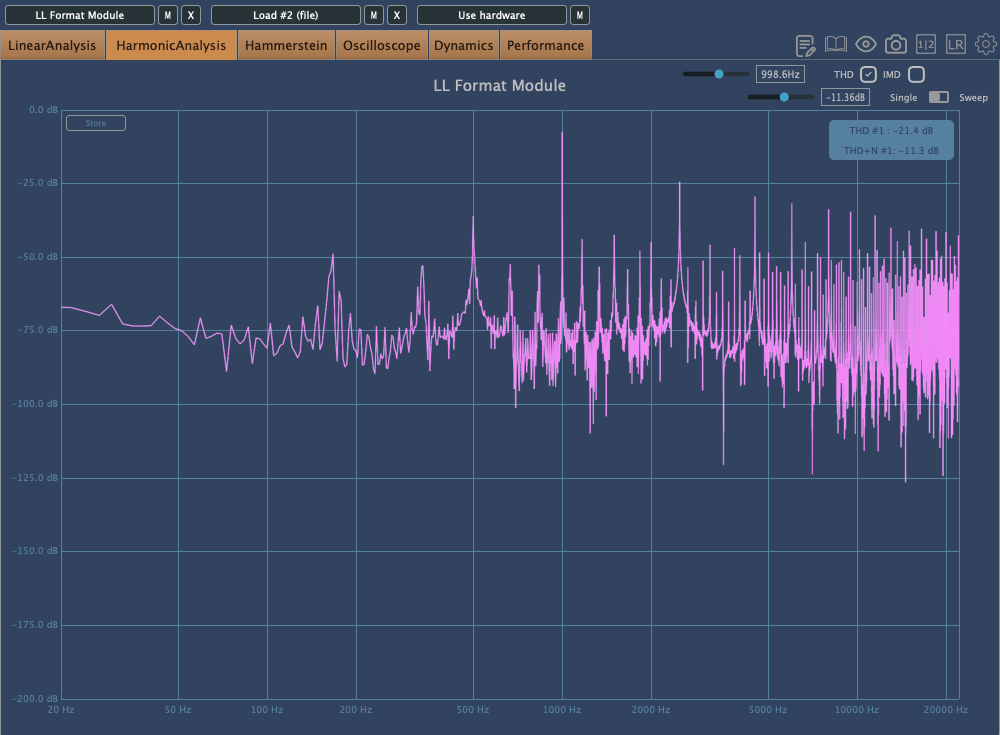
In Resample, harmonics reflect back at the Nyquist frequency, and those oscillations can be seen on the scope. It’s constantly in motion due to added frequencies.

Washed mode just smears everything.

Flatten shows harmonic reflections, indicating a resampling effect, combined with reduced bit depth, resulting in multiple distortions.

Dirt

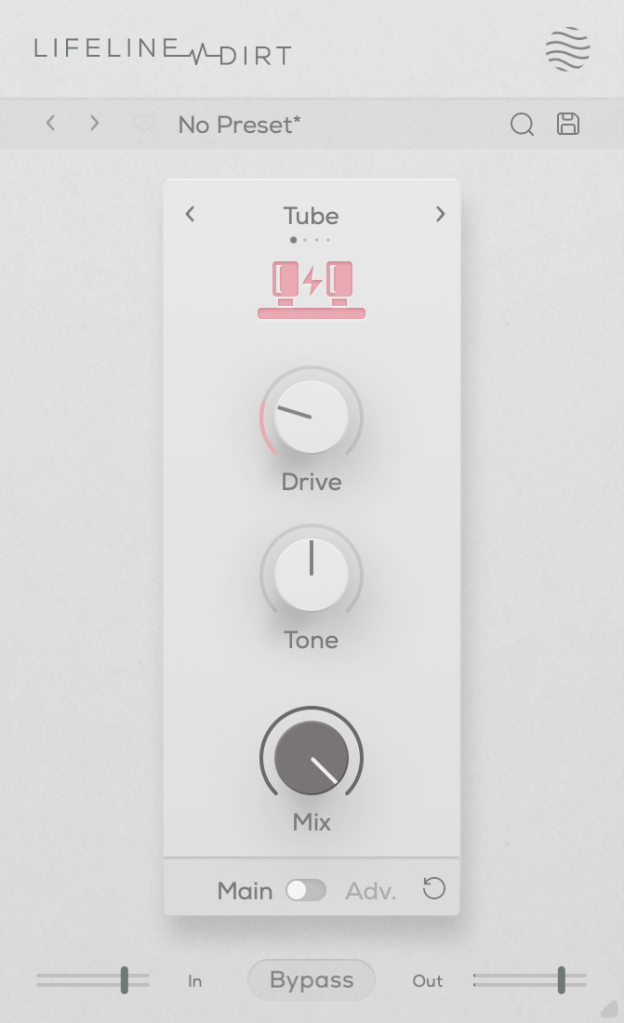
click image to buy Lifeline Dirt

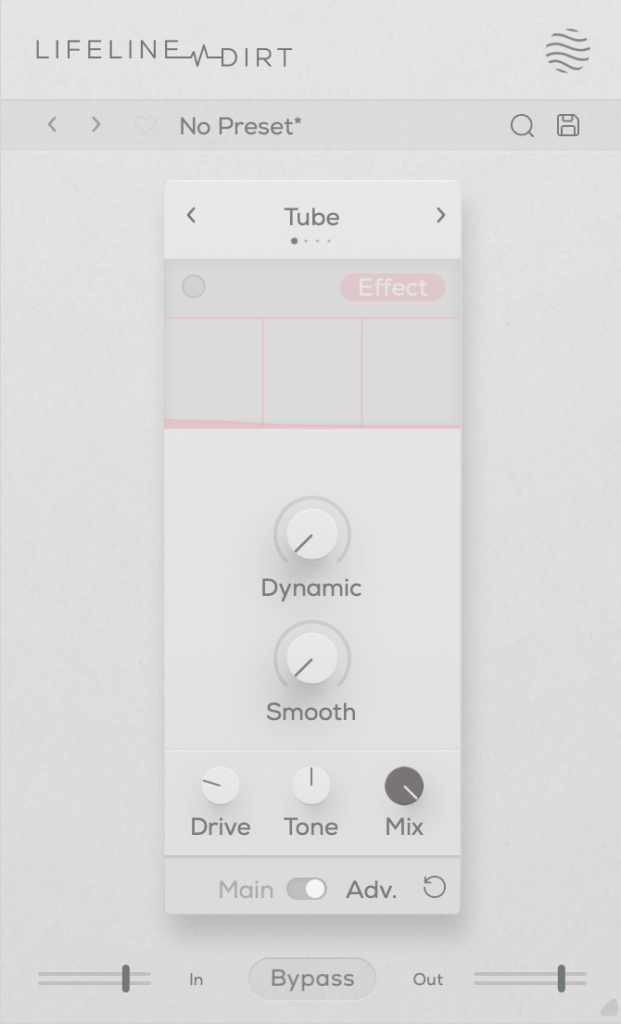
The Dirt module focuses on “analog distortion.”

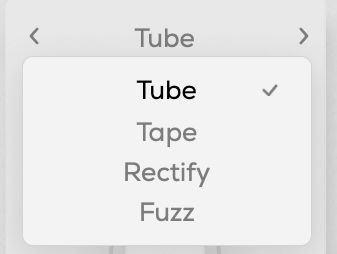
You can choose from four types: Tube, Tape, Rectify, and Fuzz. The controls are the same as in Format, so I won’t repeat the explanation.

All four modes emphasize low and mid frequencies while cutting highs. As the name “Dirt” suggests, pushing the Drive knob can make it act almost like a compressor or limiter at higher levels.

Re-Amp

click image to buy Lifeline Re-Amp

As the name suggests, Re-Amp is designed to simulate re-amping.

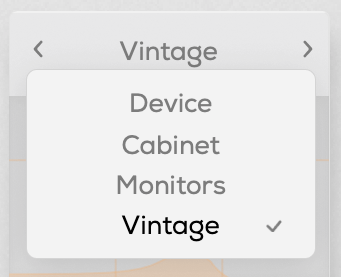
You can re-amp through small electronics, guitar cabinets, monitor speakers, or cassette recorders, with two speaker options in each category to choose from.

True to the re-amping concept, it allows you to adjust the distance of room and close microphones, and blend their sounds together.

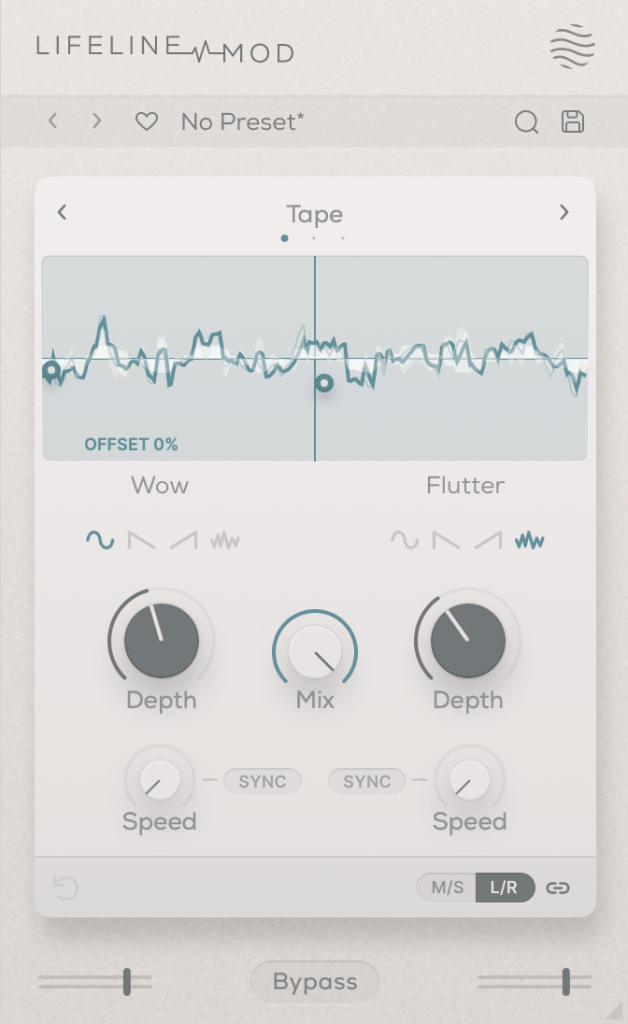
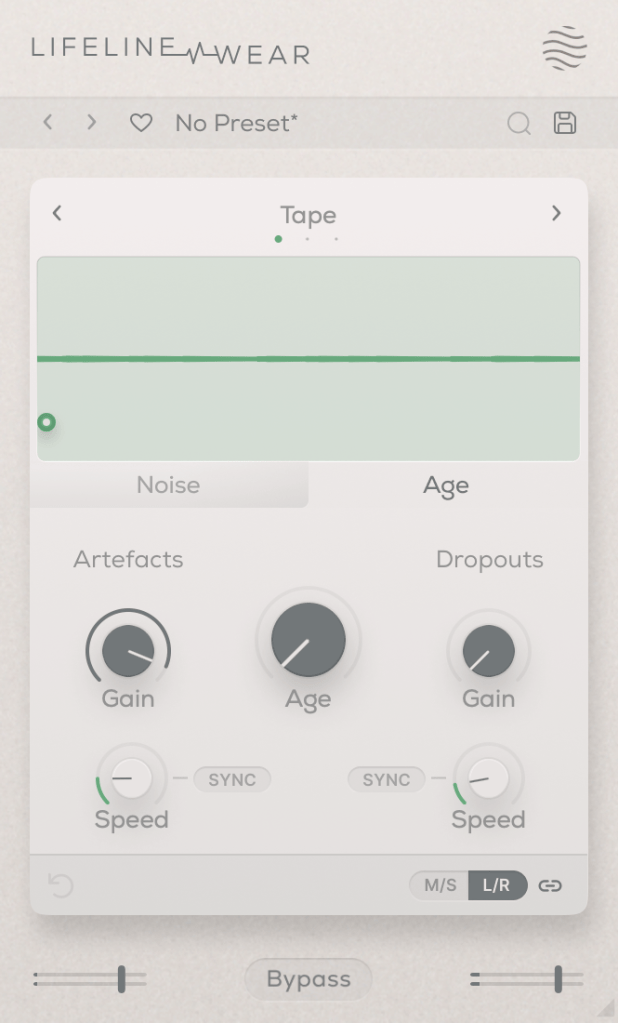
Increasing the Age value causes the highs and lows to gradually roll off, eventually introducing wow and flutter effects.

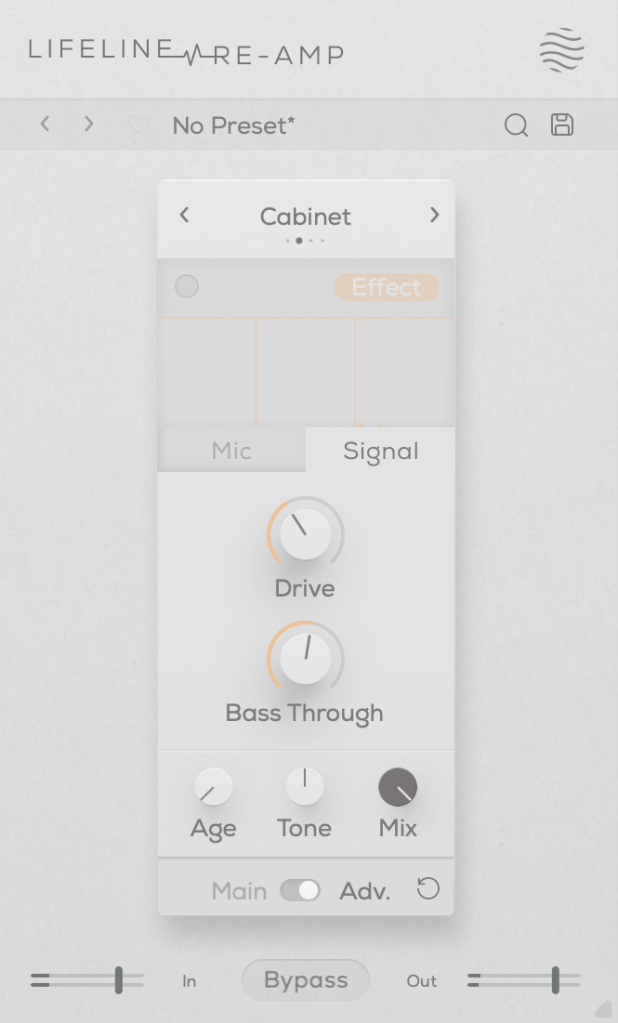
The Drive knob adds harmonic distortion, while Bass Through prevents distortion from affecting the selected low-frequency range.

Width

click image to buy Lifeline Width

The Width module adjusts stereo imaging.

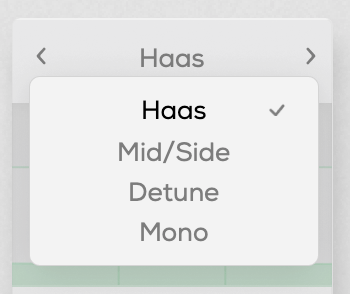
You can select from Haas, Mid/Side, Detune, and Mono modes.

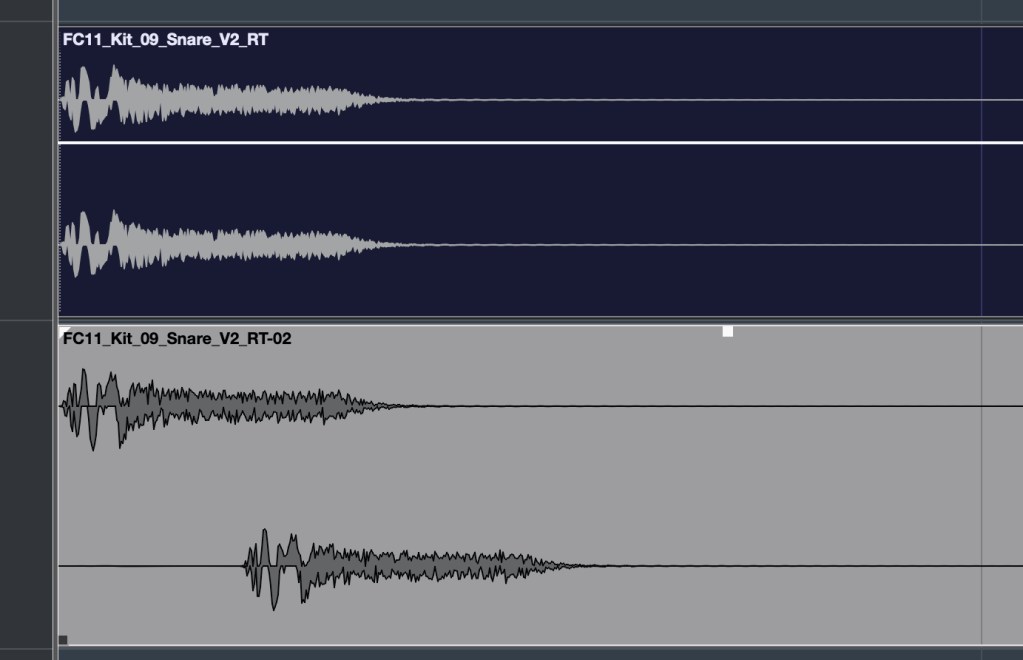
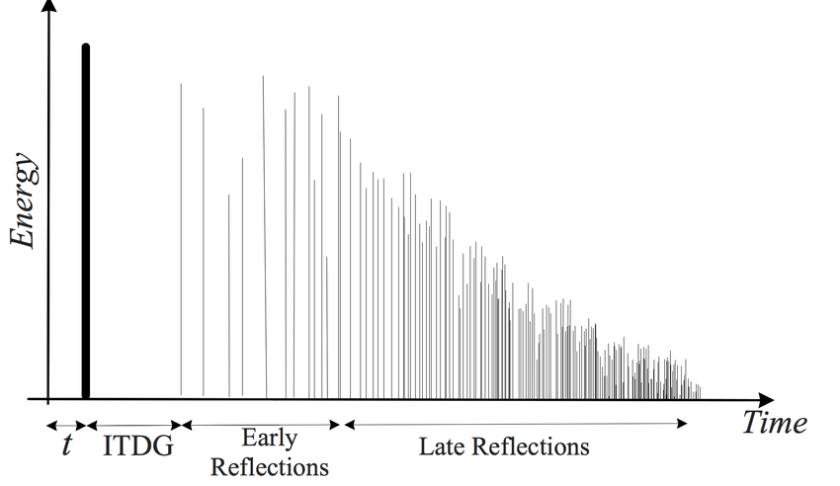
The Haas effect, as shown in the image, uses time delays to create a stereo image. Mid/Side enhances the side channels, Detune creates a wider image through pitch modulation, and Mono narrows the stereo field, gradually converting the sound into mono.

The Stereo knob enhances these effects, and Bass Mono ensures that frequencies below a set threshold are converted to mono.

I’ll skip further explanation, as the rest of the parameters are the same as in Format.

Space

click image to buy Lifeline Space

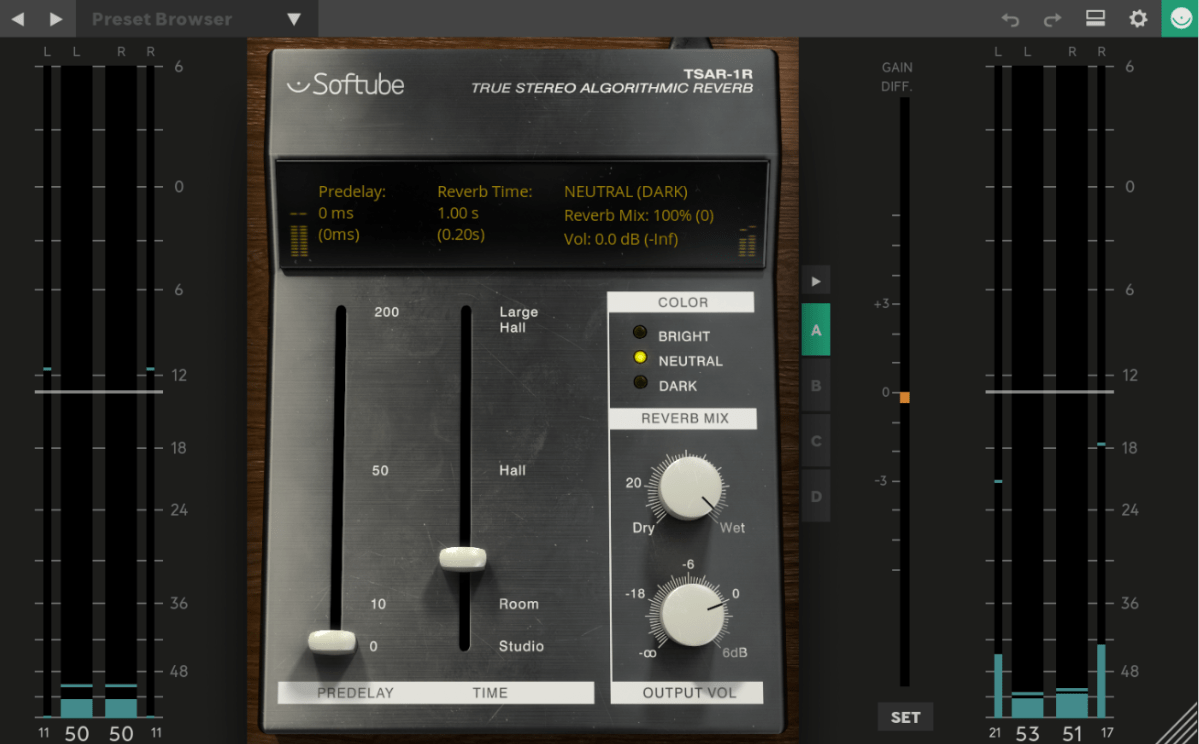
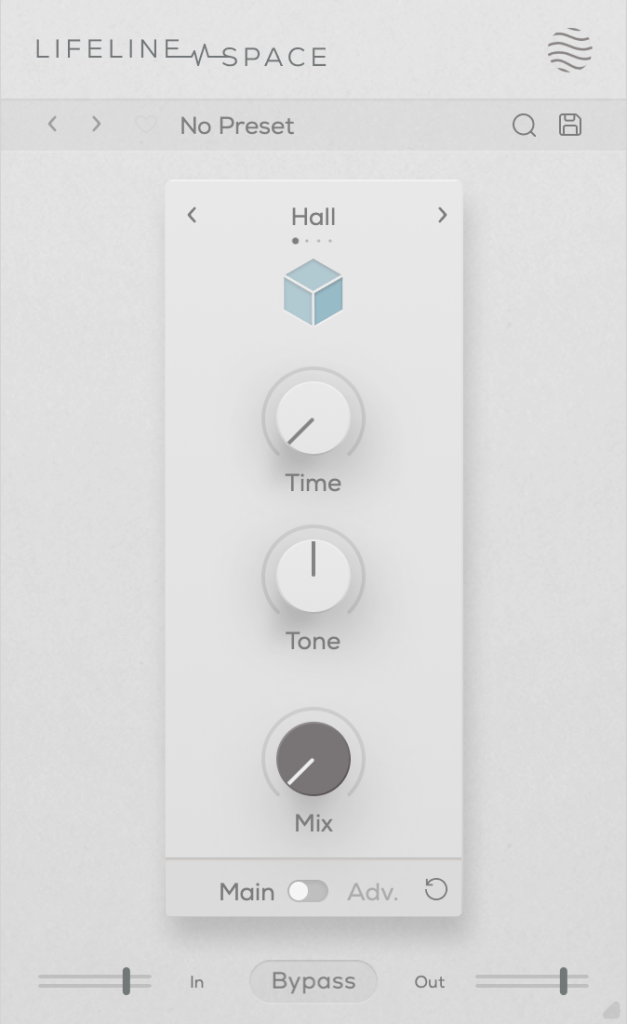
Space is a reverb module.

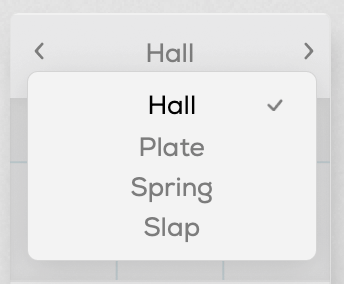
You can choose from Hall, Plate, Spring, and Slap reverb types, all offering solid digital reverb sounds.

Slap, in particular, has a delay with a significant amount of feedback, making it quite versatile.

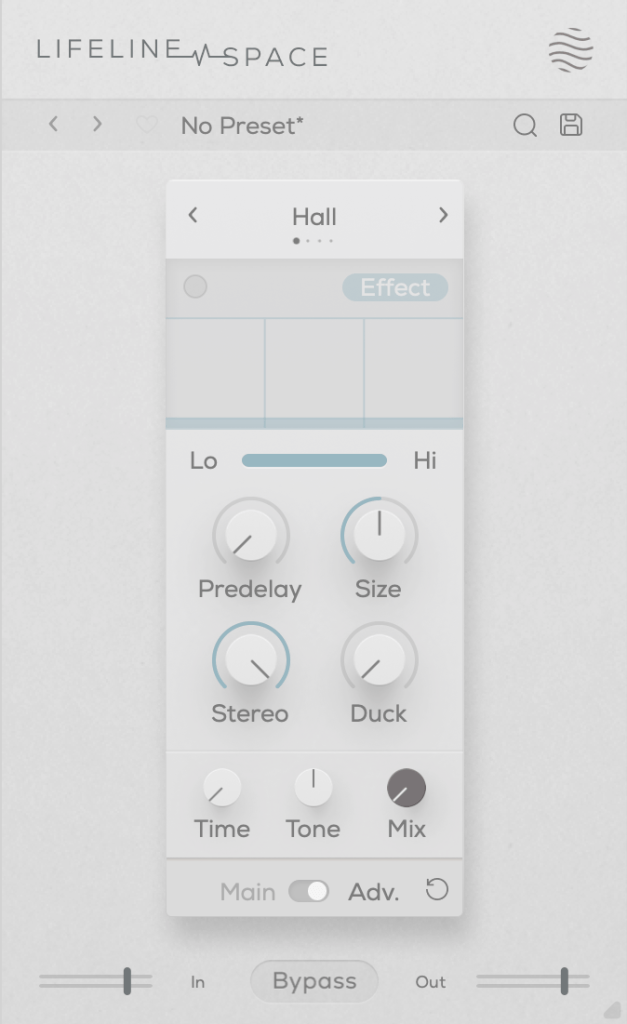
A unique parameter here is Duck, which reduces the reverb based on the incoming input signal. Other parameters are typical for reverb plugins.

Each of these modules is priced at just $11, making them very affordable. Plus, if you purchase any plugin from Plugin Boutique, you’ll receive either the Pyros distortion plugin or the Bloom Vocal Aether Lite plugin for free.

Thanks for reading, and see you in the next post! 🙂

Excite Audio Lifeline Modules: Third-Party Plugin Sale (~9/30) and Introduction Part 1 – Lifeline Console

Hello! I’m Jooyoung Kim, a mixing engineer and music producer.

Today, I’d like to introduce you to the affordable Lifeline Module plugins from Excite Audio.

Since there are quite a few plugins to cover, I’ll split this into two parts.

Before we dive in, I want to mention something.

Personally, I highly recommend these simple plugins.
They have low latency and don’t consume much CPU, so they’re easy to use without burdening your system.
Especially when working on large mixes with over 100 tracks, it can be frustrating when plugins start causing delays.

Before upgrading to a Mac Studio, managing resources was both crucial and challenging.
This was especially true with DAWs like Logic that only support buffer sizes up to 1024. It could be quite limiting!

While these plugins aren’t blazing fast, they’re definitely quick and reliable enough for most tasks.
For instance, I found that the Lifeline Comp performs about twice as fast as the CLA-2A, with latency under 7ms.

As with the previous plugins, these were provided by Plugin Boutique under NFR (Not for Resale) terms.

Let’s get started!

There are 10 Lifeline Modules in total, and the Lifeline Console includes 5: Preamp, EQ, Compressor, Modulation, and Wear.

When you purchase either the Console or Expanse, the respective modules are also provided as individual plugins, and you can buy each module separately.

Let’s start by looking at the Console window with the included modules.

Even if you bypass all the modules, the Clean, Vintage, Warm, and Shine settings still affect frequency response and harmonic distortion. It’s fair to think of it as a type of saturator.

The photo above shows the frequency response graph when Clean is set to 100%. There’s no visible harmonic distortion in Clean mode, so I’ve skipped that image.

Here’s the frequency response and harmonic distortion in Vintage mode.
You can see how the Console lives up to its name.

When set to Dry, the Console’s saturation is bypassed, and only the module effects are applied. Warm and Shine are shelving filters that boost the low and high frequencies, respectively.

That should cover the basics of the Console’s utility. Now, let’s take a closer look at the modules.

Preamp

The Preamp module offers three tonal options: Bright, Warm, and Dark. As the names suggest, Bright boosts the highs, Warm enhances the mids, and Dark emphasizes the lows while reducing the highs.

Increasing the Push will amplify these frequency changes, while Pull will reverse them. The Bias setting also alters the response.

Raising the Drive introduces some harmonic distortion, and if the signal gets too strong, limiting occurs.

The Q value works similarly to an EQ’s Q, adjusting the bandwidth of the frequency response, and the Shape control allows you to modify the frequency response curve.

Think of the Preamp module as a tool for saturation and filtering.

EQ

The EQ is, well, an EQ!

However, it’s not just a basic EQ—both Vintage and Dirty modes introduce harmonic distortion.

First: Vintage Mode, Second: Dirty Mode

Interestingly, in Dirty mode, the amount of harmonic distortion increases as you make more adjustments.

Comp

The Comp is a simple compressor with three saturation options: Analog, Transparent, and Variable.

In order: Analog, Transparent, Variable

The Lo-Hi control functions as an internal sidechain, similar to the Pre-Emphasis knob on the LA-2A.

The A button above the Makeup Gain is for auto-gain, but it’s a bit unique. It measures the audio over a short period and then locks the value. Normally, auto-gain on compressors is best avoided, but this type of fixed auto-gain might be worth trying out.

The other settings are standard for most compressors, so I won’t go into detail here.

Mod

The Mod module simulates Wow/Flutter noise with three options: Tape, Vinyl, and Cassette.

Simply applying it with the Mix set to 100 won’t change anything; you need to adjust the Depth controls on either side to affect the sound. It’s useful for creating that unstable, lo-fi tone.

Wear

The Lifeline Wear module alters the sound as soon as it’s applied.
Especially with the Age setting, the frequency response changes, and harmonic distortion increases.

These changes depend on whether you’re using the Tape, Vinyl, or Cassette mode.

Artefacts refer to the clicks and pops you hear on tape, LPs, or cassettes,
and Dropout simulates the sudden loss of sound.
It could be fun to use these for ducking or adding rhythm.

You can also select the type and amount of noise. You can listen to the noise types, but let me briefly explain the terms in the middle:

  • Constant: Keeps the noise playing even when the source is silent.
  • Ducked: Ducks the noise in sync with the source audio.
  • Dynamic: Plays noise along with the source audio.
  • Trigger: Suppresses the source audio and only plays noise in sync with it.

The Attack, Sustain, and Release settings below control the noise’s envelope.

Each Lifeline module is quite affordable, priced around $11 each. If I had to pick just one, I’d go for Wear.

There are many third-party plugins that can replace the others, but nothing quite like Wear. 😊

These plugins are also great for those who don’t own many third-party plugins.

Additionally, if you purchase any plugins from Plugin Boutique this month,
you can get either the Pyros distortion plugin or the Bloom Vocal Aether Lite plugin for free.

So, if you’re thinking of buying a few modules or considering the Expanse in addition to the Console, I recommend purchasing them separately to get both free products!

I’ll see you in the next post! 😊

The Basics of Mixing – 8.1 What is Reverb?

Hello! I’m Jooyoung Kim, a mixing engineer and music producer.
Today, we’ll be diving into the topic of reverb.

Shall we get started?

What is Reverb?

Reverb is short for “reverberation,” which can be translated as “echo” or “resonance.”

In essence, reverb is an effect that creates echo or resonance.
But why do we use it?

Normally, when we speak to each other, we aren’t whispering directly into each other’s ears.
This means we’re always hearing a bit of natural echo from our surroundings.

But what about recordings?

While room mics can capture some of that natural reverb, most recordings are done quite close to the source, almost like someone is whispering directly into your ear. As a result, these recordings often lack natural reverb and can feel “dry.”

To add that missing resonance, we use reverb. However, it’s not just about simulating the sound of a room or a studio. Reverb can create the illusion of a concert hall or an entirely virtual space, making the music sound more musical and immersive.

To understand how to use it effectively, we need to dive into how reverb is actually created.

Kaplanis, Neofytos & Bech, Søren & Jensen, Søren & Waterschoot, T.. (2014). Perception of reverberation in small rooms: A literature study. Proceedings of the AES International Conference. 2014.

As I mentioned in the “7.3 How to Use Delay” section of the previous post, reverb is created when sound waves bounce off surfaces like walls.
The first reflections of sound that reach our ears after bouncing off a surface are called Early Reflections, and these are typically the loudest part of the reverb.

Afterward, the sound continues to reflect multiple times, gradually forming the full reverb. The time it takes for the reverb to decay by 60dB from its original level is called RT60.

There is also a natural delay between the original sound and when we hear the reverb. To control this delay in reverb plugins or hardware, we use a parameter called Pre-Delay, which allows us to set the time gap between the original sound and the onset of early reflections.

For orchestral instruments, it’s common to use reverb based on Impulse Response (IR). Since sound travels at about 340 meters per second at room temperature, we can map out how reverb behaves based on the distance of the space, and calculate the time difference between the original sound and the reverb start time.

For example, if there’s a 2-meter distance, you can calculate the delay as 2m ÷ 340m/s = 0.005s, or a 5ms difference.
Setting the Pre-Delay to around 5ms can simulate this effectively.

In mixing, when a sound is intended to be closer, it’s good practice to have a larger gap between the original sound and its reverb (larger Pre-Delay). For distant sounds, a smaller Pre-Delay works better.

At the end of the day, if it sounds good, that’s what matters most!

In the upcoming posts, I’ll cover the history, types, and practical applications of reverb.

See you in the next post! 🙂

Free Plugins and Plugin Purchase Sites Overview

Hello! I’m Jooyoung Kim, a mixing engineer and music producer.

It seems like my posts about plugins are getting a lot of attention, so I’ve decided to compile a list of websites where you can find free plugins and purchase plugins at great prices.

Let’s dive in!

1. Audio Plugin Deals

    Audio Plugin Deals is a great site where you can find free plugins every month or so under their Free section. They also have time-limited deals in the Deals section, and discounted products are always available in The Shop.

    When you make a purchase, you earn Rewards points, which can be used for discounts on future purchases in The Shop. Just keep in mind that some items in The Shop have a minimum purchase requirement, even if you’re using points.

    2. Plugin Boutique

    At Plugin Boutique, you can almost always get a free plugin when you make a purchase. They also offer Virtual Cash, similar to Audio Plugin Deals’ Reward system, which can be used without restrictions on future purchases.

    If you spend over £50, you receive a token that can be exchanged for a sample pack from Plugin Boutique. They occasionally run exclusive free plugin offers, so signing up for their newsletter could bring some pleasant surprises.

    You can also find permanently free plugins in their Free section, though quality varies, so it’s worth testing them out.

    3. Audio Deluxe

    What sets Audio Deluxe apart from other sites is the regular availability of discount coupons, making prices even lower than they appear. You also earn points that can be used on future purchases.

    However, most of the free plugins offered here can be found on other sites, so there isn’t much of an advantage in that regard.

    4. every Plugin

    As I’ve mentioned before, Every Plugin is one of the best places to buy Waves plugins at a lower price. They often have the best prices on Eastwest plugins too. If you’re planning to buy, it’s a good idea to compare prices here with other sites.

    The downside is that you need to sign up and log in to see the prices. Also, they don’t offer any free plugins.

    5. JRR Shop

    JRR Shop offers discounts on plugins and also sells hardware equipment. You can find free plugins under their Free Stuff section. They frequently have good deals, so it’s worth checking out if you’re looking for a specific plugin.

    6. W.A. Production

    W.A. Production mainly sells sample packs and MIDI files, but they occasionally offer free plugins and samples, making it a site worth knowing about.

    7. Blue Cat Audio

    At Blue Cat Audio, if you go to the Download section and scroll down, you’ll find a Free Pack with all their free versions. The interface might not be the most attractive, but the plugins are solid. Although they primarily make their own plugins, I included them here as part of this list of free plugin sources.

    8. Don’t Crack

    Don’t Crack is a well-named site with occasional good discounts. I remember getting a Flux Session pack at a very reasonable price last year. The site’s layout might feel a bit sparse, like JRR Shop, but you can find some great deals if you dig around.

    9. Plugin Discounts

    I haven’t used Plugin Discounts much, but like Every Plugin, you need to log in to see the prices.

    10. Bedroom Producers Blog

    This is a large blog that regularly features free plugins and various discounts. They often curate good deals and organize them by time, and sometimes they offer exclusive discounts or free plugins. It’s a great site to check in on from time to time.

    11. Production Expert

    Production Expert isn’t a plugin store, but it’s a great resource for news, discounts, and free plugin information. Signing up for their newsletter is a good way to stay updated on the latest deals and news.

    In addition to these, companies like Universal Audio frequently release free plugins these days, so it’s worth exploring and finding the ones that suit your needs.

    That’s all for today. See you in the next post!