I overhauled my studio setup

Hello, this is Jooyoung Kim, an engineer and music producer.

Previously, I mentioned that I had to custom order and repair a toroidal transformer for my Stam Audio SA-2A. After it was fixed and returned, I was quite satisfied. However, I realized I needed more rack space, so I decided to buy a new rack cabinet.

Thinking ahead about the additional equipment I’d be adding, I also bought a patch bay and cable connectors.

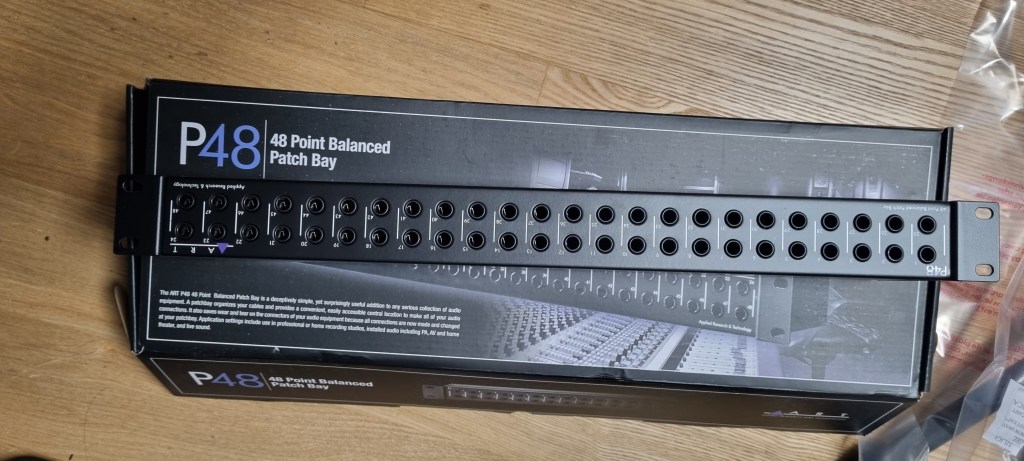
I wanted to get a Samson patch bay to match my other gear, but since there were no Samson S-Patch bays available for delivery to Korea on Amazon, I ended up buying the cheapest one that could be set to Normal mode.

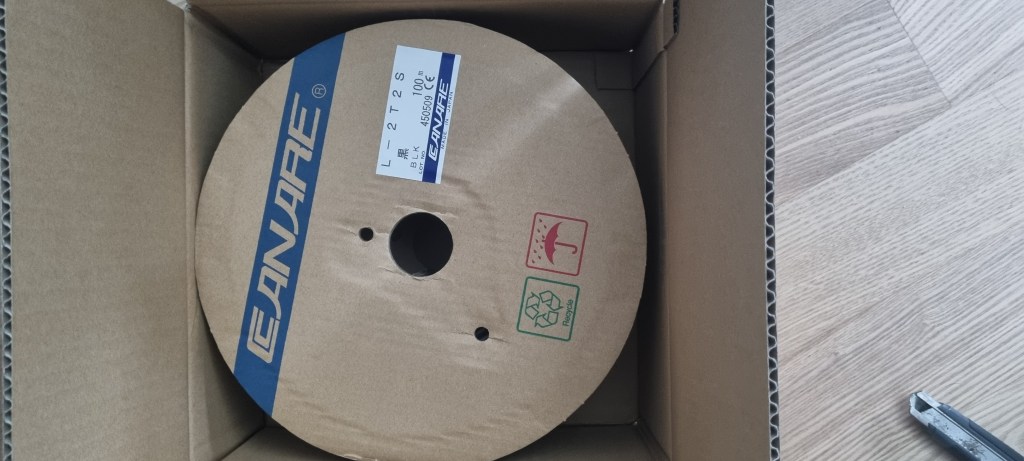
The yen was quite weak recently, so I took advantage of that when purchasing cables and connectors via Rakuten. I bought 100 meters of Canare L-2T2S cable and around 20 Neutrik TRS and XLR connectors.

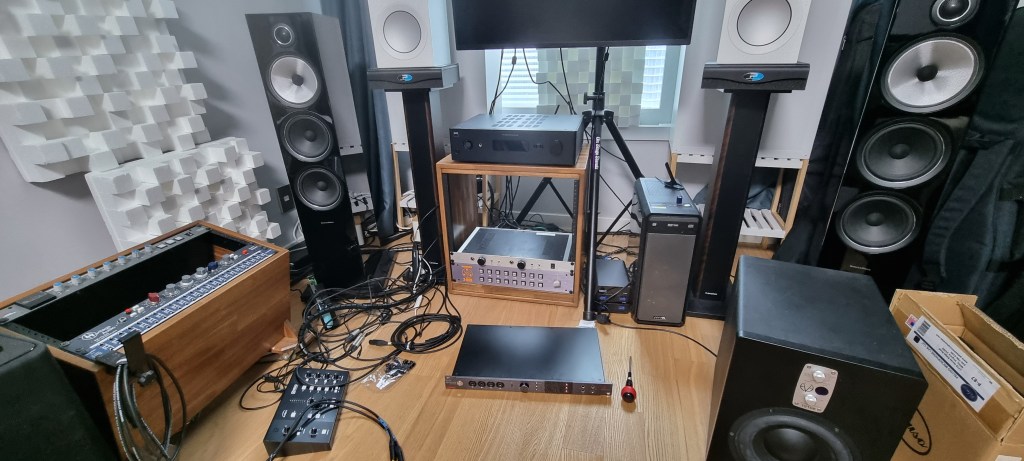
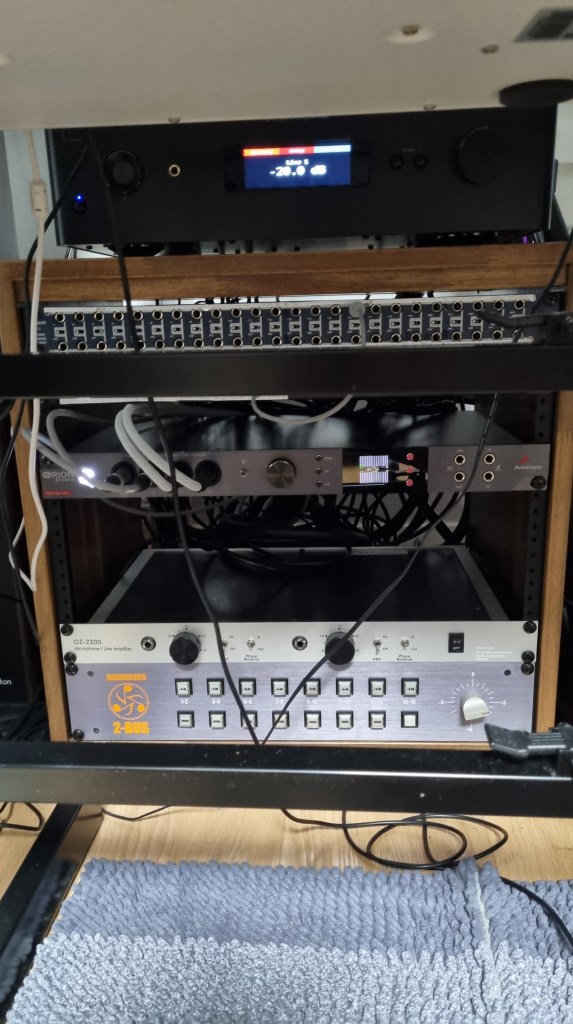
After looking around, I decided to order a custom-made rack cabinet from Shinsun Workshop(Korean: 신선공방), as their products seemed the most suitable. Other ready-made options were either too shallow or too deep for my setup.

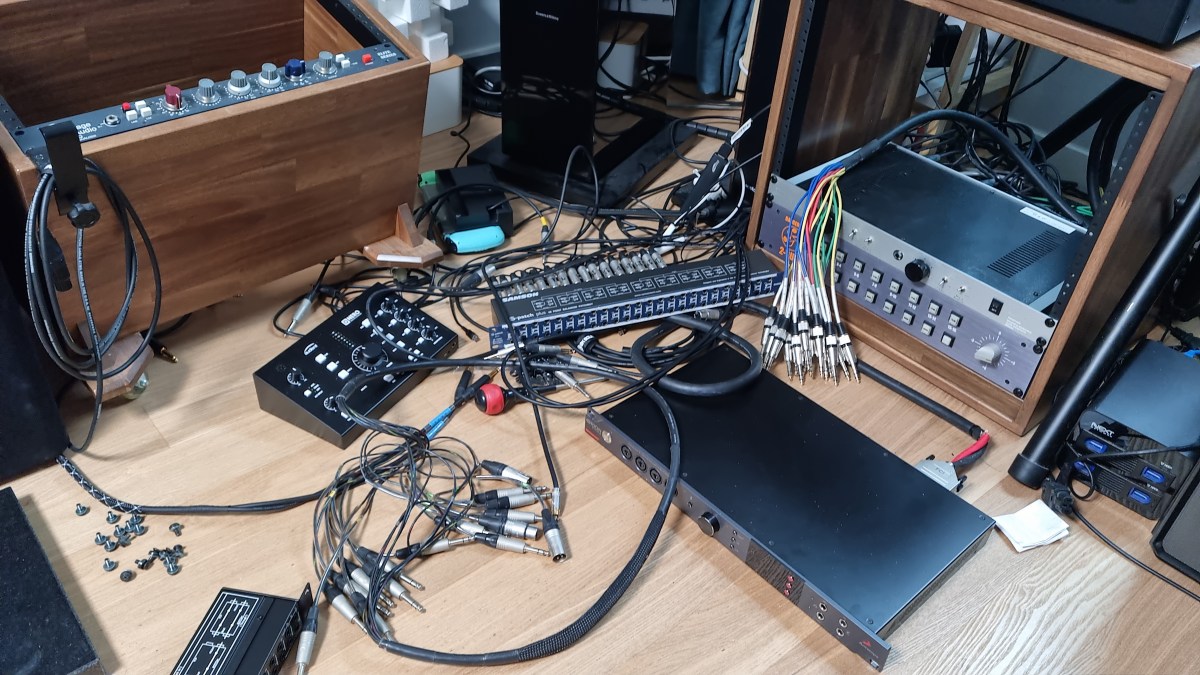
I pre-made the cables and installed everything.

Haha… It was quite a task. I started around 4 PM and finished by 11 PM, with breaks for meals. I even had to do some soldering because I forgot something with the multi-cable… haha…

But in the end, everything looked neat and tidy. I forgot to take a photo of the finished setup, though. After repeatedly sitting and standing, my legs were shaking the next day.

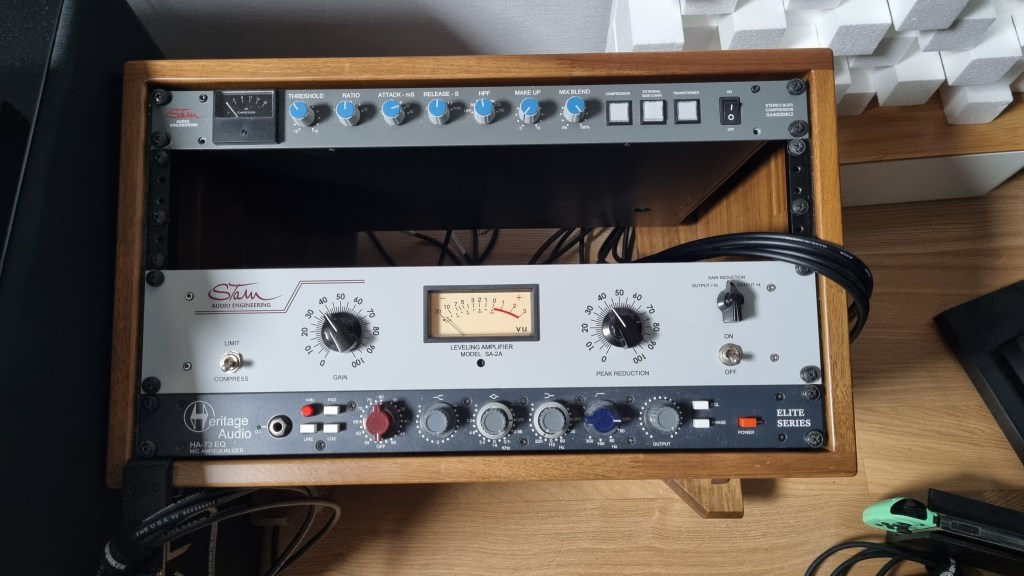
I plan to add a 2U tube preamp to the large rack cabinet, and a Behringer 369 to the smaller one. That will leave about 1U of space, which I might use for an API 2500 or a saturator later on.

I recall making a resolution last year not to buy any more equipment, but I’ve completely broken that promise. Despite buying things relatively cheaply, I should be spending money on releasing my songs. It’s quite ironic that I’m spending all my song budget on gear… Equipment addiction is real…

Lately, I’ve been collaborating with a contact I met through a previous project. We’re producing a few tracks together. Additionally, I’ll be recording and mixing a song for a regular client.

I haven’t posted much about my recent work or projects, but these collaborations have been fun, and I plan to share more once they’re finished.

See you in the next post! 🙂

Basics of Mixing – 6.1 Compressor

Hello, this is Jooyoung Kim, an engineer and music producer.

Today, I’d like to talk about compressors.

Why do we use compressors in mixing?

First, the most fundamental role of a compressor is to level the dynamics.

When the dynamic range (the difference between the loudest and softest sounds of an instrument) is large, it can cause issues where vocals or individual instruments are not clearly heard. It can also result in instruments sounding like they are moving forward and backward in the mix when listening through speakers. By controlling dynamics well, it becomes easier to increase the overall loudness during mastering.

Second, compressors can change the groove of the music.

Depending on when the compressor kicks in and out, and how it compresses, it can alter the groove of the instrument source.

Third, compressors can change the tone of the source through saturation.

Based on the harmonic distortion and frequency response characteristics of the compressor, it can add different textures to the original source.

Fourth, compressors can provide a sense of unity.

A compressor applied to a bus can impart its unique saturation and groove to the entire group of instruments, helping them blend well together.

For these various complex reasons, we use compressors.

In this sixth chapter of Mixing Basics, we will cover:

  1. How to use a compressor
  2. Types of compressors based on their operating principles
  3. Noteworthy compressors
  4. Various other dynamic processors (decompressors, expanders, gates, de-essers, multiband compressors, etc.)

In the next post, we’ll start by discussing how to use a compressor.

Basics of Mixing – 5.2 Types of EQ (2)

Hello, this is Jooyoung Kim, an engineer and music producer.

Today, I will continue discussing the types of EQ from the previous post, focusing on Parametric EQ, Dynamic EQ, and Baxandall EQ.

5) Parametric EQ

Parametric EQ was designed by the renowned engineer George Massenburg. It is commonly found as a built-in EQ in DAWs.

This type of EQ allows you to select the frequency you want to adjust and set the Q Factor, which determines the bandwidth of the adjustment.

These are examples of Parametric EQs!

Parametric EQ is used not only for musical purposes but also for addressing issues with sound sources. It can handle problems such as proximity effect from microphones, Singer’s Formant (a specific resonance found in vocalists), room resonance, and high-pitched squeaking noises from strings.

6) Dynamic EQ

Dynamic EQ combines the functions of a compressor with an EQ. It works similarly to a multiband compressor but with slight differences in how bands are set and how it operates.

  1. A multiband compressor uses cut filters to define bands, while a Dynamic EQ defines bands according to the EQ settings.

As mentioned in the previous post, cut filters cause a phase shift of π/2 for every 6dB/oct. This means that multiband compressors can alter the sound due to phase changes even without any settings.

  1. Depending on the Dynamic EQ, most do not allow you to set the ratio, attack, and decay like a compressor does. Typically, you can only set the threshold and the amount of volume reduction or increase.

Because of this, the compression curve of a Dynamic EQ can appear different. The pink curve is from Fabfilter’s Pro-Q3, and the red curve is from Initial Audio’s Dynamic EQ. Although both are Dynamic EQs, their behavior is quite different.

Interpreting Fabfilter’s unique curve, it seems to compress the sound up to a certain point, after which it stops compressing and simply reduces the volume of the sound.

In simpler terms, for Pro-Q3, if the sound exceeds a certain level, it follows the dynamic curve (green) rather than the set yellow curve, acting more like a simple EQ.

However, their usage is generally similar. Dynamic EQs are often used when you want to reduce specific frequency bands. You can choose based on your preference.

7) Baxandall EQ

Baxandall EQ was introduced by Mr. Baxandall in 1952 through Wireless World magazine without royalties, making it widely used.

Due to its minimal phase issues, it is frequently used in mastering. It’s effective for adjusting broad frequency ranges, such as lifting high or low frequencies.

Examples include Tilt EQ and Dangerous’s Bax EQ.

This concludes the overview of various types of EQ. Besides these functional classifications, there are also categories like Zero Latency/Linear Phase/Normal EQs, and whether they are used for musical (Tone Shaping) or technical (Surgical) purposes.

I will continue with these topics in the next post.

See you next time!

Basics of Mixing – 3.1 Console and DAW

Hello! This is Jooyoung Kim, a mixing engineer and music producer.

Today, I will finally talk about the functionalities.

Shall we begin?

In the days when all recording processes were done analog, mixing was performed using analog mixers and tape.

Here is a video I found related to this topic. If you are interested in analog recording, you might find it interesting to watch.

The transition from analog to digital began with the release of Digidesign’s (now AVID) Sound Tools.

Sound Tools included a DAW program called Sound Designer, various chipsets, and devices that acted as audio interfaces, all designed exclusively for Mac.

Later, this program evolved into Pro Tools, a representative DAW.

Such systems, integrated with DAWs, show why Pro Tools has become the industry standard and why Macs are commonly used in studios today.

As we moved from analog to digital, DAWs developed by incorporating analog functionalities into computers. Therefore, understanding the functions of an analog mixer can make it easier to approach mixing with a DAW.

The DAW mixer window that you need to get familiar with if you’re into mixing

The interface of the mixer window is also designed similarly to an analog mixer. Let’s take a closer look at a mixer.

  • Analog Mixer and Signal Flow

I wanted to bring a larger one, but it was difficult to see clearly.

Let’s start from the left.

Each channel has a series of stages: Pre section with mic preamp and input gain, Insert section with compressor and EQ, Send/Return section for external effects, and Post section with panning and output gain.

This configuration of a single channel is called a channel strip, and a mixer consists of multiple channel strips. The DAW mixer window is organized in a similar sequence.

The signal usually flows from top to bottom, and this path is called the ‘signal flow.’ Each DAW has a different signal flow, so you need to learn the signal flow of your specific DAW.

I usually prefer Cubase for mixing, but the current project is in Logic, so I brought the Logic mixer window. Here, you can see that each channel strip is quite similar to an analog mixer.

Let’s check the Send section in the DAW mixer window and then return to the analog mixer.

  • Send Section

The analog mixer I brought doesn’t specifically say Send but is labeled FX. This Send function allows you to send the signal from each channel strip to a separate Send channel to apply effects independently.

Some might wonder why not just apply effects in the Insert section.

In the past, studio reverb and delay units were large and expensive. Applying such effects to each channel individually was nearly impossible. Additionally, sending the sound separately through the Send section provided the advantage of processing it independently.

This feature remains in modern DAWs.

In mixing, the Send section is primarily used for applying delay, reverb, and sometimes modulation effects like phaser or chorus, as well as saturation effects like distortion.

Next, we need to look at the group/send section and bus.

  • Group and Aux Channels, and Bus

Group/Aux channels are mostly seen in large analog mixers. They are used to bundle similar instrument groups for collective control.

In Cubase, the concept of a bus isn’t used, making it more intuitive. However, in Logic and Pro Tools, the bus concept can be a bit confusing.

A bus is a signal path that combines audio signals from multiple tracks. This explanation might sound complex, but think of it as an additional step before the Aux track.

In Logic and Pro Tools, the bus function is used to create groups or apply effects like reverb or delay through Send.

  • Master Channel

All tracks ultimately converge at the master channel, which is usually the Stereo Out channel in standard mixing.

It is crucial to ensure that the digital peak does not exceed 0dB in the master channel.

Although the 32-bit float format prevents audio quality destruction even if peaking occurs, it’s good practice to manage digital peaks for industry standard compliance and effective communication.

This should provide a basic understanding of the tracks and their functionalities.

See you in the next post!