Takamine Guitar Pro Series Lineup Overview

Hello, this is Jooyoung Kim, a mixing engineer and music producer. Following my previous discussion on the G Series, I’m here to provide an overview of Takamine’s Pro Series guitars.

Let’s dive right in!

  • Pro Series
The Pro Series features guitars with wood bindings and snowflake inlays, like the P7 series, which I personally love.

All Pro Series guitars come with built-in preamps and are manufactured in Japan. The preamps in the Pro Series are interchangeable, allowing you to swap them as needed.

Here’s a detailed breakdown of the Pro Series:

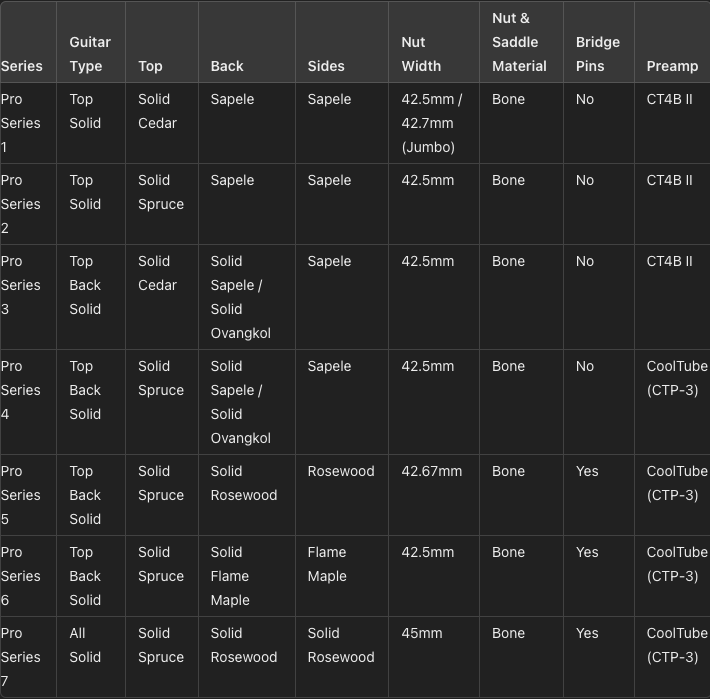
One interesting observation is that some high-priced models are top-back solid rather than all-solid. This might be because the Takamine preamps are larger, making it difficult for solid wood sides to support them.

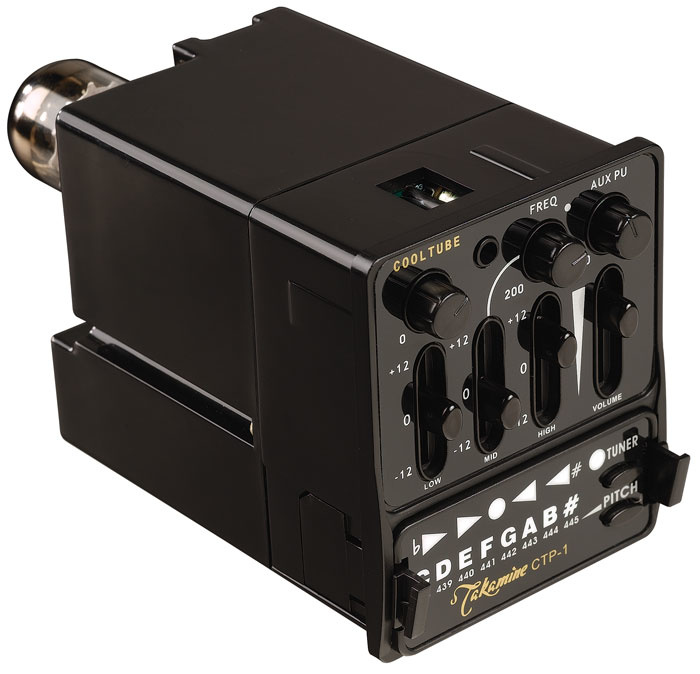
Takamine’s CoolTube preamp (CTP-3) actually contains a tube, making it quite large. Personally, I love the Pro 7 series for its specifications and design, but the price is… quite high.

The Pro Series guitars are best suited for those who lead worship frequently or perform often. However, the G Series offers excellent value for the price.

Although the Pro Series guitars are entirely made in Japan and feature unique pickups, if you don’t need Takamine’s pickups, you might want to look for models without them. There are all-solid models available without pickups, which are much cheaper than the Pro 7 Series.

The roasted tops, which have become a trend in the acoustic guitar market, have brought meaningful changes and continue to be popular.

The Pro Series is denoted as P□△○:

  • □ indicates the Pro Series number.
  • △ indicates the body shape.
  • ○ indicates whether it’s a cutaway (C) or not.
P7DC

For example, P7DC means:

  • 7th in the Pro Series
  • Dreadnought model
  • Cutaway model

P3MC means:

  • 3rd in the Pro Series
  • OM model
  • Cutaway model

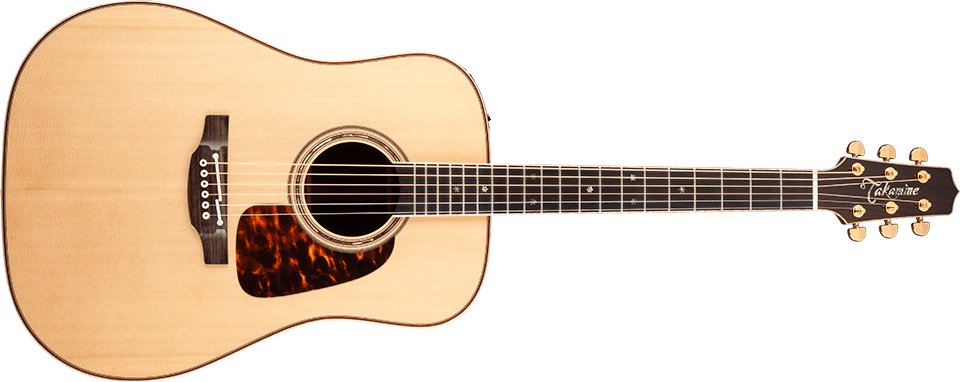
The body shapes are:
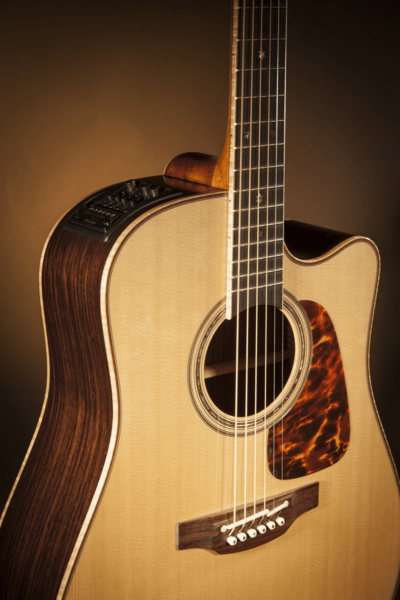
  • D – Dreadnought
  • J – Jumbo
  • N – NEX (Takamine’s little jumbo body)
  • F – FXC (Takamine’s grand concert body)
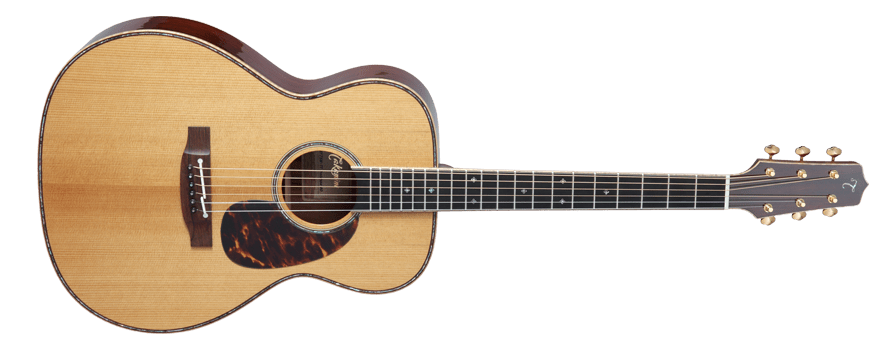
  • M – OM
  • NY – New Yorker (Takamine’s parlor body)
  • Final Thoughts on the Pro Series
EF75M-TT

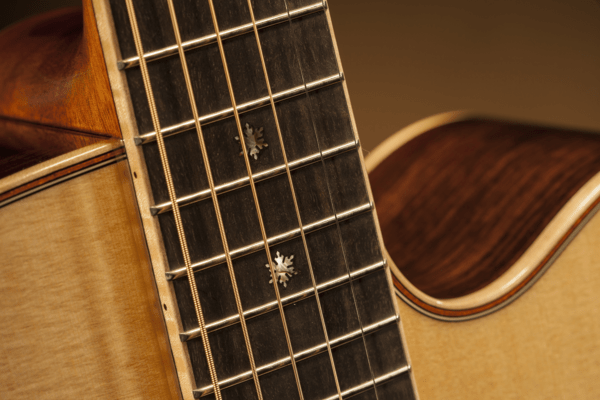
The top-tier products are incredibly beautiful, like the EF75M-TT, which is limited to 100 units worldwide. Other lines such as TT (Thermal Top/Roasted Top), LTD (Limited), and TSP (Thinline) have smaller product ranges and will be discussed in future reviews.

I hope this overview of the G Series and Pro Series has been informative. It took quite some time to compile this information directly from the site, but I hope it helps those looking for information on Takamine guitars.

My next Takamine post will likely be a review. I’ve requested demos of some models with the best specifications for their price, which I’ll be picking up tomorrow. I plan to include sound samples and detailed photos.

See you in the next post!

Basics of Mixing – 2.4 Speaker Placement and Listening Techniques

Hello, This is Jooyoung Kim, a mixing engineer and singer-songwriter.

To mix effectively, you need to listen to sound accurately.

What does it mean to listen to sound accurately? It can be a long discussion, but let’s focus on two main points:

  1. Minimize distortion (from the room, objects, speaker baffle, speaker unit limitations, etc.)
  2. Listen from the correct position.

These two principles form the foundation.

Generally, stereo speakers are arranged in an equilateral triangle. The angle marked as 30 degrees in the diagram above is called the Toe-In Angle. This angle can be adjusted slightly based on personal preference.

Additionally, the tweeter, which reproduces high frequencies, should be positioned close to ear level. This is because high frequencies are more directional and may not be heard well if the tweeter is placed too high or too low. Various stands are used to achieve this positioning.

However, recommended angles and placements can vary by manufacturer, so it’s best to start with the manual and then adjust as needed.

When changing placements, it’s important to measure and identify where the issues are. With some training, you can listen to a track and identify boosted or cut frequencies, giving you an idea of where the problems lie. Measurement, however, makes it easier to pinpoint specific issues you might miss by ear.

One of the simplest and free measurement programs is REW (Room EQ Wizard), which I introduced a long time ago.

You can use an affordable USB microphone like the miniDSP UMIK-1 for easy measurement, or, if budget allows, a measurement microphone like the Earthworks M50.

By measuring, you can understand various factors beyond just frequency response, such as phase, harmonic distortion, and reverberation time. This helps you identify and solve problems in your workspace.

Doing all this ensures you hear the sound as accurately as possible, allowing you to understand what proper sound and mixing should be.

So, you’ve set up your speakers correctly. How should you listen to the sound?

Of course, you listen with your ears, but I’m not just saying that. I’m suggesting you listen to the sound in layers.

In a typical 2-way speaker, the tweeter is on top, and the woofer is on the bottom, so high frequencies come from above and low frequencies from below. Consequently, low-frequency instruments seem to be positioned lower, and high-frequency instruments higher.

If your listening distance and room support it, well-made hi-fi tallboy speakers can make mixing easier.

That was about the vertical plane. Now, let’s talk about the front-to-back dimension.

When someone whispers in your ear versus speaking from afar, there are noticeable differences:

  1. Whispering sounds clearer (more high frequencies, less reverb)
  2. Whispering sounds louder.

These principles determine whether instrument images appear in the front or back. Panning also moves them left and right.

If you’re not familiar with this concept, try closing your eyes and identifying where each instrument is located in a mix.

Since stereo images vary with different speakers, it’s crucial to understand how your speakers reproduce images. Reference tracks are essential for this.

For example, I always listen to Michael Jackson’s albums and the MTV live version of “Hotel California” when I switch speakers. Michael Jackson’s songs are well-mixed for their age, and the live version of “Hotel California” is superbly mixed except for the vocals.

Let’s wrap it up for today. Creating the best acoustic environment in your room is essential for effective mixing.

My environment isn’t perfect either, but I’m continuously improving it..!

See you in the next post!

DC Snares (Drum Machine) Virtual Instrument Release Sale (Until July 31st, $31.9)

Hello, This is Jooyoung Kim, an engineer and music producer.

Today, I want to introduce a new virtual instrument developed by Plugin Boutique.

The newly released DC Snares is a virtual instrument that allows you to create sounds by synthesizing four different samples. You can use the Randomizer in the top right corner to generate sounds randomly.

There are a total of 10 built-in FX, allowing you to apply FX to individual samples, FX to the bus, and FX to the master track separately through the Advanced controls.

Each sample can be individually adjusted for envelope, pitch, and volume over time, and you can also set the start and end points of the samples to your preference.

In modern music production, it’s crucial to refine drum sounds meticulously to create a good groove. DC Snares offers all the necessary features for this and has a simple UI that makes sound creation convenient.

Despite its name, DC Snares is not limited to creating snare sounds. It can also be used to create hi-hats, kicks, bass, and other drum machine-like sounds. The presets are quite usable, making it a worthwhile purchase for around $30.

The sale runs until the end of July, so if you frequently work with samples, I recommend giving it a try. It also supports loading personal WAV files, adding to the fun and versatility.

See you in the next post!

Basics of Mixing – 2.2 Phase and Interference

Hi, This is Jooyoung Kim, mixing engineer and music producer.

Today, following our discussion on waves, I’d like to talk about phase and interference.

In the previous post, we talked about phase and how it represents the ‘position and state’ of a wave, which can be expressed in degrees.

When two different waves (sounds) meet, this is called interference. The concept of phase is very useful in explaining interference.

Let’s first look at the case where two waves with the same frequency and direction of travel interfere.

Left: Constructive Interference; Right: Destructive Interference

On the left, you see two waves with the same phase meeting, while on the right, you see two waves with opposite phases (180 degrees or π apart) meeting.

On the left, the amplitude doubles, and on the right, it becomes zero. This type of interference, where the amplitude increases, is called ‘constructive interference,’ and when the amplitude decreases, it is called ‘destructive interference.’

When the amplitude increases, the sound becomes louder, and when it decreases, the sound becomes softer. Therefore, when a sound with the opposite phase to the original sound is played together, the sound is canceled out.

Why should a mixing engineer know this?

Around April, I received a request for mixing for live recording at a small competition, and this is a photo of the drum recording setup.

When recording drums, multiple microphones are often used for the kick and snare, among other elements.

When these recorded sounds are combined, the recorded sources can interfere with each other, leading to destructive interference, which weakens the sound. Hence, it’s essential to align the phase of each track.

You can easily understand proper phase alignment by listening.

I’ve included a YouTube video because creating my own example would be too time-consuming. In the video, the initial sound you hear is a properly phase-aligned snare, while the subsequent sound shows a snare with phase misalignment resulting in destructive interference.

Therefore, when conducting multi-track recording, it’s crucial to check the phase of all tracks against a reference track.

In Cubase, you can change the phase in the mixer window using the Pre-phase button. In Logic, you use the Phase Invert button in the Gain plugin.

In Pro Tools, there’s a button (Φ) on the track itself to invert the phase. Other DAWs also have waveform editing functions to flip the phase.

That’s all for this post. See you in the next article!