Hi! This is Jooyoung Kim, mixing engineer and music producer.
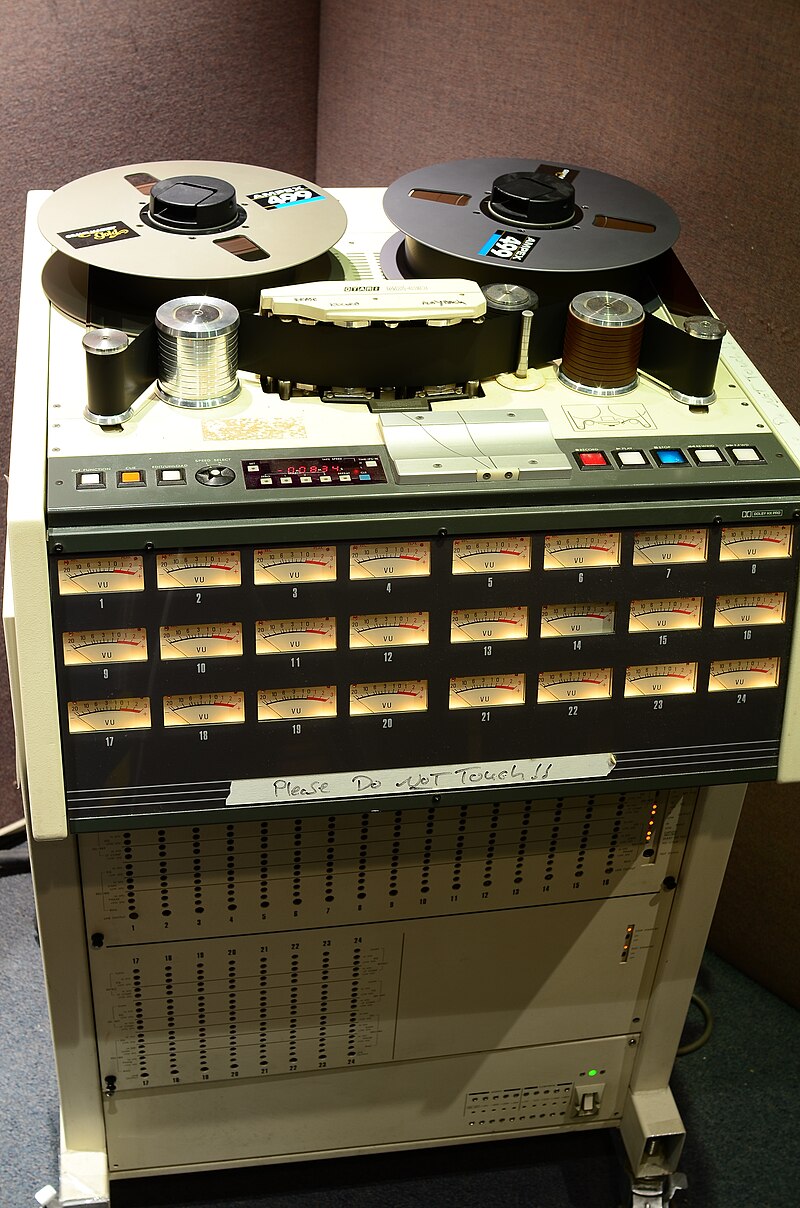
A few days ago, I met my teacher, who taught me guitar and MIDI. We talked about various topics, including tape machine plugins. That conversation inspired me to write a blog post about using tape machine plugins.
If you purchase a plugin through a link in this article, I may receive a small commission.
Let’s dive in!
First, I wrote an article about tape saturation. If you wonder how it works, please read the post above.
UAD (Universal Audio Digital)
Recently, Plugin Boutique was having a bundle sale on tapes.
Among this bundle, I will talk about three: Oxide Tape Recorder, Studer A800 Tape Recorder, and Ampex ATR-102 Master Tape.
Oxide Tape Recorder
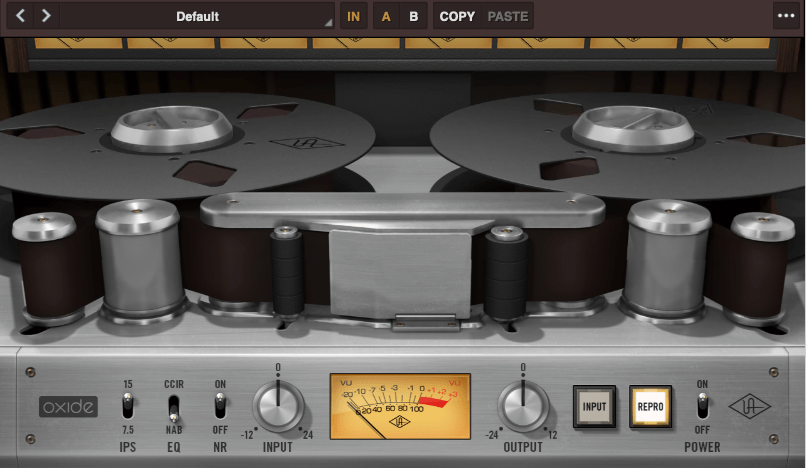
Oxide Tape Recorder is one of the best tape machine plugin made by UAD. The user interface of the Oxide Tape Recorder is simple and intuitive.
IPS means “Inches Per Second”. For example, when IPS is 15, the tape moves 15 inches per one second.
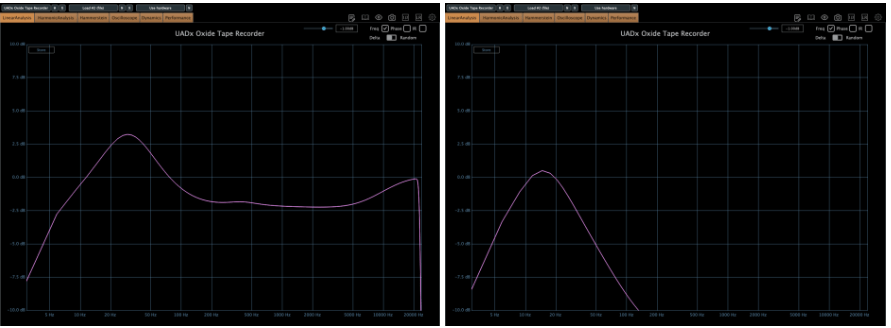
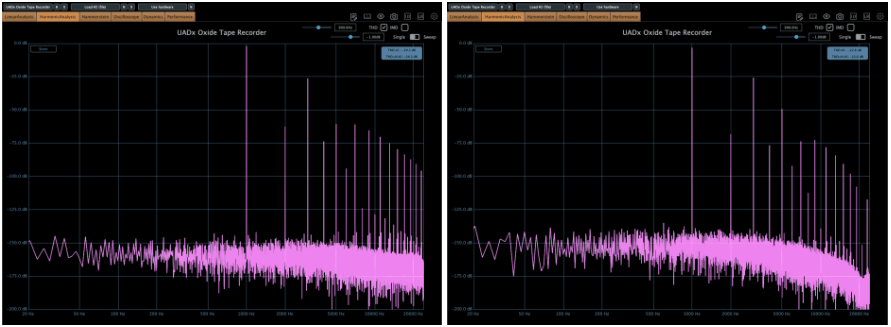
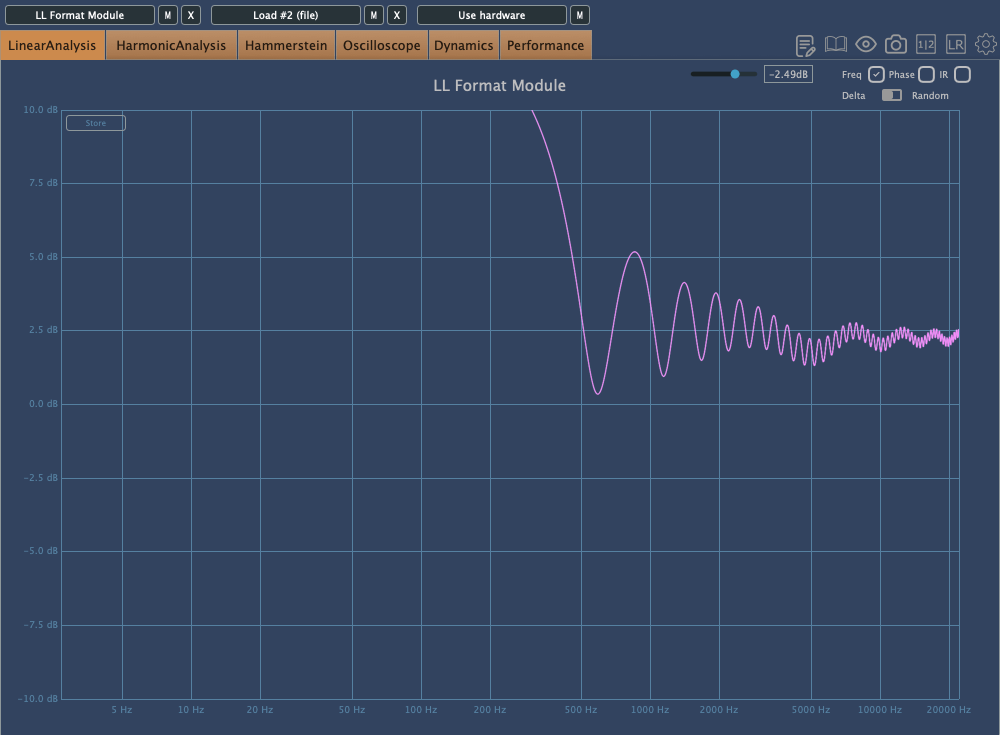
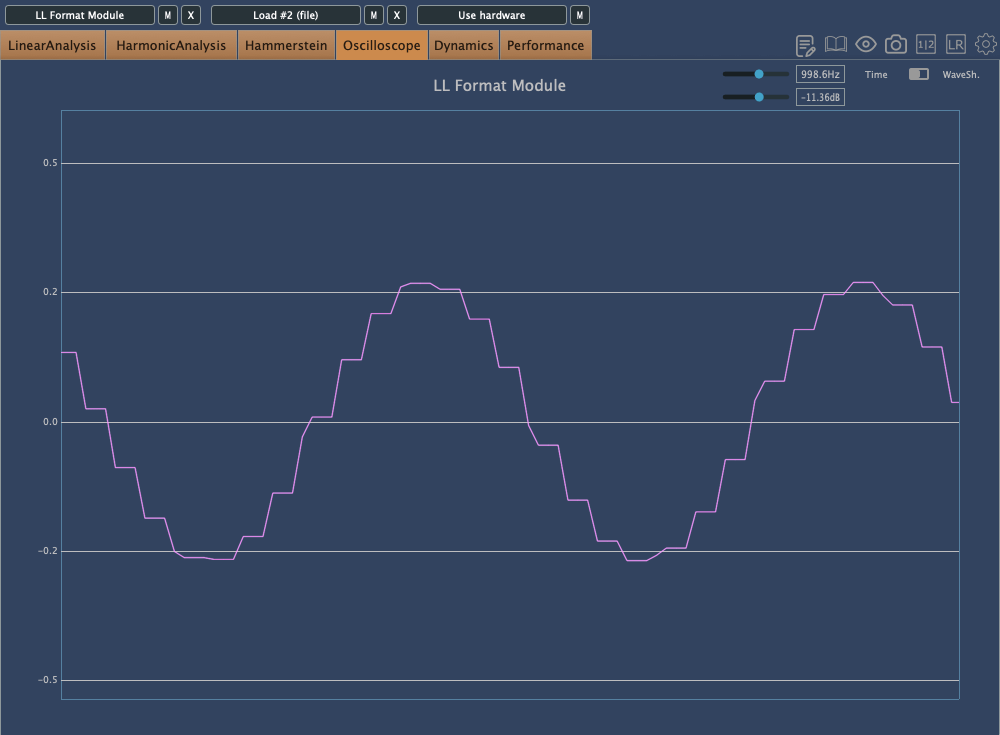
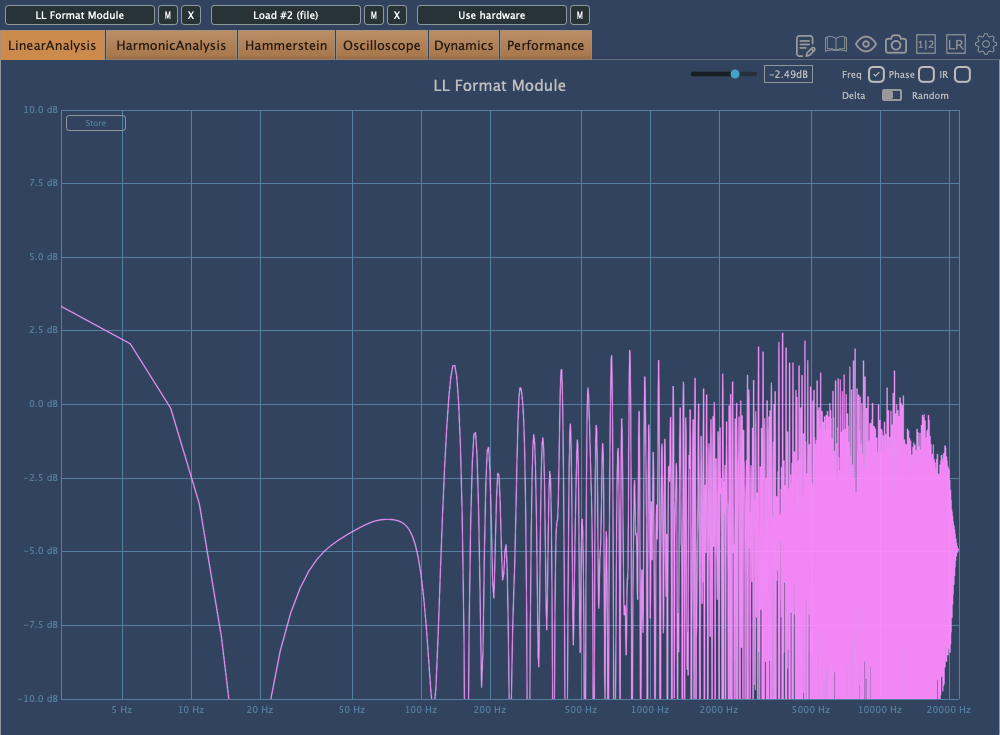
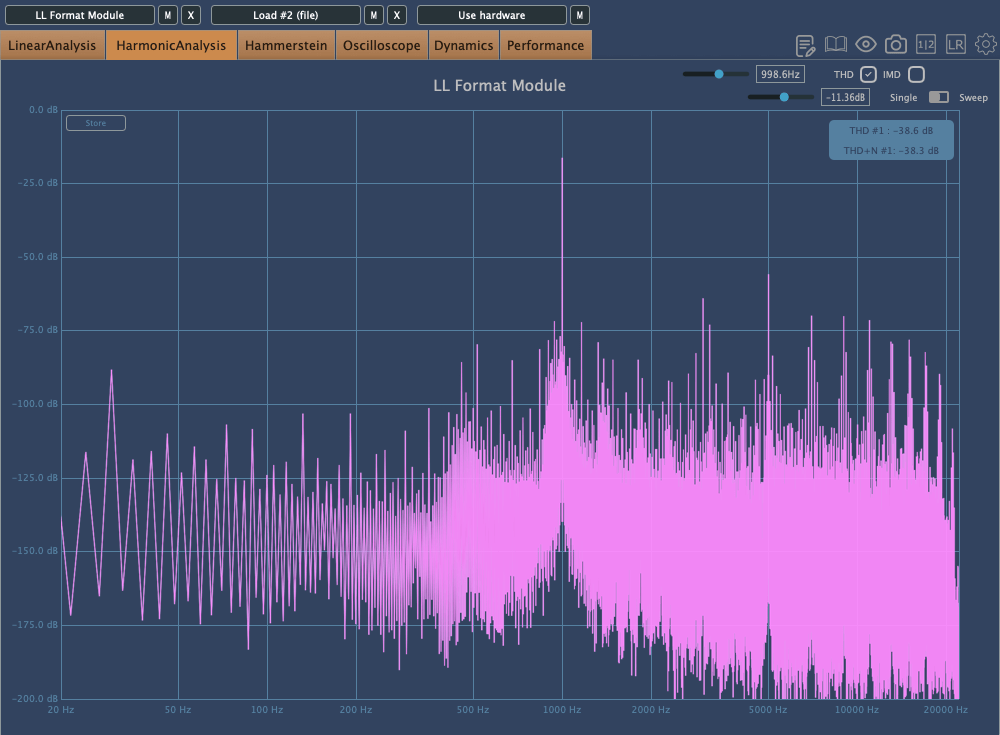
You can see how IPS affects the frequency response and harmonic distortion.
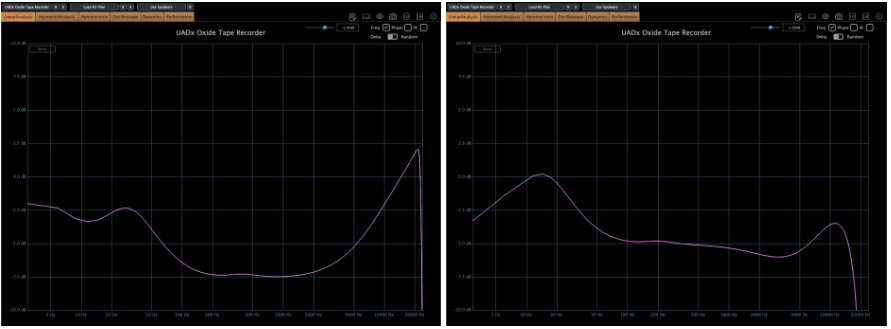

The EQ parameter has two different values: NAB(National Association of Broadcasters) & CCIR(Comité Consultatif International des Radiocommunications, Now ITU-R)
People used to emphasize high frequency by recording process with tape recorder. This is due to high-frequency loss caused by the tape head and the machine. And then, de-emphasize the high frequency when the costumer play the tape.
At those situations, the EQ called NAB & CCIR was used.
NAB was the standard of the electricity with 60Hz alternating current like USA, and CCIR was the standard of 50Hz alternating current like EU(European Union).
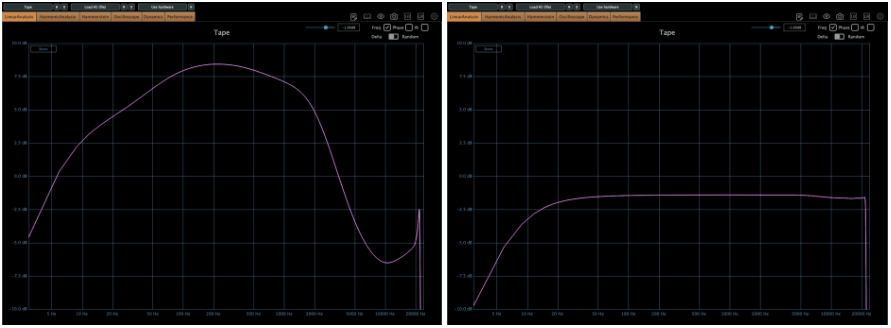
The NAB standard sounds smoother and warmer than CCIR, whereas CCIR sounds clearer and sharper than NAB. It means CCIR more emphasize the high frequency field. You can see how the two differ by the upper frequency response graph.
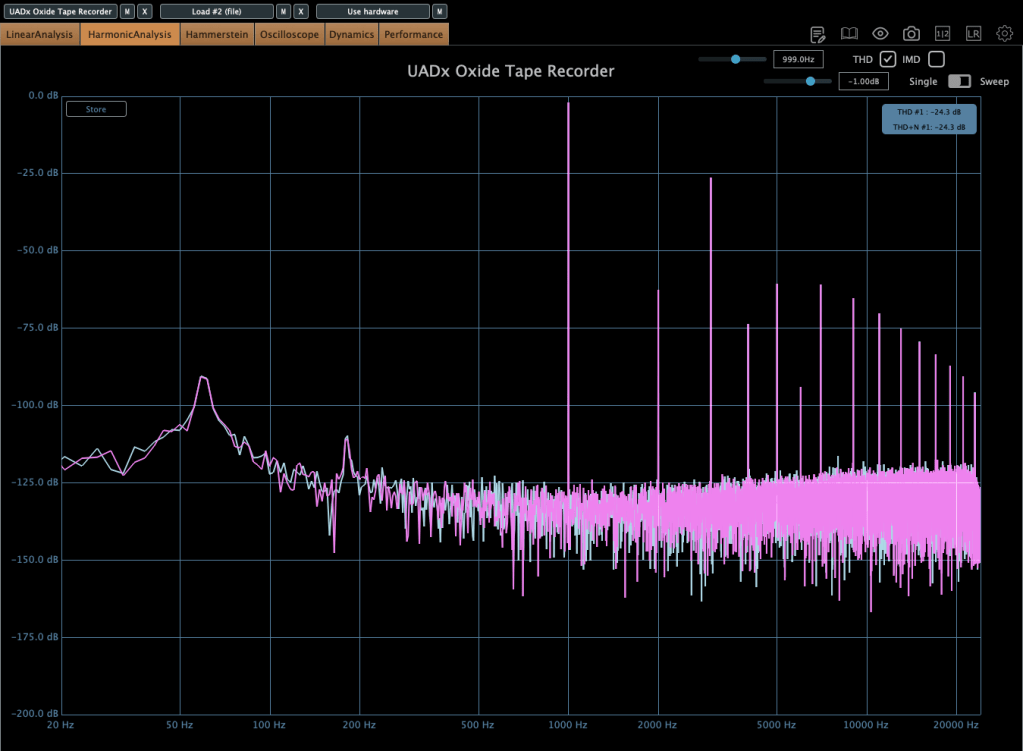
The NR parameter means just “Noise Reduction”. If it turns off, the noise occurs.
That’s all you need to know about the Oxide Tape Recorder plugin. Simple!
Ampex ATR-102 Master Tape
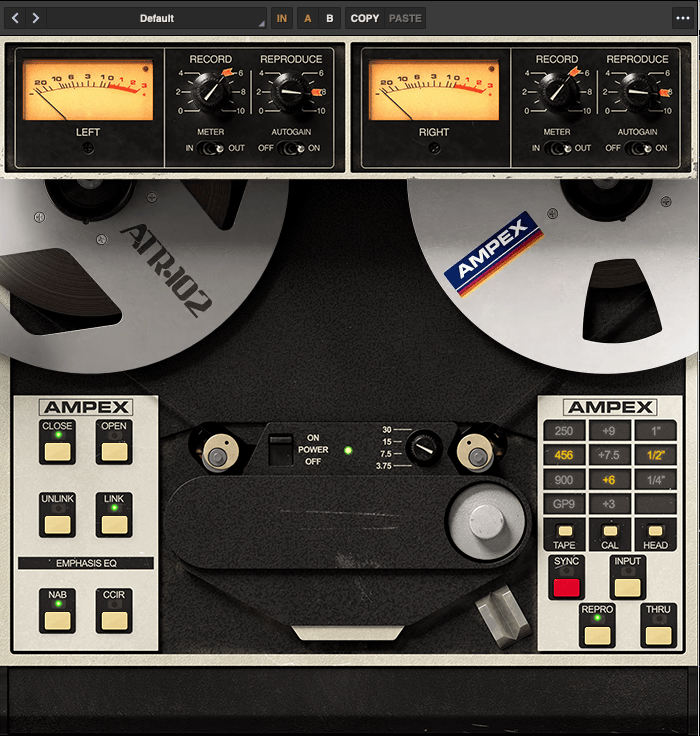
The parameters of the Ampex ATR-102 Master Tape are not as simple as those of the Oxide Tape Recorder. However, if you understand NAB, CCIR, and IPS, it’s easy to use.
Let’s see the parameters.
The record(input) and reproduce(output) knobs are located at the top of the plugin.
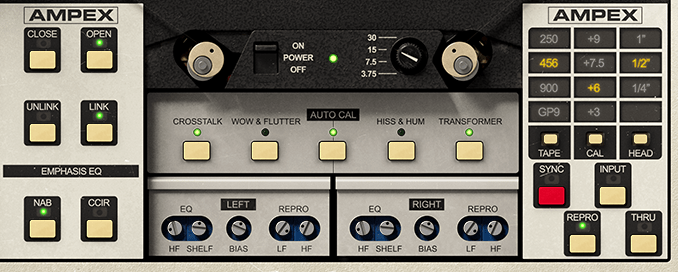
Down side of the plugin, there are buttons that enable detailed adjustments(open and close), and to choose NAB or CCIR.
The right side, you could change type of the tape, calibrate the volume, and choose the tape head width.
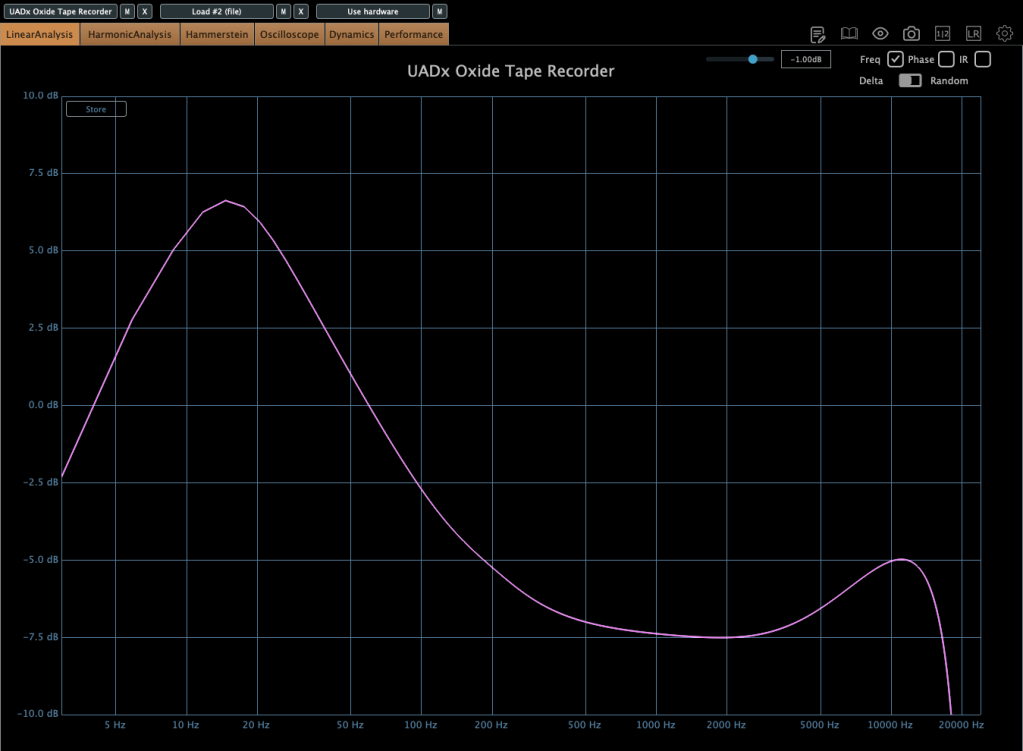
Based on 250 tape and NAB(when you choose IPS 30, couldn’t choice Emphasis EQ),
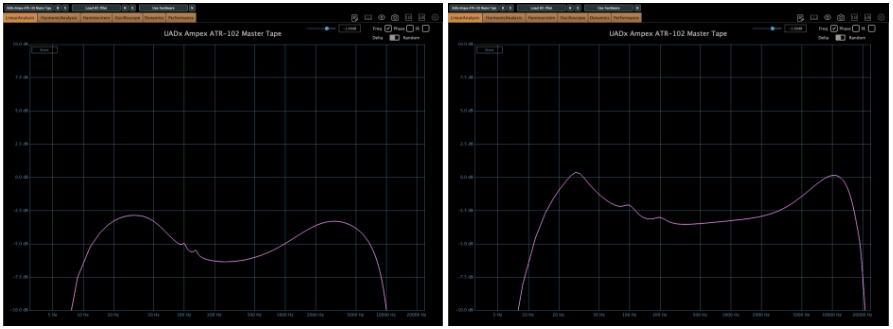
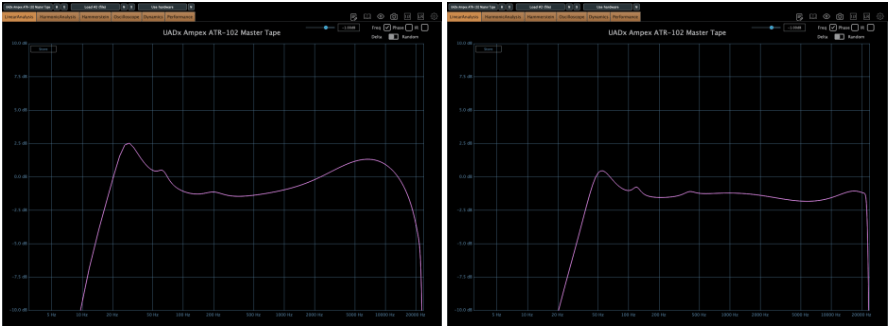
there are significant differences in frequency response.
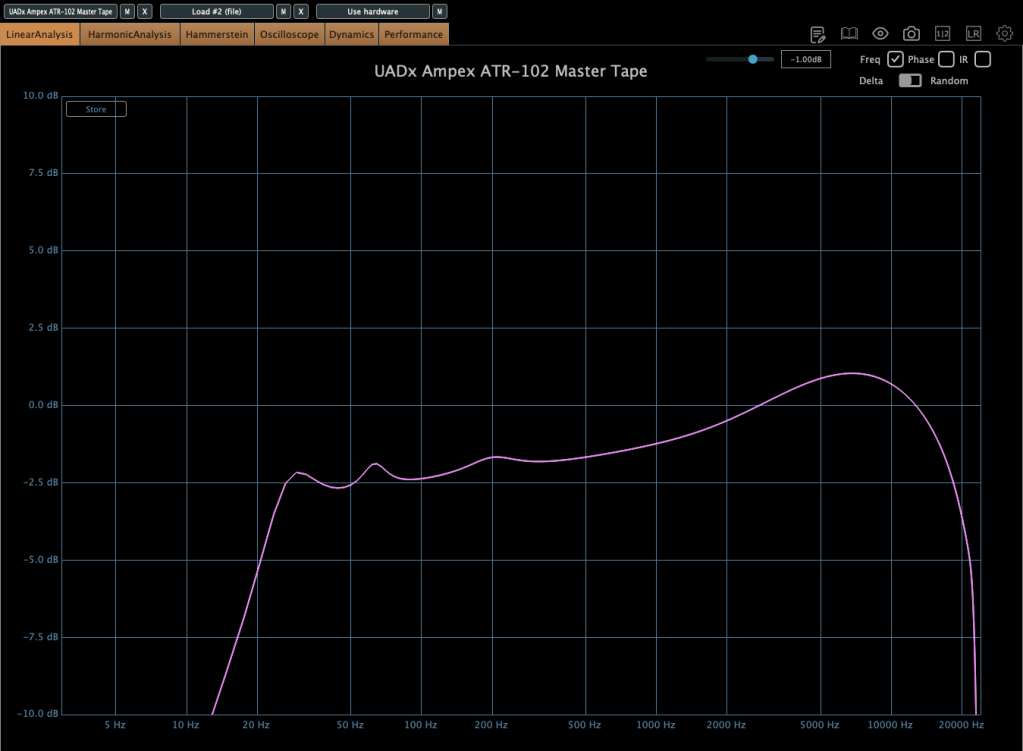
When the tape speed is at IPS 15, this graph shows how the frequency response change by selecting NAB to the other(CCIR).
Input gain and output gain value also make some difference, but it’s not that important..
Compression characteristic is unusual – increase high-volume signals even more – however, it’s not a noticeable difference, so I’ll skip the explanation.
Studer A800 Tape Recorder
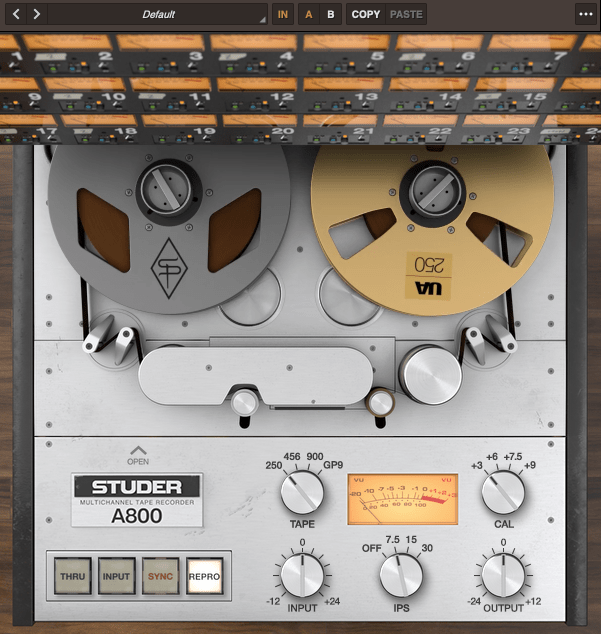
The parameter – tape type, calibration, IPS…

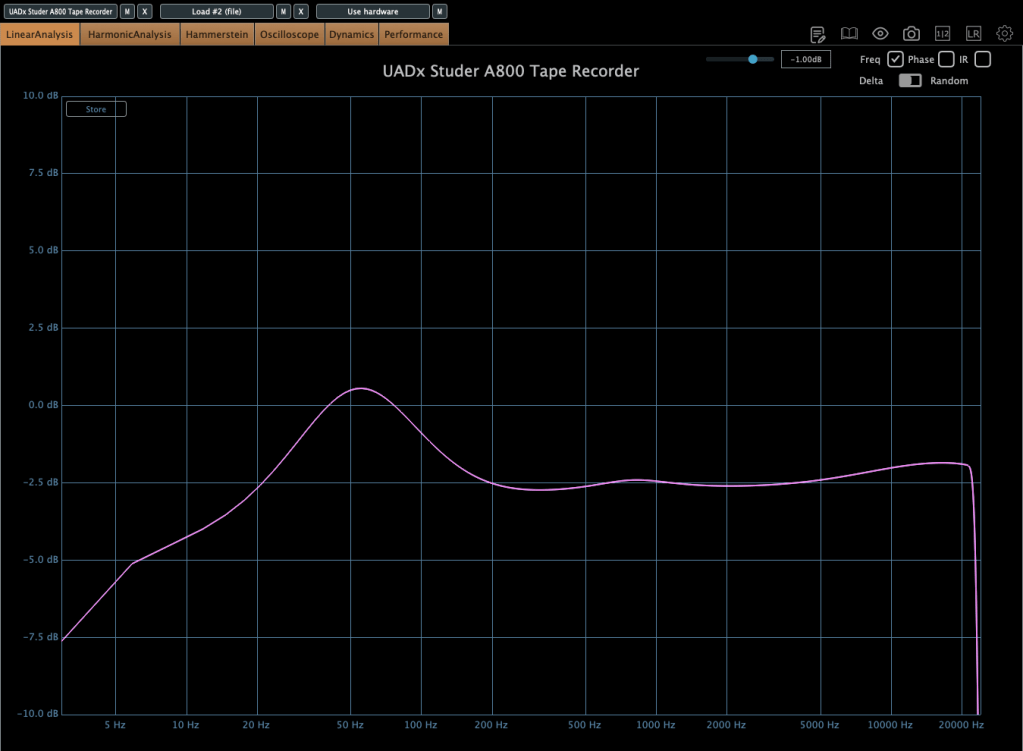
now it’s really simple. Isn’t it?
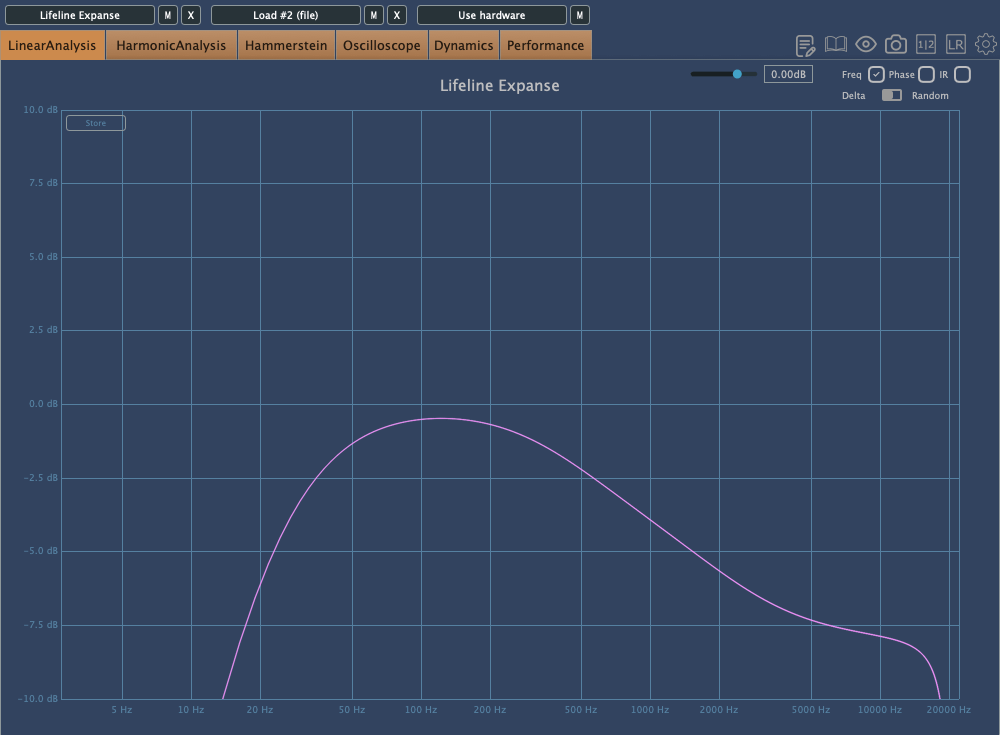
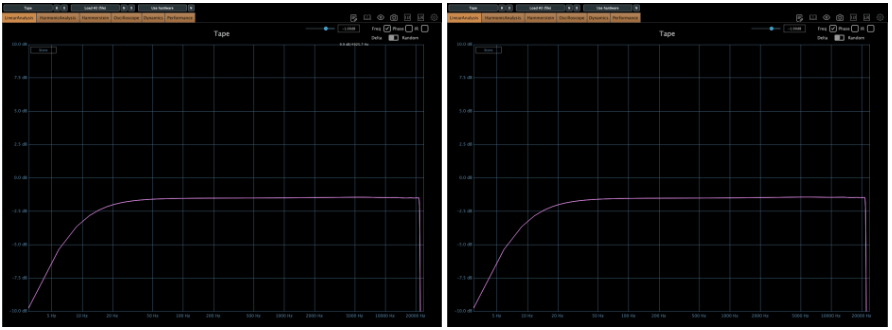
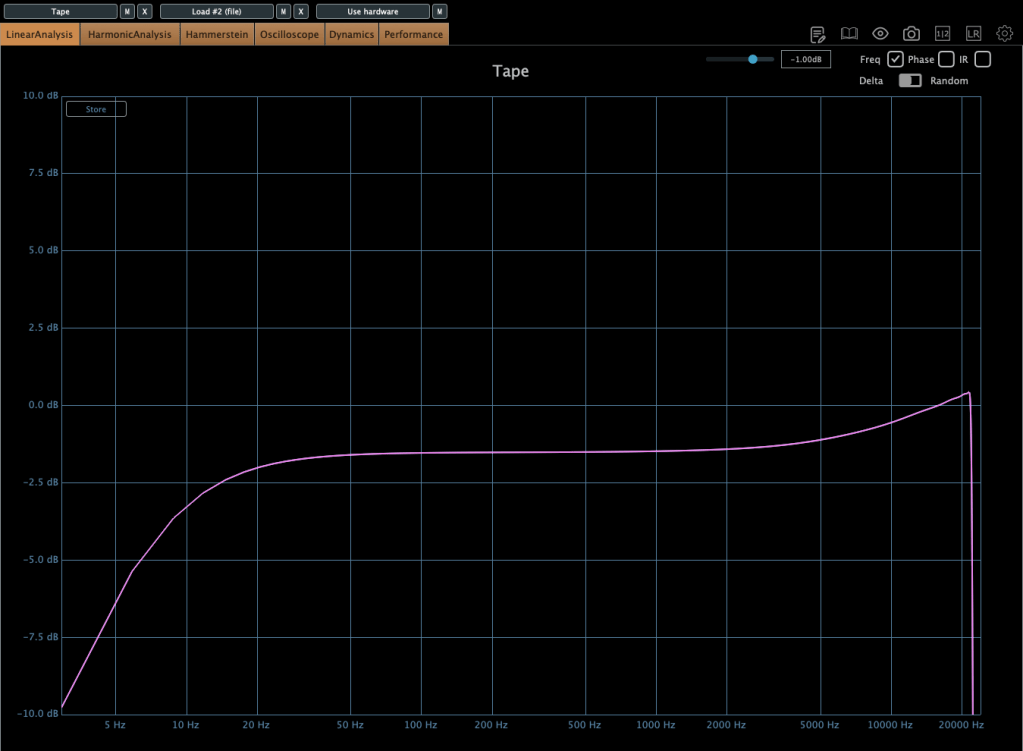
Now, without further ado, you can think of it as a friend that emphasizes the low range, and the frequency response changes like this depending on the IPS!
IK Multimedia
IK Multimedia makes various plugins like virtual instruments, mixing and mastering effects – their tape machine plugins are really great.
The total bundle sale started on Black Friday, but it’s still on sale. T-racks 5 MAX included in the total bundle includes a total of four tape machine plug-ins: Tape Machine 24, 80, 99, and 440. Let’s look around.

Parameters seems similar.. Tape types, IPS..

True stereo parameter makes the difference response between left and right, and transport modeling makes the variation value of the volume by time.
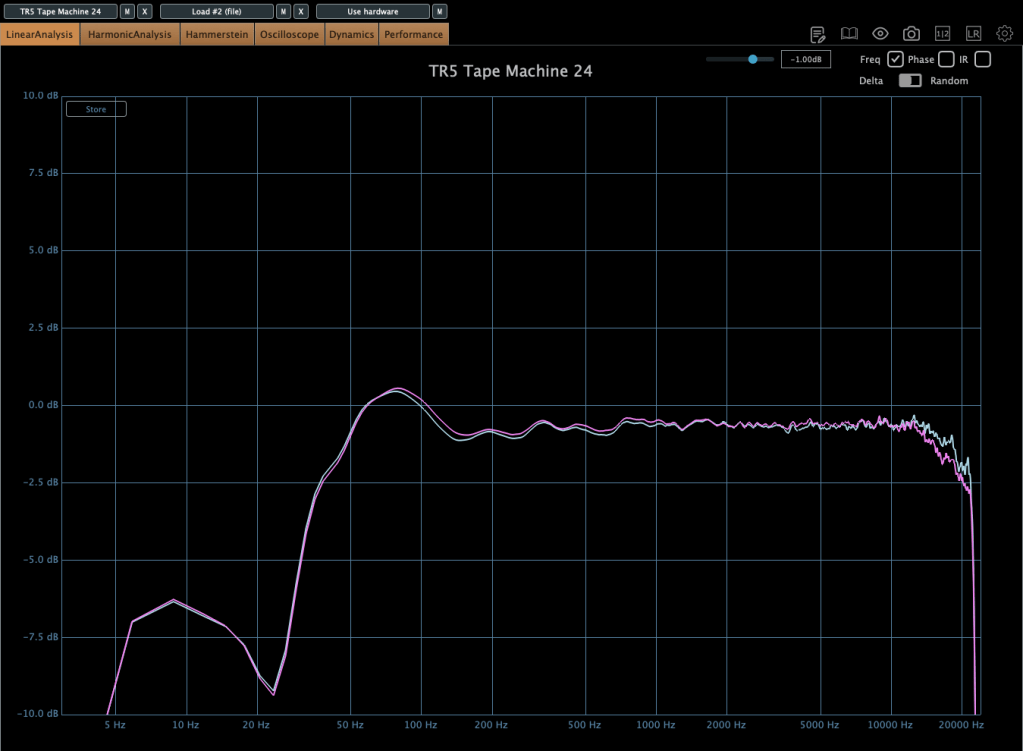

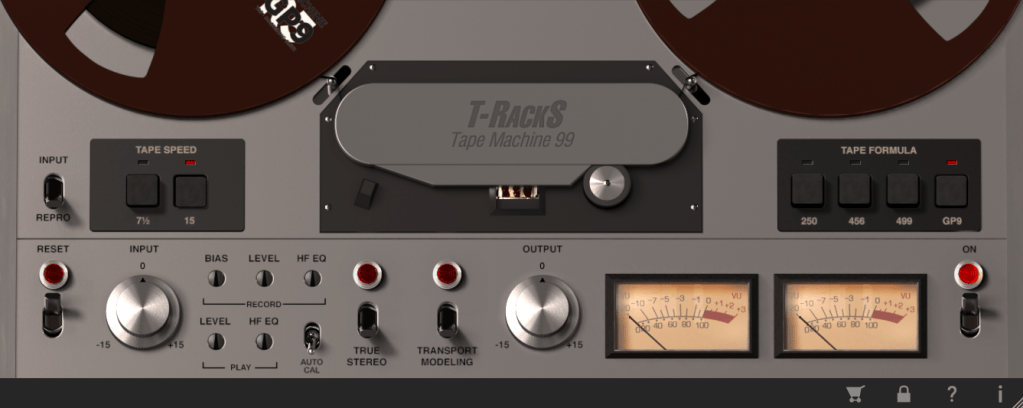
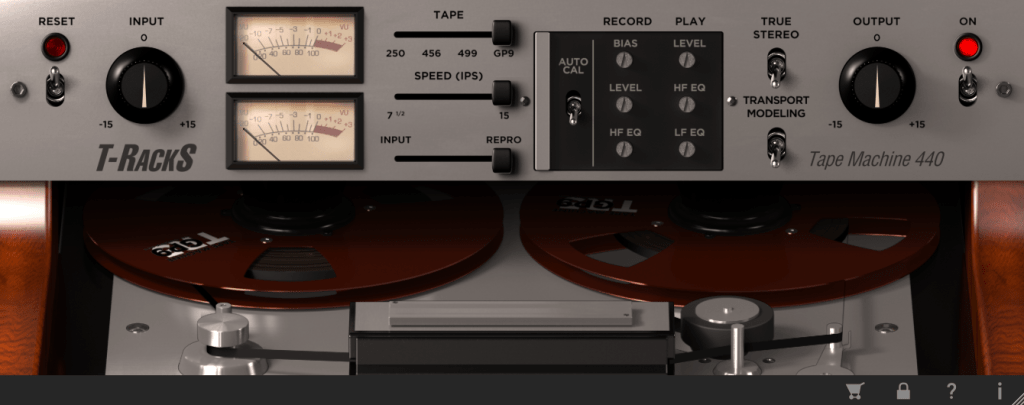
The other plugins’ parameters are same as Tape Machine 24 plugin. Just the machines are different, and they make difference in frequency response.
Simple!
Softube Tape
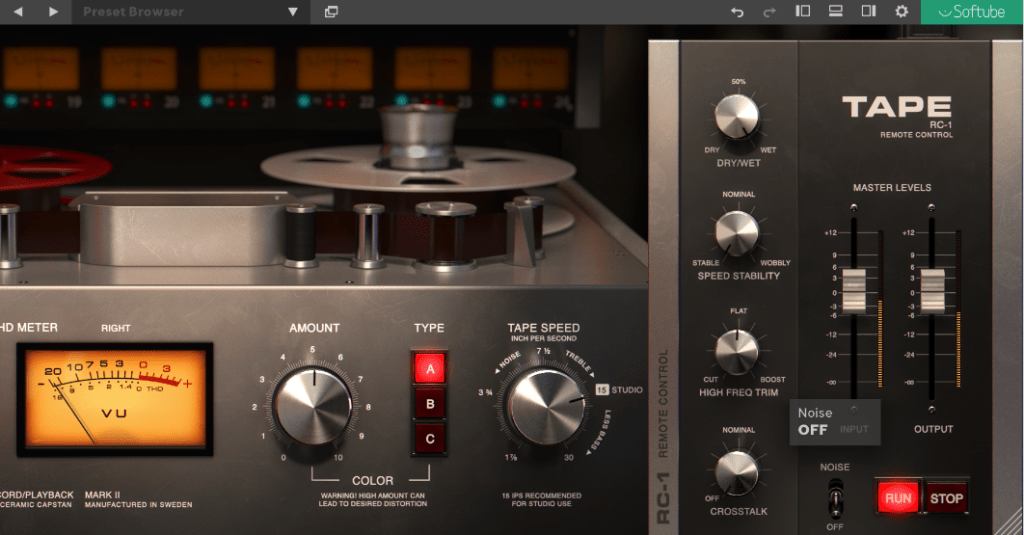
Softube’s Tape plugin is very clean tape machine plugin. The harmonic distortion quantity could changeable by Amount parameter, and tape type could be selected by the Type parameter. (Type A is clean side, B has quit a lot of low frequencies, C has the characteristic between A and B)
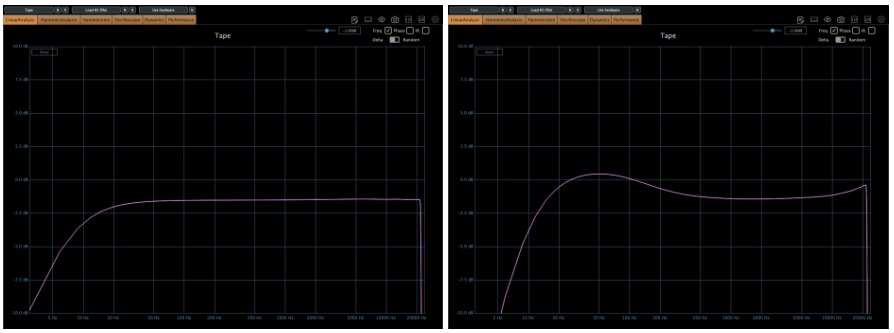
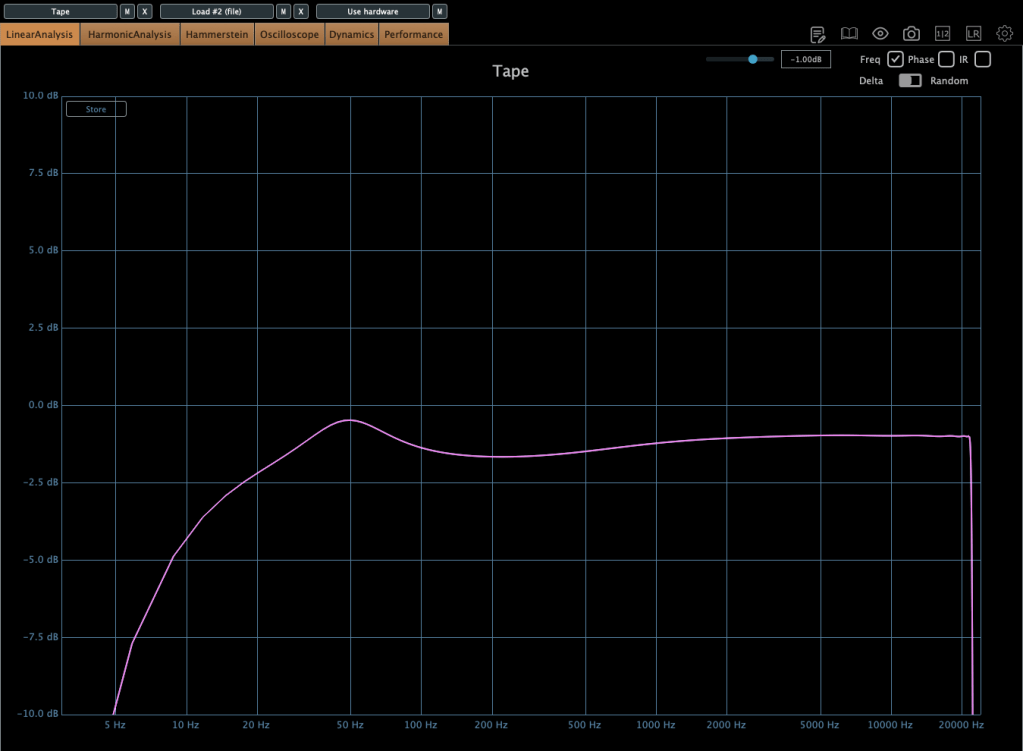
Tape speed could be changed by IPS too.
Waves also has a famous tape machine plugin called Kramer and J37, but as I was writing this, the patterns became too similar, so I will omit them.
However, there is a parameter called Bias that exists only in Waves.
If you wonder about the bias, please read upper article.
If you look at it so far, you will feel something. IPS, EQ and the tape type are everything about a tape machine.
I think that just remembering this will make it easier to use the tape plugins.
Thanks for reading! See you in the next post.