I Earned the Stage Sound Engineer Level 3 Certification

Hello, this is Jooyoung Kim—sound engineer and music producer.

In Korea, there is a government-issued certification called Stage Sound Engineer (Level 3, 3 is the first (or beginner) level, followed by 2 and 1.).
It doesn’t have a direct equivalent in the US, UK, or Canada, but you can think of it as something like a formal audio engineering license, proving both practical and theoretical knowledge in live sound.

As I’ve been working in the audio field, I realized that while practical skills are essential, having an official certification also helps when listing credentials on a résumé. For a long time, I wasn’t sure if it was worth pursuing—but I figured if I didn’t get it this year, it would only become harder later. So, I decided to take the exam.


Studying for the Written Exam

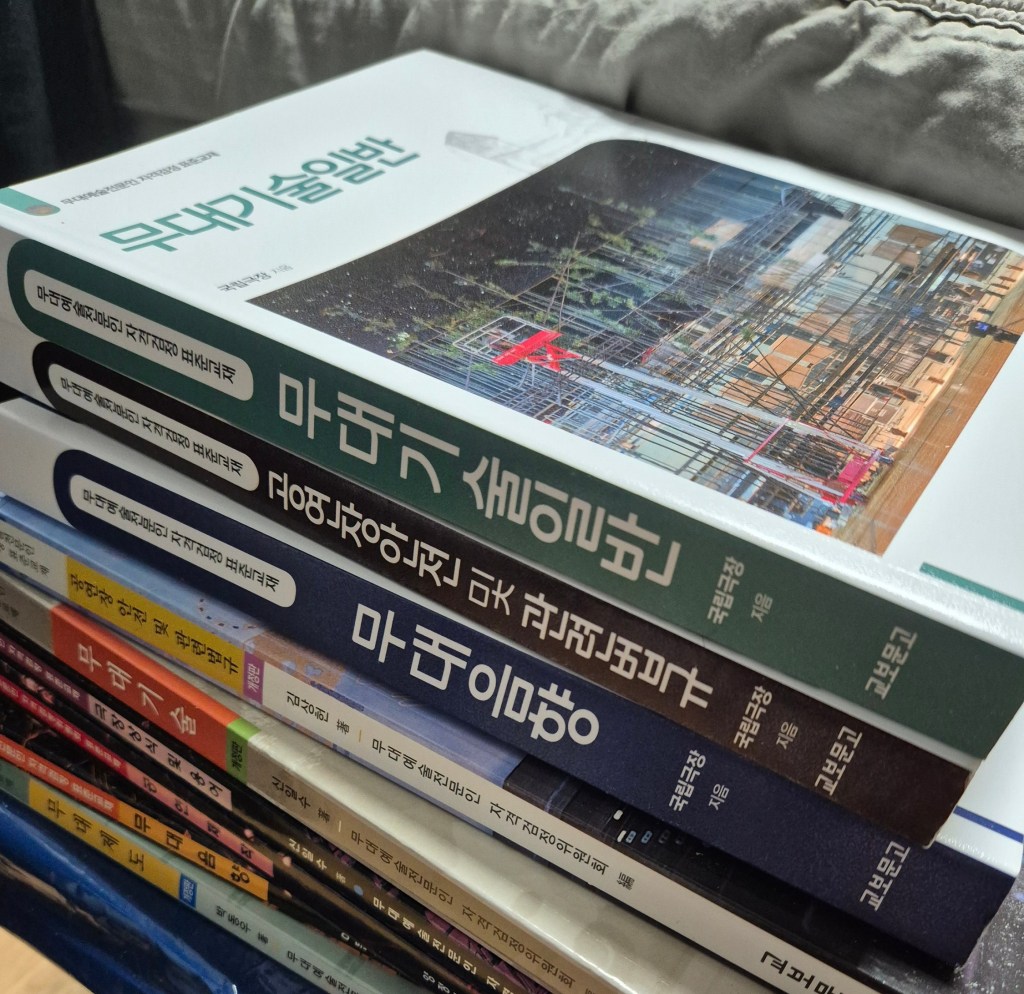
I had already bought some textbooks back when I ambitiously wanted to “master all of audio engineering.”
Unfortunately, the exam content had been updated recently, which meant my older materials were out of date.

At first, I tried to get by without buying the new edition, but after checking last year’s exam questions, I realized too many things had changed. So, I finally bought the updated books just two days before the exam and studied them intensely.

In total, I prepared for about ten days—definitely a crash course. The audio-related parts were manageable thanks to my background, but the legal regulations and stage-specific terminology were quite difficult. Memorization has never been my strong suit (even in English vocabulary study these days, I struggle a lot!).

I didn’t go through the entire book cover to cover, but I solved past exams one set per day and focused on reviewing the parts I got wrong. It was a very “efficient cramming” strategy.


The Practical Exam

Since much of the practical portion overlapped with my usual work, I didn’t need to prepare too heavily.

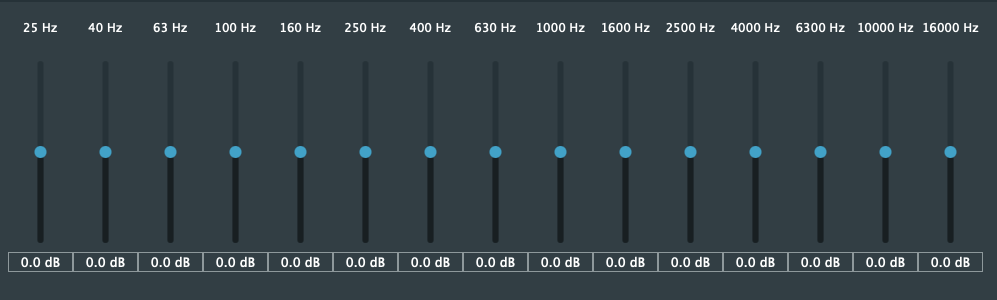
The main part was a listening test: adjusting pink noise with a 15-band graphic EQ to balance different frequency ranges, and identifying test tones across the EQ bands.

Because I couldn’t find a simple 15-band graphic EQ plugin anywhere, I actually built one myself as a VST3 and AU plugin. If anyone needs it, I uploaded it here:

🔗 GitHub – JYKlabs/15-Band-Graphic-EQ

Mac users can simply extract the files and place them in /Library/Audio/Plug-Ins/VST3 and /Library/Audio/Plug-Ins/Components.

Windows users can place the VST3 file in their VST3 plugin directory. (Since I only built it on Mac, I haven’t tested it on Windows yet.)

The plugin is extremely minimal—no extra features, just a straightforward EQ.

During the actual exam, there were 10 listening questions in total. The first five (identifying effects) were fairly easy, but the last five (detecting EQ adjustments applied to music or noise) were much harder. Since the exam environment was different from my usual studio setup, I struggled a bit.

Also, I tend to think of EQ in terms of musical intervals, but the test was structured entirely in octave relationships, which threw me off at first.

Still, since passing only required 6 correct answers out of 10, I managed to make it through. Thankfully, my hearing was in decent condition that day (sometimes ear fatigue can really mess me up).


Final Thoughts

Unlike in South Korea, many Western countries don’t offer official government-issued certifications specifically for live or stage sound engineering. Instead, recognition and credibility often come from trusted industry certifications, educational credentials, or portfolio evidence.

For example, the Certified Audio Engineer (CEA) credential from the Society of Broadcast Engineers (SBE) is well-regarded and requires both experience and passing a technical exam. For those focused on live sound, programs like Berklee’s Live Events Sound Engineering Professional Certificate offer structured, practical training.

Even if you already have solid skills, it can sometimes be difficult to secure projects or convince clients without something official to show. That’s where certifications and structured programs help: they provide a clear, external validation of your abilities and open doors that pure experience alone may not.

At the end of the day, audio work is unpredictable: sometimes you’re mixing in a studio, other times you’re troubleshooting live sound under pressure. The more prepared you are, the easier it is to adapt.

Thanks for reading, and I’ll see you in the next post!

Pulsar Audio Vocal Studio Launch

Hey there! I’m Jooyoung Kim, a mixing engineer, and music producer.

It’s been a whirlwind week with listening experiments, live performance recordings, and mixing, so I haven’t had much time to focus on the blog… haha. I worked on a pretty unconventional setup for a recent gig—more on that in the next post!

Today, I’m excited to introduce Pulsar Audio’s Vocal Studio, a new plugin designed specifically for vocals, brought to you thanks to Plugin Boutique.

If you purchase through the link on my blog, I’ll earn a small commission, which really helps me keep things going… thank you! 😊

Ready to check it out? Let’s dive in!

What’s Pulsar Vocal Studio?

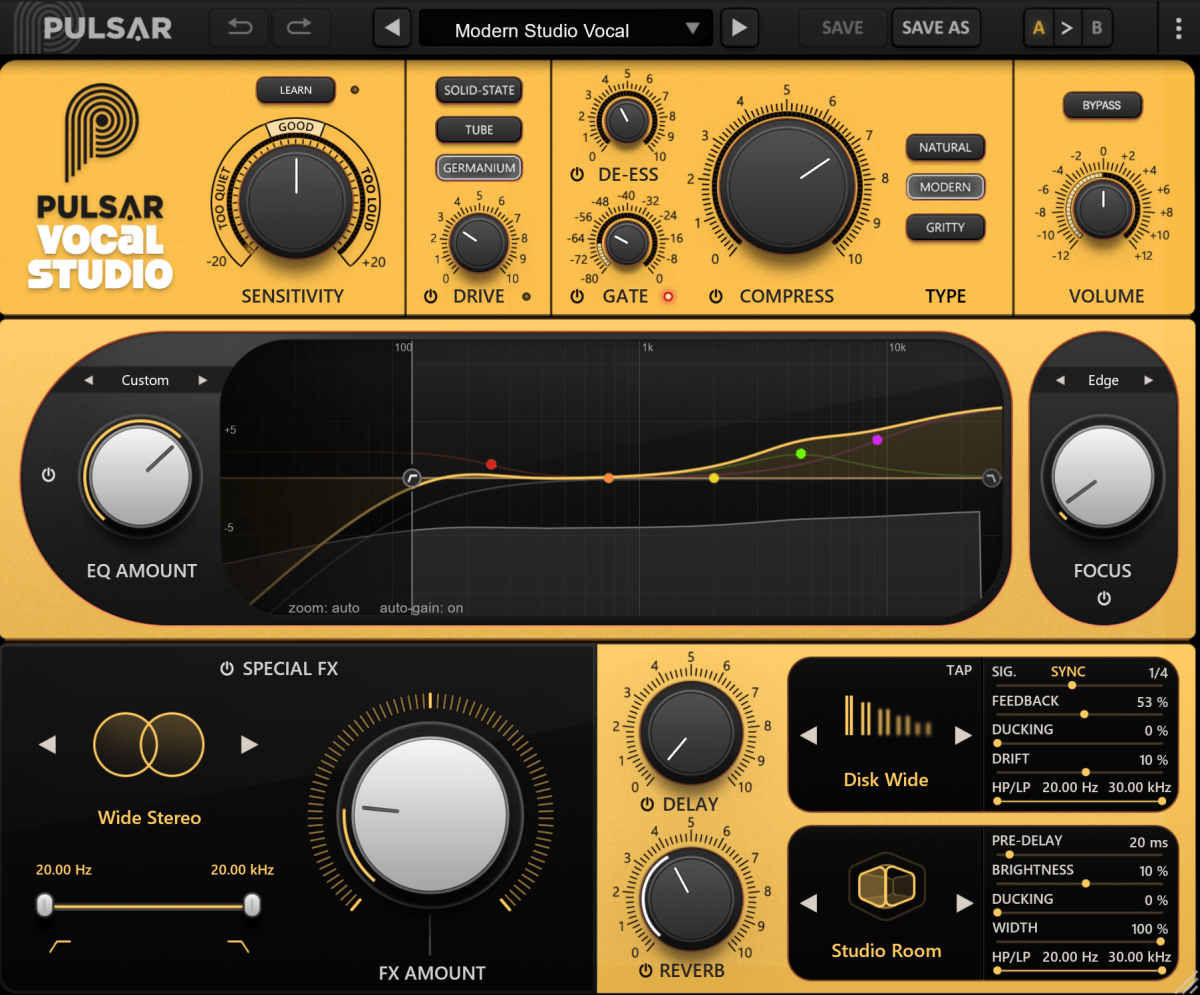
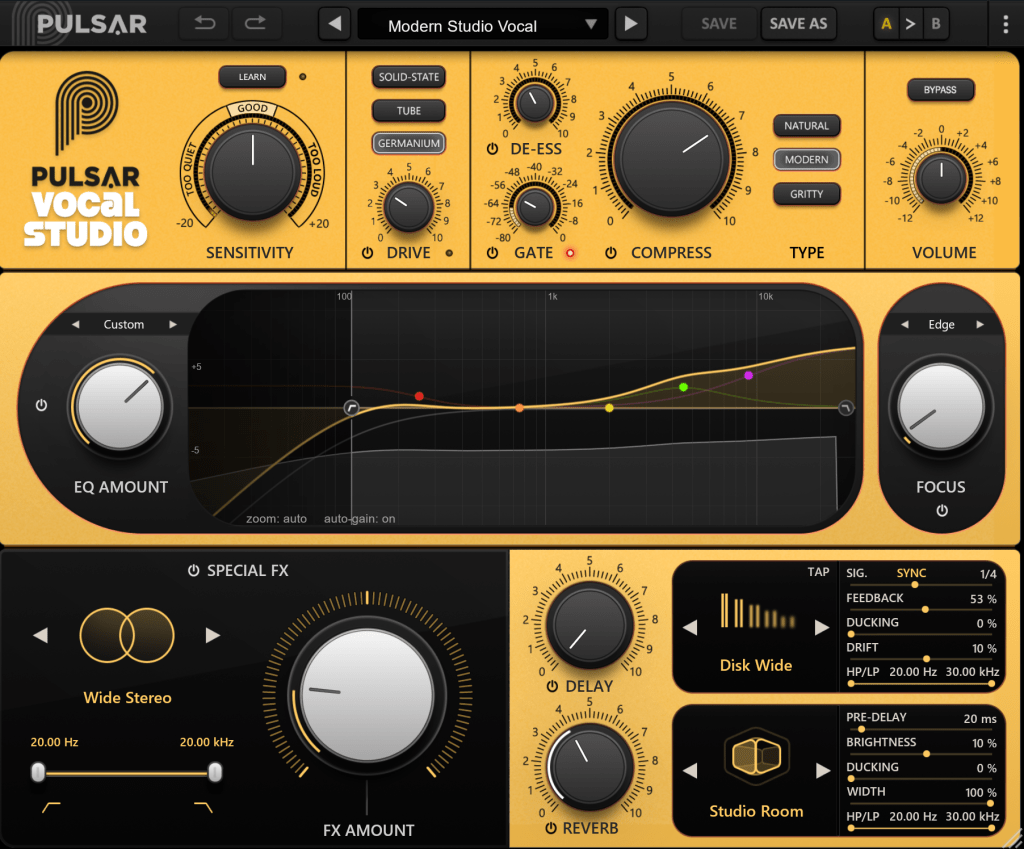
Think of this as an all-in-one vocal effect and channel strip. It’s packed with everything you need: compression, EQ, gain, saturator, gate, de-esser, delay, reverb—you name it, it’s here.

Top Section

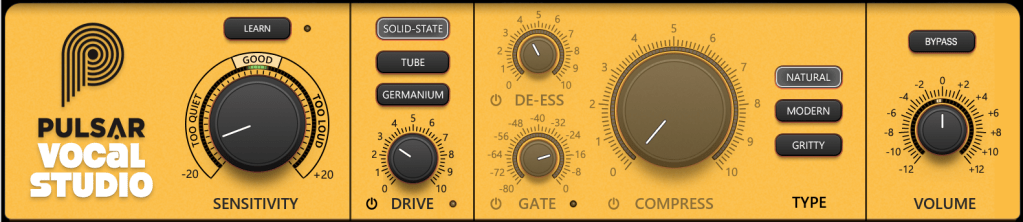
Let’s break down the controls in the Top Section of the Pulsar Vocal Studio interface:

  1. Sensitivity: Automatically adjusts volume to maintain consistent levels, working independently of the compressor.
  2. Drive: A saturator offering three distinct flavors—Solid State (inspired by Neve-style circuits), Tube (emulating a pentode preamp), and Germanium (mimicking a germanium transistor preamp).
  3. De-ess: Reduces sibilance by attenuating frequencies around 4kHz and above.
  4. Gate: Exactly what it sounds like—a gate! 😄
  5. Compress: Offers three compression modes—Natural (FET-based, smooth and transparent), Modern (faster attack/release with added saturation), and Gritty (the fastest and most aggressive for a bold effect).
  6. Volume: Adjusts the final output level of the plugin.

Mid-Section

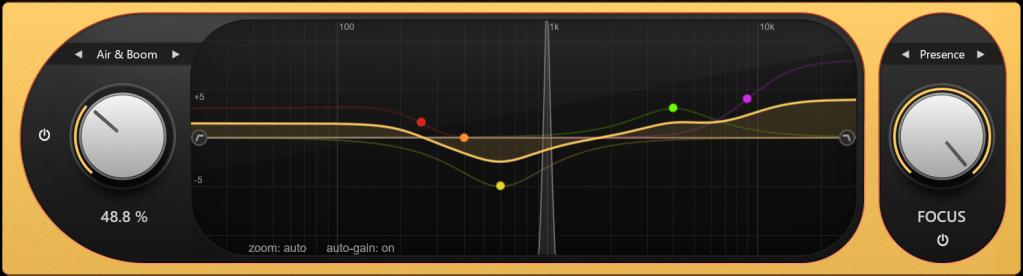
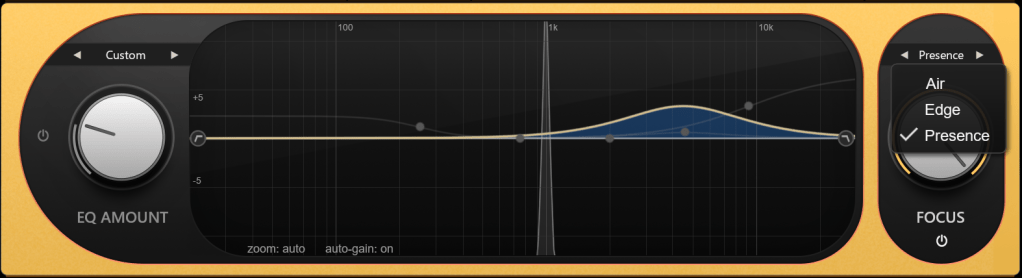
On the left, you’ve got controls for how much EQ to apply. On the right, the Focus section offers three dynamic EQ presets: Air, Edge, and Presence.

Bottom Section

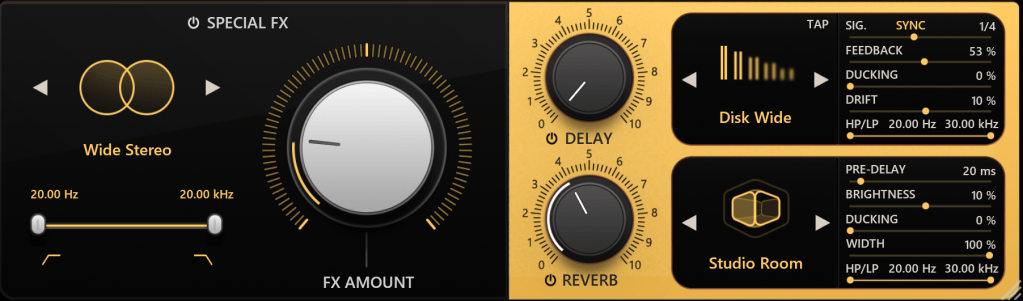
Down below, the Special FX section lets you add creative effects.

  • Delay: Includes standard delay, ping-pong, slap delay, and more.
  • Reverb: Offers a wide range of types—hall, plate, spring, room, chamber, ambience, you name it.

All delay and reverb parameters are fully tweakable, of course.

Impressions

This plugin is a bit heavy on CPU due to its many effects, but if you think of it as a one-stop shop for an entire vocal track, it’s well worth it. Personally, I think the reverbs are so clean and polished that I’d love to see them sold separately at a lower price. They’re some of the best digital reverbs I’ve come across!

Bonus Deal!

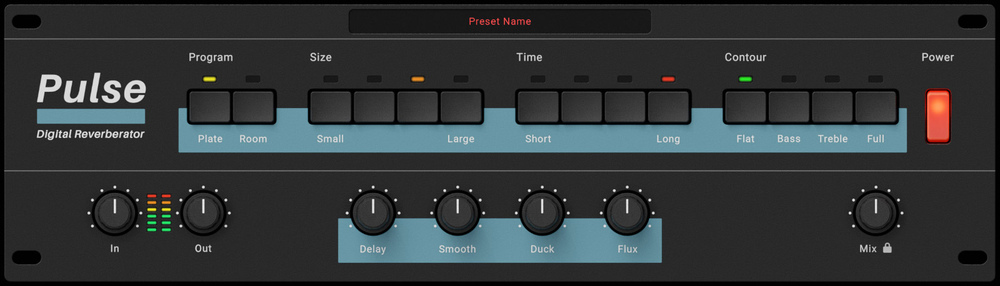
This month, if you buy any plugin from Plugin Boutique, you’ll get Wave Alchemy’s Pulse—a faithful recreation of the Lexicon PCM-60 reverb—for free. Don’t miss out!

If you’re in the market for a vocal channel strip, Pulsar Vocal Studio is definitely worth checking out.

Catch you in the next post! 😊

Basics of Mixing – 14.3 Oversampling and Upsampling

Hi! This is Jooyoung Kim, a mixing engineer and music producer.

During my undergraduate studies in physics, I often used my extra credits to take music courses. Looking back, I regret not taking any Python classes—especially now that I’m studying plugin development, data processing, and methodology. Without AI tools, I wouldn’t have been able to start coding at all.

Currently, I’m in the final semester of my master’s program in the Department of New Media Music. I’m not too worried about my thesis, so this semester, I’m focusing on a personal project: developing a saturation plugin in my own way. I know it will be challenging, but I also aim to write a paper introducing a new methodology for building audio plugins.

Now, let’s talk about oversampling and upsampling. This article is based on my book, ‘Basics of Mixing‘, released in South Korea.

What are oversampling and upsampling?

Many audio plugins offer oversampling, but what exactly is it, and how does it work?

  • Oversampling: Increasing the existing sample rate by an integer multiple (e.g., ×2, ×4, ×8, etc.).
  • Upsampling: Increasing the existing sample rate, but not necessarily by an integer multiple.

In oversampling, the process inserts zeros into the empty values and interpolates them using a low-pass FIR (Finite Impulse Response) filter..

It’s me! The right one is the photo on the left doubled horizontally.

Think of it like stretching an image by an integer factor: the blank spaces are filled in through interpolation. After processing the audio, the plugin then downsamples the result back to the original rate.

On the other hand, upsampling converts the sample rate to another rate through interpolation. This is a different process from oversampling.

Why do we use oversampling and upsampling?

Oversampling helps reduce aliasing and creates a more natural-sounding result, while upsampling is primarily used for changing the sample rate.

However, does an oversampling function always make a plugin sound better? That’s a different discussion.

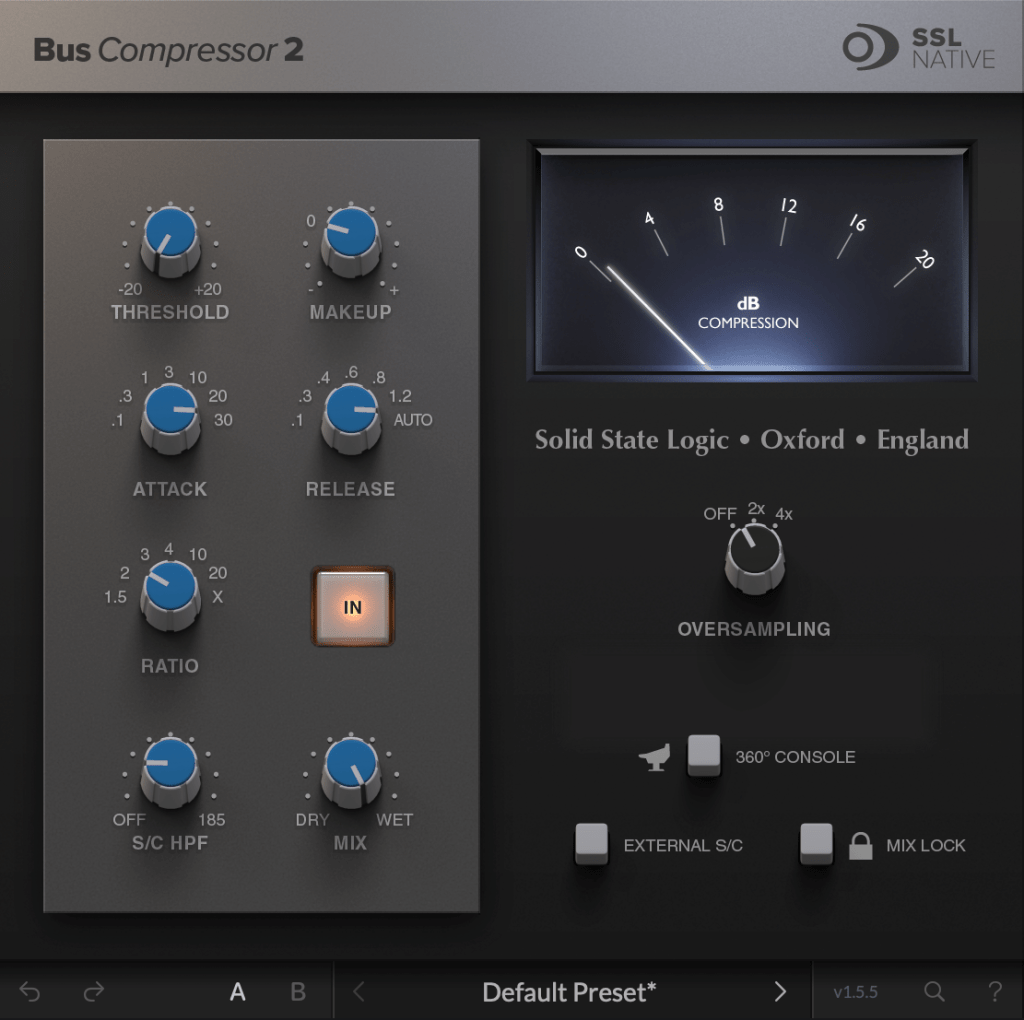
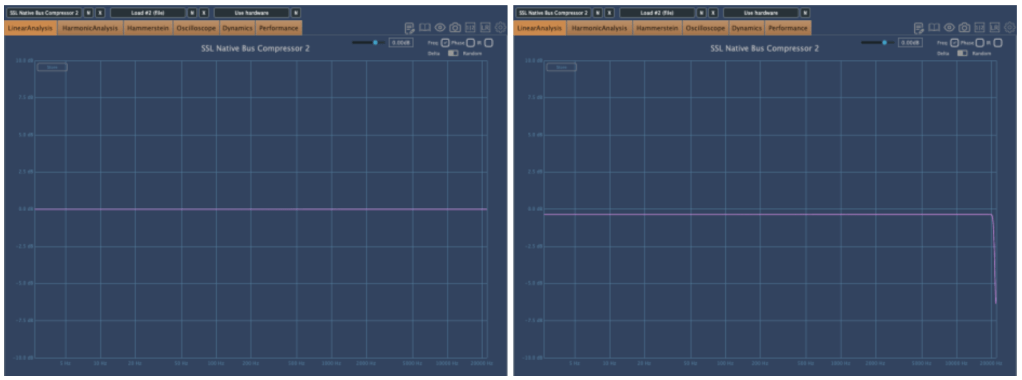
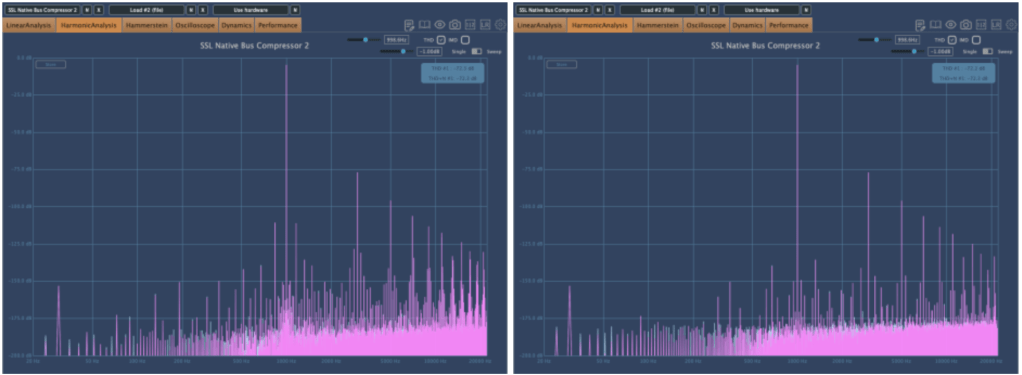
For example, the SSL Bus Compressor 2 plugin provides an oversampling option. Below, you can see the frequency response of the plugin:

The left graph shows the response without oversampling. The right graph shows the response with 2× oversampling.

Both graphs exhibit harmonic distortion at the same positions. While other measurements appear similar, even small differences between the two can result in noticeable changes in sound. In my experience, non-oversampled processing often sounds better.

That was a brief explanation of oversampling and upsampling! See you in the next post!

How to Use The Tape Machine Plugins?

Hi! This is Jooyoung Kim, mixing engineer and music producer.

A few days ago, I met my teacher, who taught me guitar and MIDI. We talked about various topics, including tape machine plugins. That conversation inspired me to write a blog post about using tape machine plugins.

If you purchase a plugin through a link in this article, I may receive a small commission.

Let’s dive in!

First, I wrote an article about tape saturation. If you wonder how it works, please read the post above.

UAD (Universal Audio Digital)

Recently, Plugin Boutique was having a bundle sale on tapes.

Among this bundle, I will talk about three: Oxide Tape Recorder, Studer A800 Tape Recorder, and Ampex ATR-102 Master Tape.

Oxide Tape Recorder

Oxide Tape Recorder is one of the best tape machine plugin made by UAD. The user interface of the Oxide Tape Recorder is simple and intuitive.

IPS means “Inches Per Second”. For example, when IPS is 15, the tape moves 15 inches per one second.

When EQ parameter is on NAB, left side is the frequency response of IPS 15, the other side is IPS 7.5
More gain at IPS 7.5
When EQ parameter is on NAB, left side is the harmonic distortion of IPS 15, the other side is IPS 7.5

You can see how IPS affects the frequency response and harmonic distortion.

When EQ parameter is on CCIR, left side is the frequency response of IPS 15, the other side is IPS 7.5
If the input gain is too high, compression acts like a soft clipper.

The EQ parameter has two different values: NAB(National Association of Broadcasters) & CCIR(Comité Consultatif International des Radiocommunications, Now ITU-R)

People used to emphasize high frequency by recording process with tape recorder. This is due to high-frequency loss caused by the tape head and the machine. And then, de-emphasize the high frequency when the costumer play the tape.

At those situations, the EQ called NAB & CCIR was used.

NAB was the standard of the electricity with 60Hz alternating current like USA, and CCIR was the standard of 50Hz alternating current like EU(European Union).

The NAB standard sounds smoother and warmer than CCIR, whereas CCIR sounds clearer and sharper than NAB. It means CCIR more emphasize the high frequency field. You can see how the two differ by the upper frequency response graph.

The NR parameter means just “Noise Reduction”. If it turns off, the noise occurs.

That’s all you need to know about the Oxide Tape Recorder plugin. Simple!

Ampex ATR-102 Master Tape

The parameters of the Ampex ATR-102 Master Tape are not as simple as those of the Oxide Tape Recorder. However, if you understand NAB, CCIR, and IPS, it’s easy to use.

Let’s see the parameters.

The record(input) and reproduce(output) knobs are located at the top of the plugin.

Down side of the plugin, there are buttons that enable detailed adjustments(open and close), and to choose NAB or CCIR.

The right side, you could change type of the tape, calibrate the volume, and choose the tape head width.

Based on 250 tape and NAB(when you choose IPS 30, couldn’t choice Emphasis EQ),

Left – IPS 3.75, Right – IPS 7.5
Left – IPS 15, Right – IPS 30

there are significant differences in frequency response.

When the tape speed is at IPS 15, this graph shows how the frequency response change by selecting NAB to the other(CCIR).

Input gain and output gain value also make some difference, but it’s not that important..

Compression characteristic is unusual – increase high-volume signals even more – however, it’s not a noticeable difference, so I’ll skip the explanation.

Studer A800 Tape Recorder

The parameter – tape type, calibration, IPS…

Left – IPS 7.5, Right – IPS 15
IPS 30

now it’s really simple. Isn’t it?

Now, without further ado, you can think of it as a friend that emphasizes the low range, and the frequency response changes like this depending on the IPS!

IK Multimedia

IK Multimedia makes various plugins like virtual instruments, mixing and mastering effects – their tape machine plugins are really great.

The total bundle sale started on Black Friday, but it’s still on sale. T-racks 5 MAX included in the total bundle includes a total of four tape machine plug-ins: Tape Machine 24, 80, 99, and 440. Let’s look around.

Parameters seems similar.. Tape types, IPS..

IPS 15 in GP9 tape

True stereo parameter makes the difference response between left and right, and transport modeling makes the variation value of the volume by time.

IPS 30 in GP9 tape

The other plugins’ parameters are same as Tape Machine 24 plugin. Just the machines are different, and they make difference in frequency response.

Simple!

Softube Tape

Softube’s Tape plugin is very clean tape machine plugin. The harmonic distortion quantity could changeable by Amount parameter, and tape type could be selected by the Type parameter. (Type A is clean side, B has quit a lot of low frequencies, C has the characteristic between A and B)

Left – Default type A, Right – Default type B
Default type C

Tape speed could be changed by IPS too.

Type A tape Left – IPS 7/8, Right – IPS 3 3/4
Type A tape Left – IPS 7 1/2, Right – IPS 15
Type A tape IPS 30

Waves also has a famous tape machine plugin called Kramer and J37, but as I was writing this, the patterns became too similar, so I will omit them.

However, there is a parameter called Bias that exists only in Waves.

If you wonder about the bias, please read upper article.

If you look at it so far, you will feel something. IPS, EQ and the tape type are everything about a tape machine.

I think that just remembering this will make it easier to use the tape plugins.

Thanks for reading! See you in the next post.