Basics of Mixing – 2.4 Speaker Placement and Listening Techniques

Hello, This is Jooyoung Kim, a mixing engineer and singer-songwriter.

To mix effectively, you need to listen to sound accurately.

What does it mean to listen to sound accurately? It can be a long discussion, but let’s focus on two main points:

  1. Minimize distortion (from the room, objects, speaker baffle, speaker unit limitations, etc.)
  2. Listen from the correct position.

These two principles form the foundation.

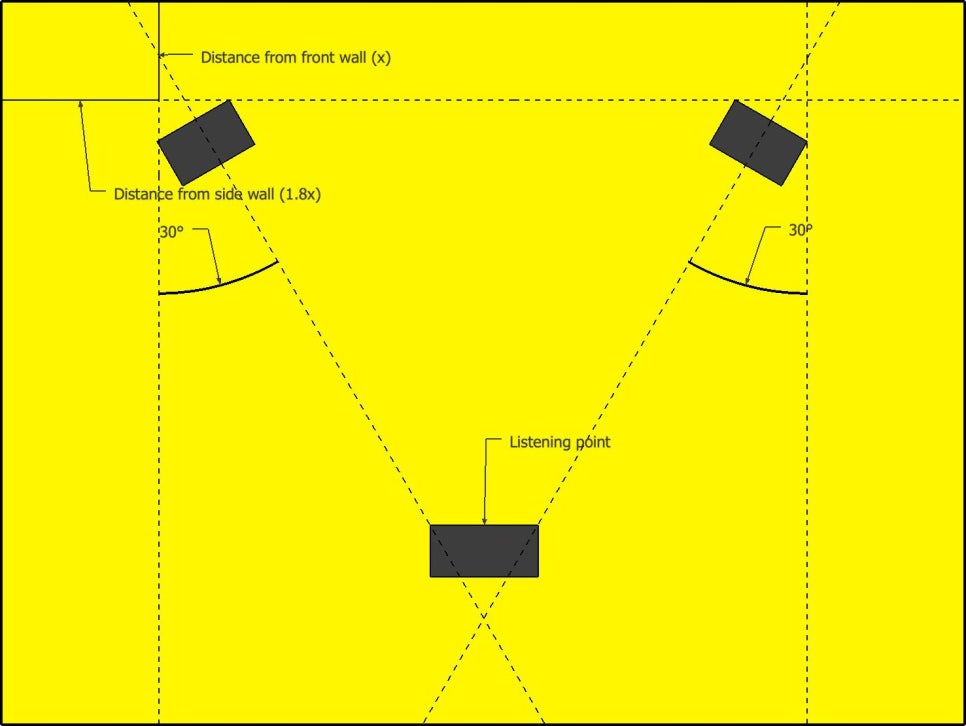
Generally, stereo speakers are arranged in an equilateral triangle. The angle marked as 30 degrees in the diagram above is called the Toe-In Angle. This angle can be adjusted slightly based on personal preference.

Additionally, the tweeter, which reproduces high frequencies, should be positioned close to ear level. This is because high frequencies are more directional and may not be heard well if the tweeter is placed too high or too low. Various stands are used to achieve this positioning.

However, recommended angles and placements can vary by manufacturer, so it’s best to start with the manual and then adjust as needed.

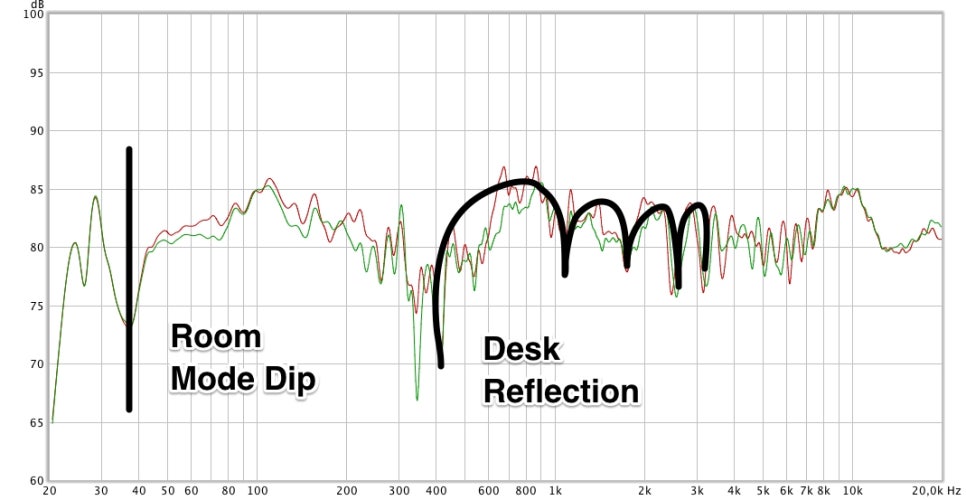
When changing placements, it’s important to measure and identify where the issues are. With some training, you can listen to a track and identify boosted or cut frequencies, giving you an idea of where the problems lie. Measurement, however, makes it easier to pinpoint specific issues you might miss by ear.

One of the simplest and free measurement programs is REW (Room EQ Wizard), which I introduced a long time ago.

You can use an affordable USB microphone like the miniDSP UMIK-1 for easy measurement, or, if budget allows, a measurement microphone like the Earthworks M50.

By measuring, you can understand various factors beyond just frequency response, such as phase, harmonic distortion, and reverberation time. This helps you identify and solve problems in your workspace.

Doing all this ensures you hear the sound as accurately as possible, allowing you to understand what proper sound and mixing should be.

So, you’ve set up your speakers correctly. How should you listen to the sound?

Of course, you listen with your ears, but I’m not just saying that. I’m suggesting you listen to the sound in layers.

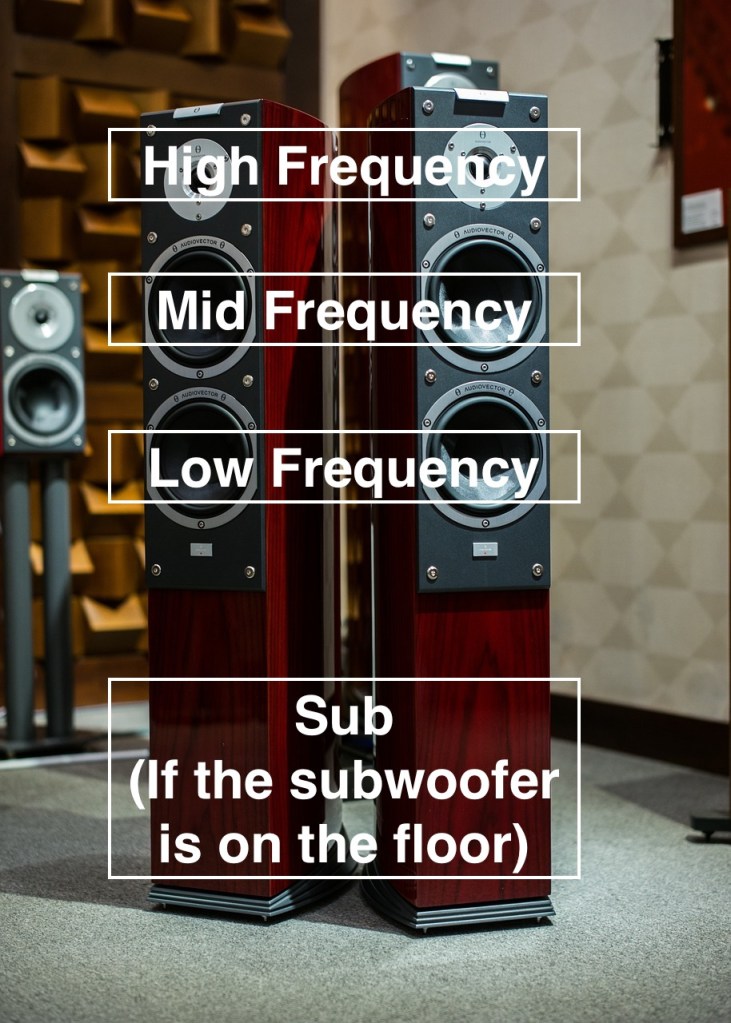
In a typical 2-way speaker, the tweeter is on top, and the woofer is on the bottom, so high frequencies come from above and low frequencies from below. Consequently, low-frequency instruments seem to be positioned lower, and high-frequency instruments higher.

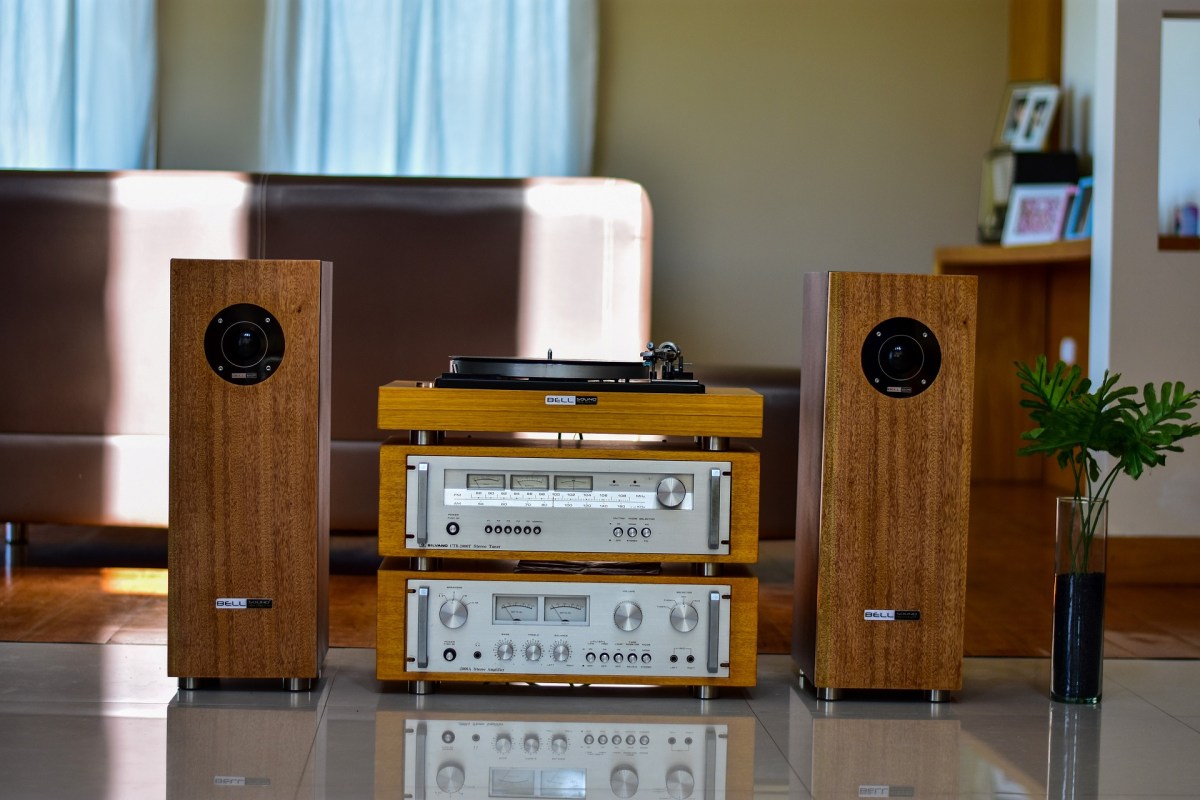
If your listening distance and room support it, well-made hi-fi tallboy speakers can make mixing easier.

That was about the vertical plane. Now, let’s talk about the front-to-back dimension.

When someone whispers in your ear versus speaking from afar, there are noticeable differences:

  1. Whispering sounds clearer (more high frequencies, less reverb)
  2. Whispering sounds louder.

These principles determine whether instrument images appear in the front or back. Panning also moves them left and right.

If you’re not familiar with this concept, try closing your eyes and identifying where each instrument is located in a mix.

Since stereo images vary with different speakers, it’s crucial to understand how your speakers reproduce images. Reference tracks are essential for this.

For example, I always listen to Michael Jackson’s albums and the MTV live version of “Hotel California” when I switch speakers. Michael Jackson’s songs are well-mixed for their age, and the live version of “Hotel California” is superbly mixed except for the vocals.

Let’s wrap it up for today. Creating the best acoustic environment in your room is essential for effective mixing.

My environment isn’t perfect either, but I’m continuously improving it..!

See you in the next post!

Basics of Mixing – 2.3 Digitalization of Sound

Hello, I’m Jooyoung Kim, a mixing engineer and music producer.

Today, I want to talk about how analog sound signals are digitized in a computer.

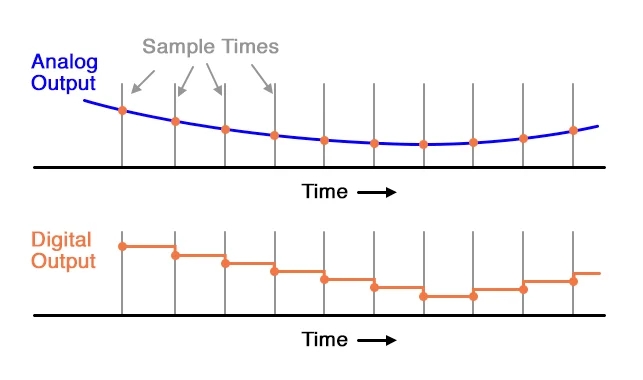
The electrical signals outputted through a microphone preamp or DI box are continuous analog signals. Since computers cannot record these continuous signals, they need to be converted into discrete signals. This is where the ADC (Analog to Digital Converter) comes into play.

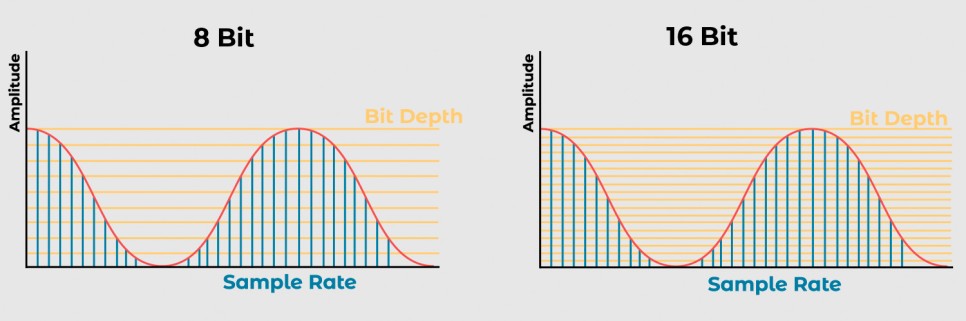
Here, the concepts of Sample Rate and Bit Depth come into the picture.

The sample rate refers to how many times per second the signal is sampled.

The bit depth refers to how finely the amplitude of the electrical signal is divided.

For example, consider a WAV file with a sample rate of 44.1kHz and a bit depth of 16 bits. This file records sound by sampling it 44,100 times per second and divides the amplitude into 65,536 levels (2^16).

A file with a sample rate of 48kHz and a bit depth of 24 bits samples the sound 48,000 times per second and divides the amplitude into 16,777,216 levels (2^24).

In a DAW (Digital Audio Workstation), these digital signals are manipulated. To listen to these digital signals, they need to be converted back into analog electrical signals.

This conversion is done by the DAC (Digital to Analog Converter), often referred to as a “DAC”.

The image above shows a simple DAC circuit that converts a 4-bit digital signal into an analog signal.

These analog signals can pass through analog processors like compressors or EQs and then go back into the ADC, or they can be sent to the power amp of speakers to produce sound.

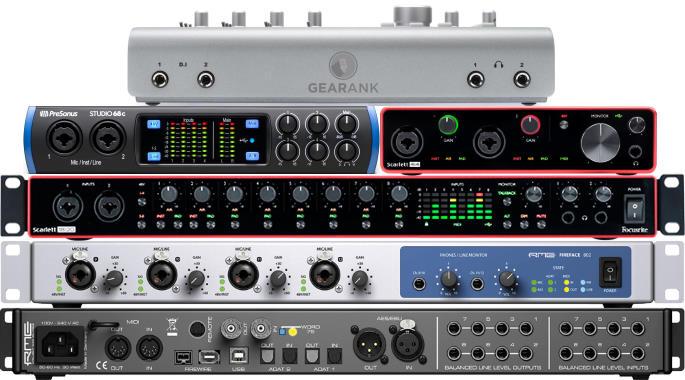
Various audio interfaces

Audio interfaces contain these converters, along with other features like microphone preamps, monitor controllers, and signal transmission to and from the computer, making them essential for music production.

Topping’s DAC

However, those who do not need input functionality might use products with only DAC functionality.

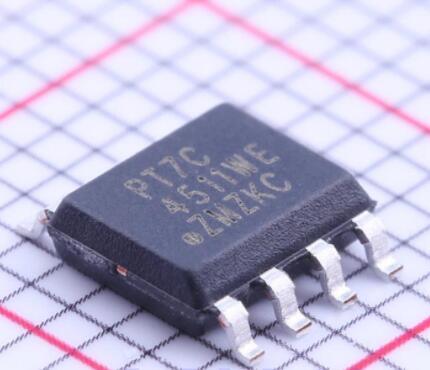
Inside these digital devices, there are usually IC chips that use a signal called a Word Clock to synchronize different parts of the circuit.

To synchronize this, devices called Clock Generators or Frequency Synthesizers are used.

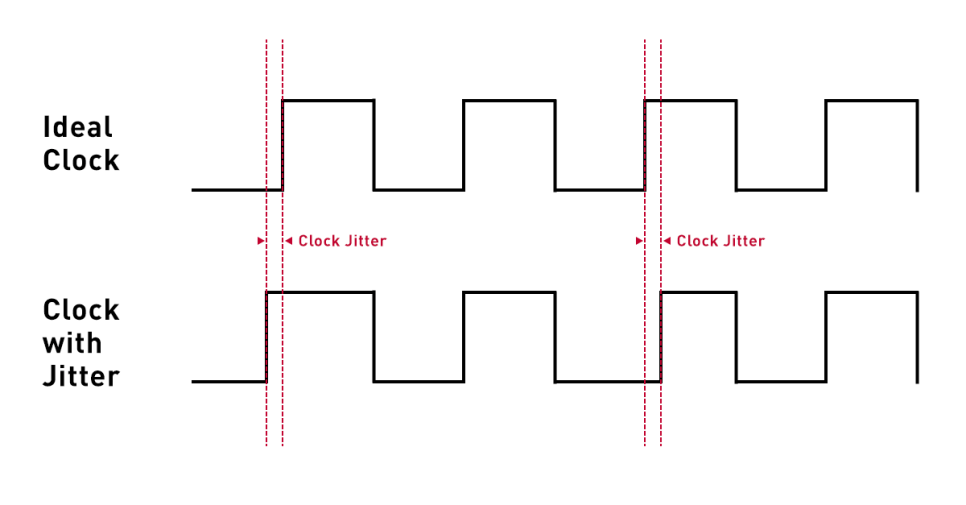
In a studio, there can be multiple digital devices, and if their clocks are not synchronized, it can cause a mismatch called jitter. Jitter can result in unwanted noises like clicks or cause the sound to gradually shift during recording (I experienced this while recording a long jazz session in a school studio where the master clocks of two devices were set differently).

To prevent this, digital devices are synchronized using an external clock generator. If you are not using multiple digital devices, the internal clock generator of the device should suffice, and there is no need for an external clock generator.

An article in the journal SOS (Sound On Sound) even mentioned that using an external clock generator does not necessarily improve sound quality.

Today, we covered Sample Rate, Bit Depth, ADC (Analog to Digital Converter), DAC (Digital to Analog Converter), Word Clock, and Jitter.

While these fundamental concepts can be a bit challenging, knowing that they exist is essential if you’re dealing with audio and mixing. If you find it difficult, just think, “Oh, so that’s how it works!” and move on.

See you in the next post!

Basics of Mixing – 2.2 Phase and Interference

Hi, This is Jooyoung Kim, mixing engineer and music producer.

Today, following our discussion on waves, I’d like to talk about phase and interference.

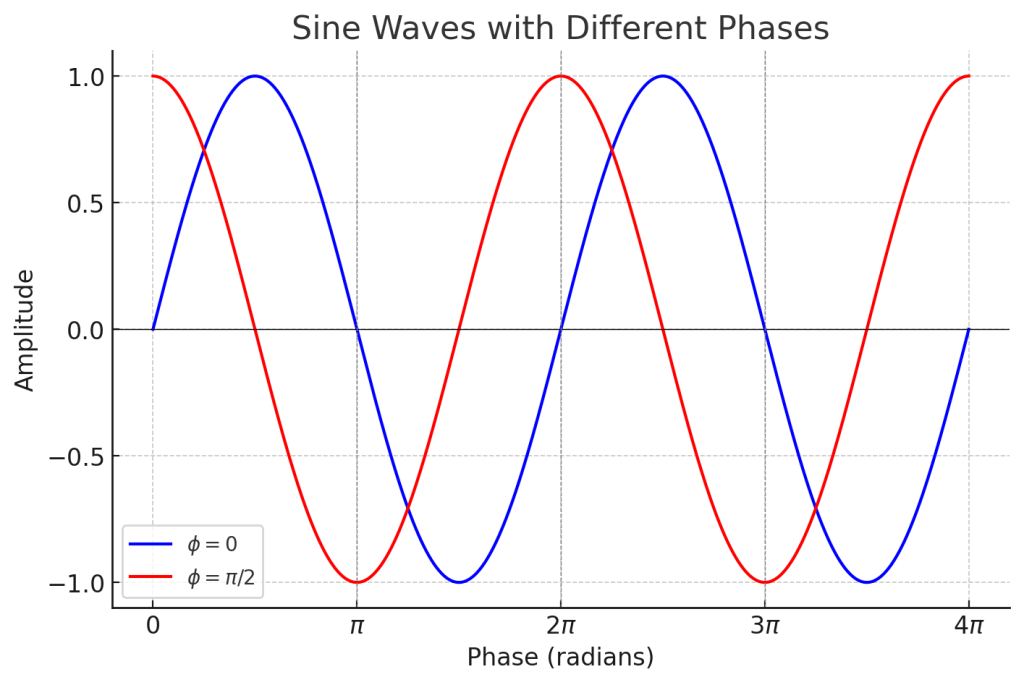
In the previous post, we talked about phase and how it represents the ‘position and state’ of a wave, which can be expressed in degrees.

When two different waves (sounds) meet, this is called interference. The concept of phase is very useful in explaining interference.

Let’s first look at the case where two waves with the same frequency and direction of travel interfere.

Left: Constructive Interference; Right: Destructive Interference

On the left, you see two waves with the same phase meeting, while on the right, you see two waves with opposite phases (180 degrees or π apart) meeting.

On the left, the amplitude doubles, and on the right, it becomes zero. This type of interference, where the amplitude increases, is called ‘constructive interference,’ and when the amplitude decreases, it is called ‘destructive interference.’

When the amplitude increases, the sound becomes louder, and when it decreases, the sound becomes softer. Therefore, when a sound with the opposite phase to the original sound is played together, the sound is canceled out.

Why should a mixing engineer know this?

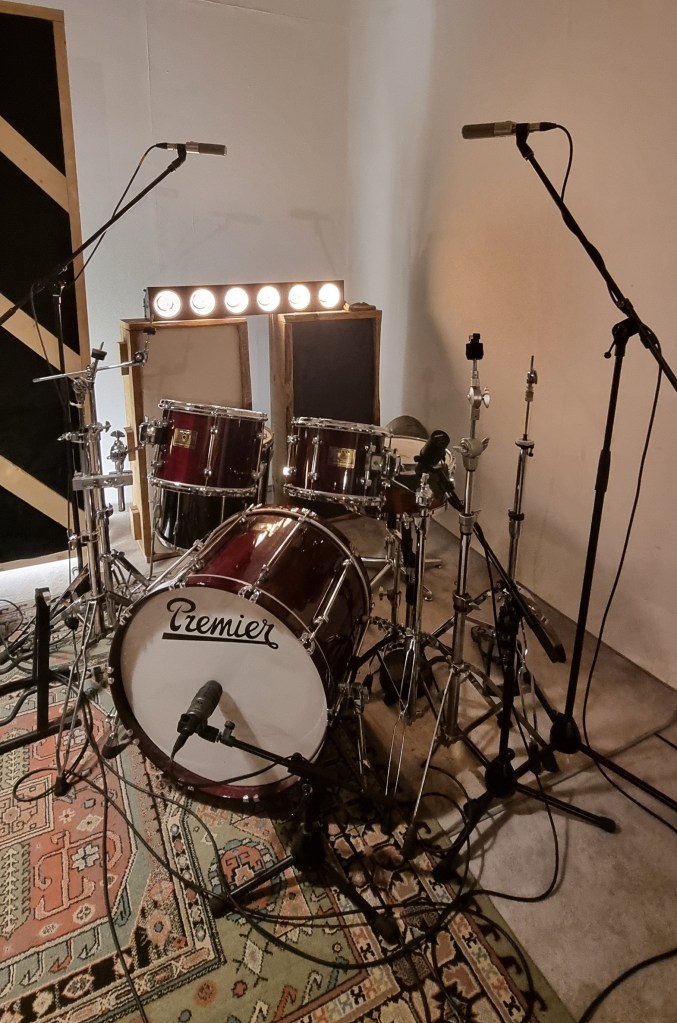
Around April, I received a request for mixing for live recording at a small competition, and this is a photo of the drum recording setup.

When recording drums, multiple microphones are often used for the kick and snare, among other elements.

When these recorded sounds are combined, the recorded sources can interfere with each other, leading to destructive interference, which weakens the sound. Hence, it’s essential to align the phase of each track.

You can easily understand proper phase alignment by listening.

I’ve included a YouTube video because creating my own example would be too time-consuming. In the video, the initial sound you hear is a properly phase-aligned snare, while the subsequent sound shows a snare with phase misalignment resulting in destructive interference.

Therefore, when conducting multi-track recording, it’s crucial to check the phase of all tracks against a reference track.

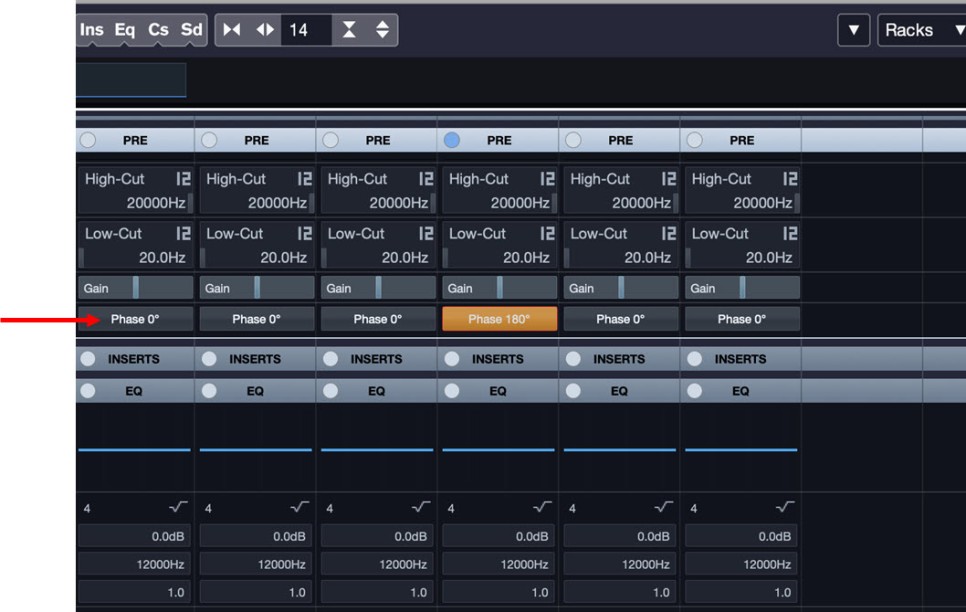
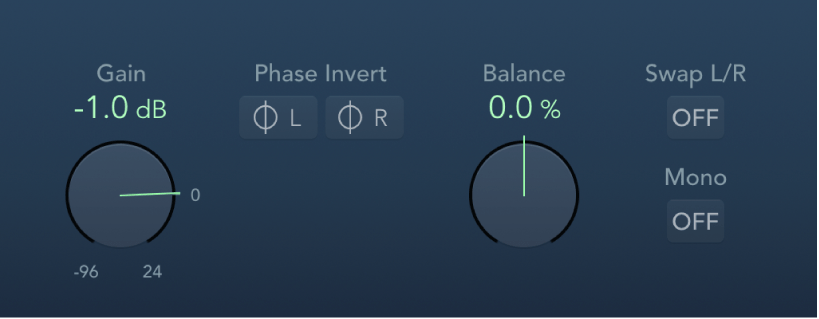
In Cubase, you can change the phase in the mixer window using the Pre-phase button. In Logic, you use the Phase Invert button in the Gain plugin.

In Pro Tools, there’s a button (Φ) on the track itself to invert the phase. Other DAWs also have waveform editing functions to flip the phase.

That’s all for this post. See you in the next article!

Basics of Mixing – 2.1 Wave

Hello, This is Jooyoung Kim, a mixing engineer and music producer.

To effectively mix, it’s essential to understand the nature of sound. Today, I’d like to talk about waves.

What is a wave?

There are various ways to define it, but a wave is fundamentally a method of transferring energy. When energy is transferred, some ‘things’ that carries this energy vibrates, and those ‘things’ is called the “medium.”

The medium for water waves is water!

There are two types of wave:
– Transverse Wave
– Longitudinal Wave

If the direction of the medium’s vibration and the direction of the energy’s travel are the same, it’s a longitudinal wave. If they are different, it’s a transverse wave.

Sound is a longitudinal wave with air as its medium. However, representing a longitudinal wave as a waveform can be complex, so in a DAW, it’s often converted into a transverse wave for simplicity.

A waveform commonly seen in DAWs

From now on, when explaining waves, I’ll use the transverse wave model. Although sound is a longitudinal wave, think of it as being converted into a transverse wave for easier understanding.

Each Circles(Reds, Greens) have same ‘Phase’

The first concept you need to understand is ‘phase.’

When I first learned physics, this was a confusing concept. According to my high school physics teacher, phase represents the ‘position and state‘ of a wave.

Simply put, if the movement direction and position of the medium at a specific point are the same, the phases are said to be identical.

Phases are expressed in degrees, which relates to representing waves as simple harmonic motion.

If the image is confusing, think of it as: “Waves can be represented by rotational motion, and thus can be expressed in degrees.”

All waves can be expressed as a combination of simple harmonic motions. However, delving into this topic would be too lengthy, so I’ll skip it for now.

You might wonder why understanding phase is important. It’s because it helps define other terms related to waves.

The shortest distance between points with the same phase is called the ‘wavelength.’ The shortest time to reach the same phase again is called the ‘period.’ The number of times the phase changes per second at a given point is called the ‘frequency.’

λ(lambda) is wavelength
T(time) is period

For instance, if a sound has a frequency of 1000 Hz, it means the sound vibrates 1000 times per second, and it takes 0.001 seconds for one vibration.

In waves, if you divide the speed by the frequency, you can find the wavelength. The speed of sound at room temperature is roughly 340 m/s, so with a simple calculation, you can find the wavelength for a specific frequency. Conversely, if you know the wavelength, you can find the frequency.

Mixing engineers might wonder why they need to calculate wavelengths when they only need to know the frequency. This is related to studio resonance.

When the wavelength’s length matches the room dimensions in specific ways, resonance occurs. This is known as Room Modes.

There are lots of articles about Room Modes

If you notice resonance at a specific frequency while listening or mixing, you can calculate the wavelength and compare it to your room dimensions. This helps determine if the issue is with the recording or the room itself.

There are websites that calculate these for you, but understanding the principle allows you to make calculations even in irregular-shaped rooms or environments where you can’t use such tools.

Today, we covered the concepts of phase, wavelength, period, frequency, and room modes.

I’ll stop here for now. See you in the next post!