2024 Year in Review

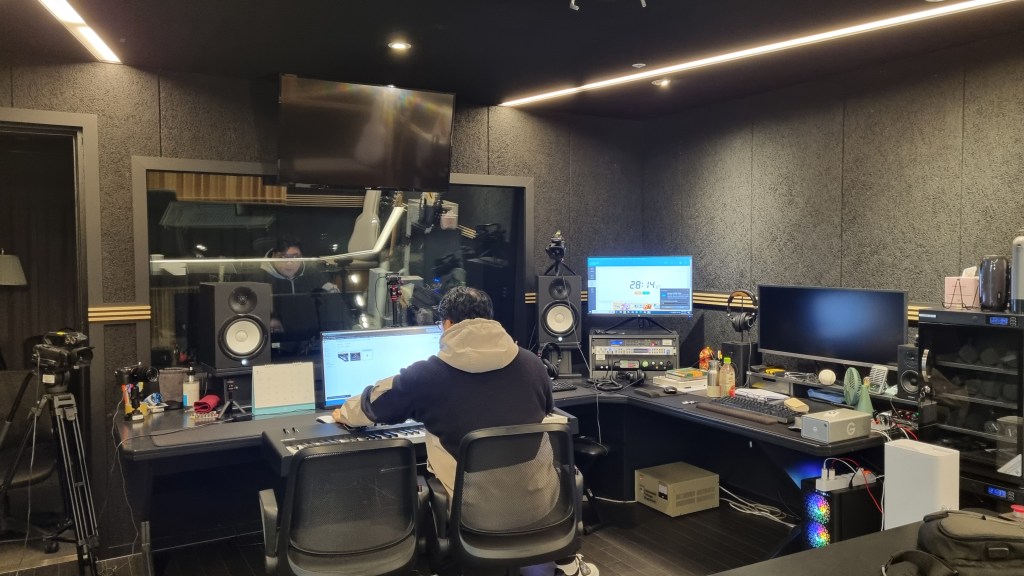
Hello! I’m Jooyoung Kim, an engineer and music producer.

It’s already the last day of 2024…
It feels like I’ve barely done anything, yet the end of the year has come around again. 😊
This year, I want to take a moment to look back on what I’ve done.


First Half of the Year

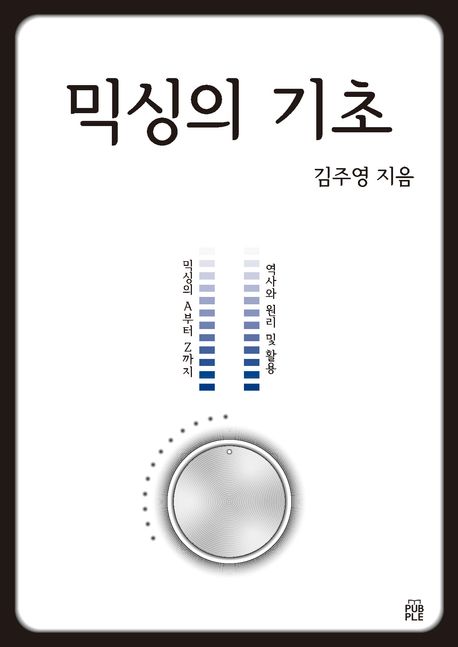
In January, I started writing introductory posts about mixing techniques.
I’d been wanting to publish articles elsewhere, but after receiving rejections from various outlets, I decided to focus on writing consistently on my blog instead.

I lost count of how many times I revised those posts! Eventually, I submitted them to Kyobo Bookstore’s POD (Print on Demand) service. To my surprise, Joongpil Goo, an engineer from Klang Studio with extensive experience as an SM engineer, graciously wrote a recommendation for the book. Even now, it feels surreal! 😊

This was finally completed by late September, and it was quite an intense journey just to publish a single book.

From January to April, I worked with a studio called Studio Dolphin, producing YouTube videos where AI collaborated with indie musicians to create songs.
We used Soundraw for the AI-generated music, ChatGPT for lyrics, and melodies were composed by indie musicians. The challenge was to create a full song in just 90 minutes.

I participated as both an engineer and a panelist, but unfortunately, the videos didn’t garner much attention, and they’ve since been taken down.

At the start of January, I was extremely busy with various recording and mixing tasks for school projects. In February, I spent a lot of time preparing paperwork to apply for government-sponsored projects. Sadly, none of these applications were successful, which left me feeling rather deflated.

In March, I returned to school, and things got busier from there.

In May, I launched my English blog and started promoting Plugin Boutique products more actively, which kept me even busier.


Summer

From July to August, I worked on producing Danny Boy’s EP from start to finish.
I handled everything—recording, arranging, mixing, and mastering. 😊

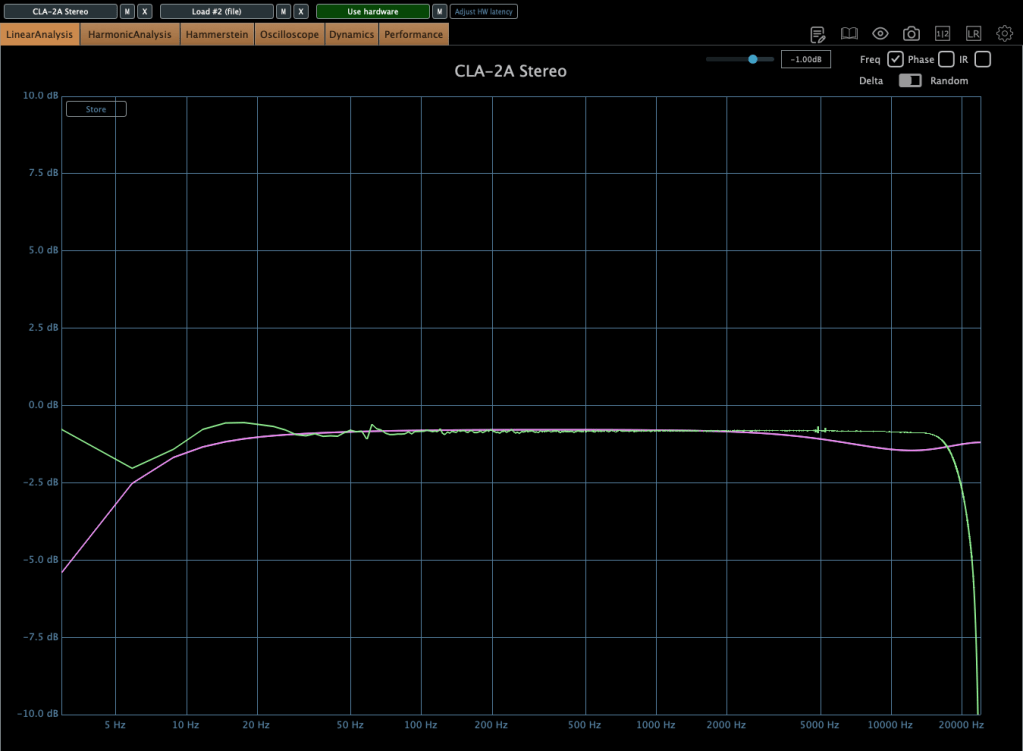
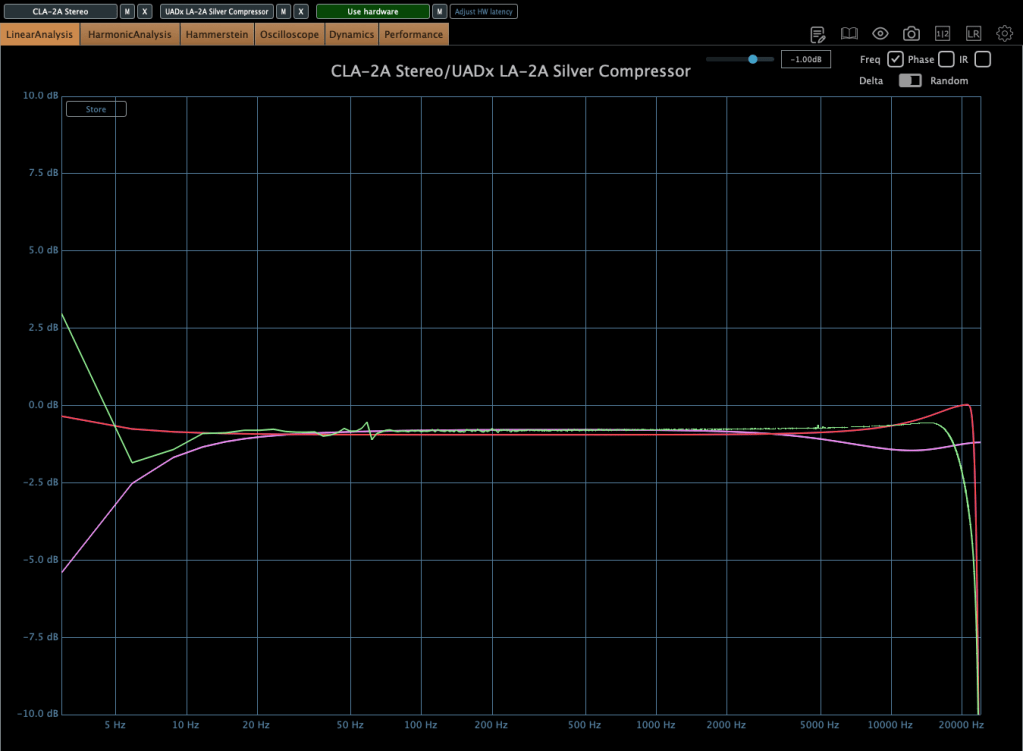
At the same time, I collected measurement data for my thesis. The data turned out well enough that I’m now preparing to submit it to an international academic journal.

While processing the data, I found myself delving into coding—a field I never thought I’d explore! Surprisingly, tools like Copilot and ChatGPT were lifesavers. At first, I barely understood anything, but after asking countless questions, things started making sense. 😊


Second Half of the Year

September was tough. I applied for several positions but didn’t get any of them. My final interview was with the Gyeonggi Arts Center, but, well… things didn’t work out. Back in May, I’d also made it to the final round for a position at Kumho Art Hall at Yonsei University but was ultimately rejected. I guess that’s just how life goes. 😊

In October, I filmed a music video, and November passed without anything particularly noteworthy.

In December, I wrote a short paper about loudness in audio and submitted it to a domestic academic journal. It was accepted and will be published in early January.

Also, during this semester, a professor from Sorigeo joined the faculty, and I took his class. In collaboration with him, I gathered data for another research paper, spending two days on measurements. The data looks promising, but I haven’t organized it yet. Once I do, I plan to publish another paper and share the details. 😊

In addition to all this, I continued working on my own music, doing external mixing/mastering, composing/arranging, and providing guide vocals.


Unforgettable Projects

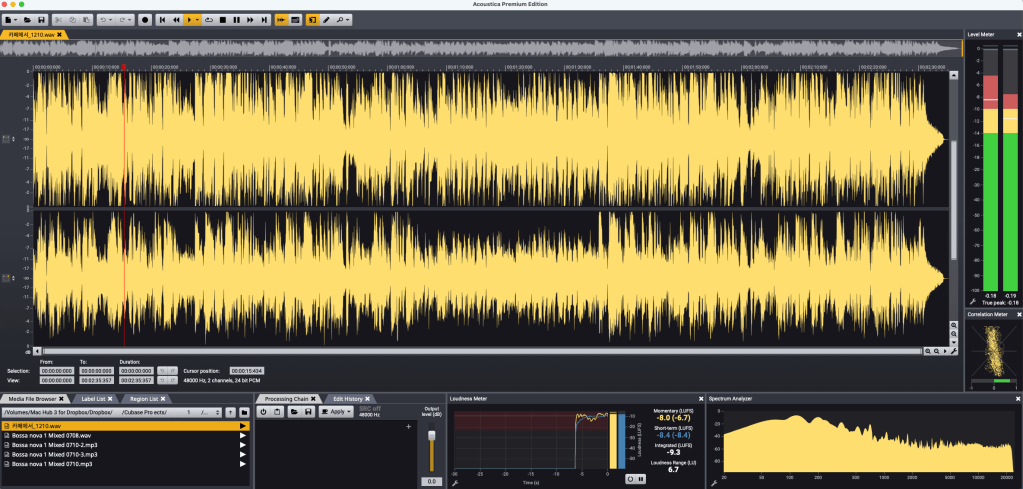
One of the most memorable projects this year was mastering the EP for the Bulkuksa Team’s Random Game. My favorite track was definitely “Microdust.”

A heads-up: the song contains explicit language. 😊

A friend had asked if I could master the track using only an MP3 demo, as they’d lost the original files. I was initially concerned about the sound quality but was blown away by how creative the music was. I couldn’t say no!

Some tracks were well-balanced, while others were completely off, but I managed to improve them significantly through proactive mastering. While the sound quality wasn’t ideal due to the limitations of MP3, the sheer fun of the music made up for it. 😊
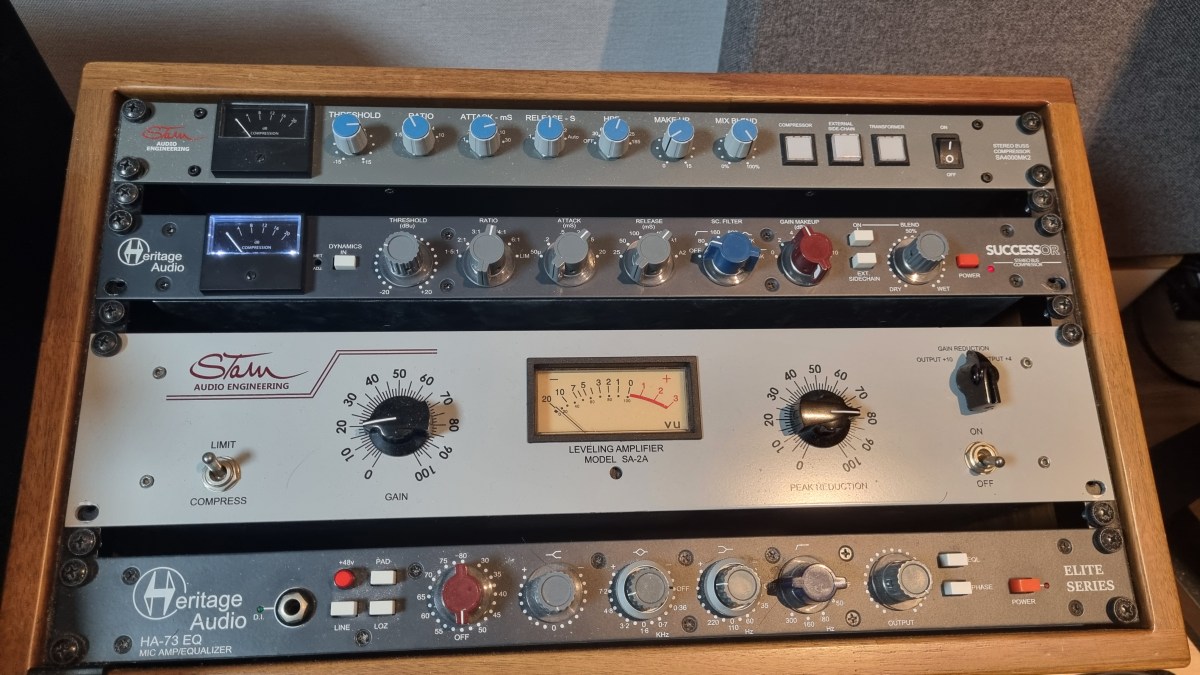
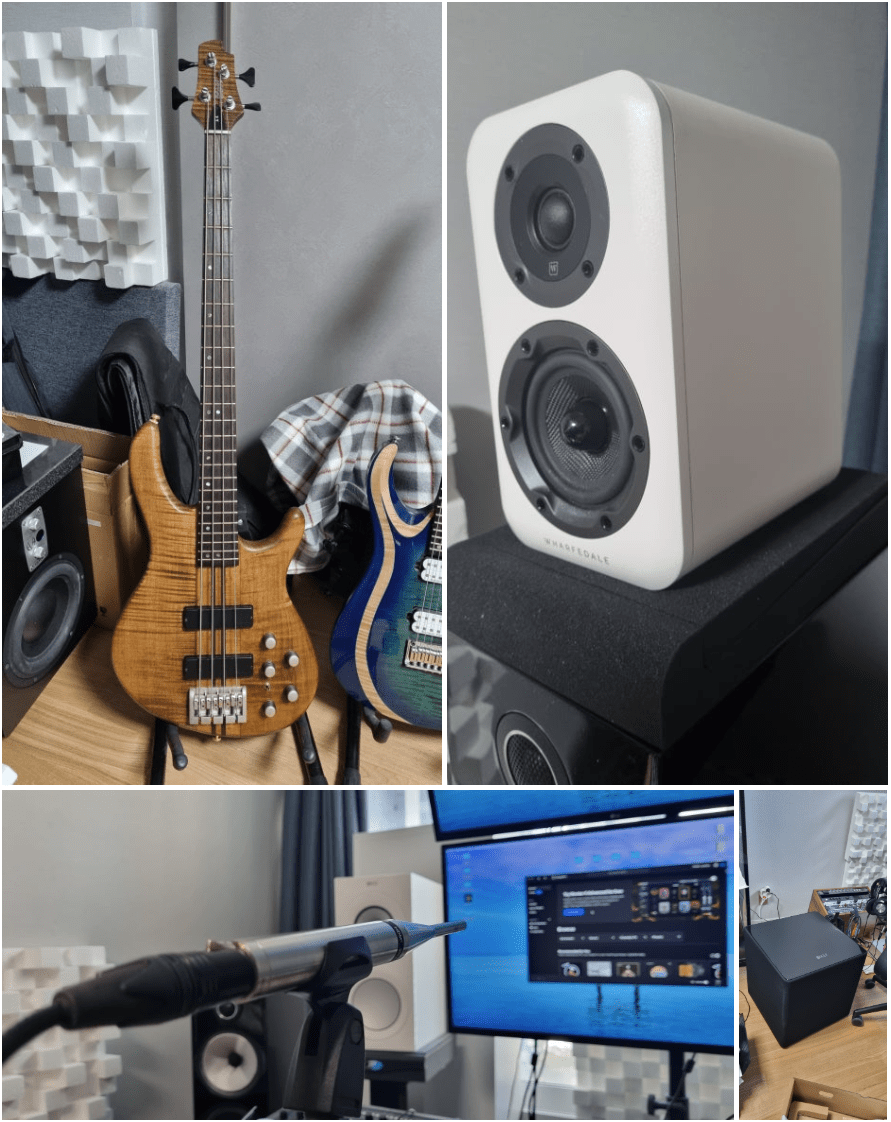

Gear Purchases

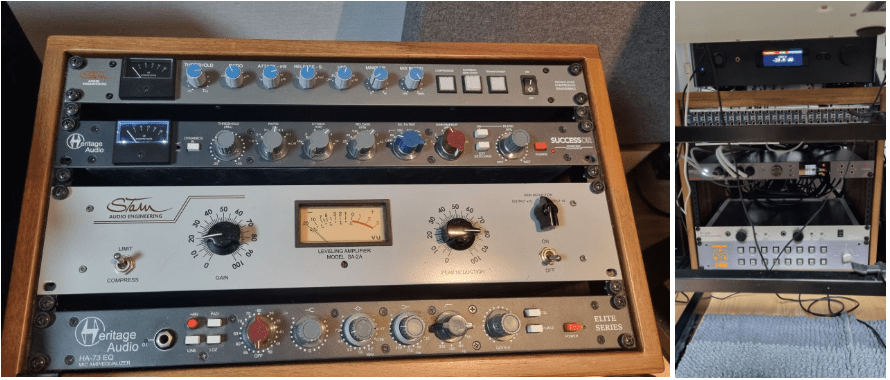
  1. Stam Audio SA-4000 MK2 Compressor
  2. KEF Kube 15 MIE Subwoofer
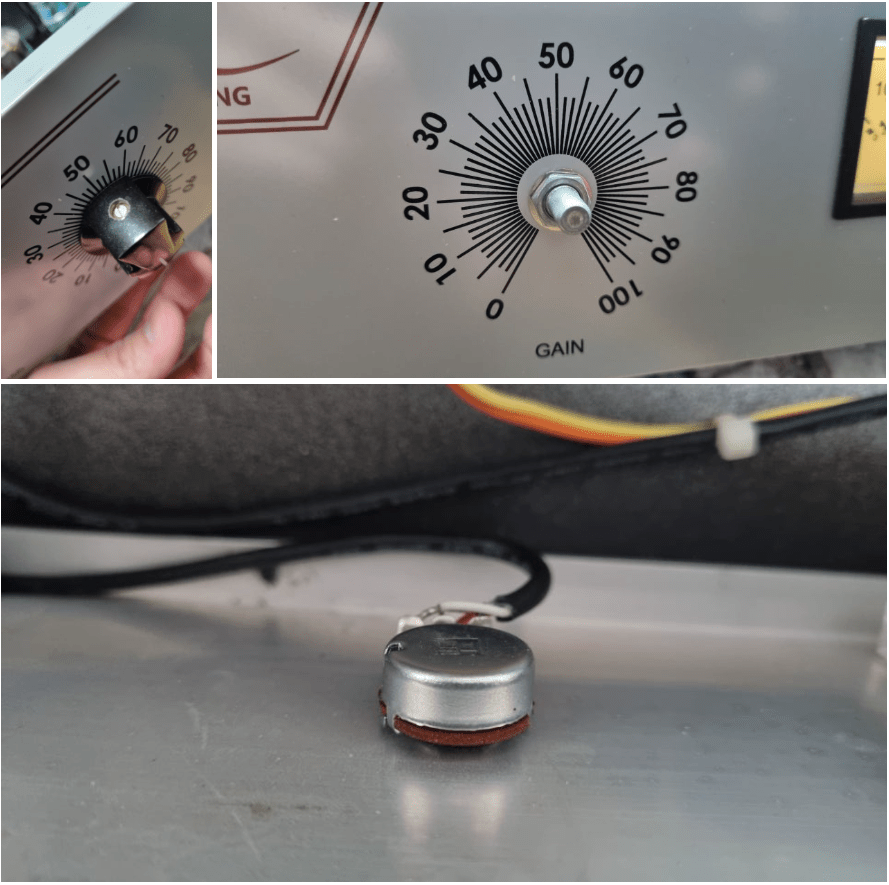
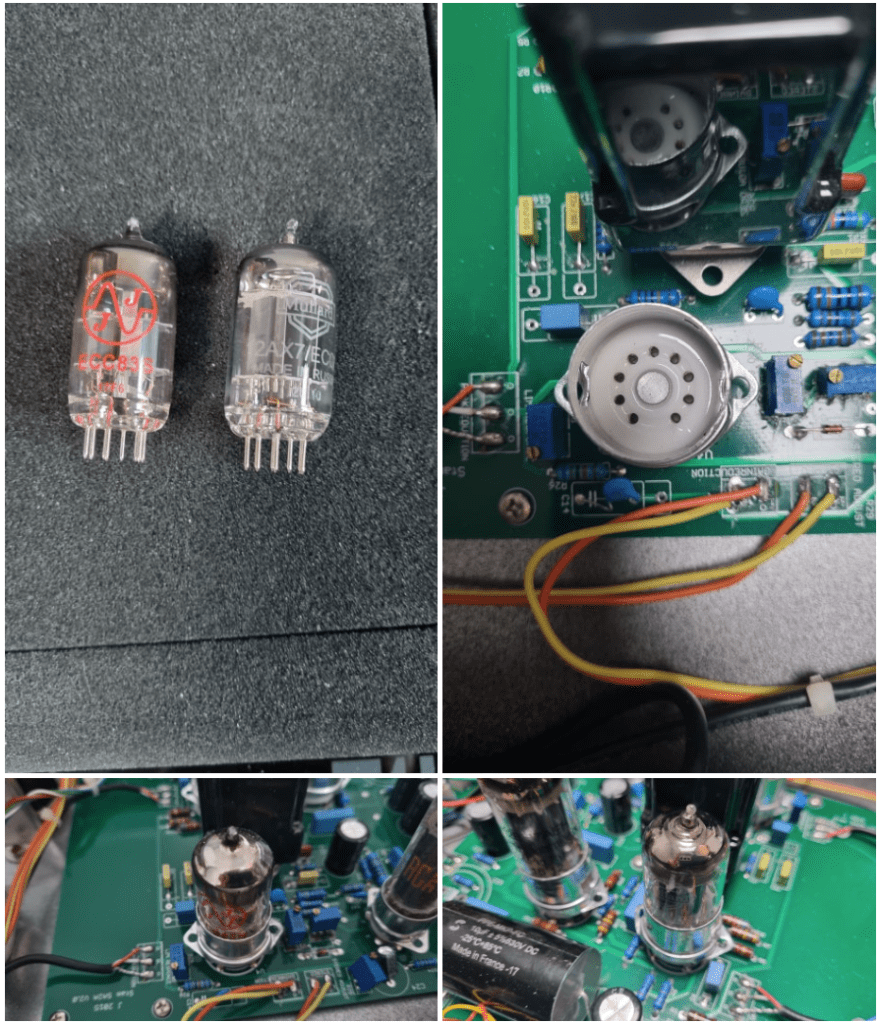
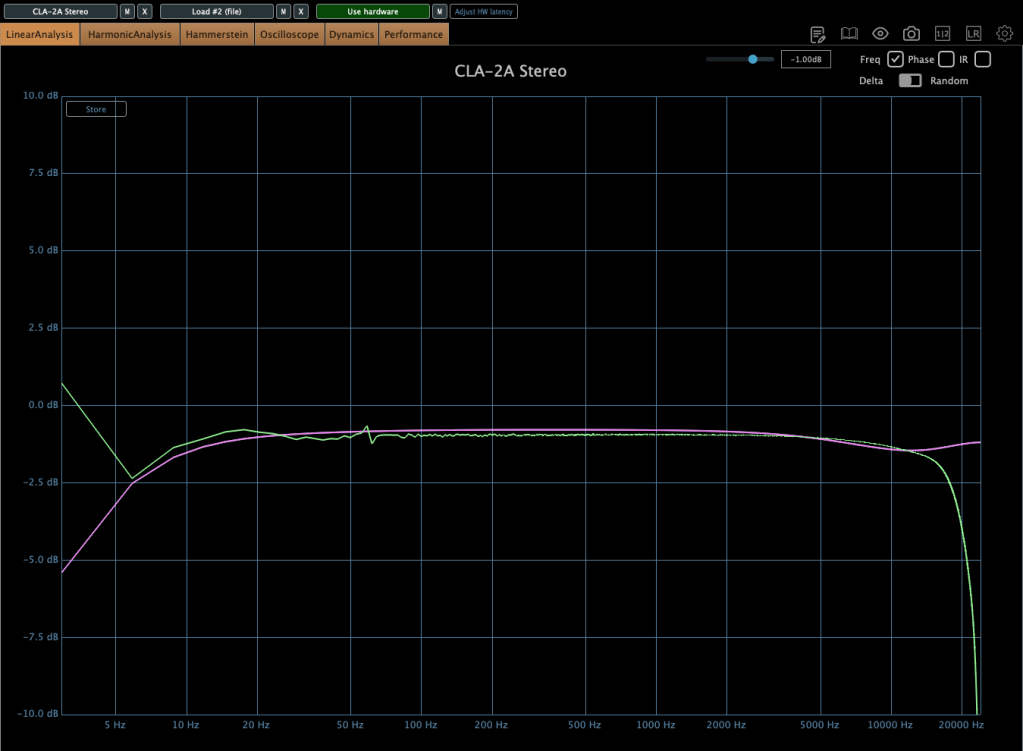
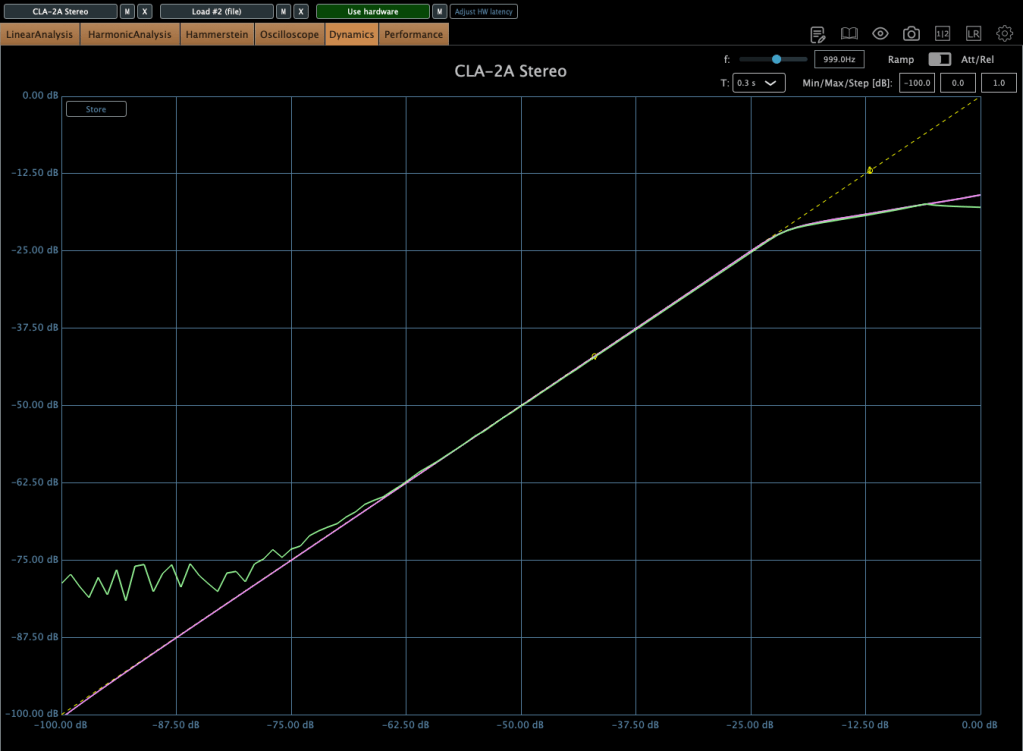
  3. Stam Audio SA-2A Compressor
  4. Earthworks M30 Measurement Microphone
  5. Rack Cabinet and Patch Bay
  6. Wharfedale D310 Passive Speakers
  7. Cort A4 Bass
  8. A broken Heritage Audio Successor Compressor

I bought quite a bit this year…

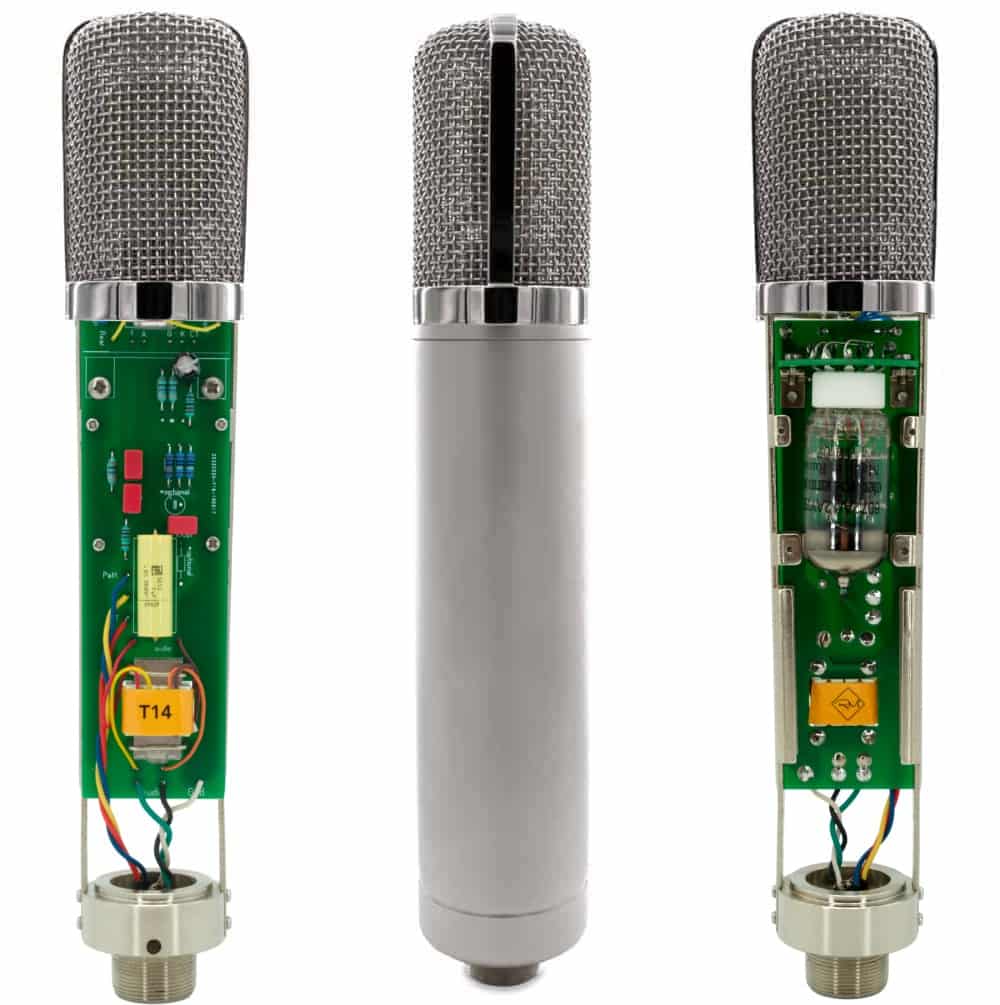
Next year, I’m thinking of adding a tube microphone preamp and an EQ. Maybe another compressor or a mic too? The gear wishlist never ends! 😊

Basics of Mixing – 13.1 Outboard and Hardware

Hello! This is Jooyoung Kim, mixing engineer & music producer.

In this chapter, I’ll talk about audio outboards. The subchapters will be as follows:

  1. Cables & Connectors
  2. Patchbays
  3. Re-amp & Re-amping
  4. Output/Input Volumes & Recall Sheet for Outboards

This article is based at my book, released at South Korea, “Basics of Mixing“.

Before we find out cables & connectors, let’s talk about why engineers use outboards. How do you think about it?


First, The sound differs significantly by circuit, input/output transformers, and amplifiers(transistor of vacuum tubes). So, you could guess why recording studios have bunch of mic pre-amps.

How about compressors, EQs, or saturators? There are several types of effects in DAW or third party plugins. If you use it well, sound will make sense.

Nevertheless, achieving the same sound as hardware with a plugin often requires multiple processing steps. Or, the saturation of hardware made irreplaceable sounds.

Of course, engineers love the gears so much, that they sometimes stack them..haha

However, there are many drawbacks to using hardware.

  1. Like Fairchild Model 670, hardwares used with vacuum tube have big problem for usage. If one vacuum tube breaks down, each one must be searched for, and the time and cost required for maintenance is considerable(Fairchild Model 670 has 20 tubes..).
  2. The noise level must be carefully considered during the mixing stage. If you don’t think about it, you could end up with quite high noise during mastering process.
  3. Hardware need Real-Time printing. It takes times.
  4. Recalling settings is cumbersome and the sound may vary depending on the condition of the hardware.

Furthermore, outboards with vacuum tubes need to be warmed up for some time (about 20–30 minutes) due to the operating principles of the tubes.

By the way, the reason we go through all this trouble and use hardware is because it sounds good.

But, it doesn’t mean all hardwares are great. More expensive isn’t necessarily better, and DIY isn’t necessarily bad.

So, what does this mean for you?

I think if you could listen bad/good sounds, it’s the right time for purchase outboards.

This chapter is about how to connect and use hardware when that time comes. In the next article, I’ll delve into cables and connectors, starting with their types and best practices. Stay tuned!

Audio Restore Plugins, Acon Digital Acoustica Post Production Suite Sale(30%, ~1/2)

Hi! This is Jooyoung Kim, a mixing engineer and music producer.

Today, I’d like to introduce Acon Digital’s Acoustica Post Production Suite, which could be a replacement for iZotope RX bundles.

This plugins was provided by plugin boutique for review. If you buy through the link in the blog, I’ll get a little commission that which really helps me make a living (it’s really hard these days…).

Acon Digital makes plugins for audio restore, mastering, mixings.

The Acoustica Post Production Suite I’m introducing this time includes all of Acon Digital’s products except for Verberate Immersive and AudioLava, including Acoustica 7 Premium Edition, Mix & Mastering Suite, and Restoration Suite. The plug-ins included in this product are listed in the table below.

CategoryPluginFunction Description
DynamicsDeEss DialogueReduces sibilance
Basic DynamicsControls basic dynamic range
LimitLimits signal peaks and prevents clipping
Multiband DynamicsAdjusts dynamic range across multiple frequency bands
EQEqualize 2EQ with features like mid/side processing and linear phase
MasteringDitherApplies audio dithering
RestorationDeBirdRemoves specific interference noises like bird sounds
DeBuzz DialogueEliminates buzz and hum noise in dialogue
DeClick 2Removes clicks and pops
DeClick DialogueRemoves clicks and pops from dialogue
DeClip 2Restores clipped audio distortion
DeHum 2Removes hum noise
DeNoise 2Reduces stationary noises, including environmental noise
DePlosive DialogueRemoves plosives from dialogue
DeRustle DialogueEliminates clothing rustle and other extraneous noises
DeWind DialogueReduces wind noise
Extract DialogueExtracts dialogue signals and reduces background noise
Phono FilterApplies LP record filtering and correction
VitalizeEnhances high-frequency audio
DeVerberate 3Removes reverberation
DeFilterResolves resonance peaks and dips
ReverbConvolveProvides convolution-based reverb
Verberate 2Stereo reverb
ToolsRemixSeparates mixes and enables audio remixing

Acoustica also provides a dedicated program called Acoustica.

Let’s take a closer look at Acoustica 7 Premium Edition!

Even if you only purchase Acoustica 7 Premium Edition, I believe it will be sufficient for your restoration tasks.

This edition includes everything except DeVerberate 3 for reverb removal and DeFilter for addressing resonance or comb filter issues.

The program’s interface is straightforward.

It features a large waveform display, a file browser on the left, a Processing Chain for applying effects, and various analyzers.

The loudness meter, which measures LUFS, allows you to set measurement parameters according to different standards.

The Processing Chain section lets you directly apply Acon Digital’s plugins.

Of course, the plugins included here can also be used in your DAW.

Similar to iZotope’s RX, you can view frequency-based volume changes over time.

This enables restoration work and even allows separate playback for the left and right channels, letting you apply different restoration processes to each.

Thanks to the advanced algorithms for separating vocals, piano, bass, drums, and other instruments, Acoustica also provides a tool called Remix for instrument separation.


iZotope RX offers more tools for noise removal, but the quality of Acoustica’s plugins is excellent.

At the current sale price of $153.89, Acoustica 7 Premium Edition is much cheaper than RX Standard’s discounted price.


You should give DeFilter a try and judge for yourself. I was blown away the first time I heard it.

While you might not use it often, it’s a great tool to have for solving significant problems when they arise.

It seems particularly beneficial for voiceover recordings.

DeVerberate also delivers solid performance.


Personally, I hope more people learn about and use products from companies like Acon Digital, which create such well-crafted plugins.

Although it’s not the cheapest, it’s significantly more affordable than competitors like RX.

If you’re considering restoration tools, I recommend taking a look at this one.


That’s all for today. See you in the next post!

After Modifying My Stam Audio SA-2A

Hello! I’m Jooyoung Kim, mixing engineer & music producer.

Today, I’ll talk about what I did after the article, Record Before Modifying the Stam Audio SA-2A, and how sound changed.


First, let’s review the problems I encountered.

  1. Output gain is similar to input gain, when the GAIN knob is too low.
  2. Compression is started when PEAK REDUCTION knob is too high.
  3. It sounds so dull, like high frequency response is cut off

Otherwise, The Compress and Limit switch was positioned incorrectly. It was simply solved by wrench.


1) Potentiometer Changed..1

If you take off the cover of SA-2A’s knob, you could see a100k potentiometer at each parts. So, I thought that if I change a100k to a50k for gain knob, amount of change is more lower. Also, change a100k to a250k for peak reduction knob, compression would be change more earlier.

So I changed them first.

The green line is SA-2A hardware, the pink line is Waves’ CLA-2A.

It doesn’t seem bad at all! Otherwise, output gain is similar to input gain, when the GAIN knob is too low yet, I ordered A25K and A10K potentiometer too.


2) Vacuum Tubes Changed

I changed my 12AX7 tubes from jj electronics to mullard.

Frequency response and compression curve was not that different compared to jj electronics’. But it sounds much better than before. Harmonic distortion seems to have changed many aspects of the sound.


3) Changed Potentiometer Once Again..2

Upper image is a25k, The lower image shows the a10k potentiometer. You could see frequency response improved when the lower value of potentiometer is used! The problem isn’t solved but it sounds really good.

Red curve is UAD LA-2A Silver face, pink curve is WAVES CLA-2A, green curve is SA-2A.

Compared to UAD, it’s nice that it doesn’t add such an overwhelming saturation. And compared to Waves, I like that it doesn’t have that overly compressed feel.

I think it’s worth trying out more simple tools like this in the future. Next time, maybe an EQ or a Comp DIY kit…!

See you in next post! 🙂