Audio Restore Plugins, Acon Digital Acoustica Post Production Suite Sale(30%, ~1/2)

Hi! This is Jooyoung Kim, a mixing engineer and music producer.

Today, I’d like to introduce Acon Digital’s Acoustica Post Production Suite, which could be a replacement for iZotope RX bundles.

This plugins was provided by plugin boutique for review. If you buy through the link in the blog, I’ll get a little commission that which really helps me make a living (it’s really hard these days…).

Acon Digital makes plugins for audio restore, mastering, mixings.

The Acoustica Post Production Suite I’m introducing this time includes all of Acon Digital’s products except for Verberate Immersive and AudioLava, including Acoustica 7 Premium Edition, Mix & Mastering Suite, and Restoration Suite. The plug-ins included in this product are listed in the table below.

CategoryPluginFunction Description
DynamicsDeEss DialogueReduces sibilance
Basic DynamicsControls basic dynamic range
LimitLimits signal peaks and prevents clipping
Multiband DynamicsAdjusts dynamic range across multiple frequency bands
EQEqualize 2EQ with features like mid/side processing and linear phase
MasteringDitherApplies audio dithering
RestorationDeBirdRemoves specific interference noises like bird sounds
DeBuzz DialogueEliminates buzz and hum noise in dialogue
DeClick 2Removes clicks and pops
DeClick DialogueRemoves clicks and pops from dialogue
DeClip 2Restores clipped audio distortion
DeHum 2Removes hum noise
DeNoise 2Reduces stationary noises, including environmental noise
DePlosive DialogueRemoves plosives from dialogue
DeRustle DialogueEliminates clothing rustle and other extraneous noises
DeWind DialogueReduces wind noise
Extract DialogueExtracts dialogue signals and reduces background noise
Phono FilterApplies LP record filtering and correction
VitalizeEnhances high-frequency audio
DeVerberate 3Removes reverberation
DeFilterResolves resonance peaks and dips
ReverbConvolveProvides convolution-based reverb
Verberate 2Stereo reverb
ToolsRemixSeparates mixes and enables audio remixing

Acoustica also provides a dedicated program called Acoustica.

Let’s take a closer look at Acoustica 7 Premium Edition!
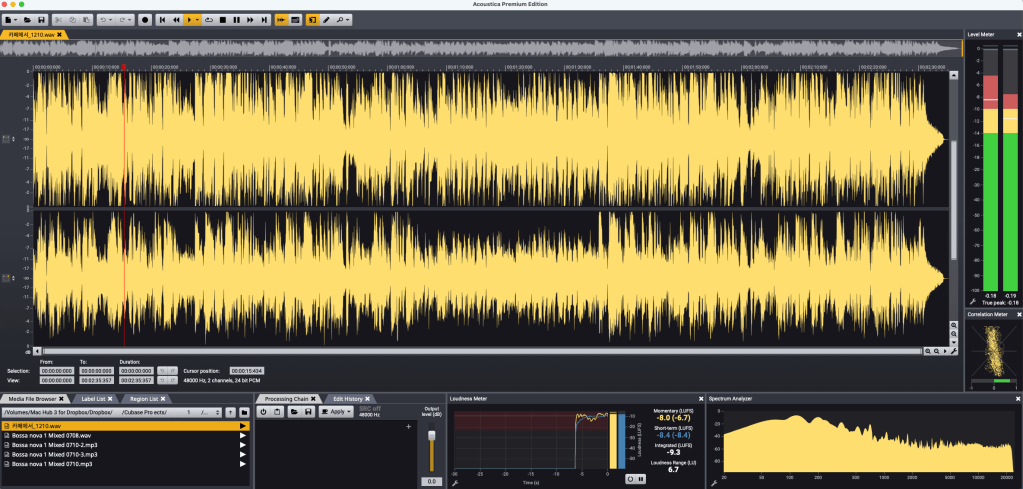
Even if you only purchase Acoustica 7 Premium Edition, I believe it will be sufficient for your restoration tasks.

This edition includes everything except DeVerberate 3 for reverb removal and DeFilter for addressing resonance or comb filter issues.

The program’s interface is straightforward.

It features a large waveform display, a file browser on the left, a Processing Chain for applying effects, and various analyzers.

The loudness meter, which measures LUFS, allows you to set measurement parameters according to different standards.
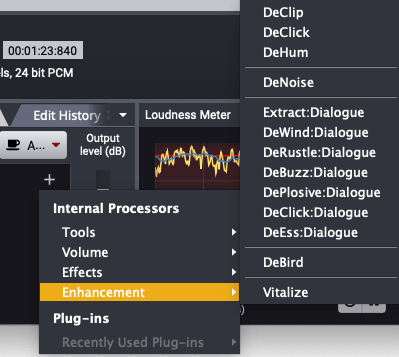
The Processing Chain section lets you directly apply Acon Digital’s plugins.

Of course, the plugins included here can also be used in your DAW.
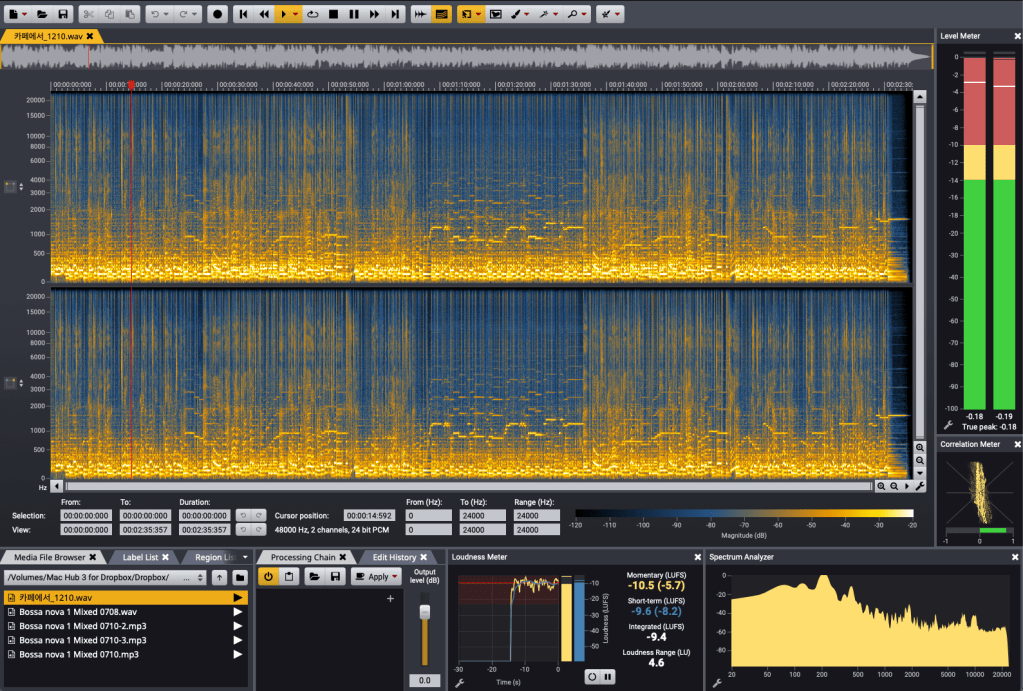
Similar to iZotope’s RX, you can view frequency-based volume changes over time.

This enables restoration work and even allows separate playback for the left and right channels, letting you apply different restoration processes to each.
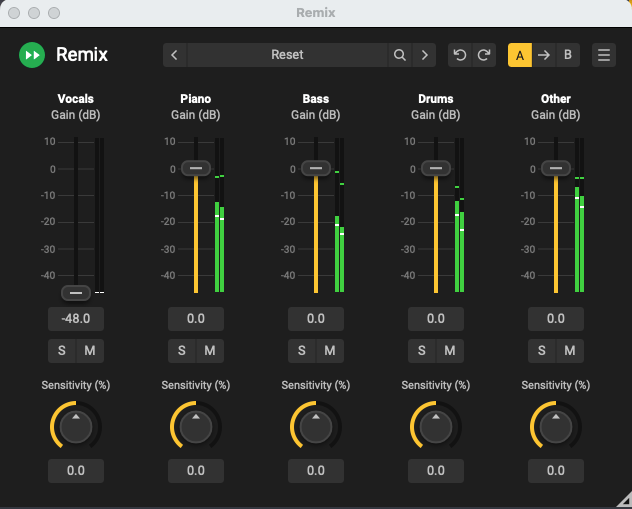
Thanks to the advanced algorithms for separating vocals, piano, bass, drums, and other instruments, Acoustica also provides a tool called Remix for instrument separation.


iZotope RX offers more tools for noise removal, but the quality of Acoustica’s plugins is excellent.

At the current sale price of $153.89, Acoustica 7 Premium Edition is much cheaper than RX Standard’s discounted price.
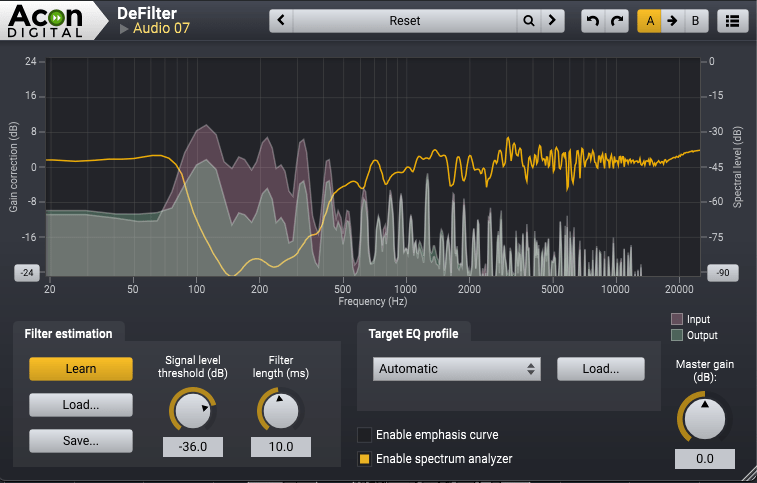

You should give DeFilter a try and judge for yourself. I was blown away the first time I heard it.

While you might not use it often, it’s a great tool to have for solving significant problems when they arise.

It seems particularly beneficial for voiceover recordings.
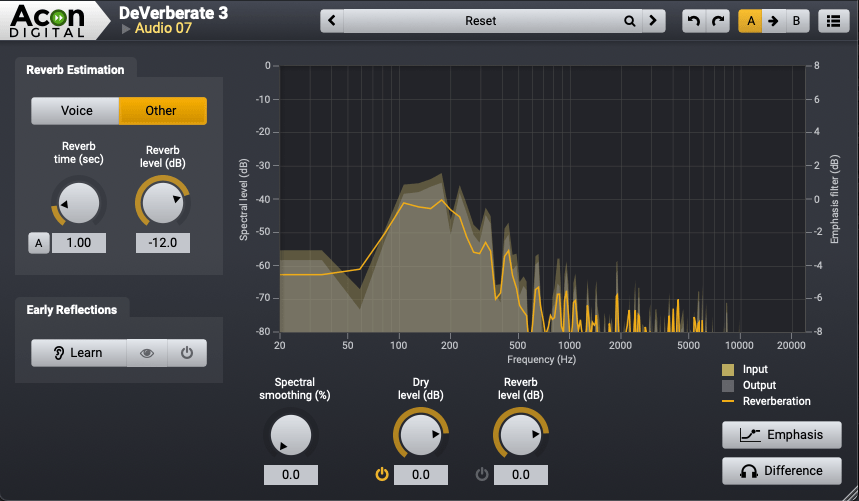
DeVerberate also delivers solid performance.


Personally, I hope more people learn about and use products from companies like Acon Digital, which create such well-crafted plugins.

Although it’s not the cheapest, it’s significantly more affordable than competitors like RX.

If you’re considering restoration tools, I recommend taking a look at this one.


That’s all for today. See you in the next post!

After Modifying My Stam Audio SA-2A

Hello! I’m Jooyoung Kim, mixing engineer & music producer.

Today, I’ll talk about what I did after the article, Record Before Modifying the Stam Audio SA-2A, and how sound changed.


First, let’s review the problems I encountered.

  1. Output gain is similar to input gain, when the GAIN knob is too low.
  2. Compression is started when PEAK REDUCTION knob is too high.
  3. It sounds so dull, like high frequency response is cut off

Otherwise, The Compress and Limit switch was positioned incorrectly. It was simply solved by wrench.


1) Potentiometer Changed..1

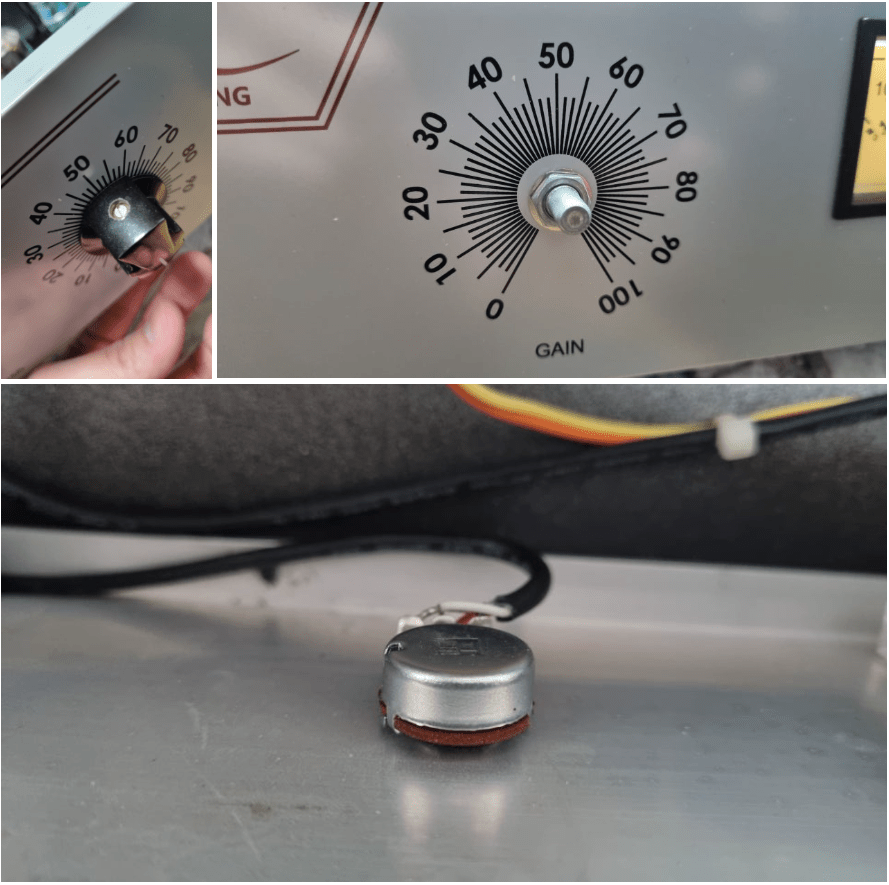
If you take off the cover of SA-2A’s knob, you could see a100k potentiometer at each parts. So, I thought that if I change a100k to a50k for gain knob, amount of change is more lower. Also, change a100k to a250k for peak reduction knob, compression would be change more earlier.

So I changed them first.

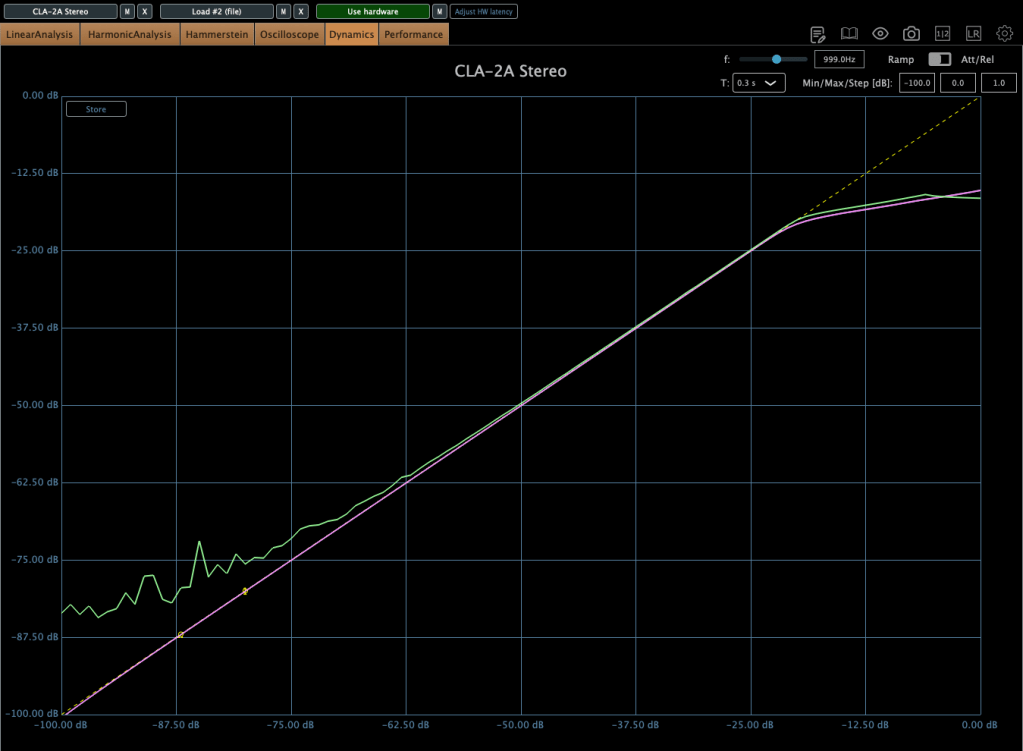
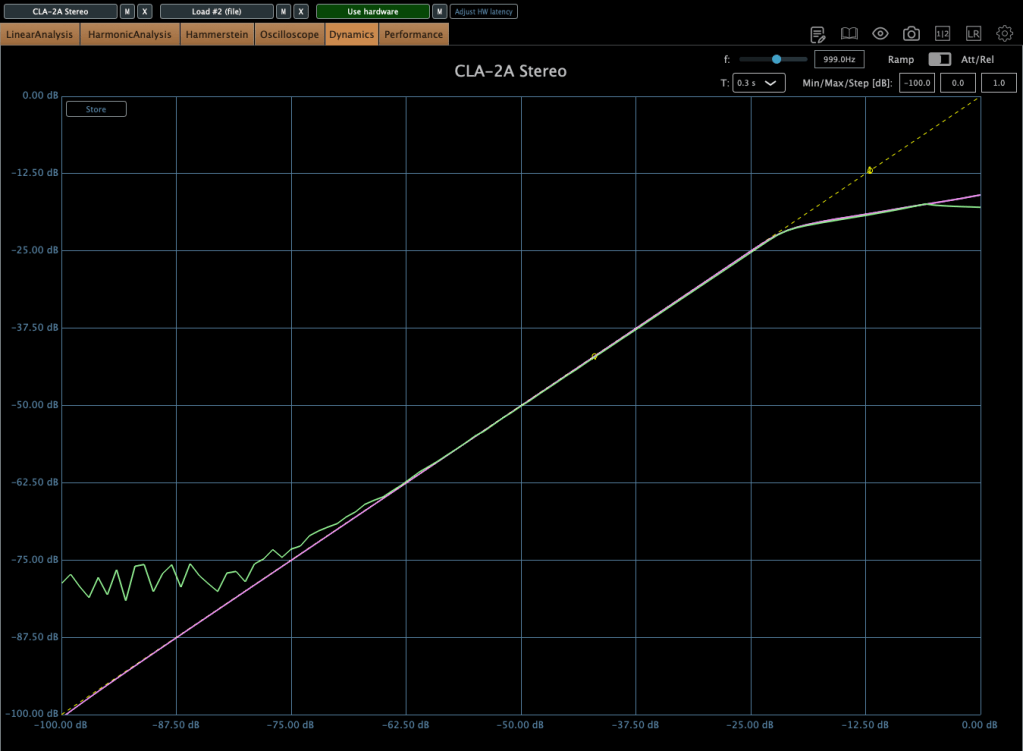
The green line is SA-2A hardware, the pink line is Waves’ CLA-2A.

It doesn’t seem bad at all! Otherwise, output gain is similar to input gain, when the GAIN knob is too low yet, I ordered A25K and A10K potentiometer too.


2) Vacuum Tubes Changed

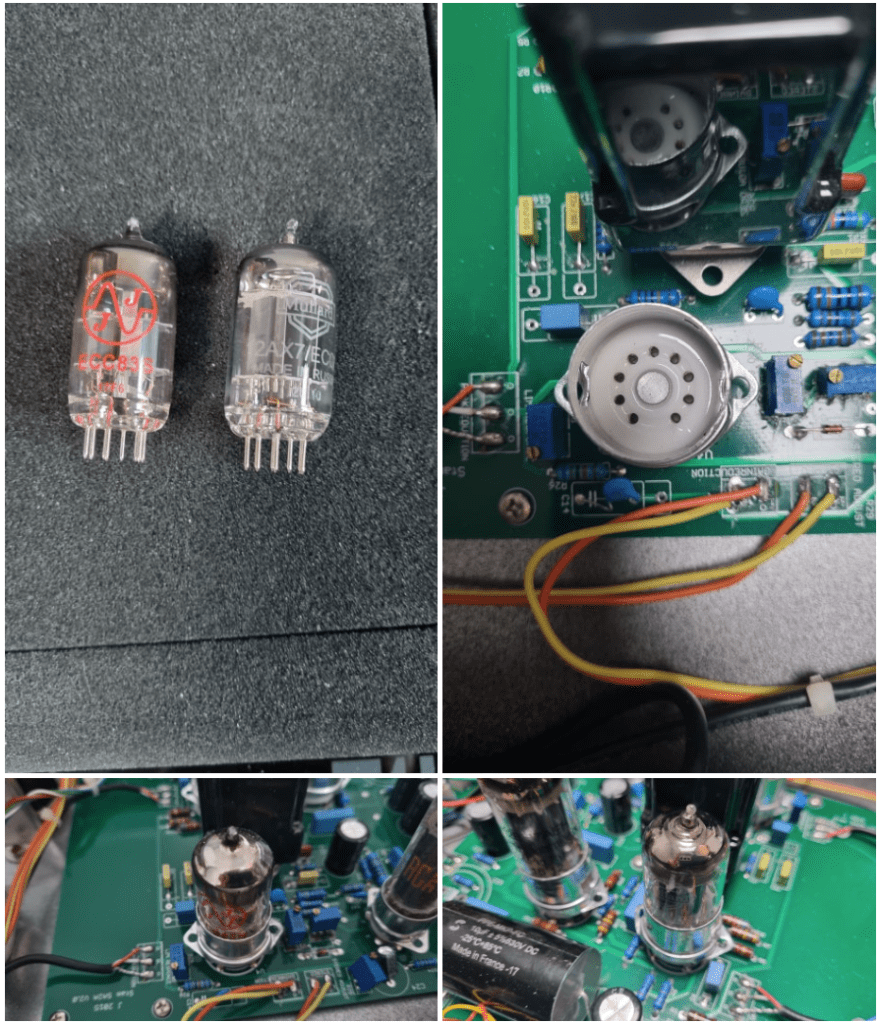
I changed my 12AX7 tubes from jj electronics to mullard.

Frequency response and compression curve was not that different compared to jj electronics’. But it sounds much better than before. Harmonic distortion seems to have changed many aspects of the sound.


3) Changed Potentiometer Once Again..2

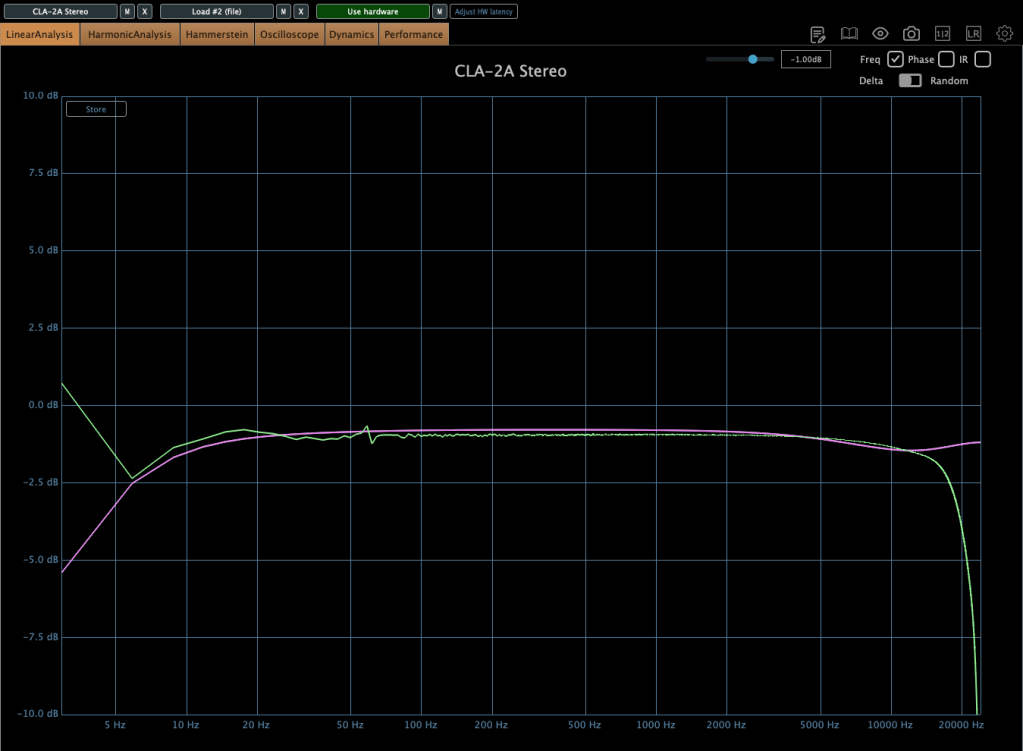
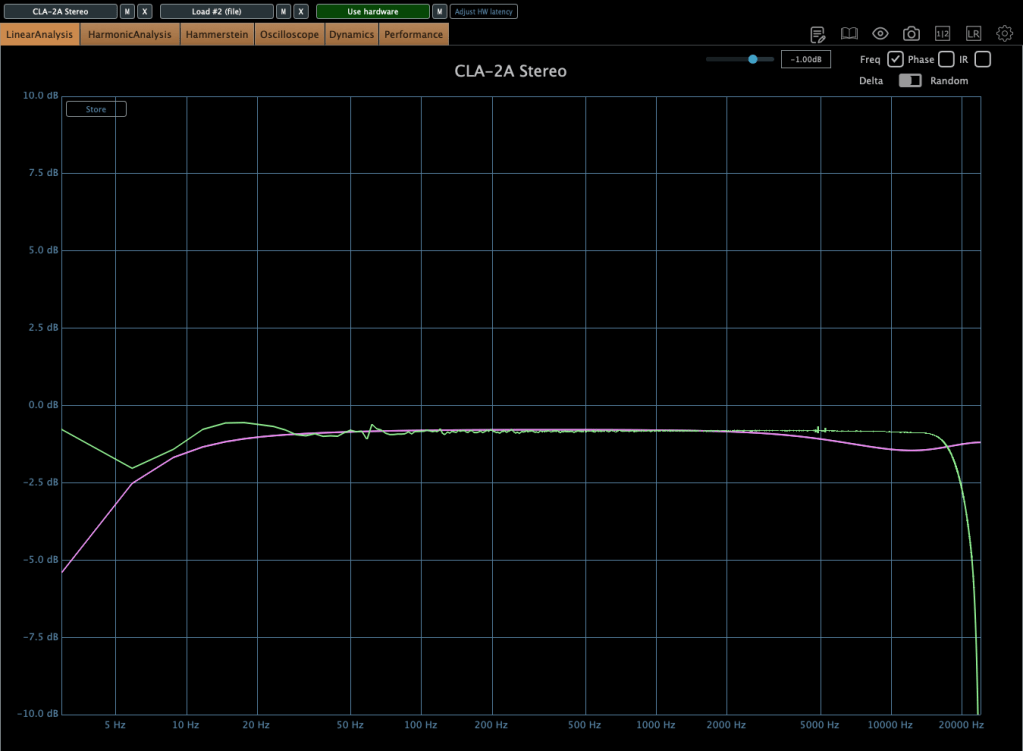
Upper image is a25k, The lower image shows the a10k potentiometer. You could see frequency response improved when the lower value of potentiometer is used! The problem isn’t solved but it sounds really good.

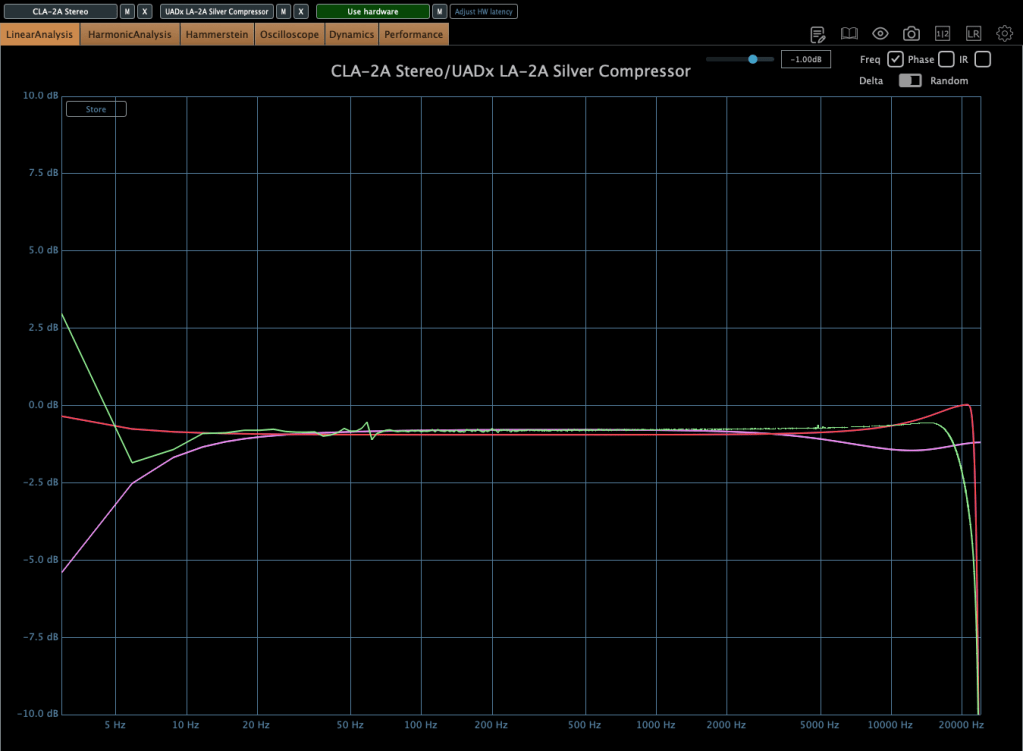
Red curve is UAD LA-2A Silver face, pink curve is WAVES CLA-2A, green curve is SA-2A.

Compared to UAD, it’s nice that it doesn’t add such an overwhelming saturation. And compared to Waves, I like that it doesn’t have that overly compressed feel.

I think it’s worth trying out more simple tools like this in the future. Next time, maybe an EQ or a Comp DIY kit…!

See you in next post! 🙂

Basics of Mixing – 12.1 How to Solve The Problems of Recording Source

Hello! This is Jooyoung Kim, a mixing engineer and music producer.

Today, I’d like to say about the problem of recording source and how to solve. This article is based on my book “Basics of Mixing” released at South Korea.

Let’s dive in!


1) Noise Floor

If you use analog hardware, electricity causes certain noise across all frequency range. We call this “Noise Floor”.

So if you recording with microphone pre-amplifier or use outboards, you have to recognize and keep in mind it. Although you can’t hear the noise in mixing step, but it could make problem in mastering step .

This matter could be fixed with plug-ins like iZotope’s RX bundles(Spectral De-Noise). But when the source processed, you will hear High Frequency & Low Frequency loss. So I don’t use it often until have no choice.


2) Popping Noise

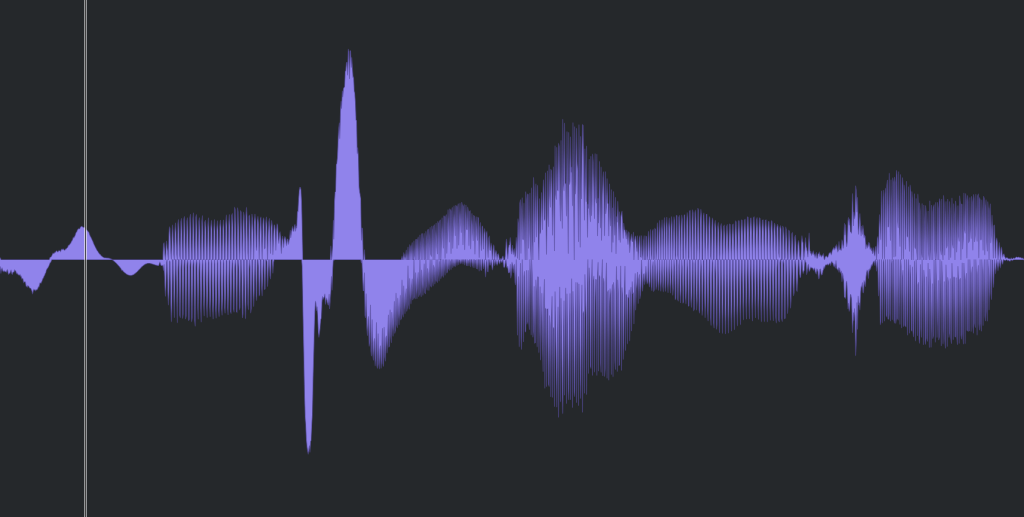
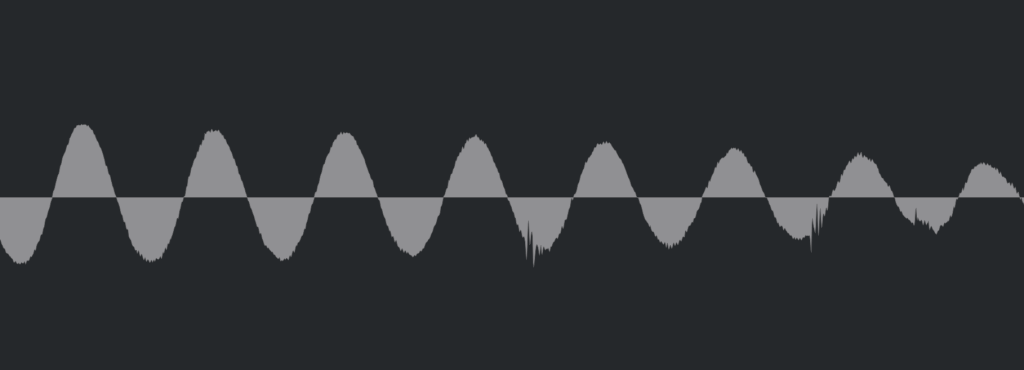
Popping Noise, A.K.A pop noise, is caused by popping sound. If you look closely upper picture, could understand it’s usually belong low frequency. So it could solved with low cut(high pass) filter.

However when you record voice, use pop filter is best method to prevent popping noise.


3) Sibilance

Sibilance is hissing sound when you pronounce like “S”. This high frequency sound can be perceived as louder than other frequencies due to the equal loudness contour.

You able to use De-Esser plug-ins or EQ to solve this problems. Another method involves cutting the sibilant peaks and adjusting the gain of the affected clip.


4) Click Noise

When you check the records, you could find click sounds frequently. In vocal records, lips make those noise. Drawing waves with pencil tools will solve this problem.

There have another way, use De-Click plug-ins. However I don’t like this method. It makes high frequency loss.


5) Clipped Noise, Distortion

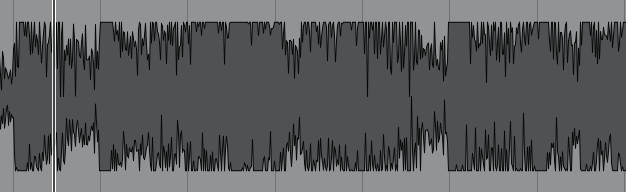
If the recording is distorted like this from the beginning, the best solution is simply to re-record it.

You might want to ask the client to double-check their export/bounce to see if the distortion originated there.

If the recording is distorted and re-recording is impossible, you can try to fix it with plugins like De-Clip, although you’ll have to sacrifice some audio quality.


6) Ambience

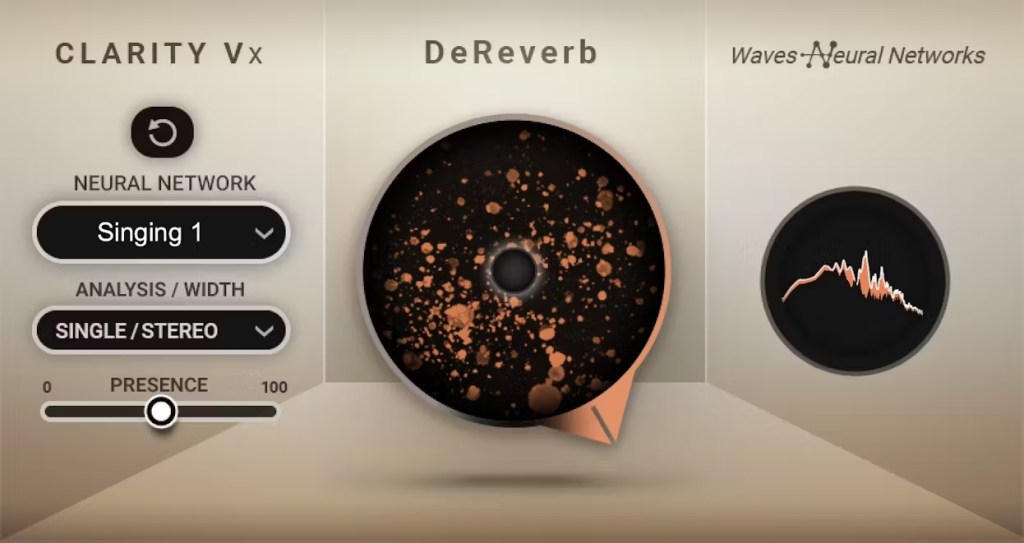
In the past, there was no way to fix recorded ambience. However, nowadays, there are many plugins that remove reverb and ambience from companies like Waves, UAD, and Izotope, so it’s not as big of a problem anymore..


7) Ambience

You can consider most other issues beyond these as unresolvable. If noise is caused by electrical issues and is consistently present, you can address it by dealing with the noise floor. However, if it appears intermittently, it’s impossible to fix.

Similarly, if a problem occurs consistently, there’s a good chance it can be fixed. But things like construction noise from nearby or the ticking of a clock are difficult to remove.


In this post, we discussed various problems with recorded audio and how to solve them.

The next chapter was originally going to be about groove and sidechaining. However, This is one of the key topics in my book, so I’ve decided not to cover it on the blog.. I don’t want to give away all the content for free and be unfair to those who purchase the book. I hope you understand.

From the next post onwards, I’ll be talking about outboard gear.

See you in next post! 🙂

Basics of Mixing – 10.1 Modulation Effects (Part 1)

Hi everyone! This is Jooyoung Kim, a mixing engineer and music producer.

Today, I want to talk about modulation effects, which are often overlooked during mixing.

(These concepts are based on my book Basics of Mixing, published in Korea.)


What are Modulation Effects?

In simple terms, modulation effects involve changing certain parameters over time.

Do you frequently use modulation effects when composing or mixing?

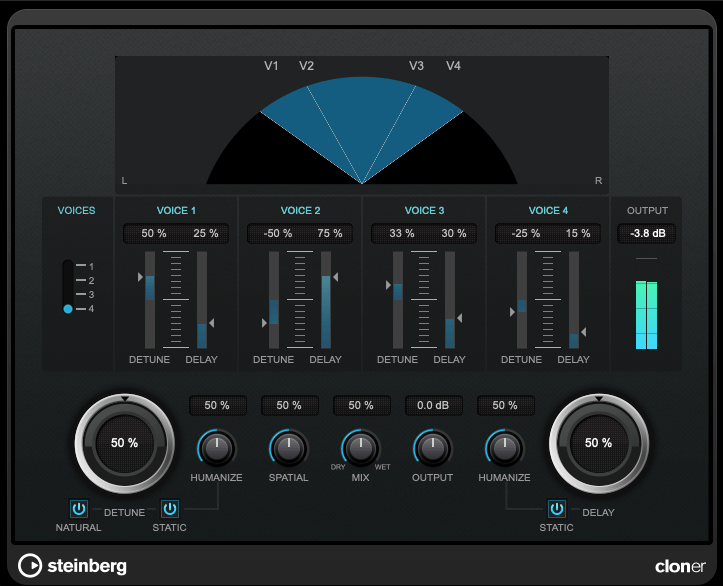
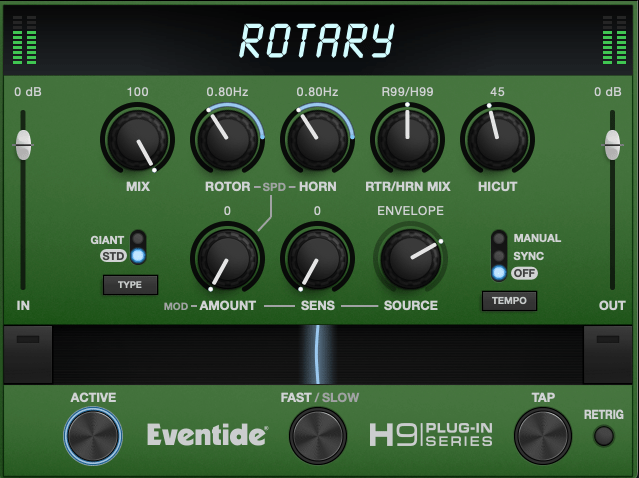
Do you ever have tools like these but rarely touch them?

I believe modulation effects, along with reverb and delay, are crucial in determining the quality of a track. However, even if you understand the theory behind these effects, you might hesitate to use them if you’re unfamiliar with how they sound in practice.

That’s why I encourage you to experiment with modulation effects regularly, even if it feels forced at first.


Types of Modulation Effects

Let’s break down some common modulation effects:

  1. Tremolo
  2. Vibrato
  3. Flanger
  4. Phaser
  5. Chorus

Before diving into these, we need to discuss two foundational concepts: the All-Pass Filter and the Comb Filtering Effect.


All-Pass Filter

An all-pass filter allows all frequencies to pass through unchanged. But why would we use such a filter?

The answer lies in phase.

When a signal passes through an all-pass filter, the phase shifts depending on the frequency. Combining this filtered signal with the original creates unique sounds due to constructive and destructive interference at different frequencies.

For more details on phase and interference, check out “Basics of Mixing – 2.2 Phase and Interference.”


Comb Filtering Effect

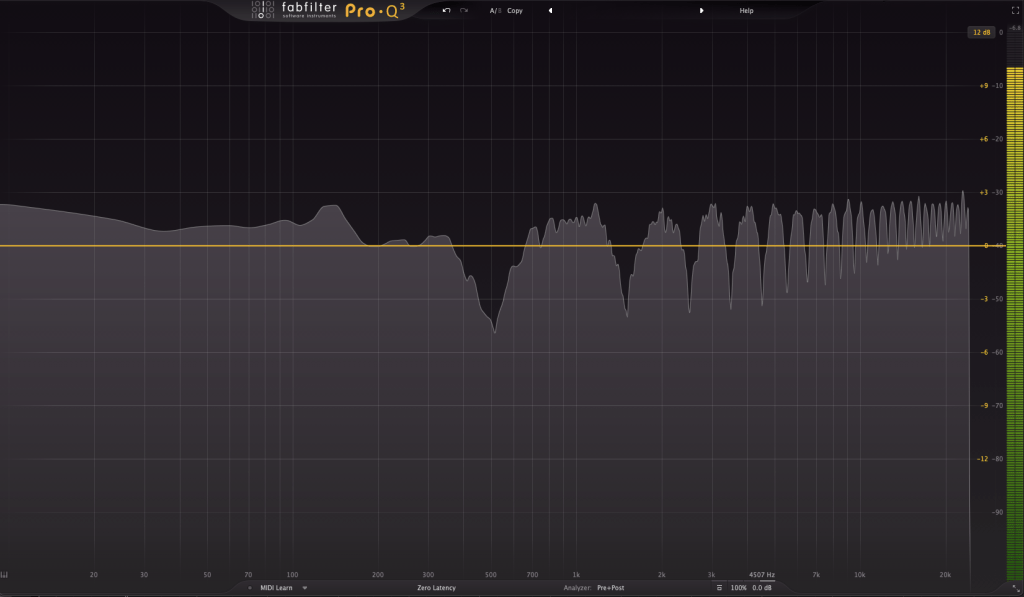
The comb filtering effect occurs when an original signal is combined with a delayed version of itself. This results in a frequency response that looks like the teeth of a comb.

It’s easy to understand this concept through simple experiments.

When every frequency in a signal is delayed by the same amount, some frequencies cancel out (destructive interference), while others amplify (constructive interference). This creates the characteristic comb-like frequency response.

Effects like flanger, phaser, and chorus are built on these principles of phase manipulation.


That’s all for now! In the next post, I’ll delve deeper into each modulation effect.

See you next time! 😊