Hello, this is Jooyoung Kim, an engineer and music producer. Today, I’ve come across an amazing discount, and I requested an NFR (Not for Resell) code from Plugin Boutique to review about those plugins.
(If you purchase through the link above, I receive a small commission which greatly helps in maintaining this blog)
The T-Racks 5 Max on sale this time is a package of plugins from IK Multimedia used for mixing and mastering. It includes a total of 53 plugins, and it has never been offered at such a low price before. You can think of it as getting each plugin for about $1.
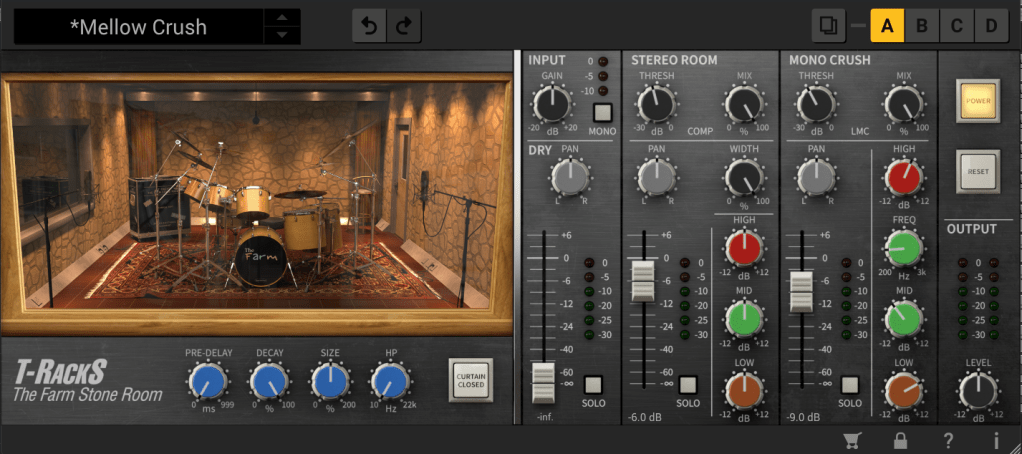
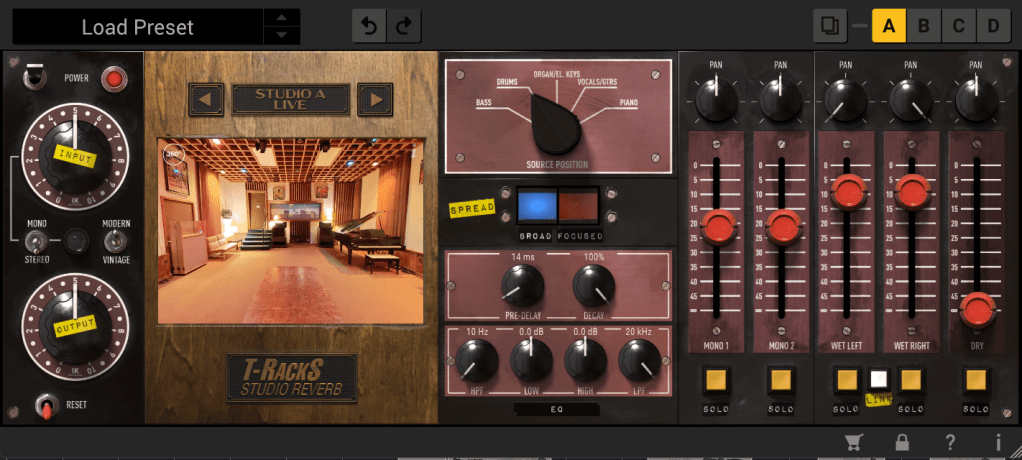
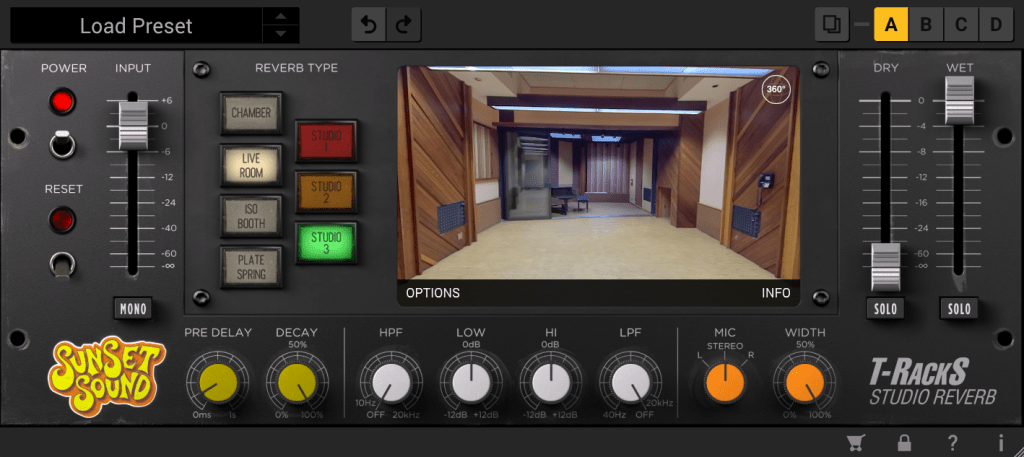
Personally, I’m amazed that they’re offering all these reverbs at this price. If I remember correctly, Sunset Sound Studio Reverb was initially sold at a launch discount of $99, and Fame Studio Reverb wasn’t bundled with T-Racks and had to be purchased separately.
In addition to that, there are well-known emulation plugins such as Urei 1176, LA-2A, SSL Bus Comp, SSL Channel Strip, Neve 33609, Manley Vari-Mu, Empirical Labs Distressor, Neve 1073, 1081, Sontec 432c, Fairchild 670, Pultec EQP-1A, API 550a, b, API 560, etc. The names might be slightly different, but they are familiar and famous emulation plugins.
In the past, I used to recommend the Waves Horizon bundle for beginners due to its cost-effectiveness, but at this price, I would now actively recommend IK Multimedia.
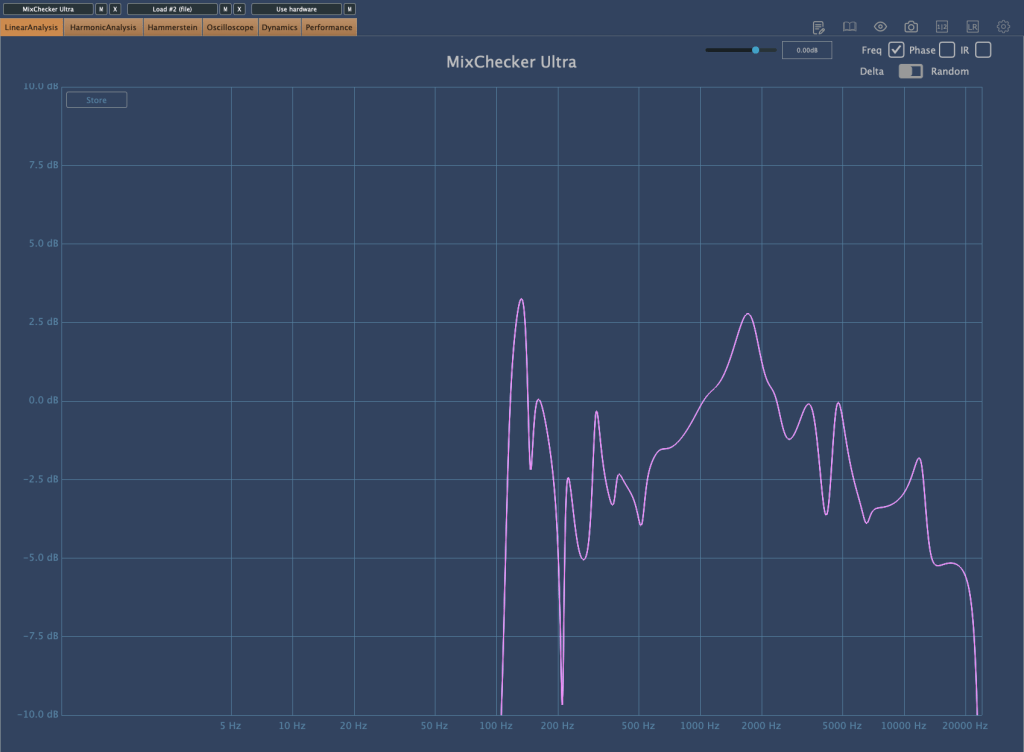
I wish I could measure and test all the processors and upload the results, but there’s too much data, so I’ll focus on the well-known ones like 1176, LA-2A, Neve 33609, Fairchild 670, and SSL Bus Comp.
- Black 76

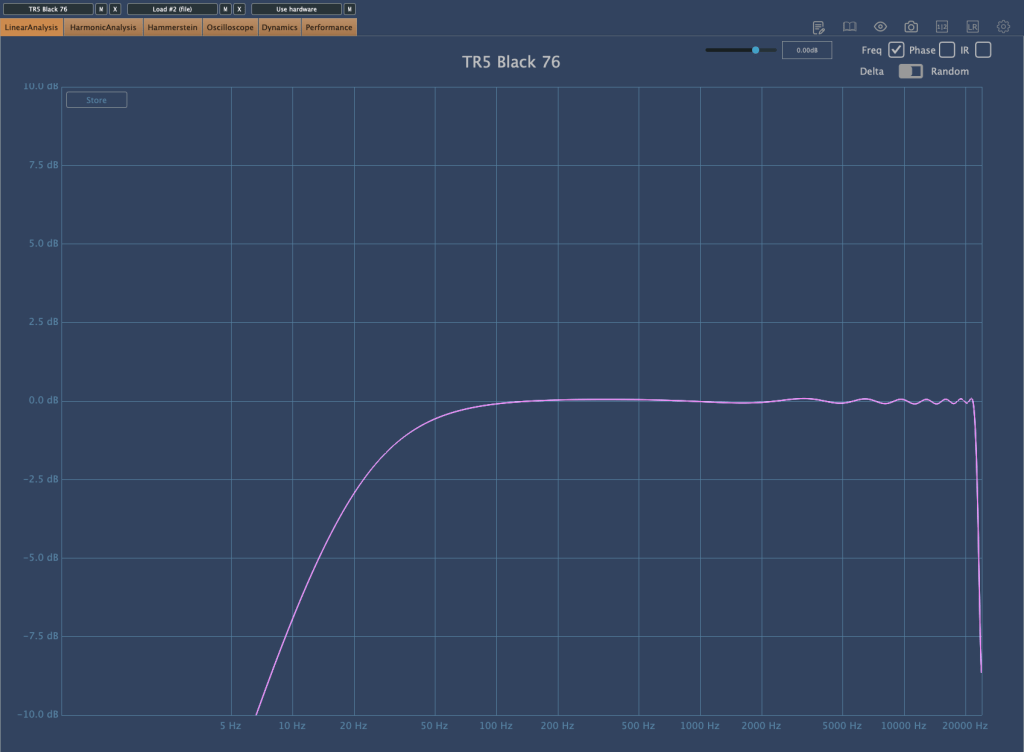

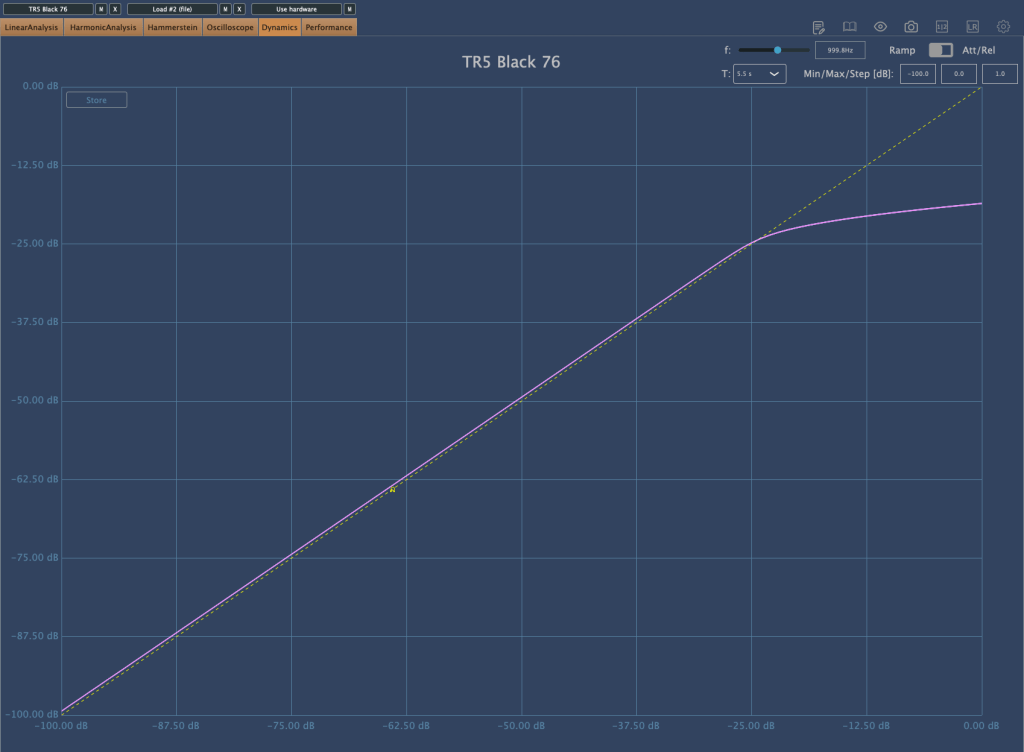
First, the Black 76 which emulates the 1176. The harmonics come out well, and it slightly compresses with a Soft Knee. When applied, it seems to reduce the low-end power and emphasize the attack.
- White 2A


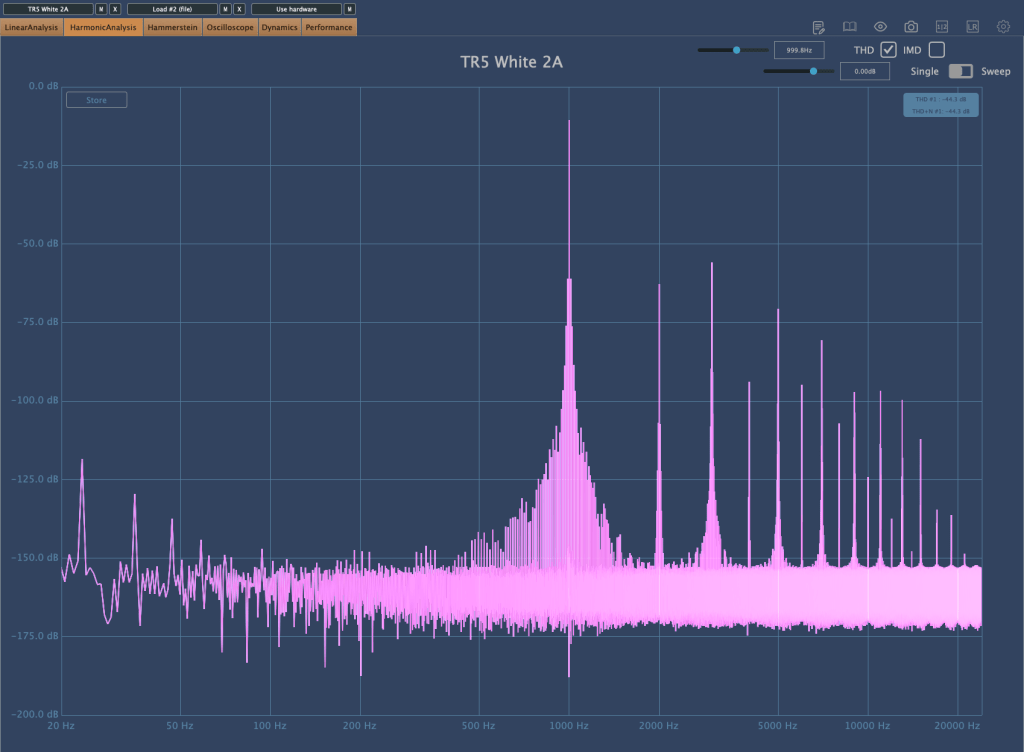
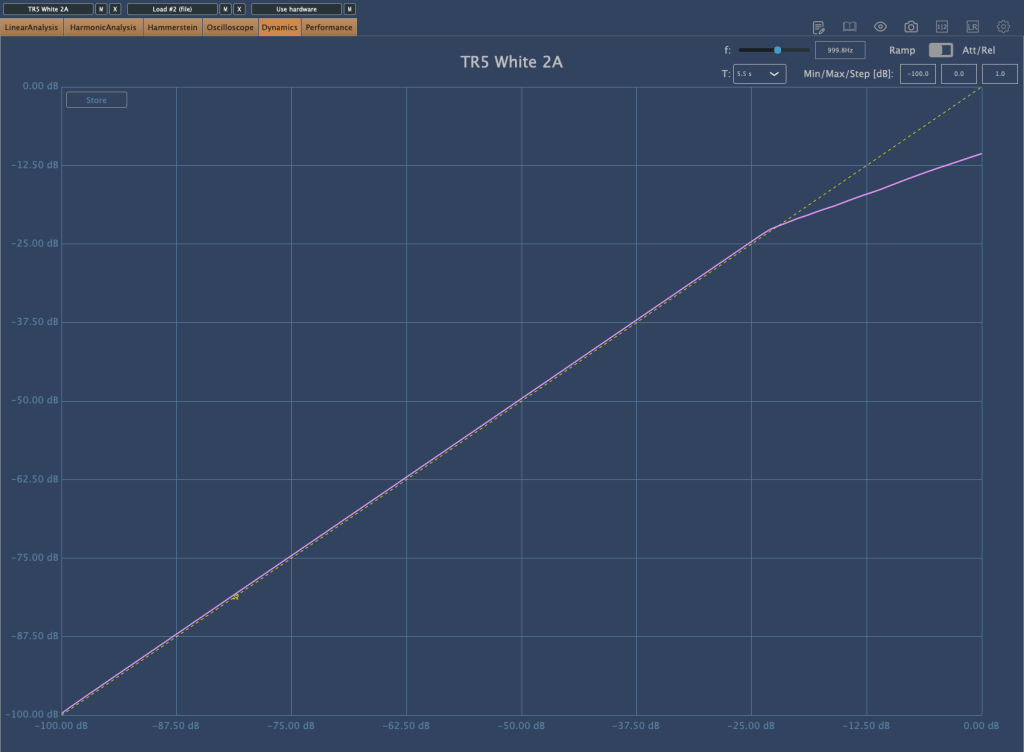
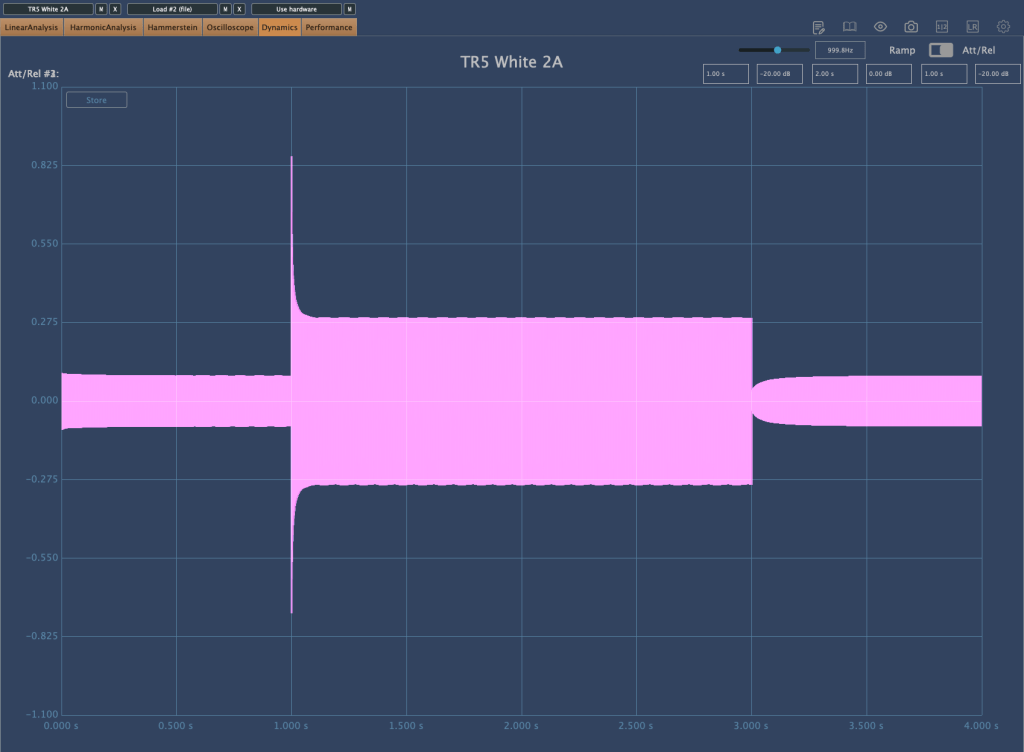
The White 2A, emulating the LA-2A, shows in its Release time that it faithfully reproduces the characteristics of an Opto compressor. It also slightly cuts the extreme low-end. Note that when first applied, the Limit/Compress switch is set to Limit, so switch it to Compress if you want to use it as a compressor.
- Precision Comp/Lim


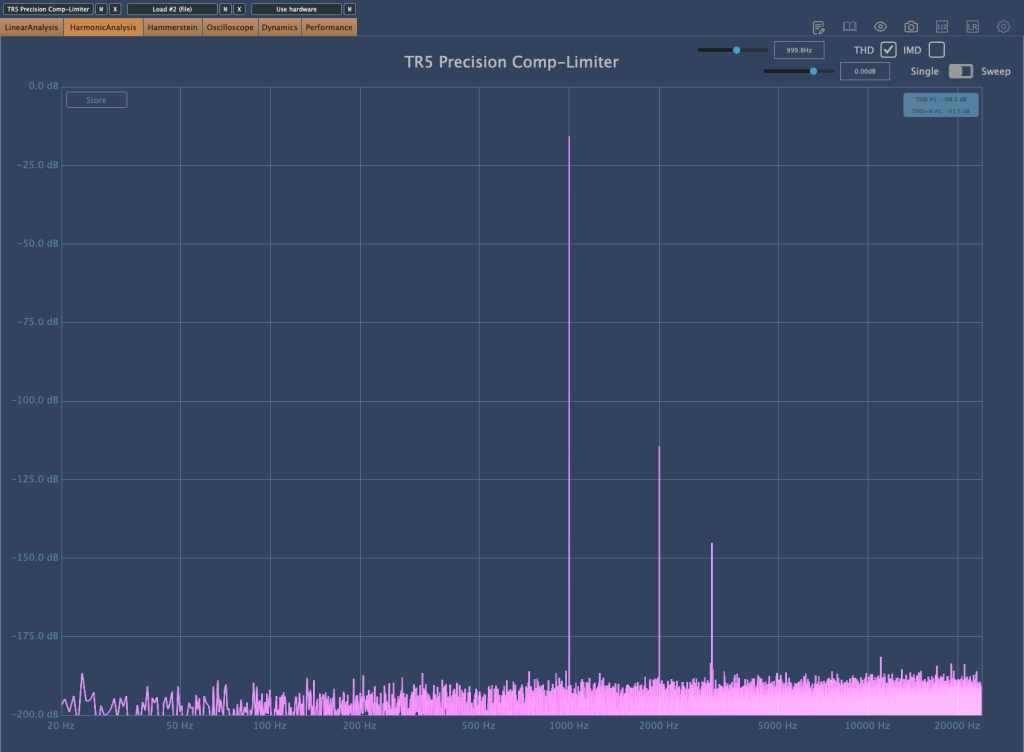


The Precision Comp/Lim, which copies the Neve 33609, seems to boost the high frequencies when applied, possibly due to its harmonics. It’s quite good, and I find myself using it often.
- Bus Compressor
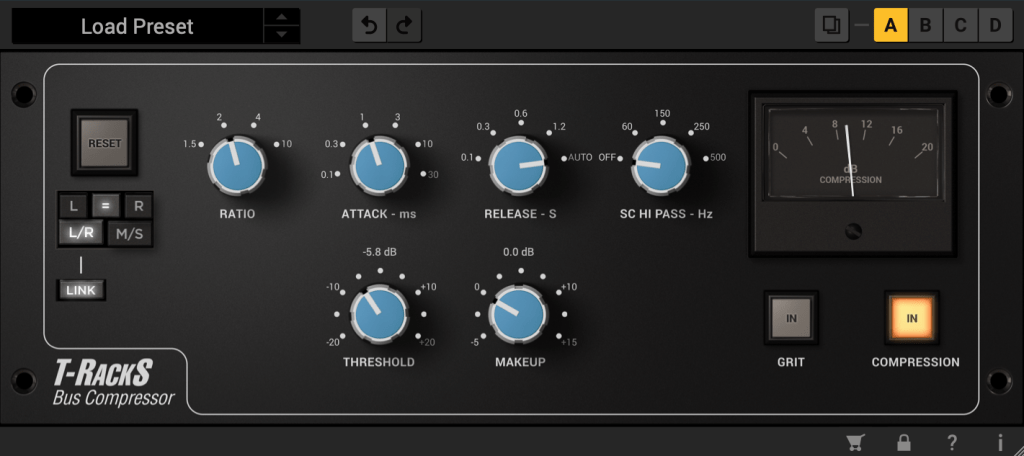

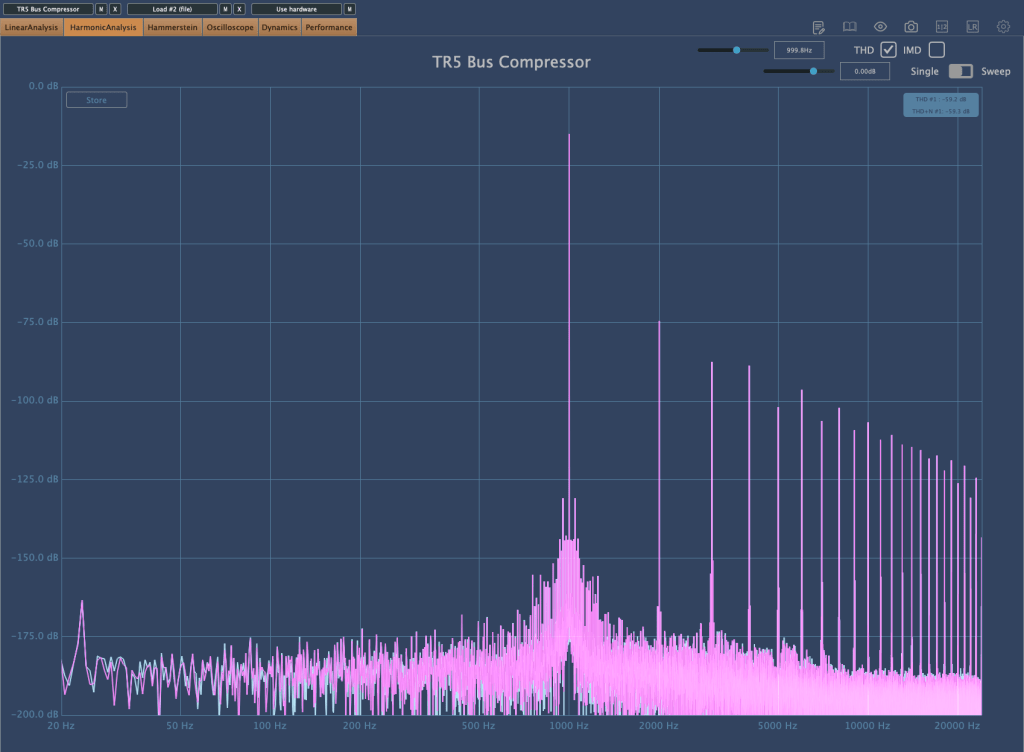

The Bus Compressor, emulating the SSL Bus Comp, operates with a Soft Knee when selecting ratios of 1.5 and 2, compressing very smoothly. It also gently tidies up the high frequencies, which I really like.
- Vintage Tube Compressor/Limiter Model 670
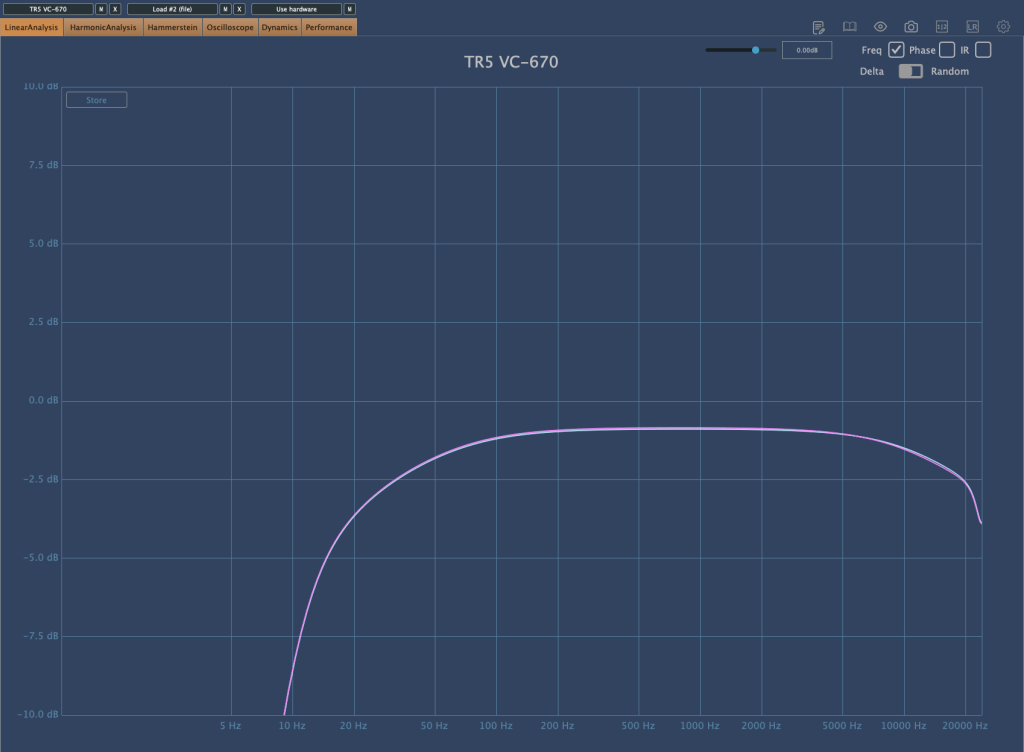

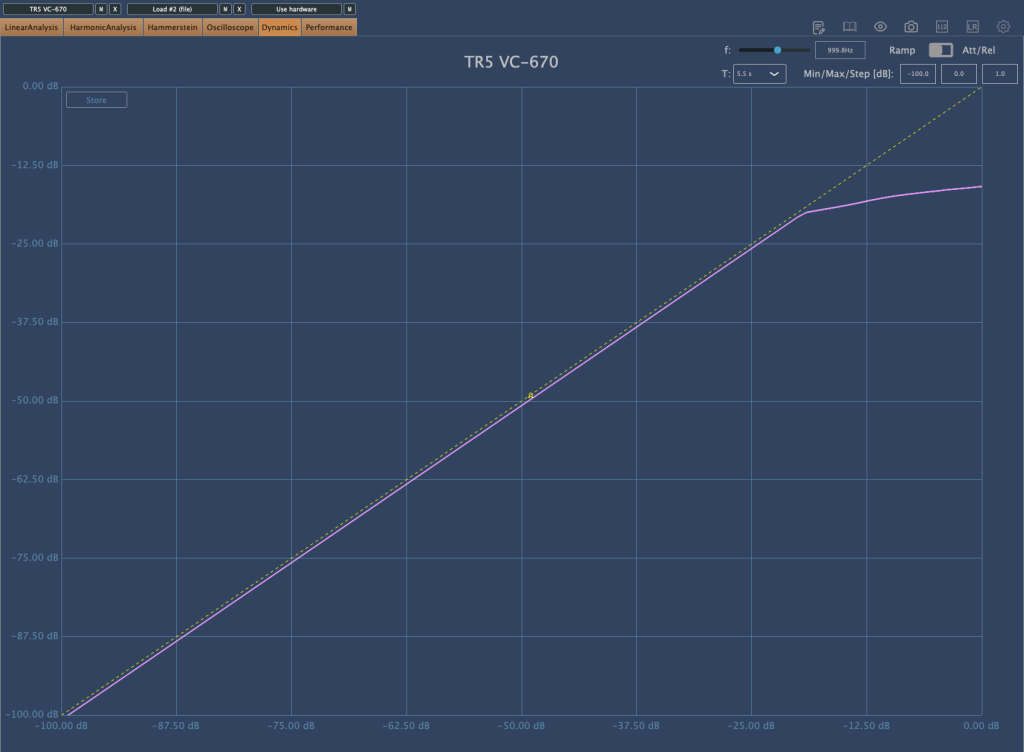
The Vintage Tube Compressor/Limiter Model 670, emulating the Fairchild 670, has a high ratio and is set with a Hard Knee. It slightly trims the frequency range, which sounds natural and not bad for acoustic tracks. However, for modern tracks that emphasize high and ultra-low frequencies, it might not be as suitable.
There are many other plugins that can be immediately used for your projects, so if you have the budget, I highly recommend this bundle.
(If you purchase through the link above, I receive a small commission which greatly helps in maintaining this blog)
As I’ve mentioned before, buying from Plugin Boutique adds about 10% tax, making it slightly more expensive than other places. Here it’s $54.99.
However, the benefits of buying from Plugin Boutique include:
1) Free plugin giveaways with purchases (the free plugins change every month)
2) Points accumulation
I usually buy expensive plugins from other places, but for plugins under $100, I decide whether to buy from Plugin Boutique or elsewhere based on the free plugin offered.


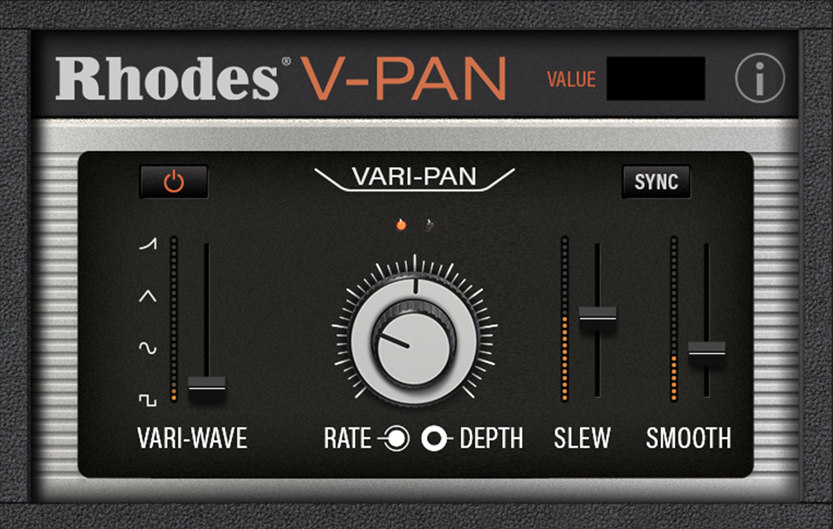
This month, the free plugins are Rhodes V-Pan, a unique Auto Pan, or Dehumaniser Simple Monsters, which creates monster-like voices used in special effects. Both can be quite useful musically.
Especially for Logic Pro users who lack a built-in Auto Pan and often use the Tremolo plugin instead, getting the feature-rich Rhodes V-Pan for free with the purchase of T-Racks 5 Max would be a very satisfying deal.
I rarely recommend sales or plugins this strongly, but this one is genuinely worth buying.
Writing this makes me feel like a salesperson…^^;;
See you in the next post!