Brainworx Mixing Month Plugin Sale (3): Mäag Audio EQ4, SPL Transient Designer Plus (~3/31, $31.90)

Hey there! I’m Jooyoung Kim, an engineer and music producer.

This month, Brainworx is holding their Mixing Month sale, featuring six plugins at a discount:

  1. Shadow Hills Mastering Compressor – Compressor
  2. Shadow Hills Mastering Compressor Class A – Compressor
  3. Black Box Analog Design HG-2 – Saturator
  4. Black Box Analog Design HG-2MS – Saturator
  5. Mäag Audio EQ4 – EQ
  6. SPL Transient Designer Plus – Transient Shaper

Following my last post, today I’ll be introducing the Mäag Audio EQ4 and SPL Transient Designer Plus.

As I’ve mentioned before, I personally bought and use 1, 3, and 5. For this round, I received NFR (Not for Resale) licenses for 2, 4, and 6 from Brainworx via Plugin Boutique.

If you purchase through the links in this blog, I’ll earn a small commission, which really helps me keep going—so thank you!

Let’s dive in!


5) Mäag Audio EQ4 – EQ

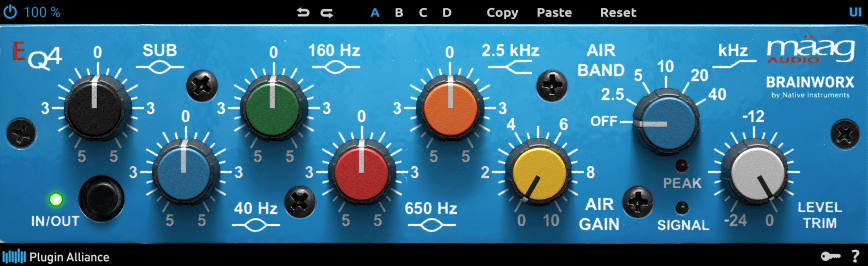
The Mäag Audio EQ4 is a plugin recreation of the iconic EQ4 hardware from Mäag Audio. I’ve mentioned this EQ a few times in my mixing basics series, and its standout feature is the AIR BAND.

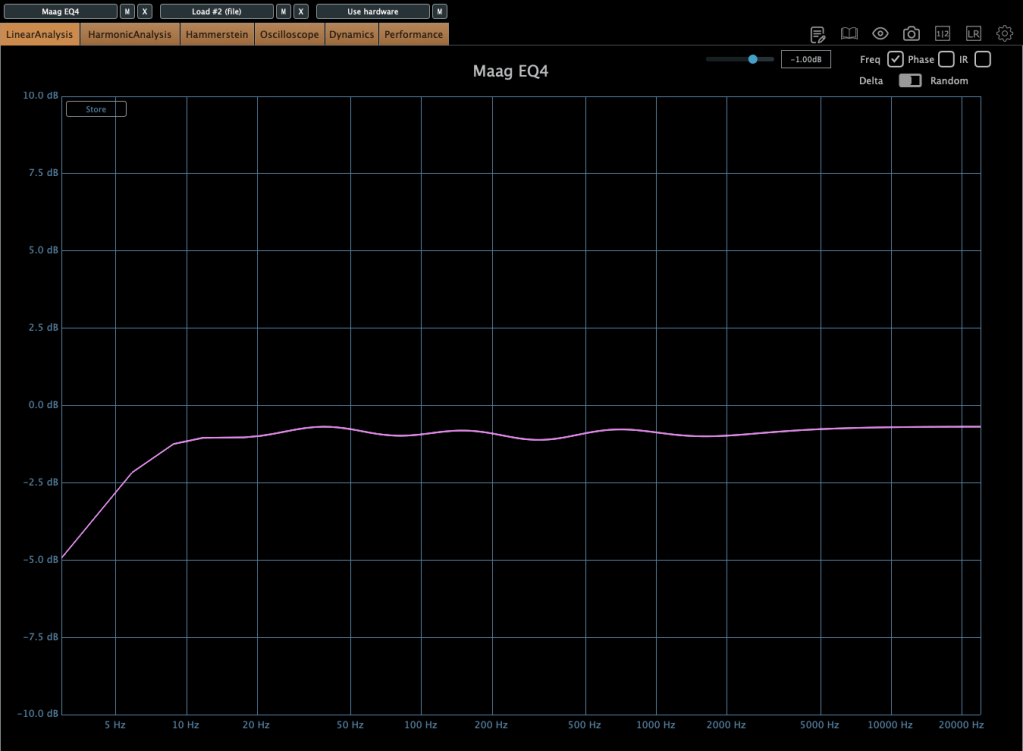
Just loading the plugin already shapes the frequency response a bit—it’s slightly bumpy, right?

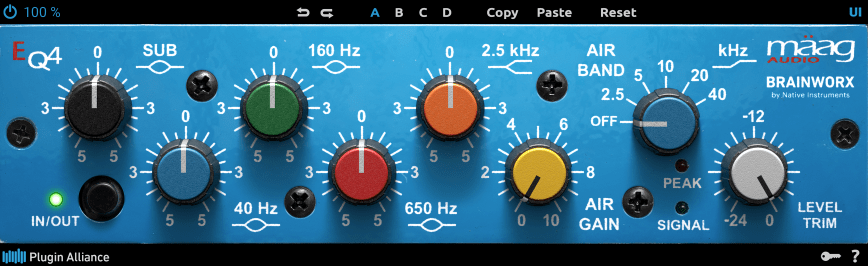
Here’s what happens when you nudge up the 20kHz band. This EQ excels at lifting those ultra-high frequencies to bring out a pleasing “air” in your mix.

I often choose between this Mäag EQ4 and Slate Digital’s Fresh Air when I want to give vocals that shiny, polished feel—it depends on the track. There’s no harmonic distortion here, which keeps it clean and super easy to tweak. That’s why I highly recommend it. Honestly, I love this vibe so much I keep thinking about getting the hardware version too… haha! If you grab it during this sale, I’m sure you’ll find plenty of uses for it.


6) SPL Transient Designer Plus

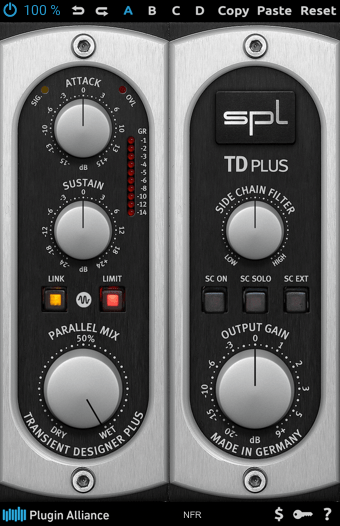
The SPL Transient Designer Plus is a plugin inspired by the TD (Transient Designer) module from the discontinued SPL RackPack, a 500-series rack format.

Photo: RackPack 8

It’s incredibly simple to use:

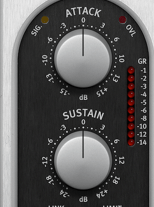
The Attack knob boosts or softens the attack phase, while the Sustain knob boosts or reduces the sustain phase. That’s it!

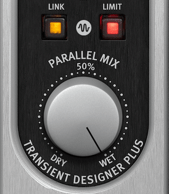
Below that, the Link button decides whether it processes stereo channels together or independently. The Limit button adds a limiter to prevent clipping if the attack gets too aggressive. And Parallel Mix? Well, that just blends the processed signal with the dry one.

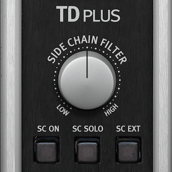
The Side Chain Filter lets you use a sidechain signal to trigger changes in the original source’s transients—think of it like a compressor’s sidechain. Hit the SC ON button to activate it. By default, it uses an Internal Side Chain, copying the input signal and applying a filter. You can press SC SOLO to hear what’s being used as the trigger. The SC EXT button switches it to an external sidechain signal instead.

For composers or engineers like me, a transient-shaping plugin like this is a must-have. A great composition or mix depends on instruments locking together just right. You can’t always achieve that by simply sliding tracks around in your DAW.

I’ve got transient tools from Sonnox, Metric Halo, Native Instruments, SPL, iZotope, and more in my collection. This one’s another solid option—pick it up during the sale, and I bet you’ll use it all the time.


That wraps up my coverage of this month’s Brainworx sale. See you in the next post!

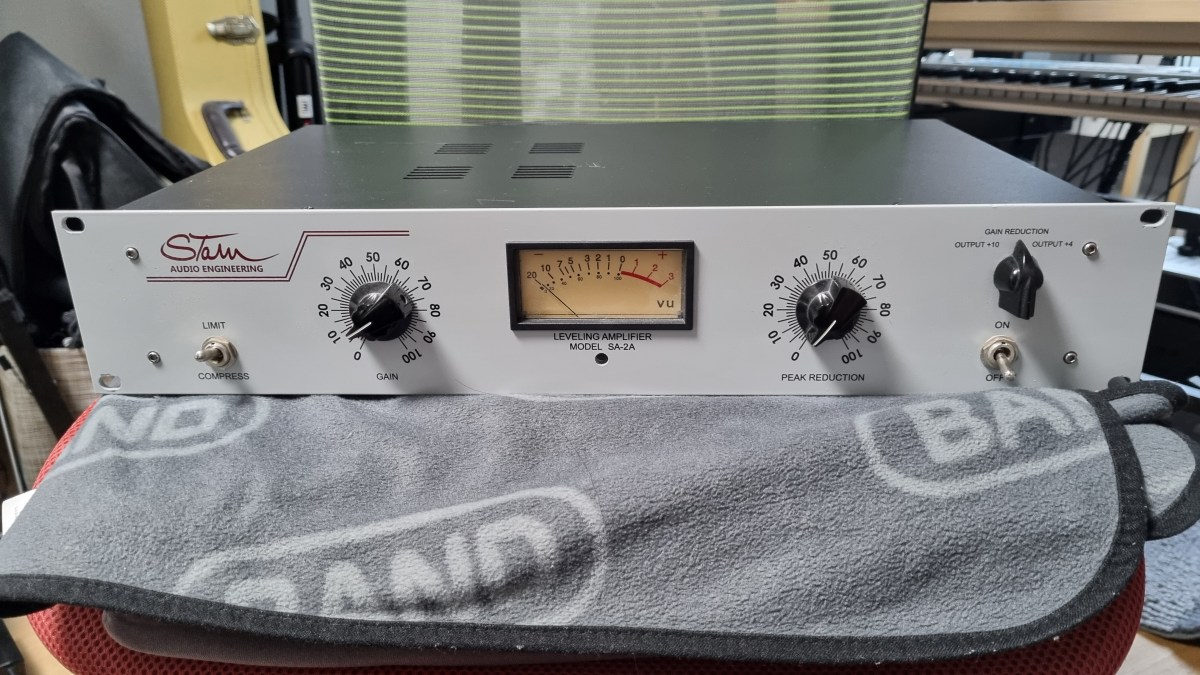
Stam Audio SA-2A Compressor Review

Hello, I’m Jooyoung Kim, a mixing engineer and music producer.

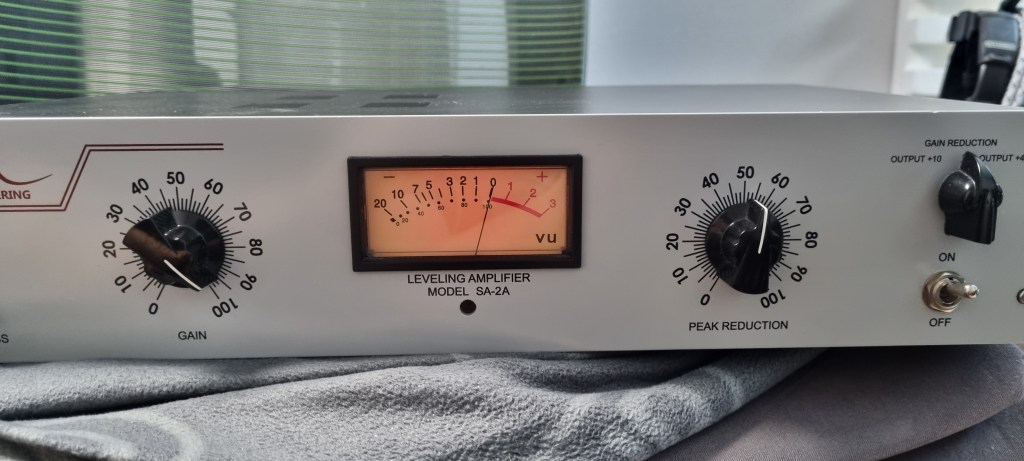
Today, I’m excited to share my review of the SA-2A, something I’ve been eagerly anticipating! Let’s dive right in.

The Struggle with the Gear

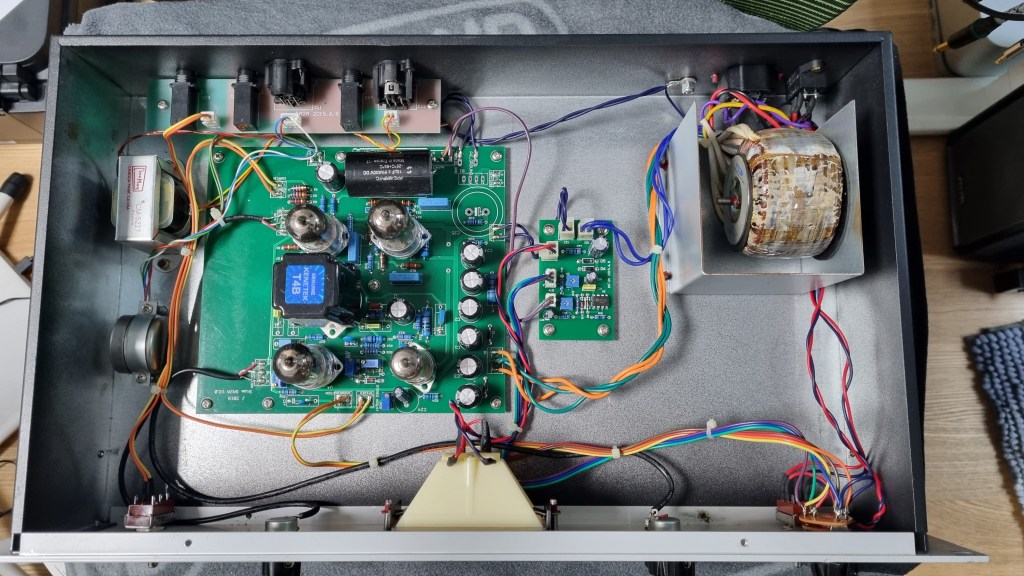
If you’ve been following my blog, you might know that this unit had quite a journey before it landed in my studio. Initially, I bought a faulty one with the idea of enhancing my understanding of circuits and practicing some soldering by fixing it myself.

I thought it might just be a simple fuse issue… But after blowing through about five fuses, I took a closer look at the circuit board.

Despite my inspection, I couldn’t find any blown capacitors or burnt resistors. So, I decided to take it to a repair shop after seeking advice.

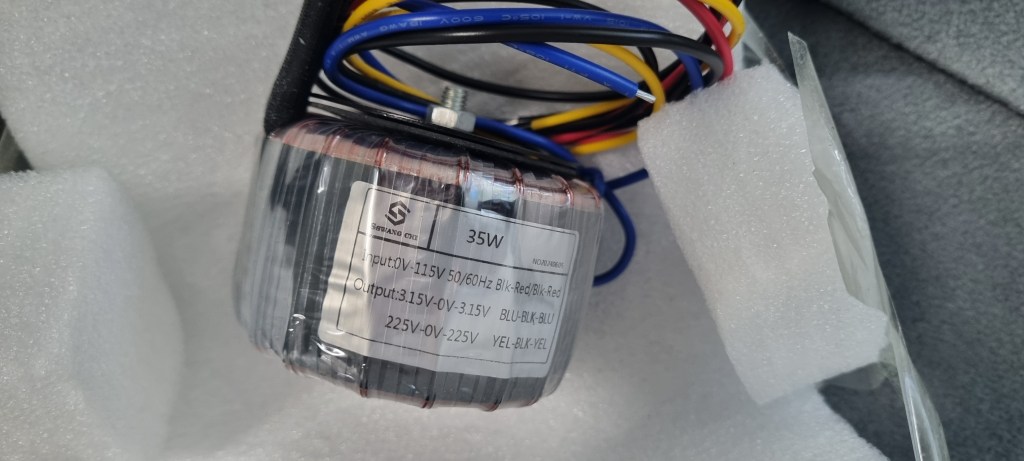
The culprit turned out to be a burnt toroidal transformer, damaged by overcurrent.

The challenge was that this early version of the SA-2A used a Cinemag transformer, and Stam Audio wasn’t sure if they had any spares left.

After two weeks of waiting for a response with no luck, I asked them to send me the specifications so I could have a custom transformer made.

After installing the custom transformer, the unit finally came to life!

I purchased the broken unit in January, and the repair was completed by early July, marking a nearly six-month battle.

Of course, I was a bit busy, which contributed to the delay, but it was quite the saga nonetheless!

Measurements

As regular readers of my blog know, I like to run measurements on gear, whether it’s hardware or plugins. While measurements don’t tell the whole story, they do help in explaining things more clearly.

I find it especially useful to compare my impressions from using the gear with the measured data, which can sometimes reveal if my ears are having an off day.

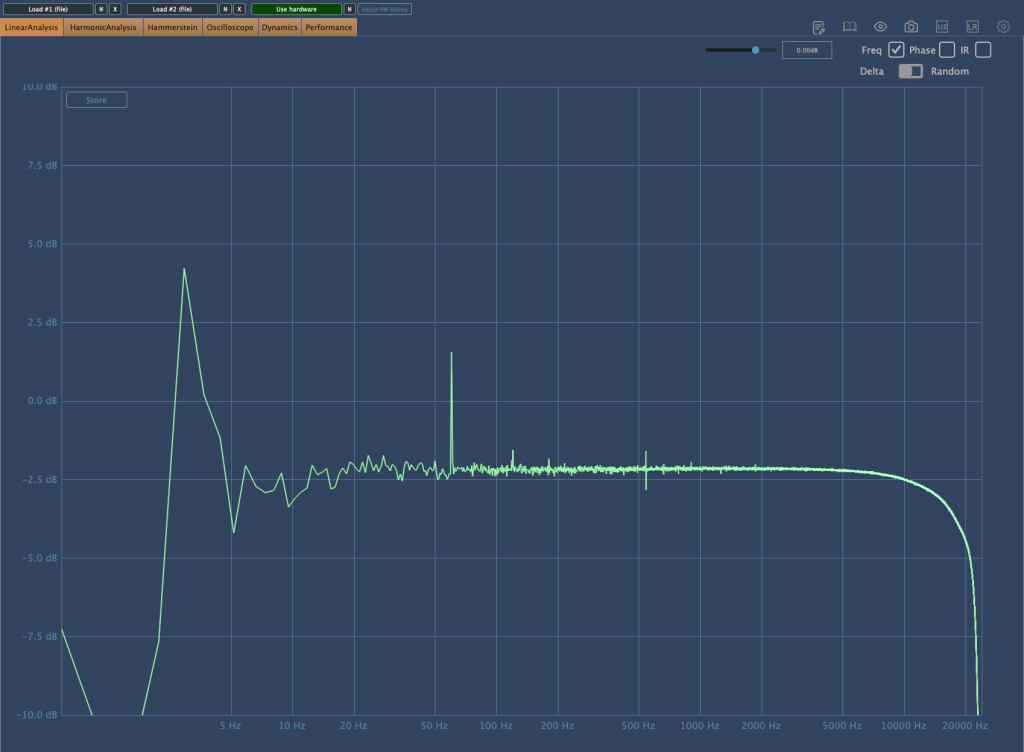
The frequency response graph above shows the response with no compression applied. (Keep in mind the peaks and valleys you see are typical of analog gear.) You can see a noticeable roll-off in the high frequencies.

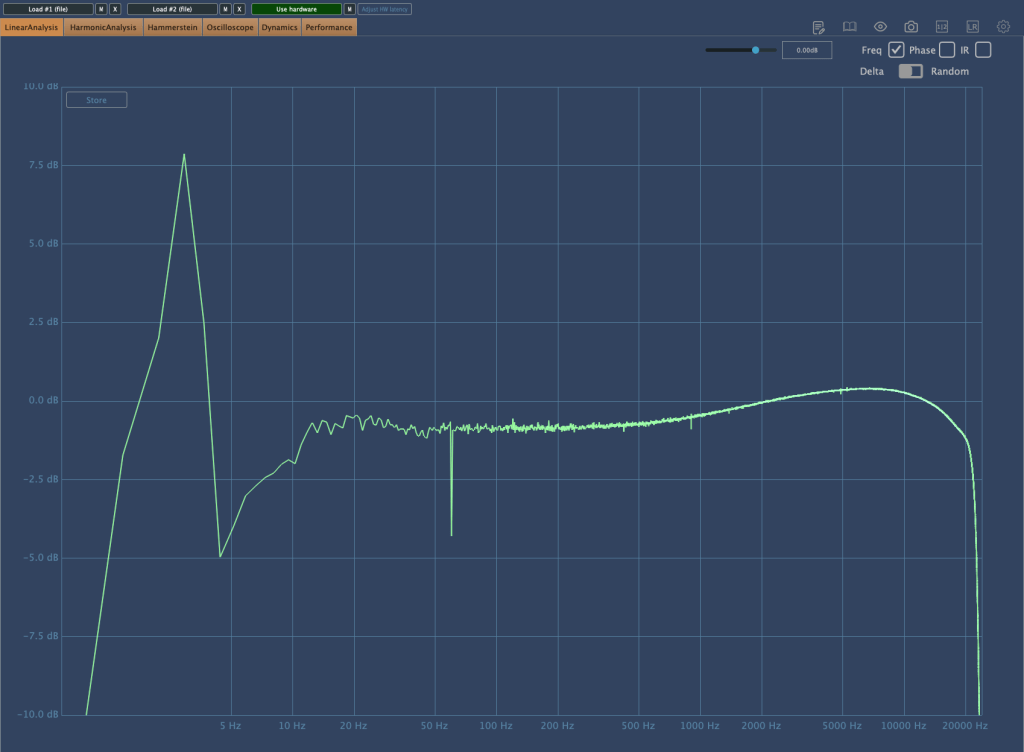
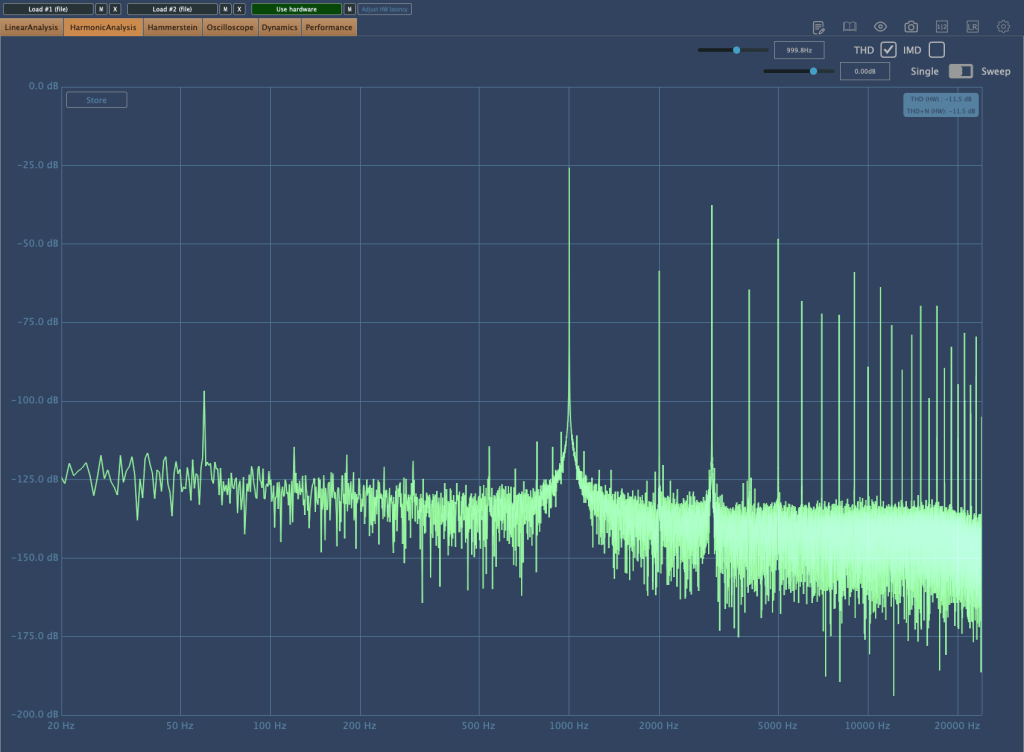
Here’s the frequency response graph with compression applied and gain compensated. There’s a rise in the high frequencies, and the right-hand graph shows noticeable distortion.

As the Peak Reduction increases, harmonic distortion also changes. It seems much more dynamic than using a plugin.

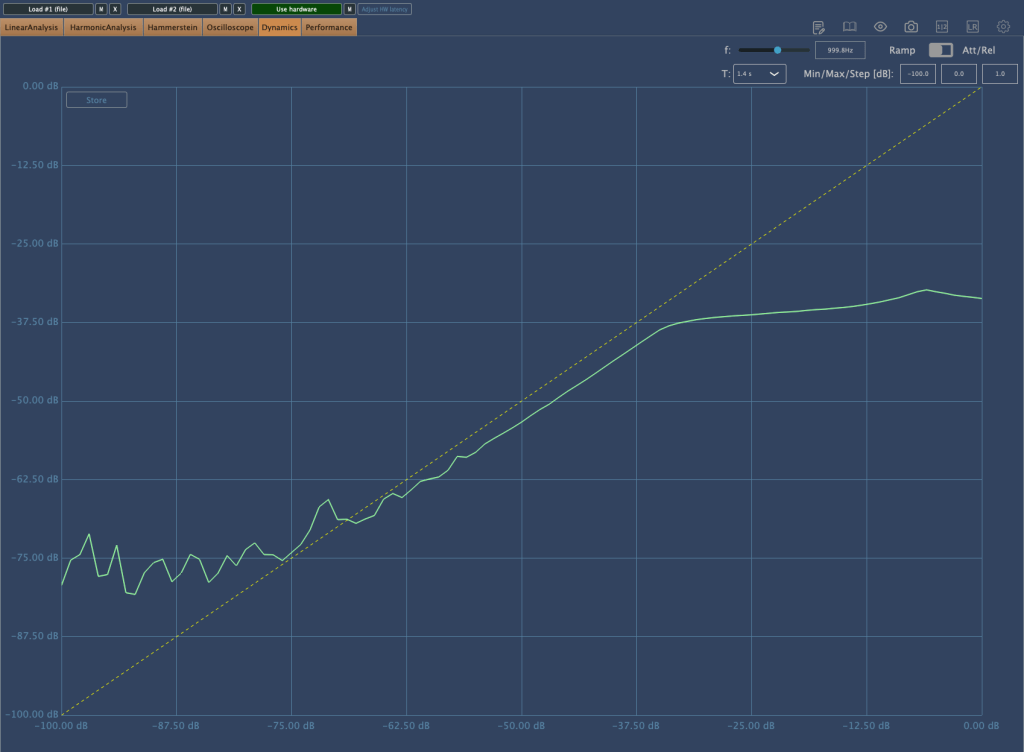
This is the compression curve graph. Strangely, the left side shows the settings for “Comp,” and the right side shows the settings for “Limit.” They seem switched, don’t they? Perhaps it’s just a labeling issue.

Even when using the device, it felt like the settings were somewhat reversed.

Practical Use

I tested the SA-2A on vocals and lead acoustic guitar in a project I’m currently mixing, as well as on some demo vocals for a production I’m working on. Additionally, I conducted a few simple tests.

My observations are as follows:

  1. It’s a saturation machine that adds a hefty amount of color.
  2. It can sound a bit rough, so careful EQing or the use of de-essers/multiband compressors may be necessary to tame it.
  3. As you increase the Peak Reduction, the high frequencies rise, so setting the Input Gain properly beforehand is crucial.
  4. It’s challenging to use on sources that are already colored.
  5. The lack of an Emphasis knob is a drawback.

I wouldn’t say I’m in love with it, but it certainly has its uses.

Since 2017, there’s been an option to use Sowter transformers, and it seems they’ve started custom ordering these transformers from the two companies they work with.

While the raw sound isn’t spectacular, it integrates nicely into a mix. I plan to experiment more with transformer and tube swapping in the coming months.

I hope you enjoyed reading this review. See you in the next post!

I’m always open to reviewing hardware products! If you’d like me to review a product, please feel free to reach out at joe1346@naver.com.

Zynaptiq Pitchmap Sale (until July 28)

Hello, I’m Jooyoung Kim, an engineer and music producer.

Today, I want to introduce Pitchmap, a plugin by Zynaptiq that’s frequently used in color bass music.

For this review, I requested an NFR (Not for Resale) code for Pitchmap from Plugin Boutique. Thankfully, Zynaptiq provided me with the ZAP IV bundle code. I’d like to express my gratitude to them. Besides Pitchmap, I’ll be reviewing other Zynaptiq plugins during their sale periods.

Let’s get started!

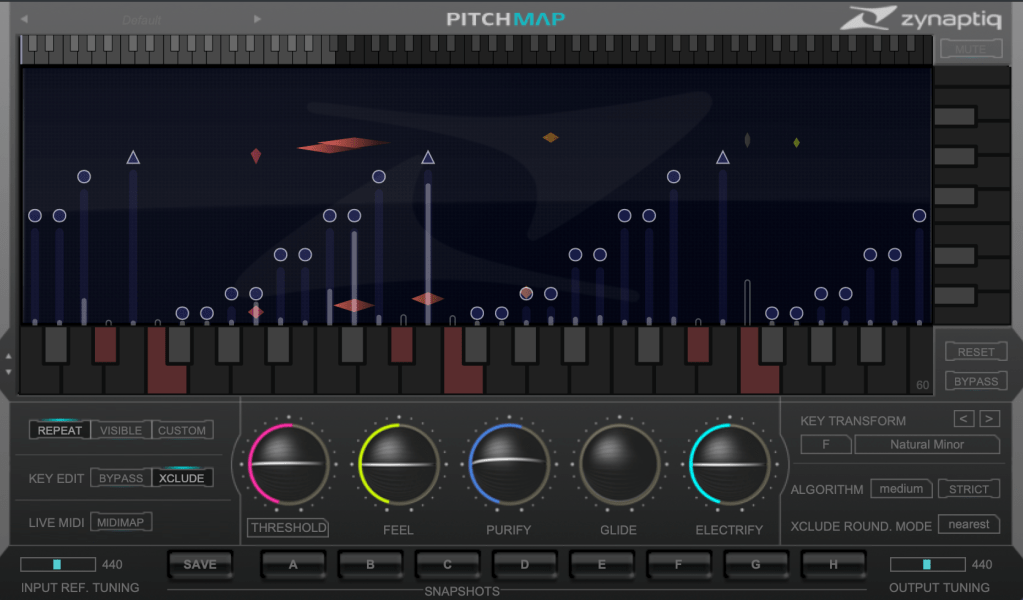
Pitchmap is a pitch correction plugin created by Zynaptiq in 2013.

While pitch correction is commonly associated with vocal tuning, Pitchmap is more often used in remixing and sound design.

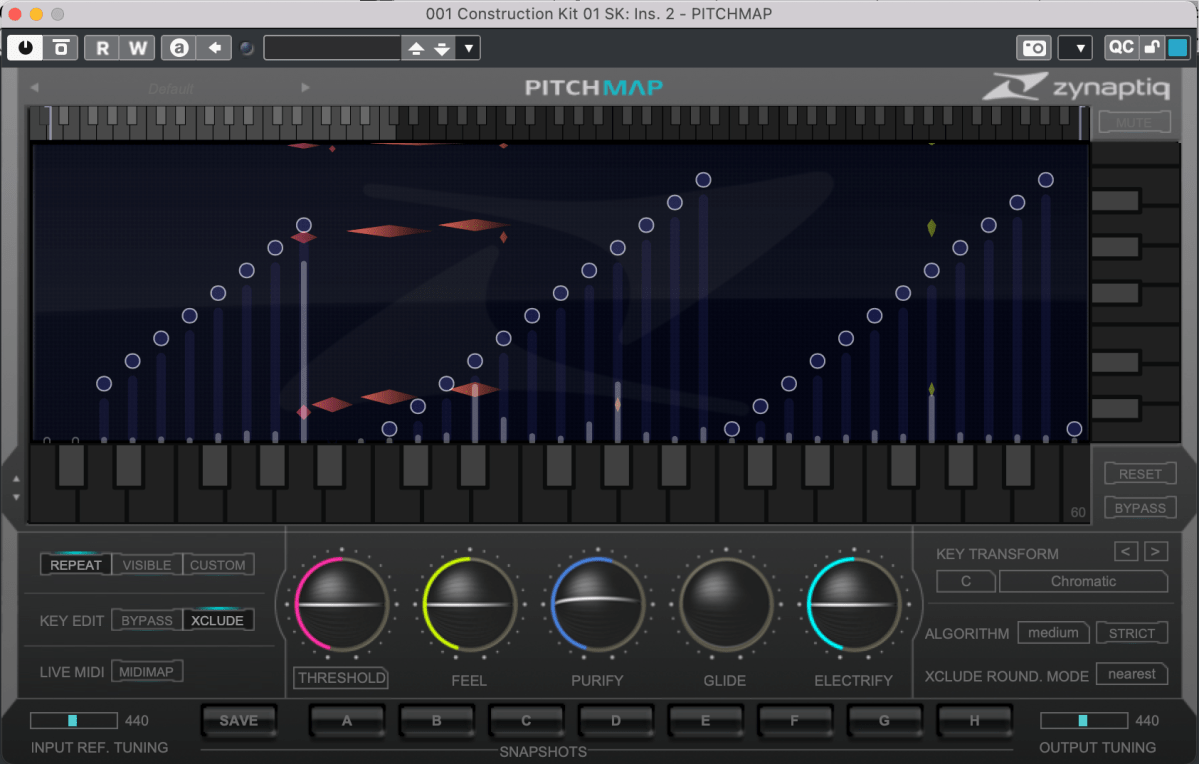
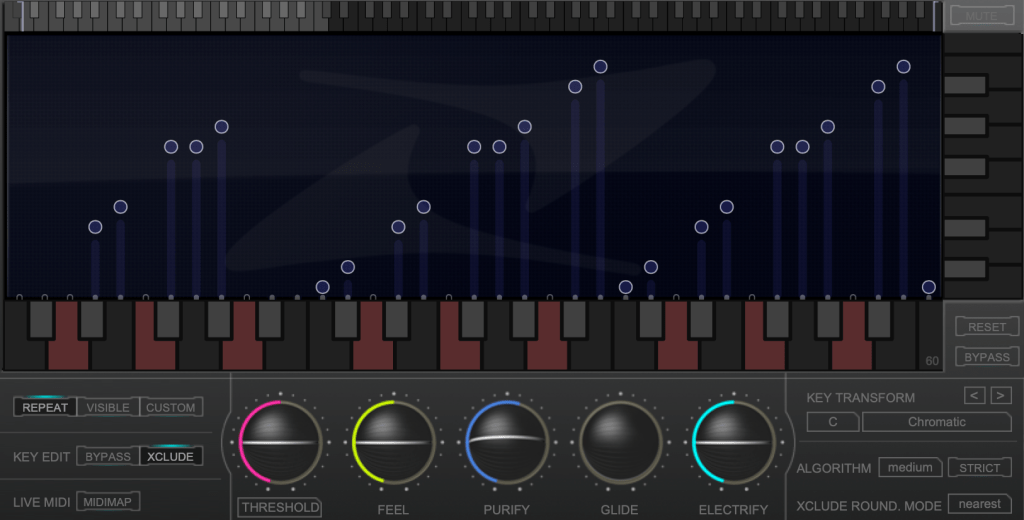
The horizontal axis represents pitch, similar to a keyboard roll.

Although only three octaves are shown,

you can adjust the display by clicking the light gray area at the top to navigate to the desired pitch range.

The vertical axis represents time, with red/orange markings indicating the pitch at that specific time. Essentially, the X and Y axes are flipped compared to typical vocal tuning plugins.

The white bars show relative volume, and the circles indicate pitch shifts.

For example, moving a circle representing F# upwards changes the sound from F# to G.

This allows you to change the key of the entire piece arbitrarily.

Double-clicking on a circle transforms it into various shapes: inverted triangle, triangle, square, etc.

  1. A square maintains the pitch within the same octave.
  2. A circle shifts to the nearest pitch (up by 9 semitones or down by 3 semitones).
  3. An inverted triangle always shifts downwards.
  4. A triangle always shifts upwards.

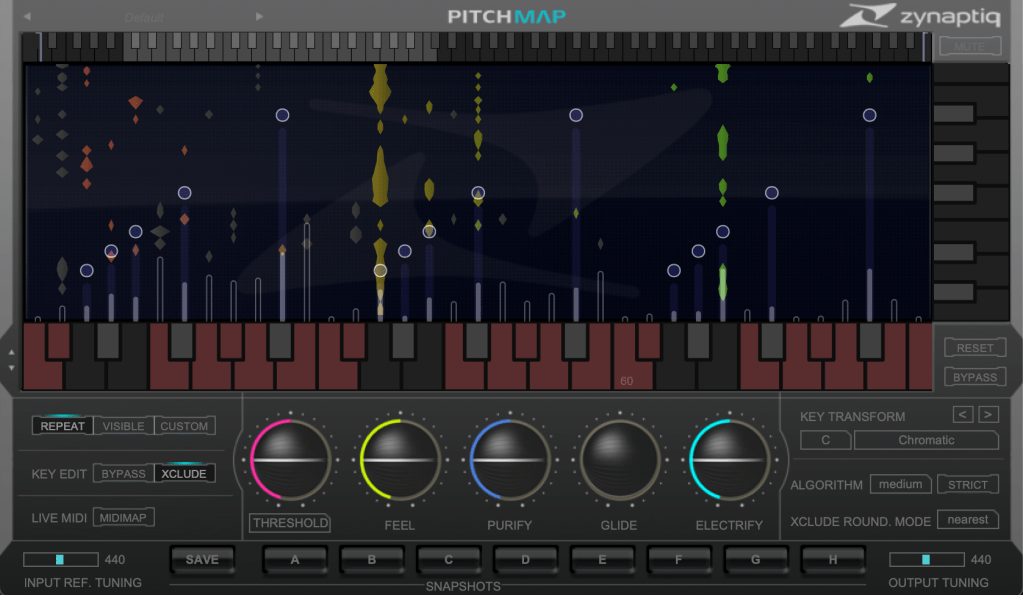
In Key Edit mode, you can click on notes in the piano roll to exclude them from playback.

Clicking Bypass and selecting notes in the piano roll means those notes will bypass the effect.

You can also allow MIDI input to select pitches in real-time through a MIDI channel.

You might wonder if these changes would make the sound awkward, but surprisingly, the result is quite cohesive, making Pitchmap ideal for remixing.

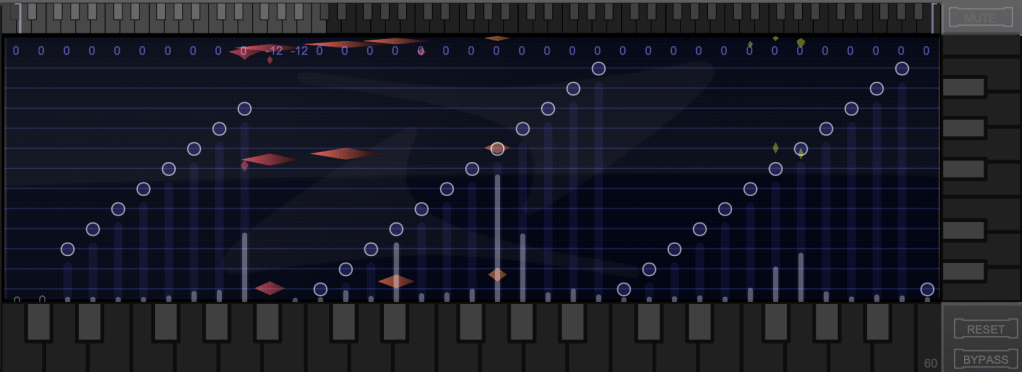
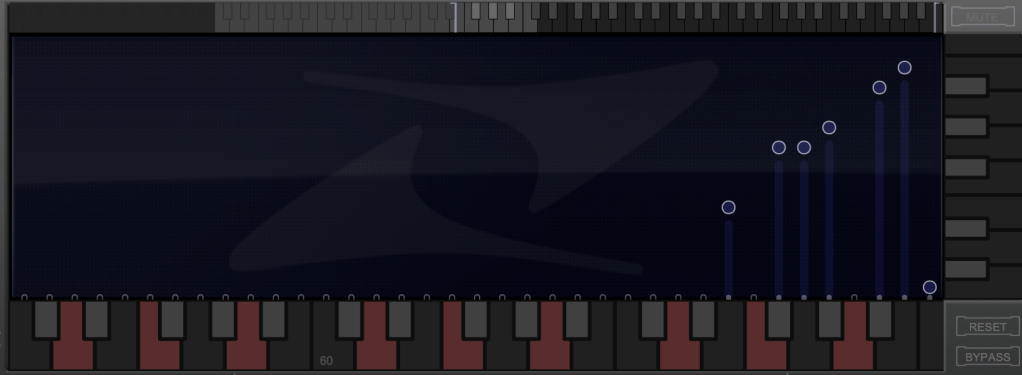
The white bars in the top piano roll can be moved to set a specific pitch range. The image above sets the range from Eb downwards to be excluded.

Other parameters include:

  1. Threshold: Determines the extent of tuning (lower values mean more comprehensive processing).
  2. Feel: Controls subtle pitch variations after tuning (higher values retain more nuance).
  3. Purify: Reduces noise above 50% and increases noise below 50%.
  4. Glide: Adds glide/portamento effects.
  5. Electrify: Enhances the synthetic feel or optimizes signal processing.

Exploring the rest of the features will help you understand their functionalities better.

This plugin is not only useful for contemporary music, often centered around remixes and bass, but also for creating unique sounds in other genres. Personally, I enjoy blending these elements into string or band sections for a sophisticated and effective sound.

I’ll share some YouTube videos demonstrating how I use Pitchmap.

The current sale lasts until July 28, and the discount is substantial. If interested, I highly recommend purchasing.

Additionally, purchasing from Plugin Boutique entitles you to a free plugin. This month, the options are Frostbite 2 by AudioThing or EQuivocate by Newfangled Audio.

Frostbite 2 offers various modulation effects, and EQuivocate is a graphic EQ with auditory filters and a Match EQ feature. Personally, I’d choose Frostbite 2.

See you in the next post!

Stam Audio SA4000 mk2 Compressor Review

Hello, I’m Jooyoung Kim, an audio engineer and music producer.

Today, I’d like to share my thoughts after using the SA4000 mk2 compressor for a couple of months.

  • Appearance

The back panel is equipped with XLR connectors throughout, and the sidechain input is a stereo unbalanced connection via XLR.

The exterior is quite standard for rack equipment, with a solid and heavy build. It’s a 1U unit and features a British Mod, noticeable by the two red Carnhill transformers on the right side.

The unit is relatively deep, so I had to connect a right-angled power cable to mount it properly.

For the sidechain, I used my Send Return TRS to TS cable, converting the TRS to XLR to create an unbalanced stereo XLR to TS cable.

  • Usage

The left side shows the frequency response without the transformers, and the right side shows it with the transformers.

The difference isn’t drastic; the transformers slightly reduce the low frequencies and overall volume.

In terms of harmonics, there isn’t a significant difference except for the volume change. Again, the left side is without the transformers, and the right side is with them.

I examined the Ratio settings for any peculiarities and found that the Knee is slightly softer. The primary difference with and without transformers seems to be the volume.

In practical use, I noticed:

  1. The high frequencies are considerably tamed, making it suitable for use as a bus compressor on harsh hi-hats.
  2. Recording with the transformers engaged reduces the high frequencies, which isn’t to my taste.
  3. When gain-matched, the version with the transformers engaged sounds slightly more pronounced.

These are the main points I’ve gathered.

Among the SSL clone compressor plugins I’m familiar with, I’ve never encountered one with this specific frequency response. It has a unique character.

In particular, I find it effective with BFD drums, where overheads or hi-hats often have excessive high frequencies. Using this compressor effectively tames those troublesome areas. It would also work well on a master bus for retro-style tracks, preserving that vintage feel.

  • Conclusion

Using hardware can be cumbersome. You need to prepare recall sheets for future mix adjustments, carefully manage equipment routing, and more. Despite these hassles, hardware is employed to capture its unique color and character.

This compressor, with its distinct features, has become a regular part of my setup. I’m using it frequently.

However, I don’t want to suggest that hardware is inherently superior. Both plugins and hardware are merely tools. As long as they suit your purpose and deliver the desired tone, it doesn’t matter whether it’s a plugin or hardware.

In that sense, I’m very keen on getting a tube preamp. I’ve been eyeing Oz Design, but it’s a little-known brand, so reselling might be challenging.

That’s all for today. See you in the next post!

I’m always open to reviewing hardware products! If you’d like me to review a product, please feel free to reach out at joe1346@naver.com.