Hello! I’m Jooyoung Kim, an audio engineer and music producer.
Today, I’d like to talk about the essential components of sound generation in a synthesizer. Every synthesizer or modular system utilizes these three core functions: the VCO, VCF, and VCA.
Their functions are explained below:
- VCO (Voltage Controlled Oscillator): Generates basic waveforms such as sine, square, sawtooth, and triangle waves.
- VCF (Voltage Controlled Filter): Processes the signal from the VCO by attenuating specific frequencies. Common types include low-pass, high-pass, and band-pass filters, which are essential for sound design.
- VCA (Voltage Controlled Amplifier): Acts as a gate or gain stage that shapes the volume of the audio signal over time, typically controlled by an envelope generator (which defines the attack, decay, sustain, and release of the sound).
VCO – Basic Waveforms
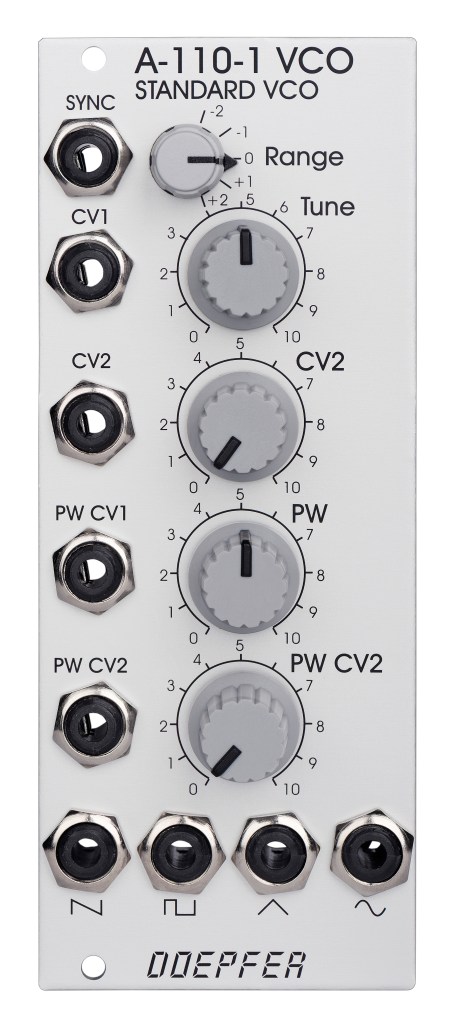
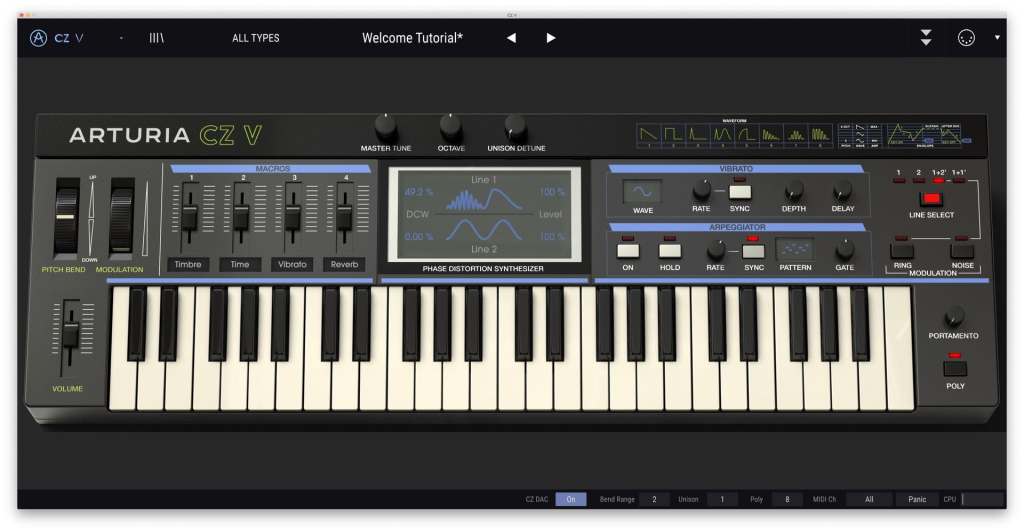
You can easily find these waveforms on a VCO module. The image above is an example from Doepfer A-100 module system; the waveforms are depicted on the panel, located below the output connectors.
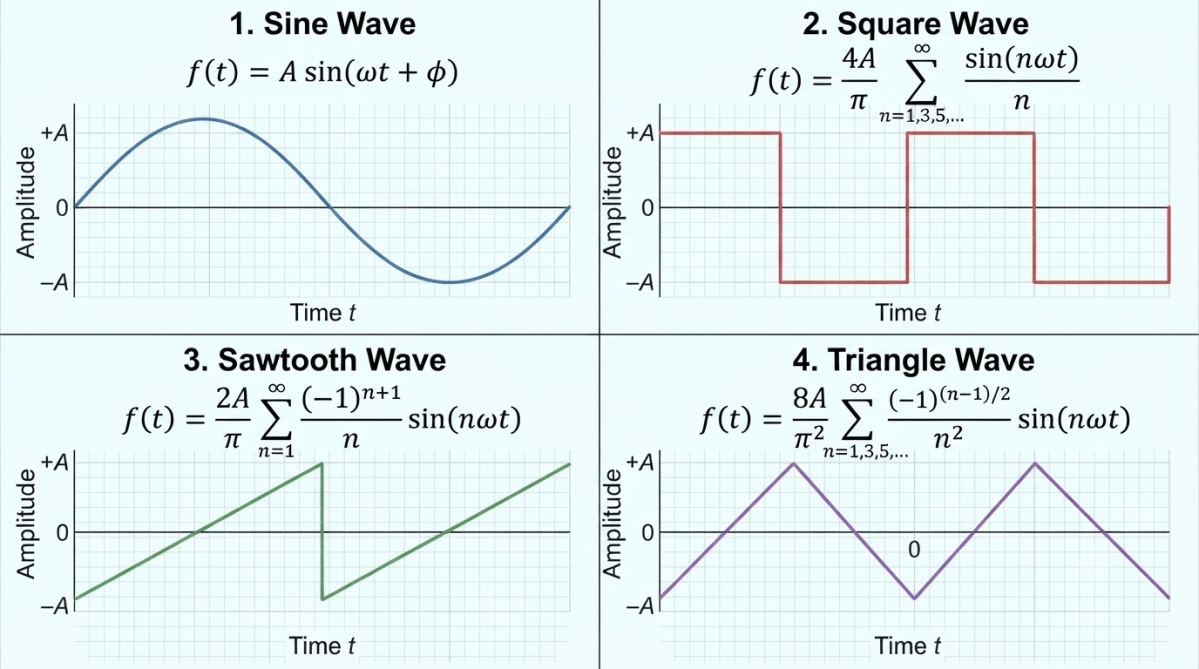
As you can see, there are four types of basic waveforms: sine, square (pulse), sawtooth, and triangle. They are created by combining various harmonics, which can be expressed using mathematical equations.
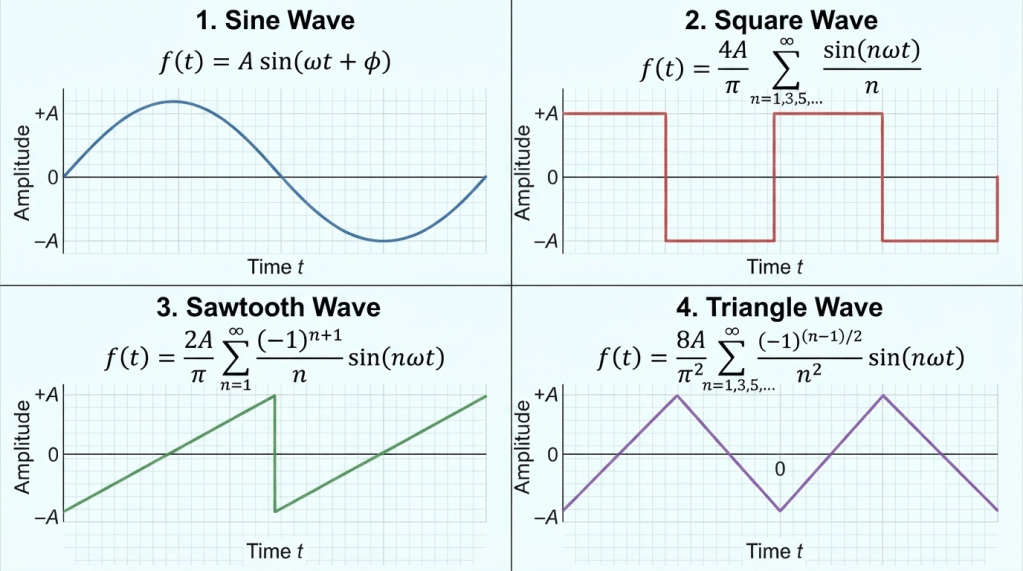
Therefore, I will explain all types of waveforms with graphs and equations.
Sine Wave
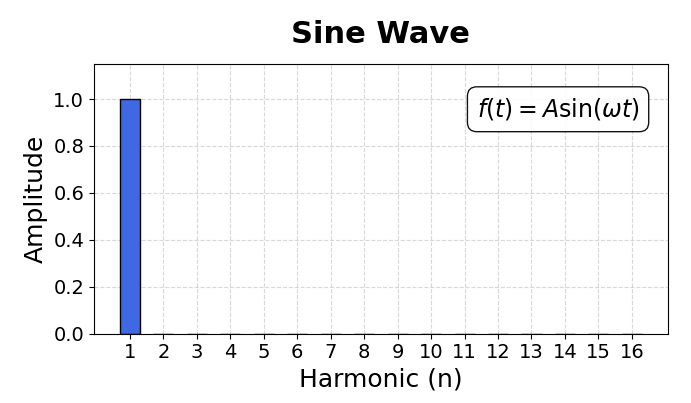
Sine wave is the most fundamental wave. It is defined by the function:
- A: Amplitude (peak value)
- ω: Angular frequency
- ϕ: Phase shift
- t: time
Square Wave

Square wave is a periodic wave that switches between two levels. It can be represented as an infinite summation of odd harmonics of sine waves:
- A: Amplitude (peak value)
- ω: Angular frequency
- t: time
Sawtooth Wave
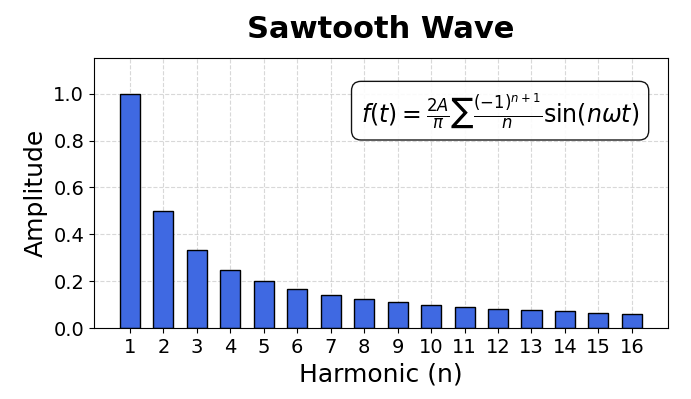
This waveform increases linearly and drops instantly. It contains all integer harmonics:
- A: Amplitude (peak value)
- ω: Angular frequency
- t: time
Triangle Wave
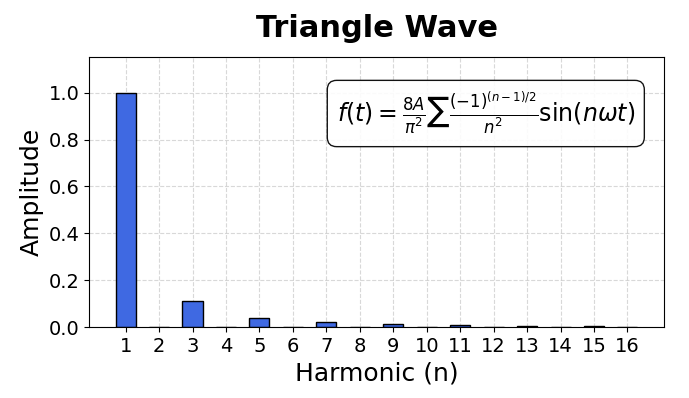
It is similar to a sawtooth, but symmetric. It consists only of odd harmonics, but with a faster decay of amplitude:
- A: Amplitude (peak value)
- ω: Angular frequency
- t: time
Each waveform has distinctive sound characteristics, and these basic waves are the foundation of synthesizers.
As a side note, because the sawtooth wave contains the richest harmonics among these basic forms, it is frequently used to create pad sounds to fill up the background.
VCF – Basic Filters
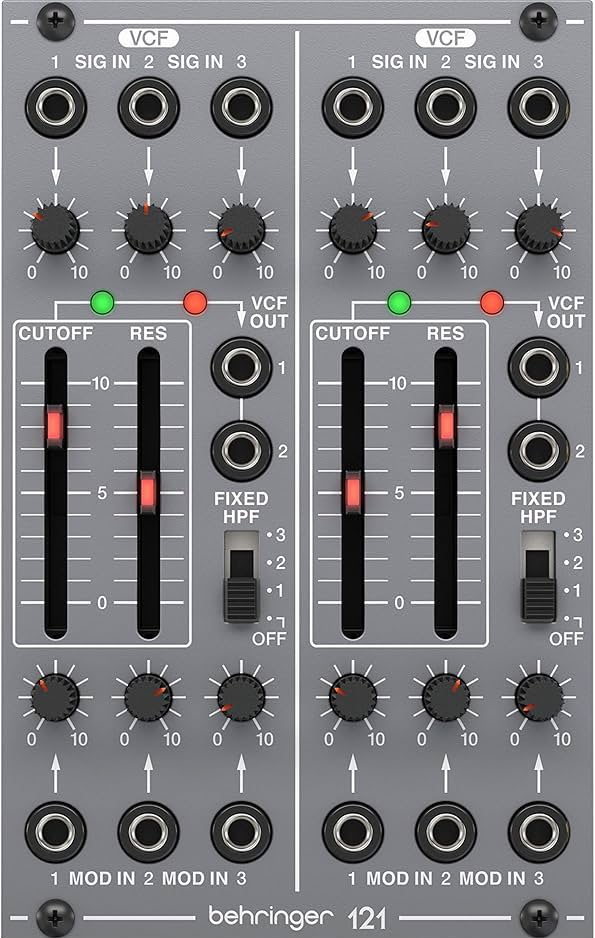
Basic filters are typically categorized into three types: low-pass (high-cut), high-pass (low-cut), and band-pass. Filters have various parameters, but I will introduce only the basics today.
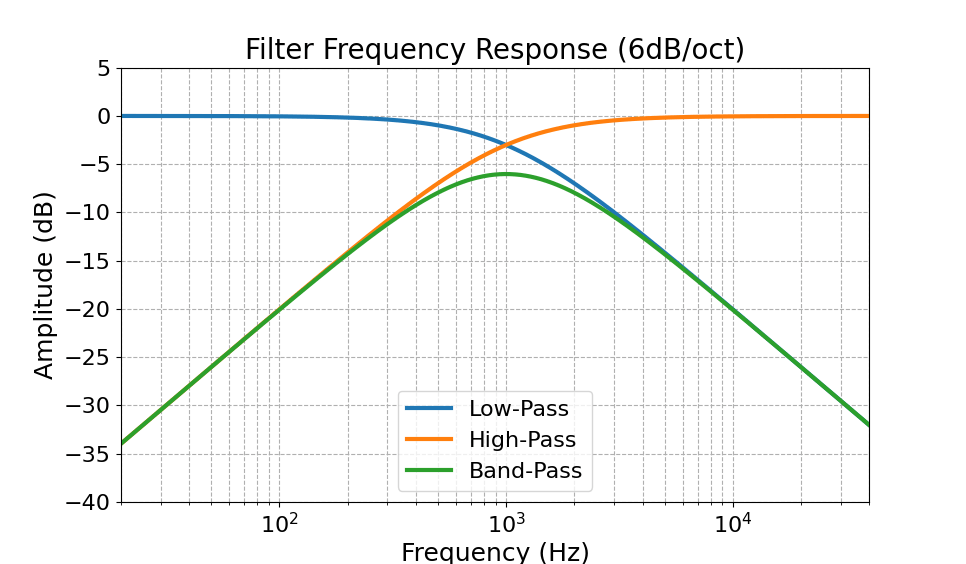
- Cutoff Frequency: Due to the characteristics of the Butterworth filter (the standard filter used in audio), 3 dB of attenuation occurs at the cutoff frequency.
- Slope: 6dB/oct is the fundamental slope. This represents one ‘pole’ of the filter. Since filter order (the number of poles) determines the steepness, you will commonly see slopes of 12, 18, 24 dB/oct, etc.
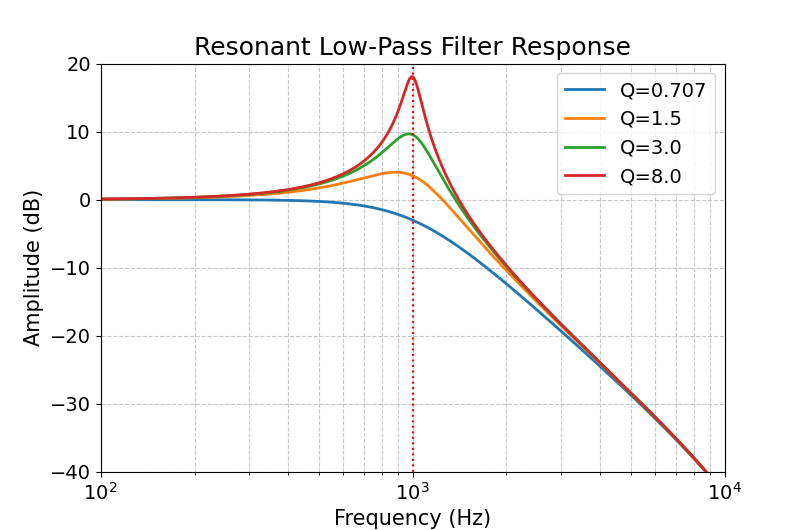
Many filter modules include a resonance function that emphasizes frequencies near the cutoff frequency. When modulated, the fluctuating cutoff frequency also causes the resonance peak to shift. This shifting creates the perception of pitch fluctuation, even though the actual fundamental pitch remains unchanged.
VCA – ADSR Envelope Generator
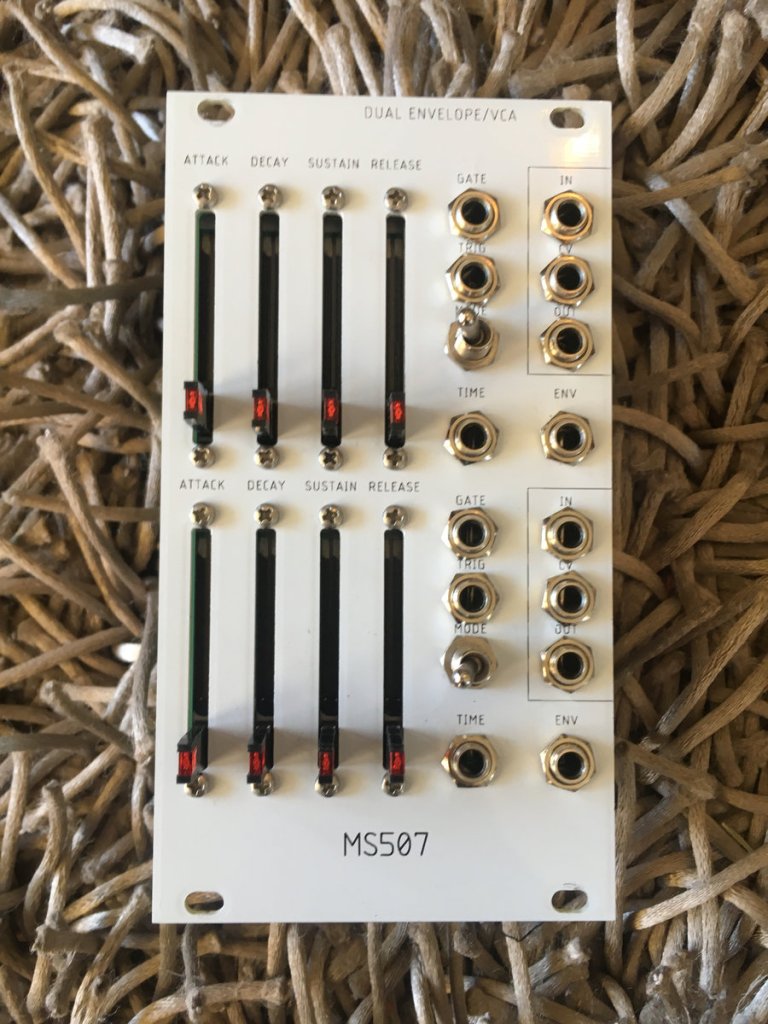
Although I have covered the ADSR concept previously, I will break it down again for those who are new to it. While a VCO and VCF are essential for creating and shaping a sound, they do not have a built-in gate mechanism to trigger or shape the signal’s output. This is where the ADSR envelope comes in.
ADSR stands for Attack, Decay, Sustain, and Release. These four parameters define how the amplitude of a signal changes over time as it passes through a VCA.
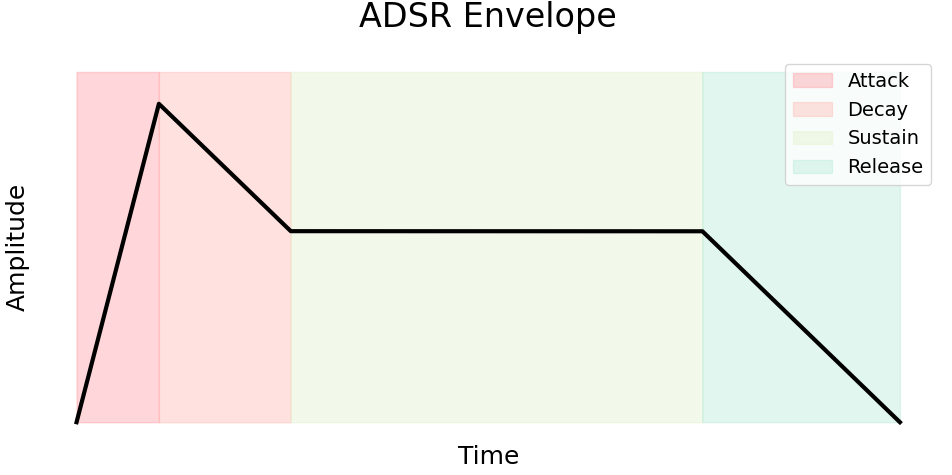
- Attack (time): The time it takes for the sound to reach its peak level from the moment a key is pressed.
- Decay (time): The time it takes for the sound to drop from its peak level to the designated sustain level.
- Sustain (level): The volume level that the sound maintains while the key is held down.
- Release (time): The time it takes for the sound to fade away completely after the key is released.
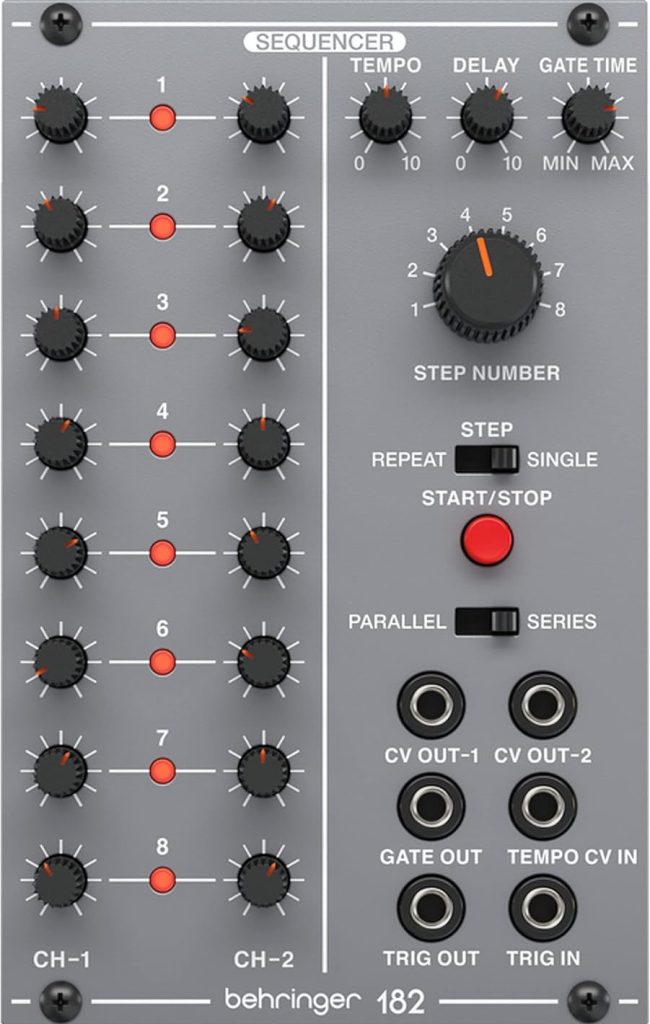
In modular synthesizers, sequencer modules are often used instead of keyboards.
So far, we have explored the essential building blocks of a synthesizer. These modules serve as the ‘alphabet’ of sound design; therefore, becoming familiar with them is crucial for mastering these complex musical instruments.
That’s all for today. I hope this overview helps, and I look forward to seeing you in the next post!


.jpg)