2025 Summer Expressive E Soliste String Virtual Instrument Series Launch Sale (~July 18, 40% Off)

Hey there! I’m Jooyoung Kim, a mixing engineer and music producer.

Today, I’m excited to introduce you to a brand-new release from Expressive E called the Soliste series, featuring four virtual string instruments: violin, viola, cello, and double bass.

As with my previous plugin and virtual instrument posts, if you purchase through the links in this post via Plugin Boutique, I get a small commission, which really helps me keep going! So, let’s dive in!

Unlike traditional sample-based instruments, Soliste uses Physical Modeling technology, so it’s super lightweight. Even if you buy all four instruments—violin, viola, cello, and double bass—it only takes up about 1.3GB of space.

I’m not sure if I mentioned this when I talked about synthesizer types before, but physical modeling involves mathematically simulating the principles of how sound is produced. I believe it all started with Yamaha’s waveguide modeling.

Back in the day, these modeled instruments were tough to use due to high CPU demands, but with today’s powerful CPUs, they’re super efficient, compact, and easy to tweak while sounding great.

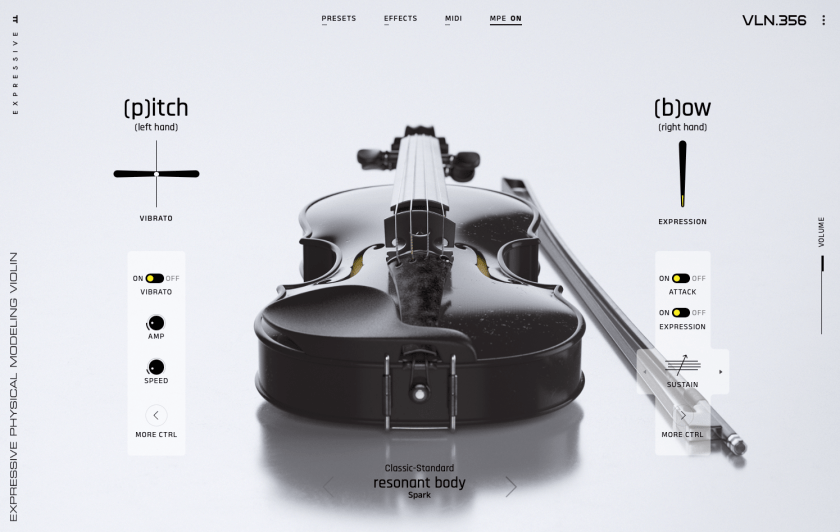
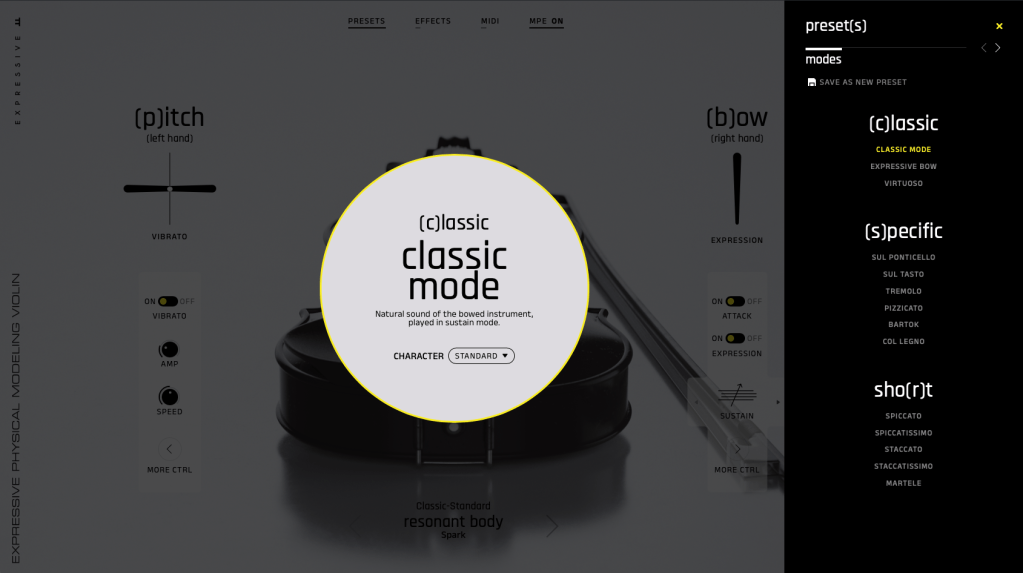
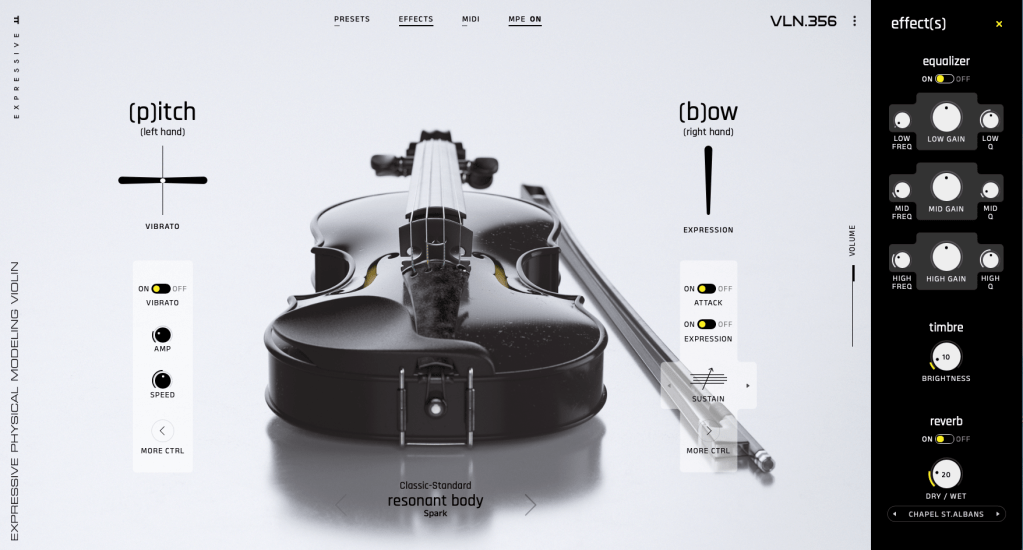
What’s cool about Soliste is how it’s laid out: effects related to the left hand (like vibrato and portamento) are on the left side of the interface, while bowing-related effects are on the right. Pretty intuitive!

Here are the standout features of Soliste:

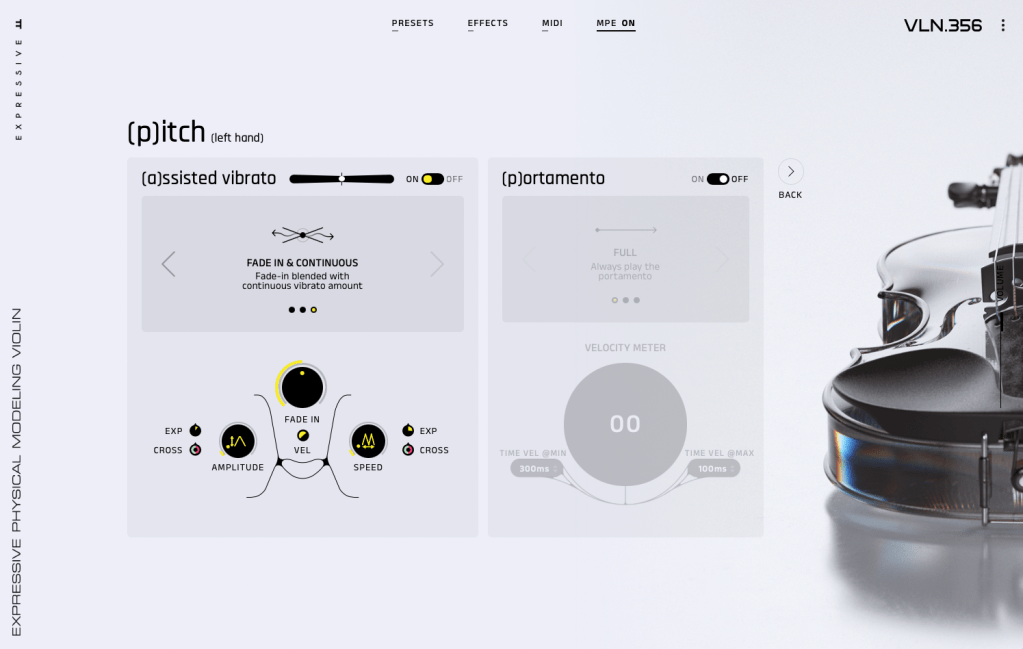
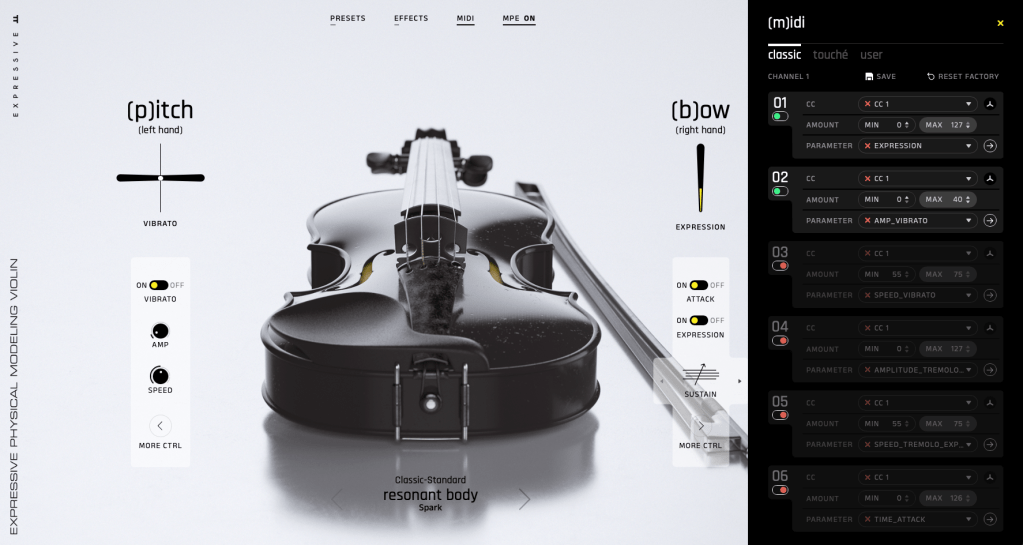
  1. Vibrato and Portamento Control: You can adjust the intensity of vibrato and portamento, and control their amount using the Expression (labeled as EXP, tied to modulation).
  2. Aftertouch for Extra Expression: Beyond the modulation wheel, you can use aftertouch to dial in more EXP, which is mapped by default for convenience (though other instruments could do this too if set up).
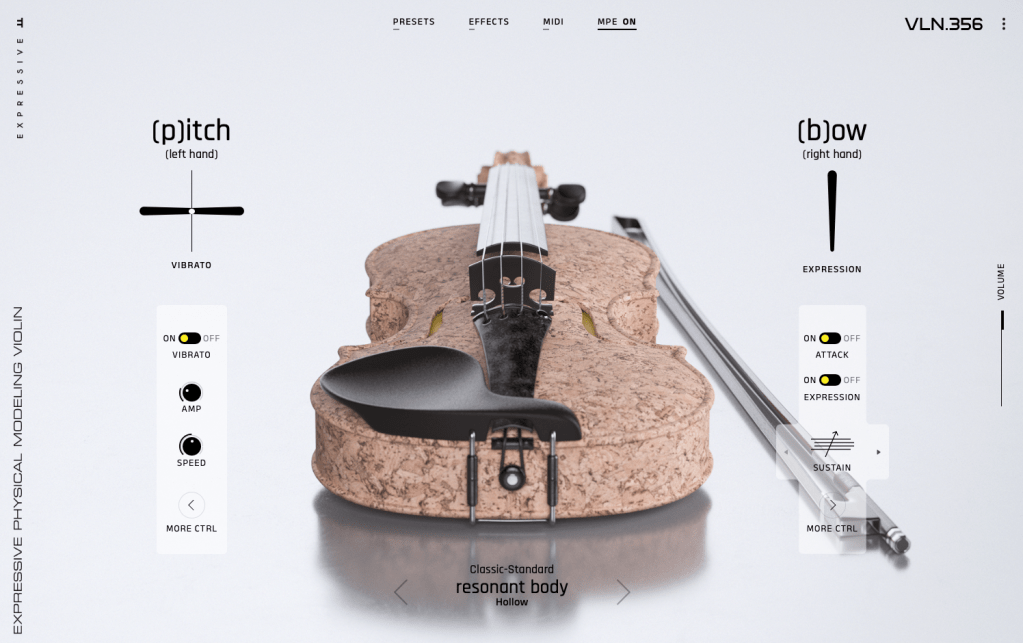
  3. Six Tonal Flavors: Choose from Spark, Hollow, Sleek, Antique, Lyric, or Mellow to shape the sound.
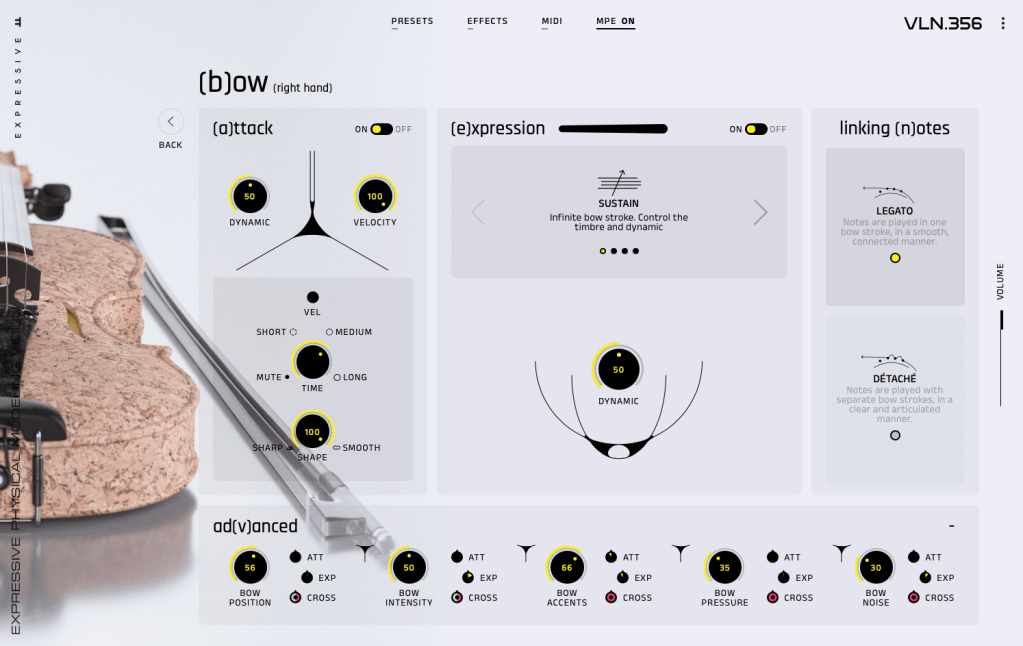
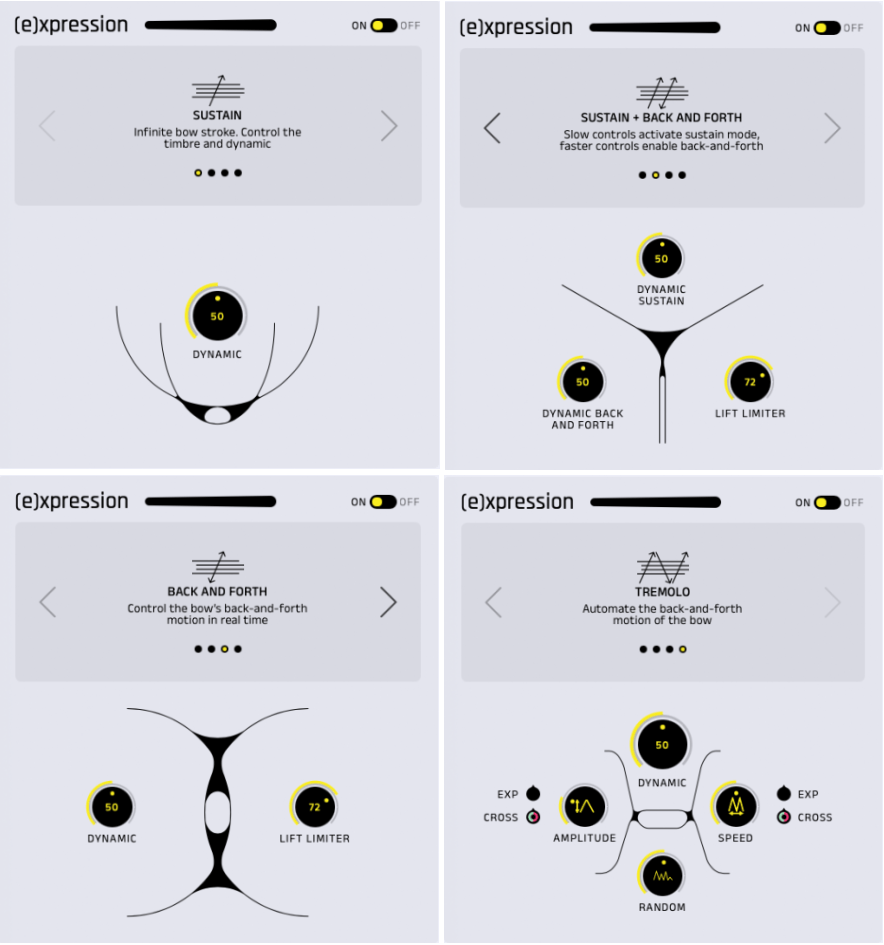
  4. Bowing Parameters: Adjust Attack, Position, Tension, and more, with the ability to change their intensity in real-time based on Expression, just like vibrato or portamento.

That’s the gist of it!

You also get presets for different playing techniques, simple effects, and MIDI settings for flexible use. I used to think SWAM was the king of modeled solo instruments, but after listening to Soliste’s samples [Link] and trying it out myself, I think it’s a solid alternative. The only downside? It doesn’t seem to support double or triple stops (yet), and if you’re not careful with articulation or play it solo, the modeled nature can feel a bit obvious.

Still, for the price, it’s a fantastic deal, haha. It’s great as a solo instrument, but since there aren’t many virtual instruments with this tonal vibe, it’d also shine when mixed into a chamber string ensemble for a richer sound.

  1. Soliste VLN 356 – Violin
  2. Soliste VLA 419 – Viola
  3. Soliste CLO 756 – Cello
  4. Soliste DBS 1130 – Double Bass

You can buy the bundle or pick individual instruments based on your needs.

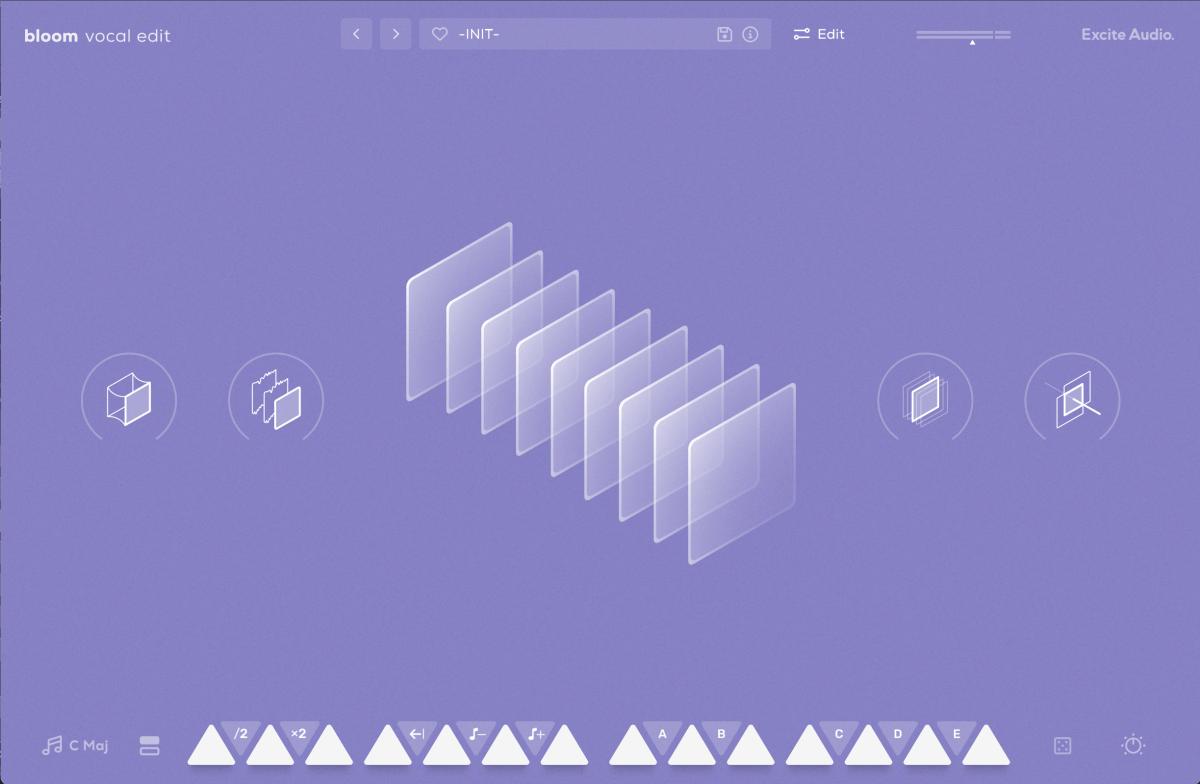
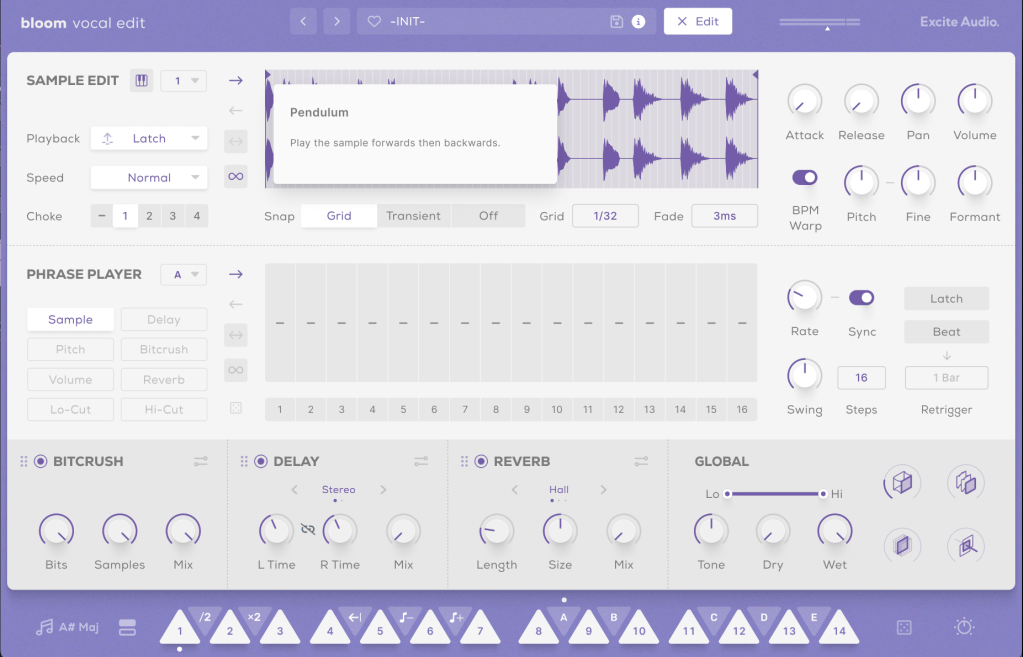
Oh, and if you purchase from Plugin Boutique this month, you’ll get Excite Audio Motion: Dimension Lite for free!

I’ve previously introduced the full version of Dimension (not the Lite one), and it’s a really solid delay/reverb plugin, so don’t miss out on this freebie!

That’s all for now—see you in the next post!

UVI Falcon Sale (50% Off, Until May 9)

Hi there! I’m Jooyoung Kim, a mixing engineer and music producer.

UVI is a company renowned for its piano virtual instruments, much like Spectrasonics. These days, they’ve expanded beyond pianos to develop synthesizers and a variety of audio effects.

Recently, UVI joined Plugin Boutique, kicking off an exciting Intro Sale. Currently, Plugin Boutique offers two UVI products:

The Sonic Bundle, which includes all of UVI’s products, and FALCON, UVI’s flagship synthesizer/virtual instrument engine. Today, I’ll be diving into Falcon.

Full disclosure: I received an NFR (Not for Resale) code for this product from UVI via Plugin Boutique. If you purchase through the links in this blog, I earn a small commission, which helps me keep creating content and, frankly, survive! Thank you for your support.

Let’s get started!

What is Falcon?

Falcon is a versatile engine, similar to Native Instruments’ Kontakt, capable of loading virtual instruments or functioning as a synthesizer/sampler with 20 oscillators and various synthesis methods.

Like Kontakt, Falcon can feel overwhelming if you dive into all its detailed settings or try to build a sampler from scratch. It’s especially tricky for beginners, particularly when combining FX and modulation with synthesizer configurations.

Instead of trying to master everything at once, let’s start with the basics.

When you first open Falcon, you can choose from 21 default preset synthesizers, including Analog, FM, Additive, Organ, Wavetable, Noise, Pluck, Texture, Sample, Drum, MPE, Granular, Vosim, Harmonic Resonator, Bowed String, and more.

Once loaded, the Info tab displays the most basic parameters for tweaking.

In the Edit tab, you can fine-tune more detailed parameters, such as FX, Layer, Key Group, Oscillator, Mapping, and Modulation for the loaded synthesizer or virtual instrument.

The Effects tab lets you dive deeper into FX adjustments. With over 100 effects included in Falcon, it’s tough to cover them all! They lean more toward sound design than traditional mixing, offering incredible creative possibilities.

In the Event tab, you can add MIDI FX processors and other MIDI-based effects.

The Mods tab is where you control modulation effects like LFOs and ADSR envelopes.

In the Mappers tab, you can draw shapes to scale, quantize, curve, or pattern modulation source values, allowing you to customize how modulation effects evolve.

On the left, you can add modules to incorporate more virtual instruments or synthesizers.

The Tree view shows which sounds or effects are applied to each part, while the List view displays the data settings for the virtual instrument or synthesizer.

On the right, you can browse sounds by folder or soundbank and preview them with a quick click.

The search bar helps you find presets, while the waveform icon loads sounds into the mapping editor. The “fx” category covers effects, and “mfx” refers to music FX for sound effects. The note icon represents MIDI effects for the Event tab, and the frequency spectrum-like icon is for modulation effects in the Mods tab.

Falcon’s extensive features can take time to master, but its versatility lets you create an incredible range of sounds.

Until May 9, Plugin Boutique is offering a 50% discount on Falcon as part of the Intro Sale. If you’re looking for a single, all-in-one synthesizer virtual instrument, Falcon is a fantastic choice.

Thanks for reading, and I’ll see you in the next post! 😊

Introducing Sale! Excite Audio Bloom Vocal Edit Virtual Instrument (Vocal Chop, 39$ ~9/1)

Hello! This is Jooyoung Kim, an audio engineer and music producer.

Today, I’m excited to introduce a new virtual instrument specifically designed for vocal chops, now available at an attractive price. Like my previous posts on sales and new releases, I’ve received an NFR (Not for Resale) code from Plugin Boutique for this review.

Let’s dive right in!

The basic interface is quite similar to the Bloom Bass Impulse.

When I first reviewed a virtual instrument from this company, I thought it was a sophisticated sampler. It’s impressive that Excite Audio has now adapted it for vocal chops, a truly innovative idea.

Upon launching the interface, you can easily add effects like Glue (for compression and saturation), Fuzz, Metallic (short delay), and Doubler.

The lower section displays a keyboard. Pressing the white keys plays the sample assigned to that key, while the black keys offer functionalities like playing the sample at half or double speed, reverse playback, octave shifts, and sequential playback.

You can also assign samples randomly by pressing the dice icon.

The knobs allow you to adjust effects such as Delay, Bitcrush, Reverb, Lo-Cut, and Hi-Cut.

Clicking the key indicator on the lower left automatically adjusts each vocal sample to match the chosen key.

Next to the key indicator, the “Bank” button reveals a collection of 112 samples, offering a rich variety.

Clicking the “Edit” button in the preset window allows you to edit the samples assigned to the white keys and choose how they play back when pressing the black keys (options A, B, C, D, E, etc.).

The parameters visible in the main UI, like Bitcrush, Delay, and Global Reverb, are also adjustable.

The Sample Edit function offers extensive control, including Snap, Attack and Release Time adjustments, speed and BPM Warp functionality, and more.

Most of the other features are straightforward. If you’re unsure about anything, just click the “i” (information) icon next to the preset search bar for a helpful explanation of each feature.

Until now, I’ve used Kontakt or basic DAW samplers for vocal chops, but this new instrument is really impressive.

It comes with pre-calculated pitch adjustments and offers a wide range of sample options, not just short one-shot samples.

A minor drawback is that you can’t import your own samples, but for vocal chops used as ad-libs or fills, this instrument offers plenty of potential to create great sounds.

You can check out the sound demos in the video made by Plugin Boutique.

The current price is $39, which is a 33% discount. With such a clean and intuitive UI, I highly recommend this instrument, especially if you don’t already have a dedicated vocal chop tool.

If you buy from Plugin Boutique today, you can also get Audio Thing’s Frostbite 2 or Newfangled Audio’s EQuivocate for free. Plugin Boutique often offers a free plugin with purchases, though I’m not sure what they’ll offer in August.

Once the freebie for August is announced, I’ll update this post accordingly.

See you in the next post!

Create Your Own Virtual Instrument with NI’s Kontakt!

Hello everyone! This is Jooyoung Kim, an engineer and music producer.

Today, I’d like to share a simple guide on creating your own virtual instrument using Kontakt 6 (often just referred to as Kontakt).

While Kontakt 7 is the latest version, I haven’t upgraded to the newest Komplete bundle due to the lack of significant new libraries. Therefore, I’m using Komplete with Kontakt 6 for this tutorial. The process should be similar across versions, so I hope this will still be helpful.

Given Kontakt’s extensive features, I will not cover every detail here. For in-depth editing, I recommend checking the manual.

Let’s get started!

First, open Kontakt and double-click the empty space on the right to create a sampler. Click the wrench icon in the upper left corner to open the settings tab, as shown above. There are a lot of settings available!

First, let’s open the Mapping Editor highlighted in the picture.

You’ll see a piano roll screen along with a grid that looks like an Excel spreadsheet. The horizontal axis represents pitch, and the vertical axis represents velocity. Load your desired sample onto this grid.

The grid and the piano roll will be colored like this. Pressing the colored keys on the piano roll will play the original sample, while pressing other keys will change the pitch.

You can adjust the highlighted areas with your mouse.

By properly adjusting the areas, you can set different samples to play depending on the velocity when you press a key, as shown above.

Similarly, you can click and drag the colored areas on the piano roll to adjust the pitch range.

For example, if you open the settings for Alicia’s Keys, a commonly used instrument, and examine the mapping, you’ll see 12 velocity layers for each key. Instruments created with Kontakt often have such detailed velocity mappings. The more sophisticated the instrument, the fuller the mapping editor will be.

After completing the mapping, you can use the Wave Editor to fine-tune the samples to your liking.

You can loop the sample or perform various other edits.

The parameters are similar to those of general samplers, so if you’re familiar with samplers, you should find it easy to use.

If you’re new to samplers, exploring Kontakt can help you understand the structure of virtual instruments created with it, which can be useful when purchasing such instruments.

After some basic editing, the sound of your virtual instrument is complete. Finally, select Instrument Options and add a wallpaper with a TGA or PNG file (the manual suggests a width of 633 pixels).

This gives you a virtual instrument with a polished look. But what if you want adjustable parameters like other Kontakt instruments?

You need to use the Script Editor to add those features.

If you don’t want to dive too deep, you can simply select a factory preset from the side and add the “make_perfview” command between the “on init” and “end on” lines.

This will display the factory preset script in the main window, known as the performance view. To create a more customized performance view, you’ll need to learn scripting from various forums.

https://community.native-instruments.com/categories/scripting-workshop

For those who want to explore further, NI has a community that’s worth checking out.

Other settings like Effects, Envelopes, and Buses are similar to those in other samplers or track settings, so I won’t explain them in detail here.

It may seem challenging at first, but once you understand it, you’ll be able to use other Kontakt-based virtual instruments more flexibly. If you’re into music production, it’s definitely worth studying.

I hope this post is helpful for those dealing with virtual instruments.

See you in the next post!