Hello! I’m Jooyoung Kim, a mixing engineer and music producer.
It’s been a while since my last post, hasn’t it?
After getting rejected by AES for the second time, I was like, “Alright, let’s fix this research!” So, I scrapped my experiments, started over, re-collected all the data, and reformatted everything for submission elsewhere. Time just flew by in the process… haha.
I’m really hoping this one gets accepted before I graduate. Fingers crossed this time…
Lately, I’ve been working on recreating hardware compressors using deep learning. I trained the model with test signals, but when I fed it guitar sounds, all I got was white noise and sine sweeps… That took about two weeks of work.
So, I’ve spent the past few days coding from scratch, preparing new training data, and running the training process again. Here’s hoping the results turn out well, but man, it’s exhausting…
I’d love to own a Yamaha DX7 in real life
On another note, I recently wrapped up a year-long series on the basics of mixing, and I was wondering what to write about next. Then it hit me: why not talk about using synthesizers?
Even though my music style doesn’t heavily rely on synths, understanding how different synthesizers work can definitely broaden the creative spectrum for writing music. From an engineer’s perspective, learning about filter techniques and the unique sound characteristics of various synths can spark a ton of new ideas.
That said, I’m still organizing my research on this topic, and with some recent worries about making ends meet, it’s been tough to write as quickly as I’d like… Still, I’ll do my best to keep the posts consistent.
The content will likely follow a simple structure: “Sound synthesis methods and their history -> Iconic synthesizers”
That’s the plan. Looking forward to catching you in the next post!
Hello everyone! This is Jooyoung Kim, an engineer and music producer.
Today, I’d like to share a simple guide on creating your own virtual instrument using Kontakt 6 (often just referred to as Kontakt).
While Kontakt 7 is the latest version, I haven’t upgraded to the newest Komplete bundle due to the lack of significant new libraries. Therefore, I’m using Komplete with Kontakt 6 for this tutorial. The process should be similar across versions, so I hope this will still be helpful.
Given Kontakt’s extensive features, I will not cover every detail here. For in-depth editing, I recommend checking the manual.
Let’s get started!
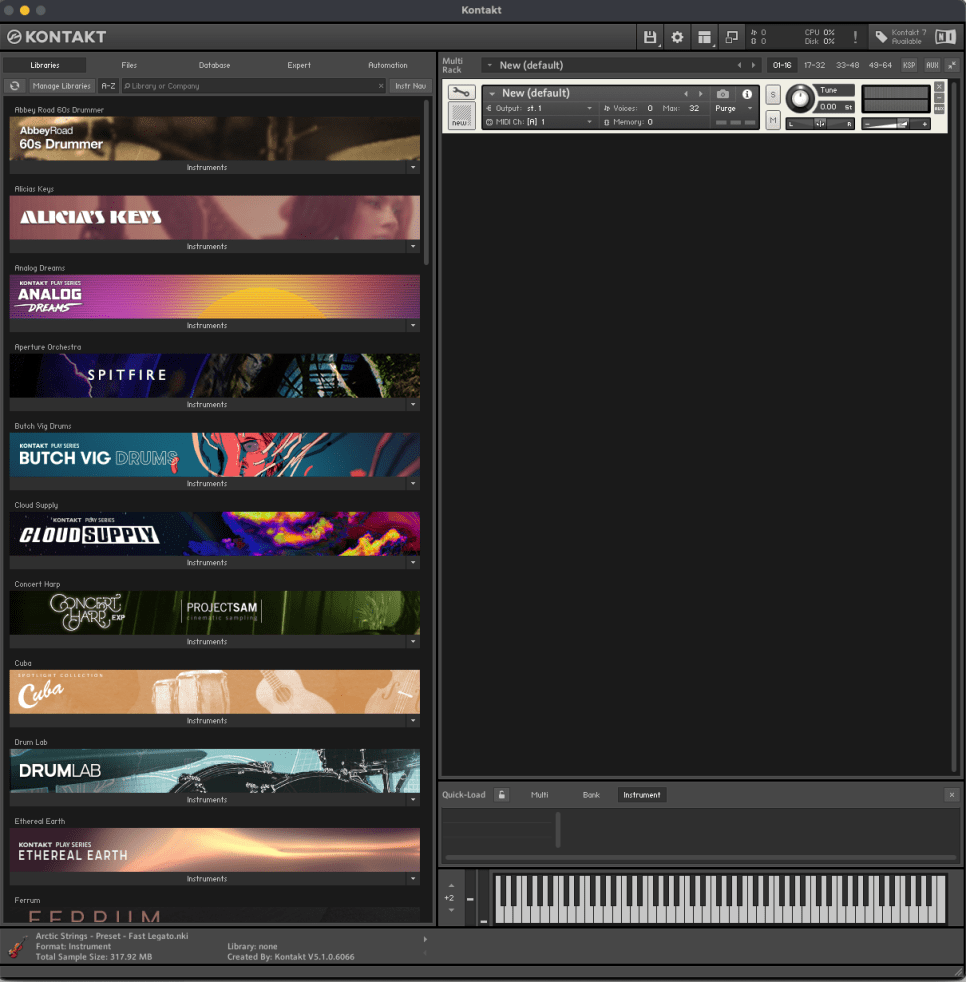
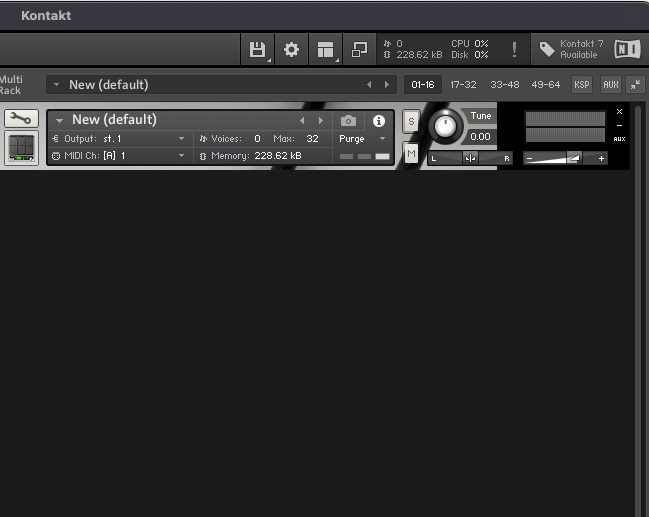
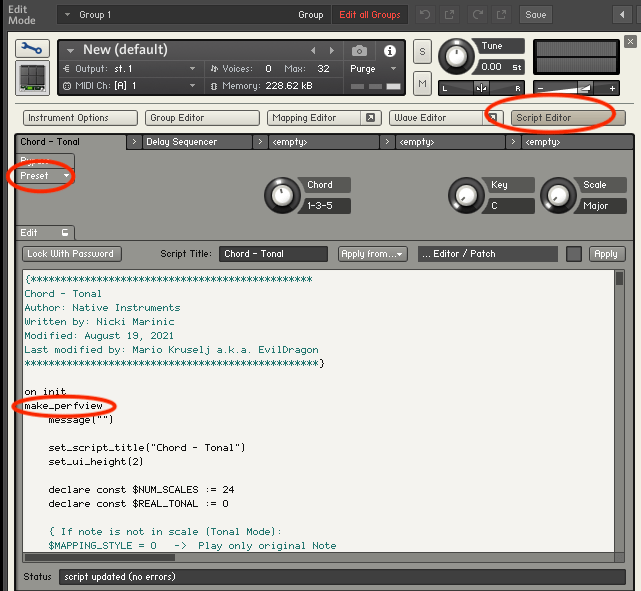
First, open Kontakt and double-click the empty space on the right to create a sampler. Click the wrench icon in the upper left corner to open the settings tab, as shown above. There are a lot of settings available!
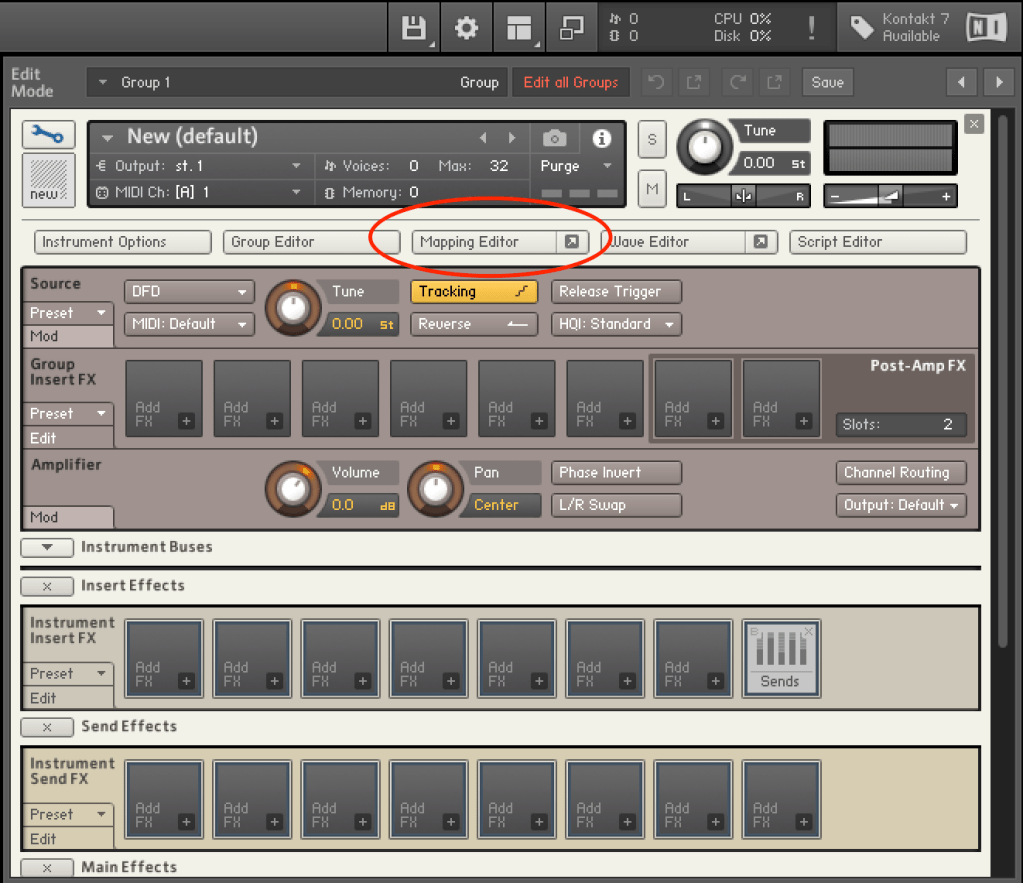
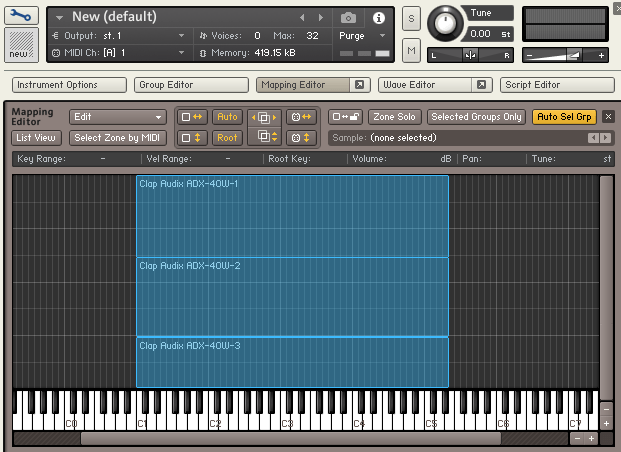
First, let’s open the Mapping Editor highlighted in the picture.
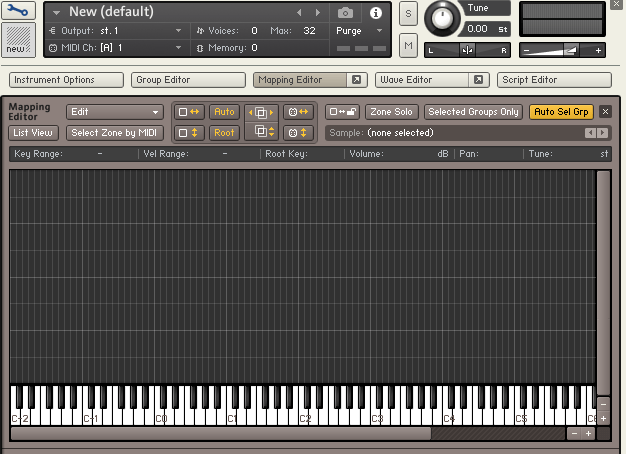
You’ll see a piano roll screen along with a grid that looks like an Excel spreadsheet. The horizontal axis represents pitch, and the vertical axis represents velocity. Load your desired sample onto this grid.
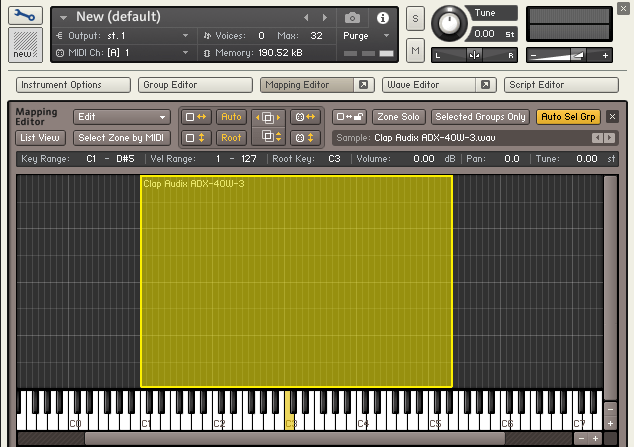
The grid and the piano roll will be colored like this. Pressing the colored keys on the piano roll will play the original sample, while pressing other keys will change the pitch.
You can adjust the highlighted areas with your mouse.
By properly adjusting the areas, you can set different samples to play depending on the velocity when you press a key, as shown above.
Similarly, you can click and drag the colored areas on the piano roll to adjust the pitch range.
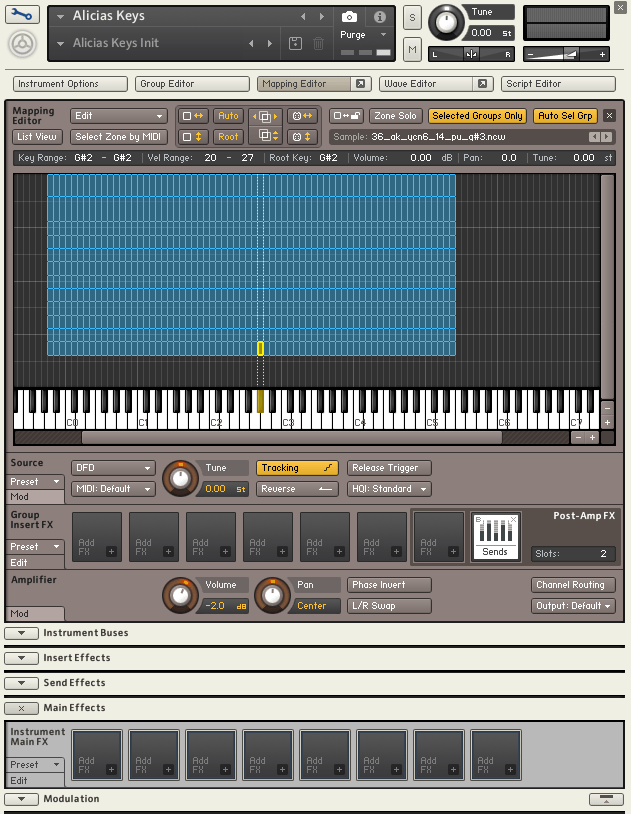
For example, if you open the settings for Alicia’s Keys, a commonly used instrument, and examine the mapping, you’ll see 12 velocity layers for each key. Instruments created with Kontakt often have such detailed velocity mappings. The more sophisticated the instrument, the fuller the mapping editor will be.
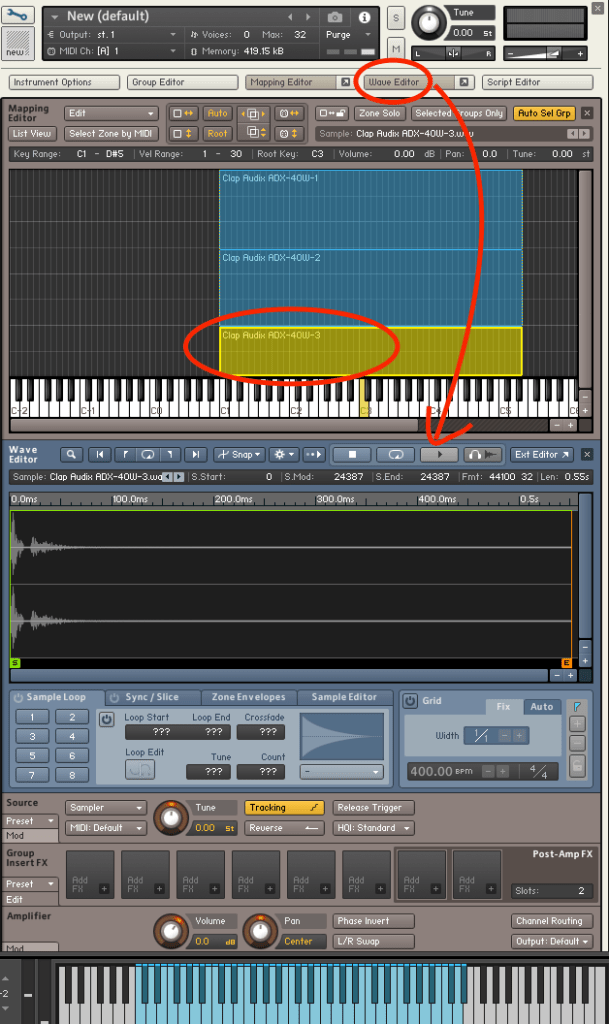
After completing the mapping, you can use the Wave Editor to fine-tune the samples to your liking.
You can loop the sample or perform various other edits.
The parameters are similar to those of general samplers, so if you’re familiar with samplers, you should find it easy to use.
If you’re new to samplers, exploring Kontakt can help you understand the structure of virtual instruments created with it, which can be useful when purchasing such instruments.
After some basic editing, the sound of your virtual instrument is complete. Finally, select Instrument Options and add a wallpaper with a TGA or PNG file (the manual suggests a width of 633 pixels).
This gives you a virtual instrument with a polished look. But what if you want adjustable parameters like other Kontakt instruments?
You need to use the Script Editor to add those features.
If you don’t want to dive too deep, you can simply select a factory preset from the side and add the “make_perfview” command between the “on init” and “end on” lines.
This will display the factory preset script in the main window, known as the performance view. To create a more customized performance view, you’ll need to learn scripting from various forums.
For those who want to explore further, NI has a community that’s worth checking out.
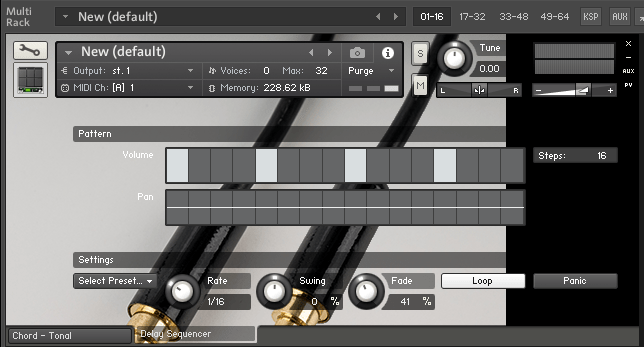
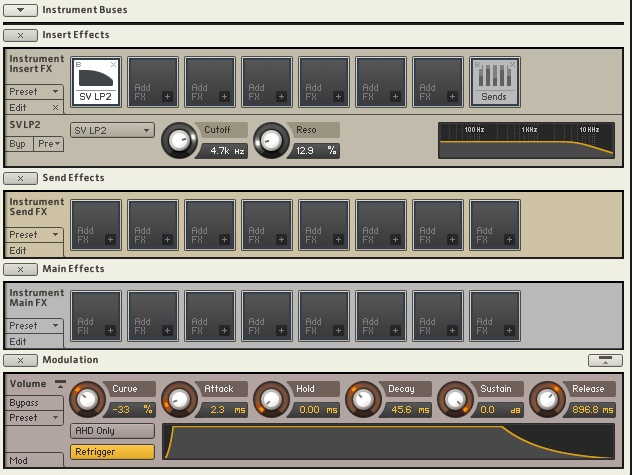
Other settings like Effects, Envelopes, and Buses are similar to those in other samplers or track settings, so I won’t explain them in detail here.
It may seem challenging at first, but once you understand it, you’ll be able to use other Kontakt-based virtual instruments more flexibly. If you’re into music production, it’s definitely worth studying.
I hope this post is helpful for those dealing with virtual instruments.
Hello, this is Jooyoung Kim, a mixing engineer and music producer.
Today, I’ll continue from my previous post on the basics of orchestration, focusing on percussion instruments.
Shall we begin?
Triangle
The triangle is a metallic, triangular instrument that is suspended by a loop made of gut or nylon string, which is worn on the finger and struck with a metal beater of the same material.
Because it involves metal striking metal, it produces a sharp, clear sound. Despite its small size, it can cut through an entire orchestra due to its metallic timbre.
Playing techniques include single strokes, drags, and triangle rolls, where the beater trills along the edges. A unique feature is that you can mute the triangle by touching the body with your fingers. Like most percussion instruments, the intensity of the stroke determines the volume.
Crotales
Also known as antique cymbals, crotales are small cymbals about 4 inches (10 cm) in diameter, each with a specific pitch.
They can produce about two octaves of sound, extending the range by adding additional sets. These instruments are transposing, sounding two octaves higher than written, and are typically tuned to A=442Hz.
Crotales are fixed to stands with nuts, similar to cymbals. The nuts must be adjusted correctly to avoid dampening the sound or losing control of the vibration. Their metallic sound can pierce through an orchestra. Unlike glockenspiels, which are made of steel, crotales are usually made of brass, resulting in a different timbre. They produce a long sustain and are often struck with mallets that have hard heads.
Crotales can also be muted by hand or played with rolls. A unique technique involves using a string bow to scrape the edge, producing a distinctive sound.
Castanets
Castanets, also known as clackers or palillos, are instruments that produce sound by clapping two pieces together. Their exact origin is unknown, but they are widely used, especially in Latin music and flamenco dance, where female dancers rhythmically play them in both hands.
Traditionally made of wood, modern versions can be made from fiberglass. Castanets do not have a definite pitch, but the size difference between the pairs (macho for the larger, deeper-sounding one and hembra for the smaller, higher-sounding one) gives a perceived pitch variance.
Castanets are connected by a string loop, worn on the thumb, and struck with the other fingers. While single notes can be played, rolls are often more effective, especially in fast and complex pieces.
Mark Tree
Also known as bar chimes, nail tree, or chime tree, this instrument consists of aluminum or brass tubes, either hollow or solid. Instead of striking each bar individually, players typically use their hands or fingers to create a glissando by sweeping across the bars.
Mark Trees are used across various musical genres, including orchestral and popular music, to create a shimmering sound. The instrument’s range isn’t usually notated.
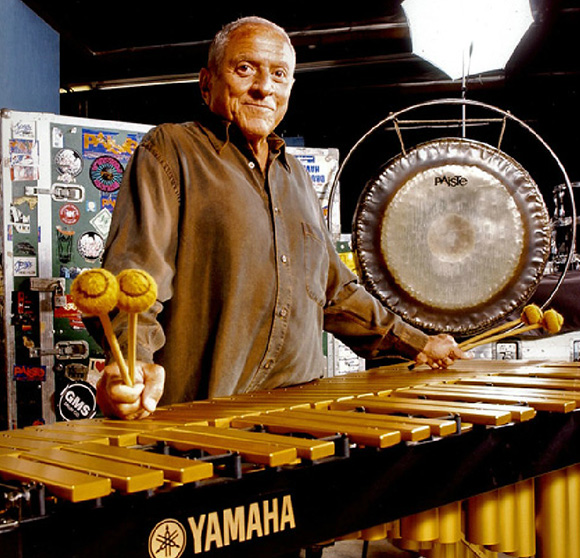
Emil Richards
Invented by Mark Stevens in 1967, the instrument was named by the legendary percussionist Emil Richards, who referred to it as the Mark Tree. The instrument is also known by other names like bar chimes or chime tree due to its chime-like quality.
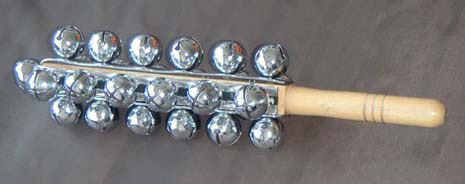
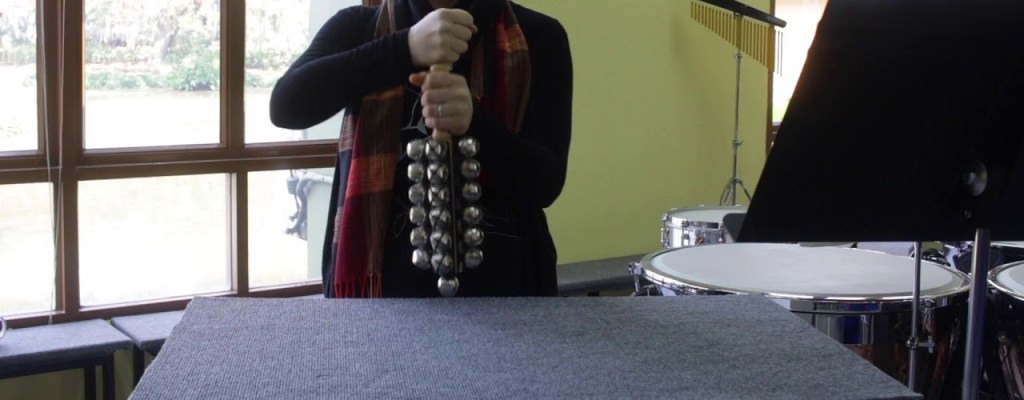
Jingle Bells
The jingle bell, famously known from the Christmas song “Jingle Bells,” is also called sleigh bell because it’s attached to sleighs. It’s a quintessential instrument for holiday music, producing a recognizable jingling sound.
Jingle bells are typically mounted on a stick, played by shaking or striking with another hand. This method ensures precise timing and clean sound release.
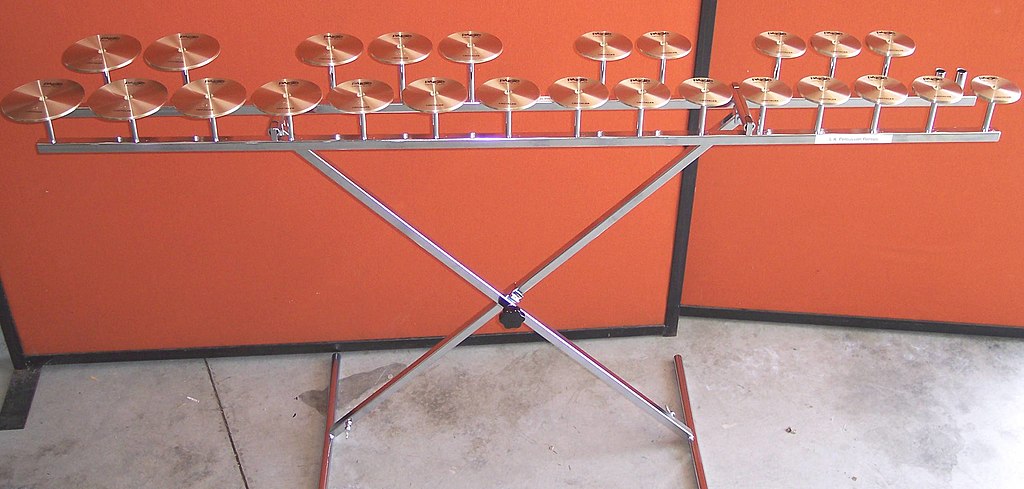
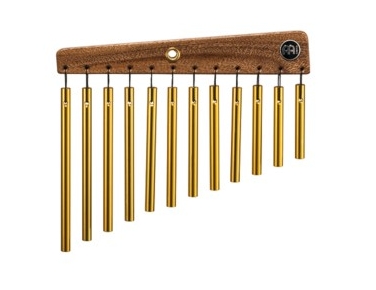
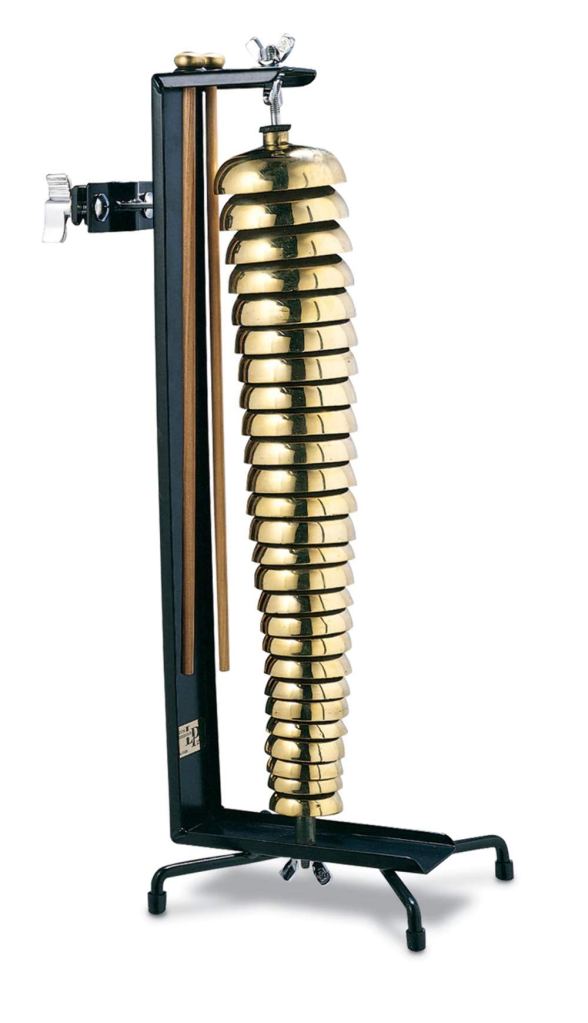
Bell Tree
The bell tree, also known as tree bells or Chinese bell tree, consists of 14 to 28 bells arranged vertically. Unlike the Mark Tree, it is played by sweeping a beater, usually a triangle beater or a glockenspiel/xylophone mallet, from top to bottom for a glissando, or striking individual bells for single notes.
The bell tree has a long sustain and can pierce through an orchestra, often used for sound effects in film and commercial music. Its relatively short history dates back to its first studio use in the 1990s.
Conclusion
This concludes the basics of orchestration for percussion instruments. I hope this information has been helpful!
Hello, this is Jooyoung Kim, a mixing engineer and music producer. Today, I’d like to finish the final part of my orchestration basics series, focusing on percussion instruments.
Percussion instruments are a category of musical instruments that produce sound by being struck, shaken, or scraped. They consist of a striking object A and a struck object B, and the sound changes based on the material of each object.
Percussion instruments are generally divided into those with definite pitches and those without, but their playing techniques share similarities.
Therefore, we will first cover effective playing techniques for percussion instruments before moving on to descriptions of individual instruments.
1) Flam
Flam is a technique used to produce a quick “ta-da” sound, often used as an embellishment. Also known as a drag, it is commonly used on instruments like timpani, snare drums, and tom-toms.
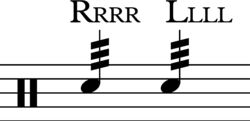
2) Roll
A roll, also referred to as a trill, involves continuous tremolo and is a very impactful technique frequently used across many percussion instruments.
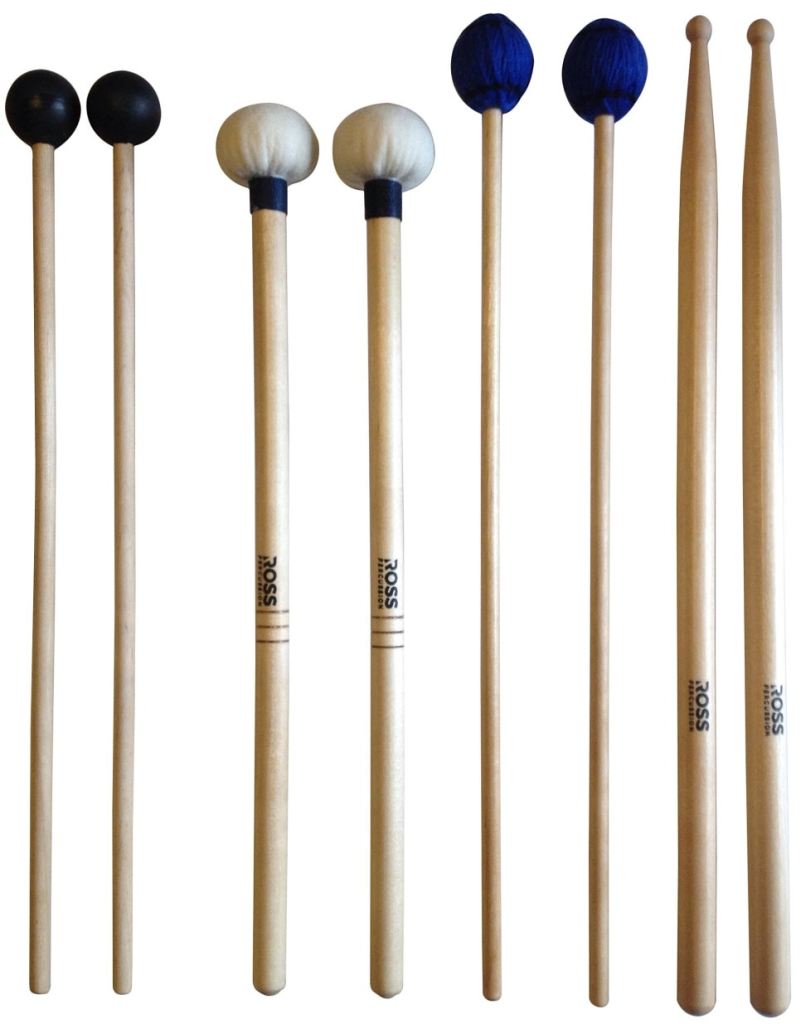
3) Mallet
A mallet consists of a stick and a head. Generally, the stick is made of rattan, while the head can be made of various materials, resulting in different timbres. Performers typically prepare several mallets to choose from, depending on the desired nuance, ranging from hard, medium, soft, wire brushes, timpani/bass drum mallets, to drumsticks.
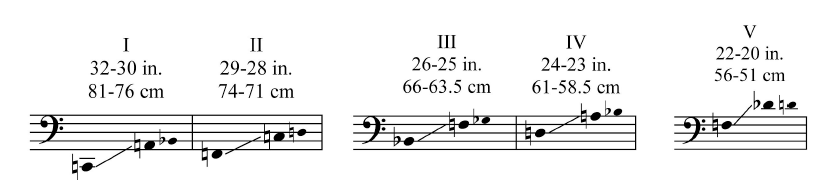
Timpani
Timpani, also known as kettledrums or temple drums, are pitched percussion instruments. Originally used in military settings, they became essential in orchestras by the late 18th century. Classical composers like Mozart and Haydn typically used two timpani in symphonies, tuned to the tonic and dominant (or subdominant) of the key. Beethoven expanded their use to include four timpani, and Berlioz, known as the father of orchestration, even wrote pieces requiring 16 timpani played by 10 musicians. Modern compositions usually feature one player handling four timpani.
Timpani range and pitch are controlled by adjusting the tension of the drumhead. The shells are made from materials like copper, aluminum, or fiberglass, with hemispherical shells producing a brighter tone and parabolic shells a darker tone. The pedal at the bottom is used to tune the timpani, and while tuning during a performance is challenging, it can be done to produce glissando effects. Though not transposing instruments, their sound is typically perceived an octave lower than written.
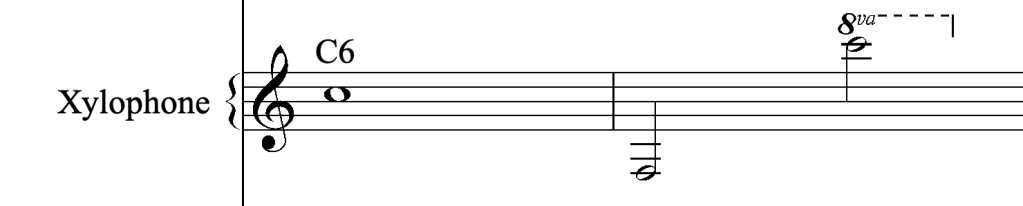
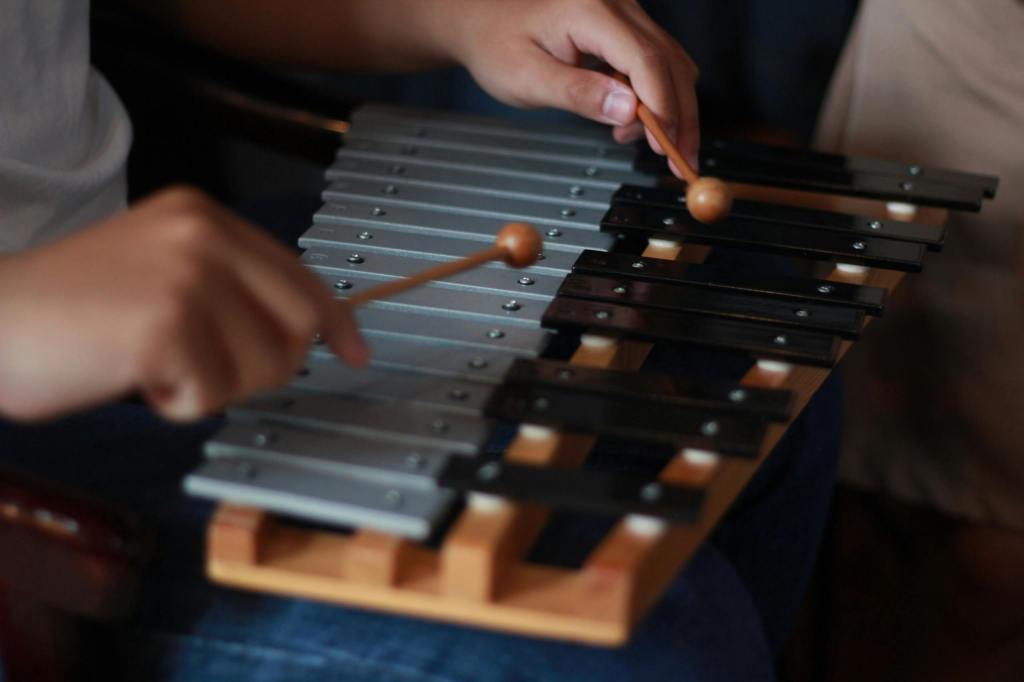
Xylophone
The xylophone has wooden bars arranged like a piano keyboard and is sensitive to strong impacts, so its attack is not very forceful. It’s usually played with four mallets (two in each hand), and the resonators beneath the bars amplify the sound.
Xylophones come in various sizes and can cover up to four octaves. They are transposing instruments, sounding an octave higher than written. For longer note values, rolls are the primary technique.
Marimba
Similar to the xylophone, the marimba typically spans five octaves. Bass marimbas exist but are rarely used. Marimbas are larger than xylophones and produce a softer, richer sound. Unlike the xylophone, marimbas are not transposing instruments.
Glockenspiel
The glockenspiel, also known as orchestra bells, has metal bars and produces a bright, penetrating sound.
It is played with metal mallets and has a range of about three octaves, sounding two octaves higher than written.
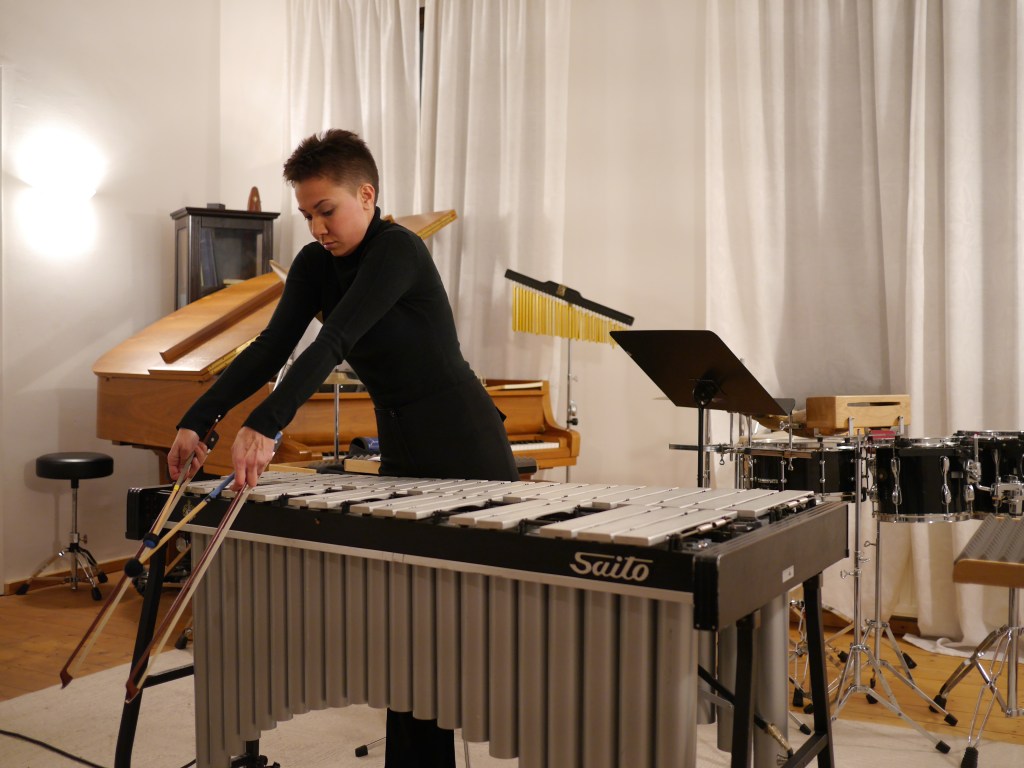
Vibraphone
The vibraphone features a damper pedal to sustain or mute sounds and has electric fans that create vibrato. The mallets, referred to as beaters, have metal heads. Soft and hard mallets are used, with soft mallets being more common. The vibraphone is a non-transposing instrument.
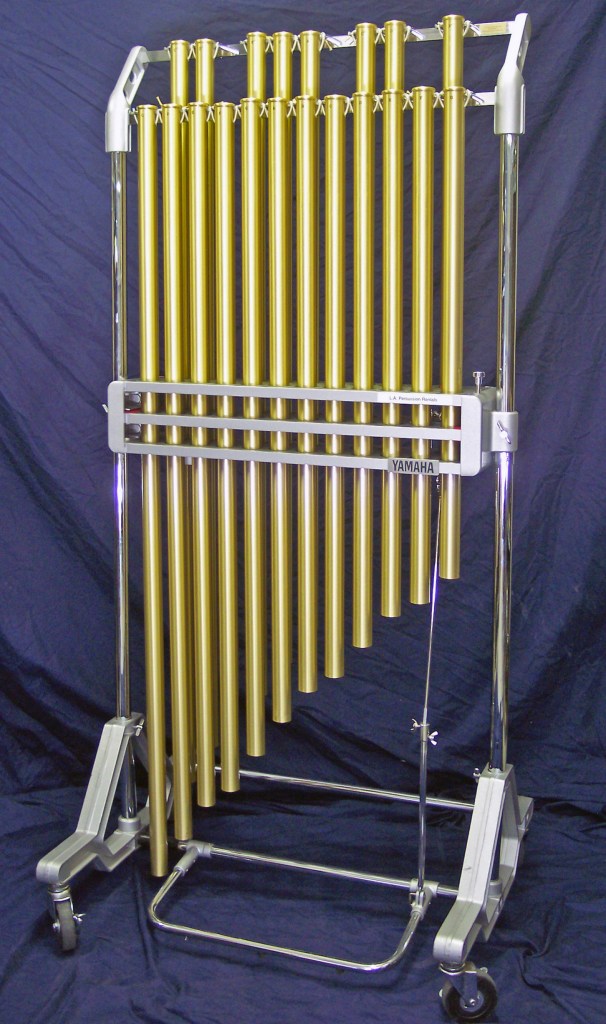
Tubular Bells
Tubular bells, or chimes, consist of metal tubes and are struck with wooden or metal hammers. They produce a long, resonant sound controlled with a damper.
Tubular bells are transposing instruments, sounding an octave higher than written, but their sound is often perceived as lower. They are effective for creating church bell sounds.
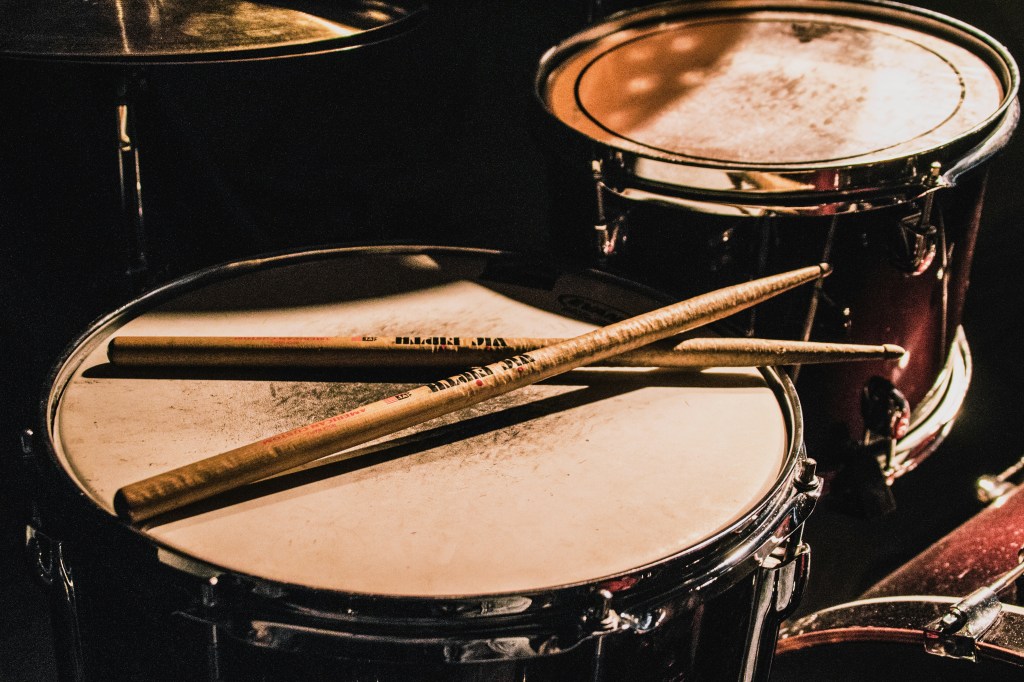
Snare Drum
The snare drum’s characteristic sound comes from the metal wires (snares) on its underside. These can be tightened or loosened to alter the sound. Techniques like the rim shot, where the drum’s rim is struck, and playing with wire brushes for different textures are common. The snare drum doesn’t have a definite pitch, but it can have resonant frequencies.
Bass Drum
The bass drum, ranging from 24 to 36 inches, is played while standing and typically dampened by hand. It is notated on a single line in the score.
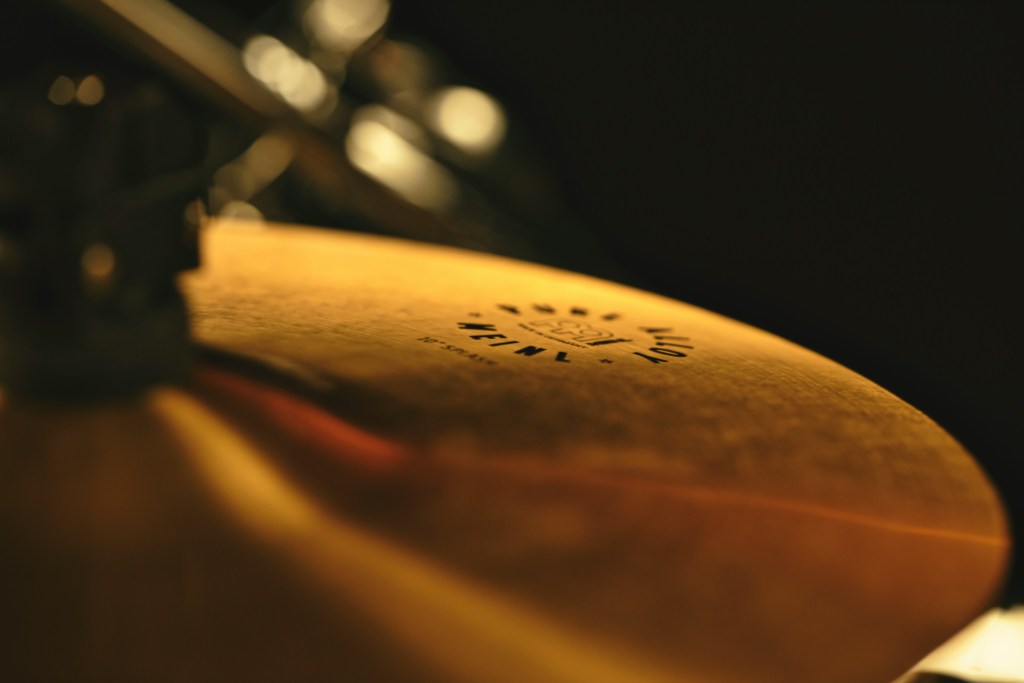
Cymbals
Cymbals are metal discs played by striking them together (clash) or by rubbing them for a roll. They can also be played with a bow for a unique sound. Stopping the cymbals’ vibration is indicated as a choke.
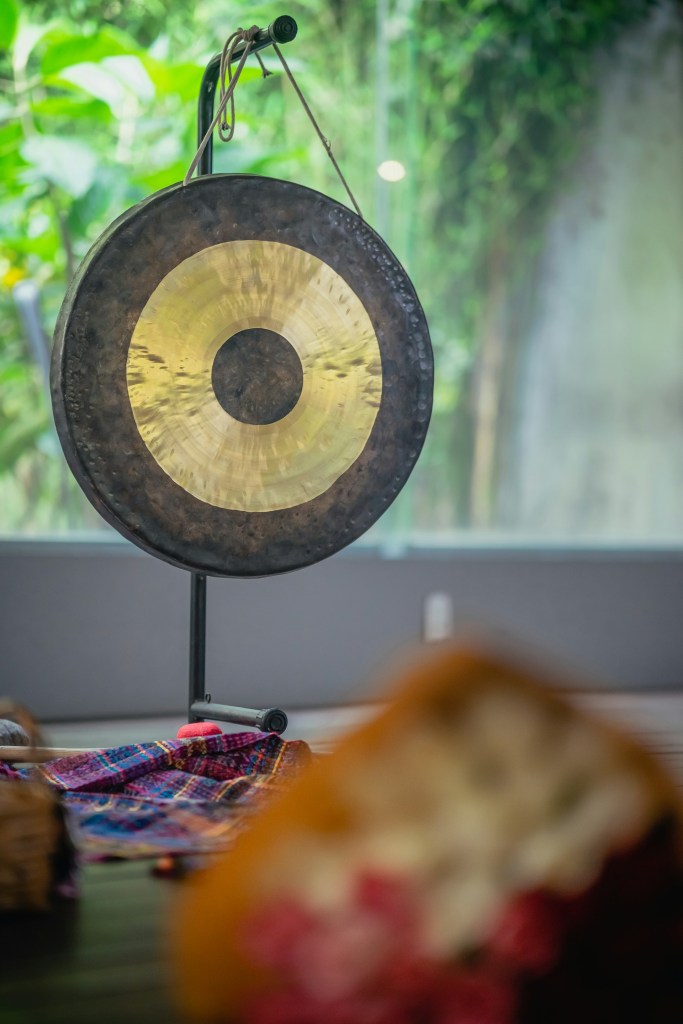
Tam-tam
The tam-tam, similar to a Chinese gong, can produce different sounds depending on the playing technique, such as scraping with a coin for a unique effect. It is usually played with mallets that have cloth or felt heads.
More percussion instruments will be covered in the next post. See you in the next article~:)