Output Portal Granular FX 50% Off Sale (Until August 16th)

Hello, this is Jooyoung Kim, mixing engineer and music producer.

Today, I’m excited to share that Output is having a summer sale with 50% off on their plugins!

Output is a well-known company that creates fantastic plugins. If you’ve been into music production, you’ve likely heard of them.

Since this sale is a rare opportunity, I requested NFR (Not for Resale) codes for three of Output’s flagship plugins—Portal, Thermal, and Movement—from Plugin Boutique to review them.

Instead of covering them all at once, which might be overwhelming for both you and me, I’ll review them one by one. Let’s start with Portal!

Portal is a plugin that transforms incoming audio into a granular synthesizer-like sound. But first, let’s explore what a granular synthesizer is.

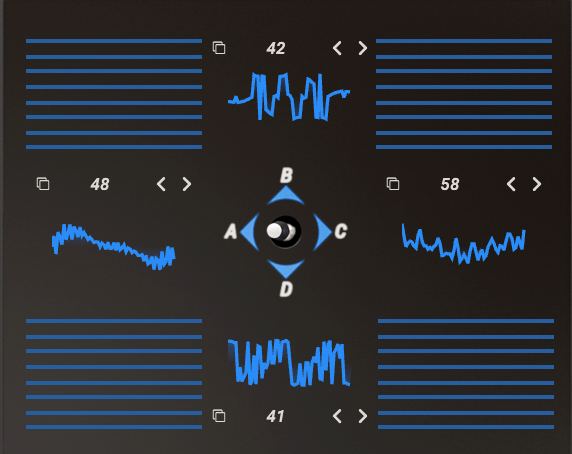
A granular synthesizer chops up a sample into tiny grains ranging from 1 to 100ms to synthesize new sounds. As shown in the image, you can slice and rearrange waveforms to create unique sounds.

This technique is particularly effective for creating atmospheric pads, making it a popular choice in movie soundtracks and instrumental genres.

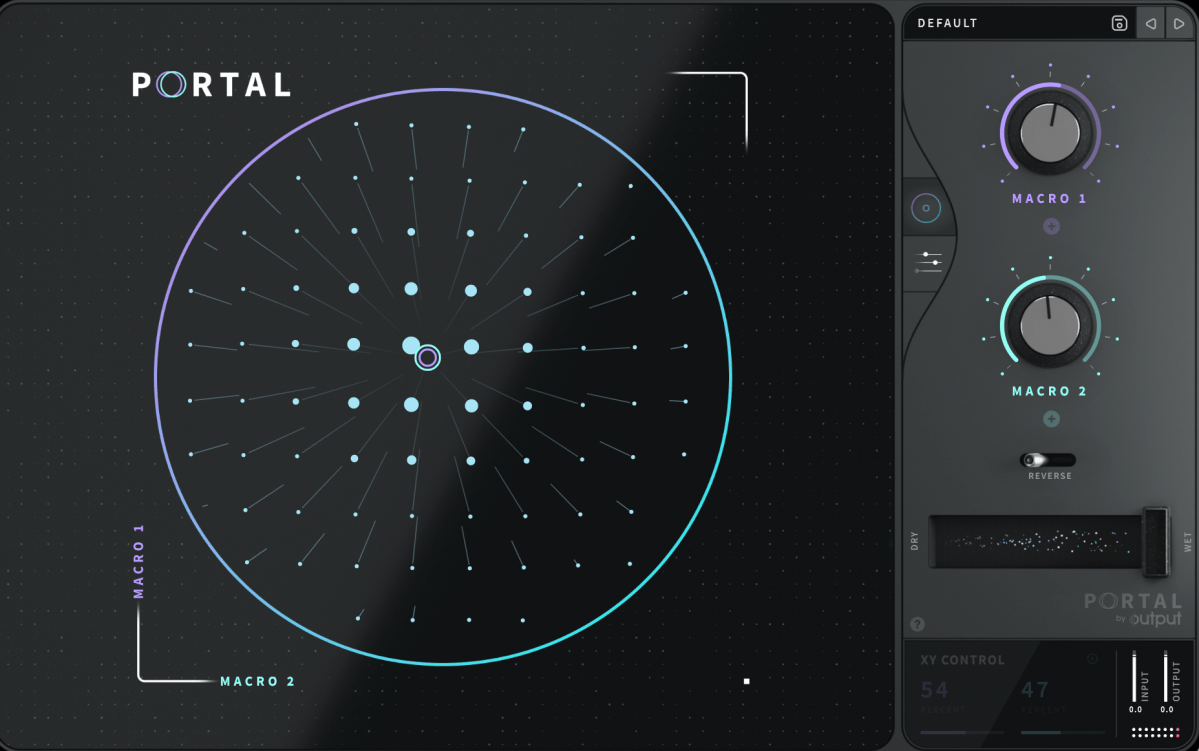
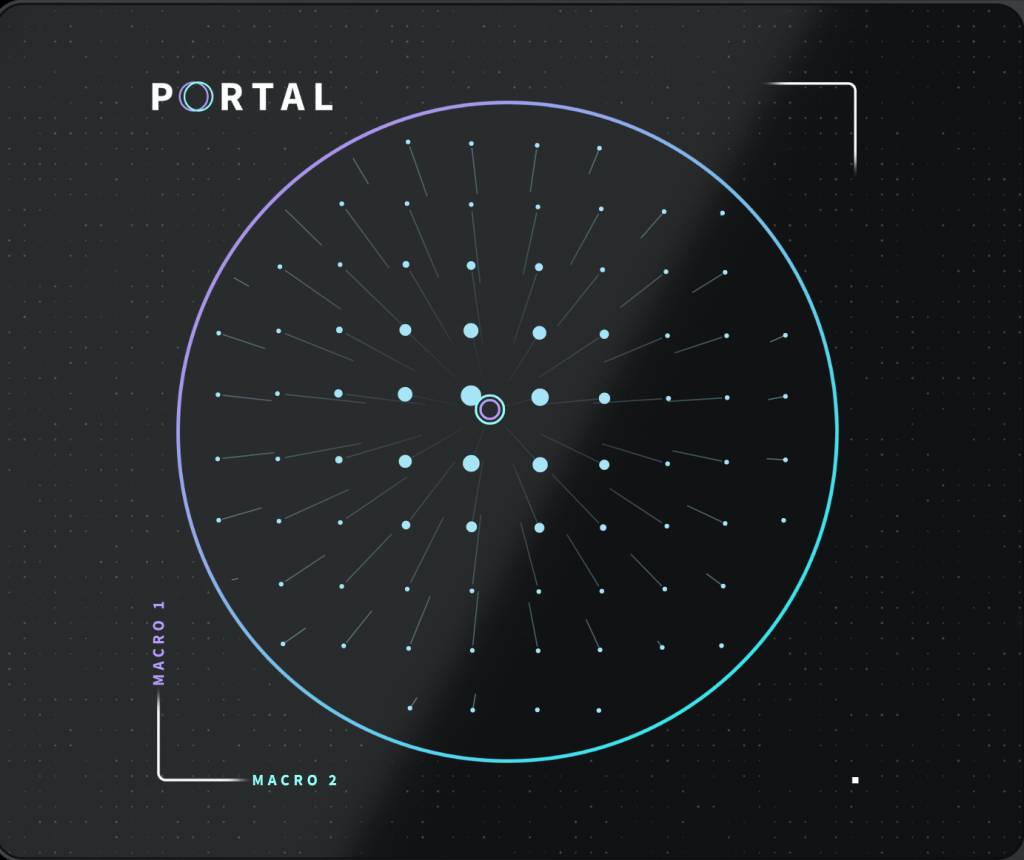
Portal’s user interface is designed to resemble that of a vector synthesizer.

Joystick from a Prophet-VS vector synthesizer plugin

A vector synthesizer can be considered an early form of a wavetable synthesizer. It uses a joystick to blend different waveforms assigned to each direction.

In Output’s Portal, Macro 1 is placed on the vertical axis, while Macro 2 is on the horizontal axis. The values of these macros control various parameters.

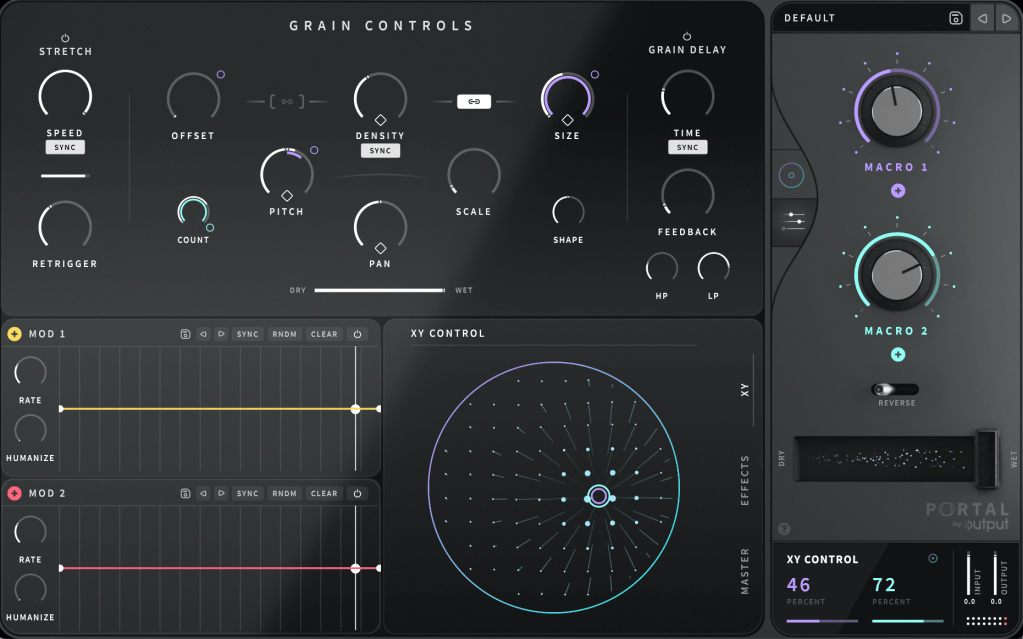
You can connect Macro 1 and Macro 2 to different parameters in the Grain Control section. By double-clicking the macro names, you can even rename them.

To assign a macro, click the ‘+’ sign below the name of each knob (like Macro 1 and Macro 2), then drag it to a parameter. A small circle will appear next to the parameter, indicating the range of control the macro has.

Similarly, you can use the LFO in the bottom left to modulate parameters. Think of it as a traditional synthesizer, which should make it easier to approach.

At the bottom center, you can choose between the XY, Effects, and Master sections to adjust various parameters.

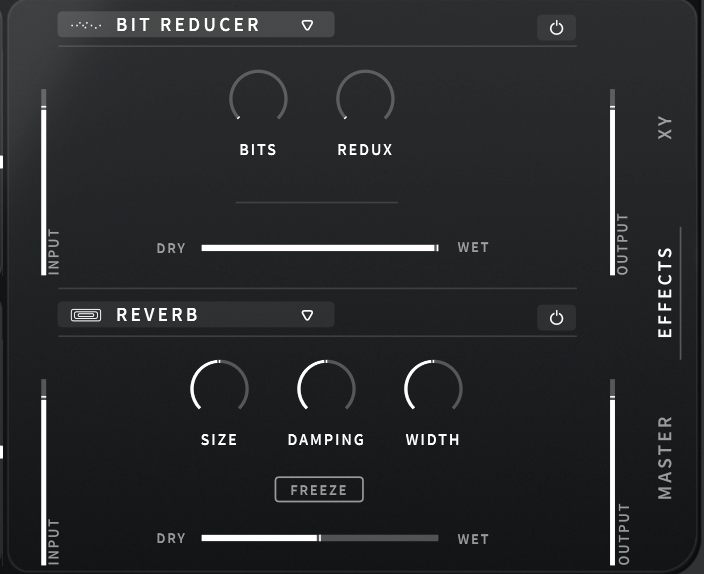
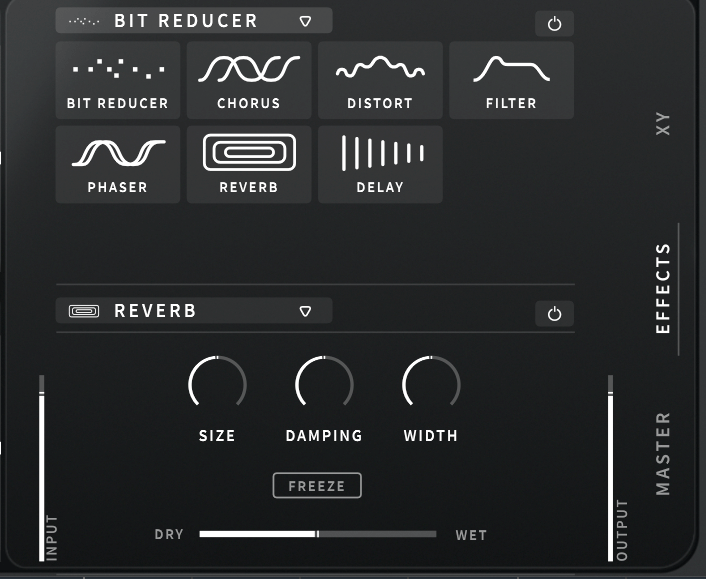
The built-in effects include Bit Reducer, Chorus, Distortion, Filter, Phaser, Reverb, and Delay, making for a total of seven options. All these parameters can be linked to the LFO modulation or macro functions for dynamic control.

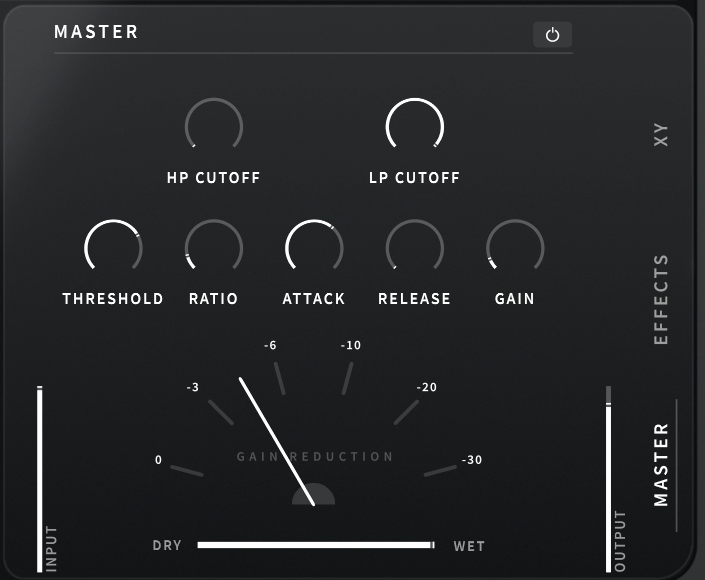
The Master section includes a built-in filter and compressor, which can also be modulated with LFOs and macros.

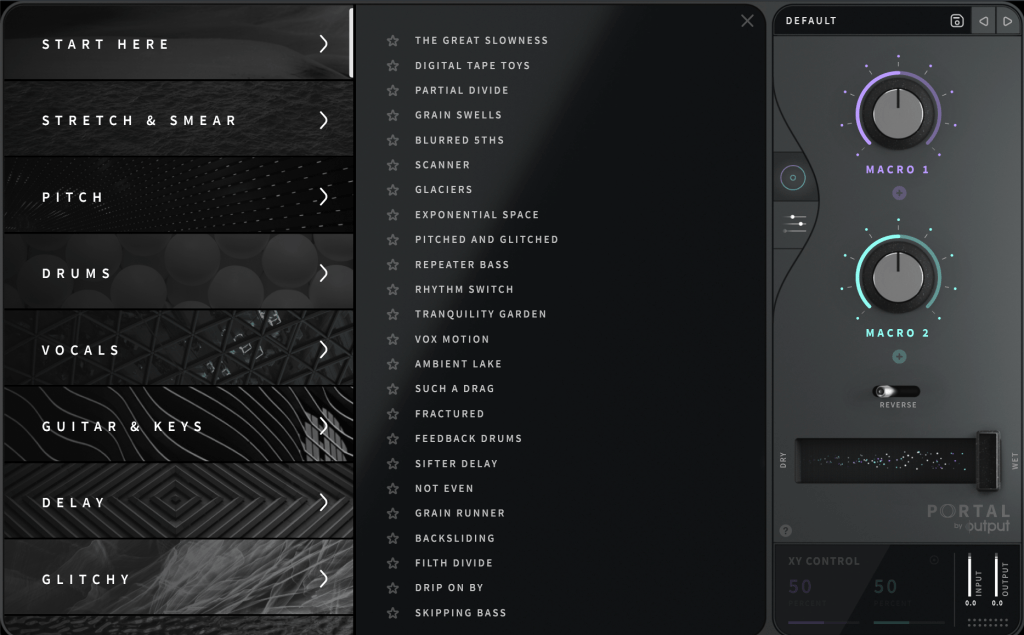
Clicking ‘DEFAULT’ at the top right allows you to access various presets. Beginners might find it helpful to start here.

Portal is particularly appealing due to its ability to produce random, evolving sounds based on XY values. It’s an excellent choice for those who don’t already have a granular FX plugin.

Check out the demo video to hear what it can do.

The 50% off sale runs until August 16th! Here’s the purchase link:

Additionally, if you purchase from Plugin Boutique, you can get a free plugin. This month, you can choose between Softube’s VCA Comp or K7D’s Delay.

Softube previously offered the VCA Comp for free in March. It’s a great dbx160-style compressor, perfect if you don’t already have one.

The K7D Delay is a tape delay that sounds great on electric guitars and works well in mixes.

That wraps up the overview of Portal. In the next post, I’ll review another Output plugin, Thermal. Stay tuned!

Introducing Sale! Excite Audio Bloom Vocal Edit Virtual Instrument (Vocal Chop, 39$ ~9/1)

Hello! This is Jooyoung Kim, an audio engineer and music producer.

Today, I’m excited to introduce a new virtual instrument specifically designed for vocal chops, now available at an attractive price. Like my previous posts on sales and new releases, I’ve received an NFR (Not for Resale) code from Plugin Boutique for this review.

Let’s dive right in!

The basic interface is quite similar to the Bloom Bass Impulse.

When I first reviewed a virtual instrument from this company, I thought it was a sophisticated sampler. It’s impressive that Excite Audio has now adapted it for vocal chops, a truly innovative idea.

Upon launching the interface, you can easily add effects like Glue (for compression and saturation), Fuzz, Metallic (short delay), and Doubler.

The lower section displays a keyboard. Pressing the white keys plays the sample assigned to that key, while the black keys offer functionalities like playing the sample at half or double speed, reverse playback, octave shifts, and sequential playback.

You can also assign samples randomly by pressing the dice icon.

The knobs allow you to adjust effects such as Delay, Bitcrush, Reverb, Lo-Cut, and Hi-Cut.

Clicking the key indicator on the lower left automatically adjusts each vocal sample to match the chosen key.

Next to the key indicator, the “Bank” button reveals a collection of 112 samples, offering a rich variety.

Clicking the “Edit” button in the preset window allows you to edit the samples assigned to the white keys and choose how they play back when pressing the black keys (options A, B, C, D, E, etc.).

The parameters visible in the main UI, like Bitcrush, Delay, and Global Reverb, are also adjustable.

The Sample Edit function offers extensive control, including Snap, Attack and Release Time adjustments, speed and BPM Warp functionality, and more.

Most of the other features are straightforward. If you’re unsure about anything, just click the “i” (information) icon next to the preset search bar for a helpful explanation of each feature.

Until now, I’ve used Kontakt or basic DAW samplers for vocal chops, but this new instrument is really impressive.

It comes with pre-calculated pitch adjustments and offers a wide range of sample options, not just short one-shot samples.

A minor drawback is that you can’t import your own samples, but for vocal chops used as ad-libs or fills, this instrument offers plenty of potential to create great sounds.

You can check out the sound demos in the video made by Plugin Boutique.

The current price is $39, which is a 33% discount. With such a clean and intuitive UI, I highly recommend this instrument, especially if you don’t already have a dedicated vocal chop tool.

If you buy from Plugin Boutique today, you can also get Audio Thing’s Frostbite 2 or Newfangled Audio’s EQuivocate for free. Plugin Boutique often offers a free plugin with purchases, though I’m not sure what they’ll offer in August.

Once the freebie for August is announced, I’ll update this post accordingly.

See you in the next post!

Zynaptiq Pitchmap Sale (until July 28)

Hello, I’m Jooyoung Kim, an engineer and music producer.

Today, I want to introduce Pitchmap, a plugin by Zynaptiq that’s frequently used in color bass music.

For this review, I requested an NFR (Not for Resale) code for Pitchmap from Plugin Boutique. Thankfully, Zynaptiq provided me with the ZAP IV bundle code. I’d like to express my gratitude to them. Besides Pitchmap, I’ll be reviewing other Zynaptiq plugins during their sale periods.

Let’s get started!

Pitchmap is a pitch correction plugin created by Zynaptiq in 2013.

While pitch correction is commonly associated with vocal tuning, Pitchmap is more often used in remixing and sound design.

The horizontal axis represents pitch, similar to a keyboard roll.

Although only three octaves are shown,

you can adjust the display by clicking the light gray area at the top to navigate to the desired pitch range.

The vertical axis represents time, with red/orange markings indicating the pitch at that specific time. Essentially, the X and Y axes are flipped compared to typical vocal tuning plugins.

The white bars show relative volume, and the circles indicate pitch shifts.

For example, moving a circle representing F# upwards changes the sound from F# to G.

This allows you to change the key of the entire piece arbitrarily.

Double-clicking on a circle transforms it into various shapes: inverted triangle, triangle, square, etc.

  1. A square maintains the pitch within the same octave.
  2. A circle shifts to the nearest pitch (up by 9 semitones or down by 3 semitones).
  3. An inverted triangle always shifts downwards.
  4. A triangle always shifts upwards.

In Key Edit mode, you can click on notes in the piano roll to exclude them from playback.

Clicking Bypass and selecting notes in the piano roll means those notes will bypass the effect.

You can also allow MIDI input to select pitches in real-time through a MIDI channel.

You might wonder if these changes would make the sound awkward, but surprisingly, the result is quite cohesive, making Pitchmap ideal for remixing.

The white bars in the top piano roll can be moved to set a specific pitch range. The image above sets the range from Eb downwards to be excluded.

Other parameters include:

  1. Threshold: Determines the extent of tuning (lower values mean more comprehensive processing).
  2. Feel: Controls subtle pitch variations after tuning (higher values retain more nuance).
  3. Purify: Reduces noise above 50% and increases noise below 50%.
  4. Glide: Adds glide/portamento effects.
  5. Electrify: Enhances the synthetic feel or optimizes signal processing.

Exploring the rest of the features will help you understand their functionalities better.

This plugin is not only useful for contemporary music, often centered around remixes and bass, but also for creating unique sounds in other genres. Personally, I enjoy blending these elements into string or band sections for a sophisticated and effective sound.

I’ll share some YouTube videos demonstrating how I use Pitchmap.

The current sale lasts until July 28, and the discount is substantial. If interested, I highly recommend purchasing.

Additionally, purchasing from Plugin Boutique entitles you to a free plugin. This month, the options are Frostbite 2 by AudioThing or EQuivocate by Newfangled Audio.

Frostbite 2 offers various modulation effects, and EQuivocate is a graphic EQ with auditory filters and a Match EQ feature. Personally, I’d choose Frostbite 2.

See you in the next post!

DC Snares (Drum Machine) Virtual Instrument Release Sale (Until July 31st, $31.9)

Hello, This is Jooyoung Kim, an engineer and music producer.

Today, I want to introduce a new virtual instrument developed by Plugin Boutique.

The newly released DC Snares is a virtual instrument that allows you to create sounds by synthesizing four different samples. You can use the Randomizer in the top right corner to generate sounds randomly.

There are a total of 10 built-in FX, allowing you to apply FX to individual samples, FX to the bus, and FX to the master track separately through the Advanced controls.

Each sample can be individually adjusted for envelope, pitch, and volume over time, and you can also set the start and end points of the samples to your preference.

In modern music production, it’s crucial to refine drum sounds meticulously to create a good groove. DC Snares offers all the necessary features for this and has a simple UI that makes sound creation convenient.

Despite its name, DC Snares is not limited to creating snare sounds. It can also be used to create hi-hats, kicks, bass, and other drum machine-like sounds. The presets are quite usable, making it a worthwhile purchase for around $30.

The sale runs until the end of July, so if you frequently work with samples, I recommend giving it a try. It also supports loading personal WAV files, adding to the fun and versatility.

See you in the next post!