Basics of Mixing – 6.2 Compressor Operation Principles

Hello, this is Jooyoung Kim, an engineer and music producer.

Today, we’ll discuss the basic principles of how a compressor works.

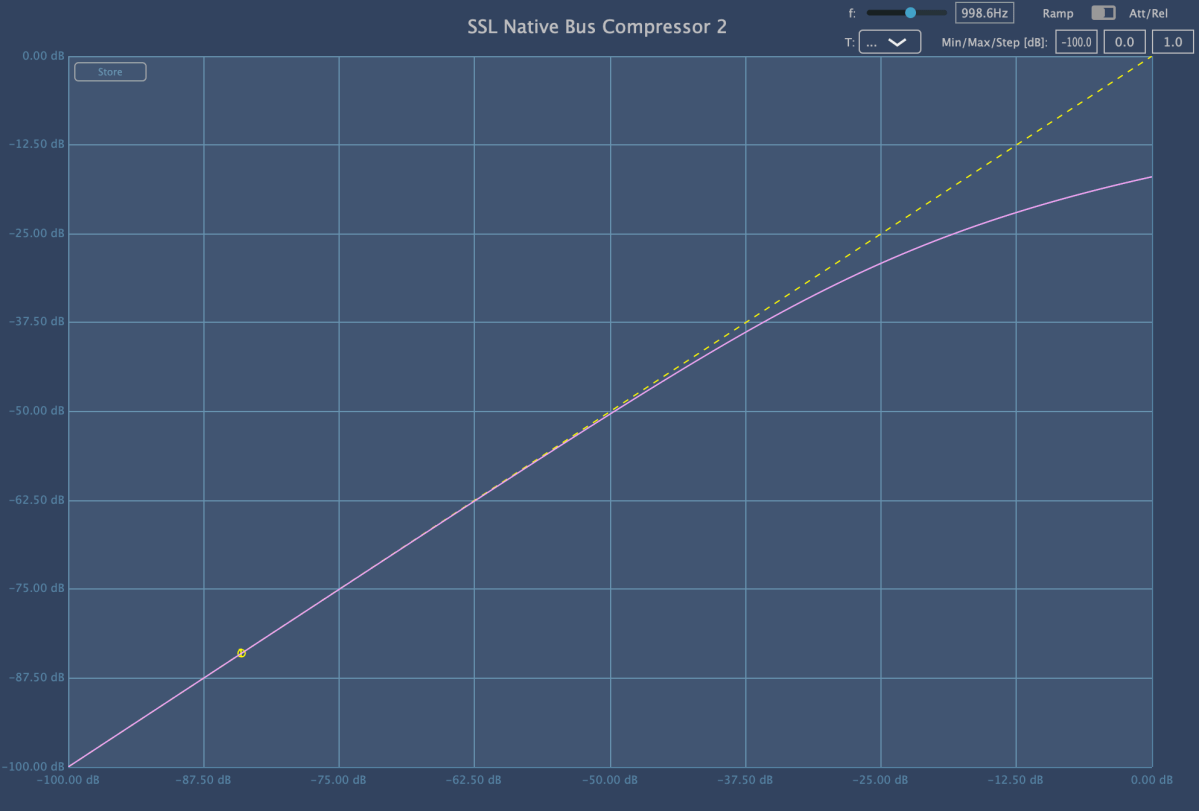
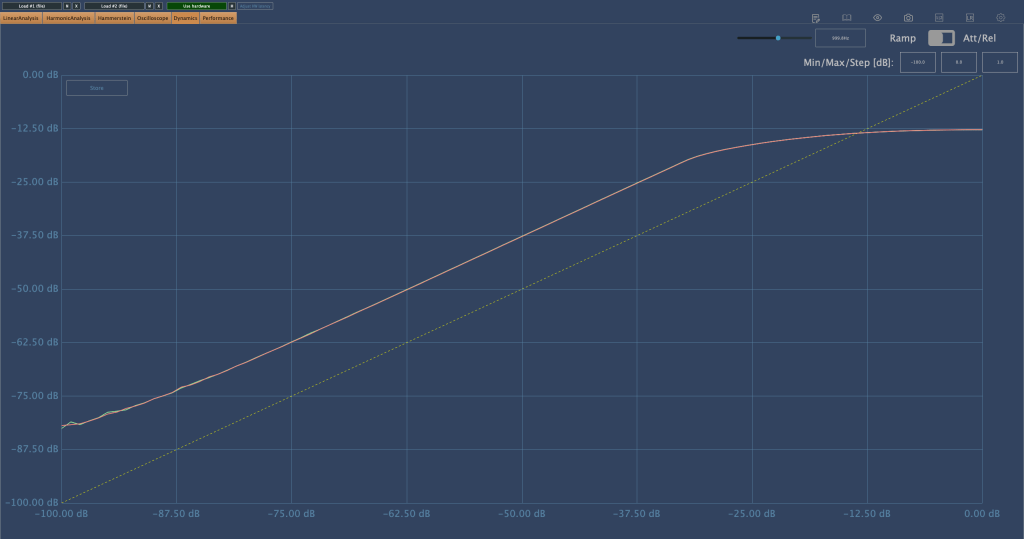
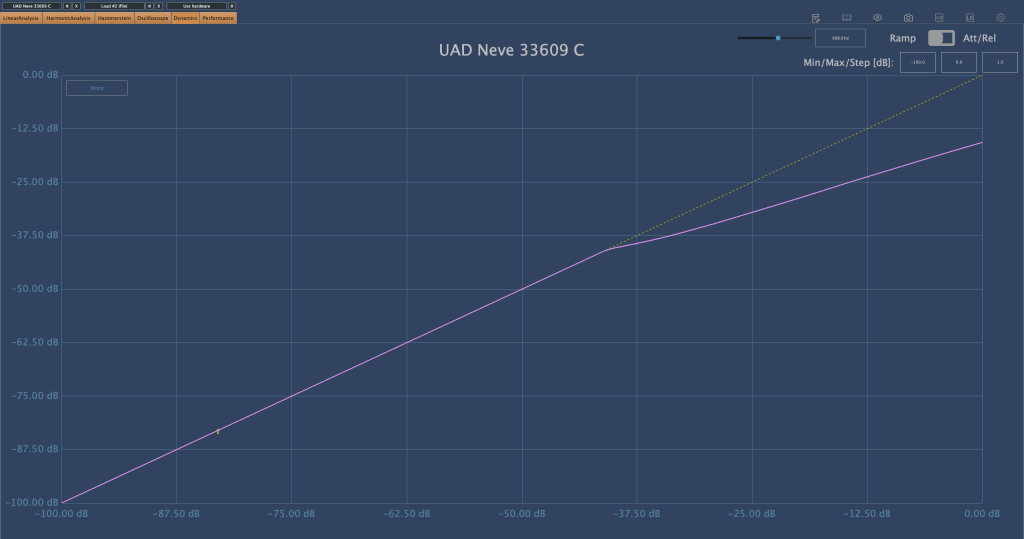
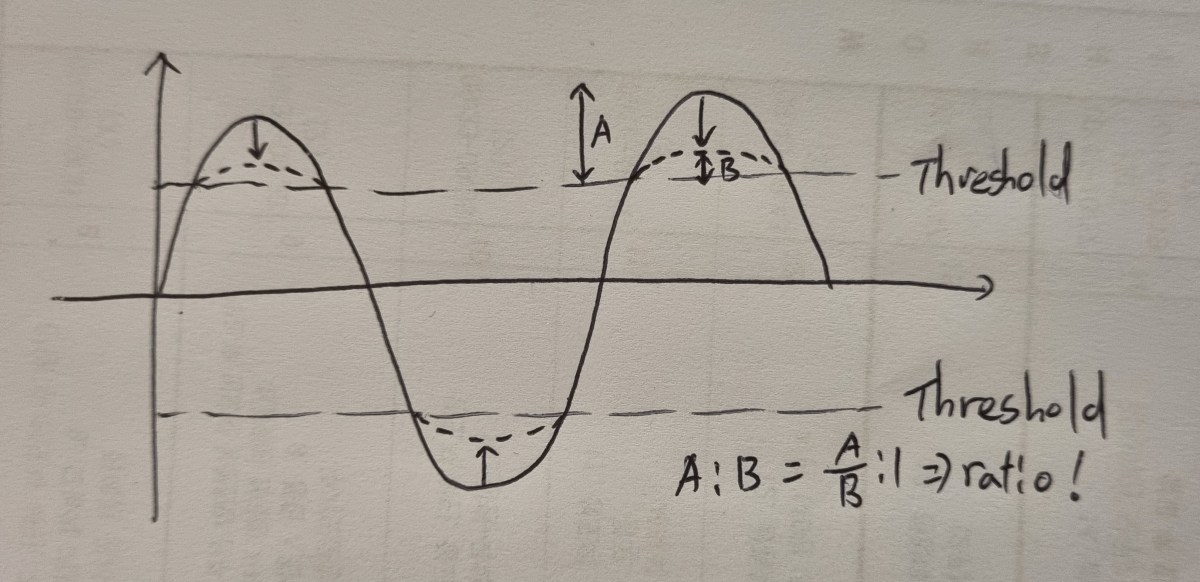
A compressor is a device that reduces sounds exceeding a set volume threshold by a certain ratio.

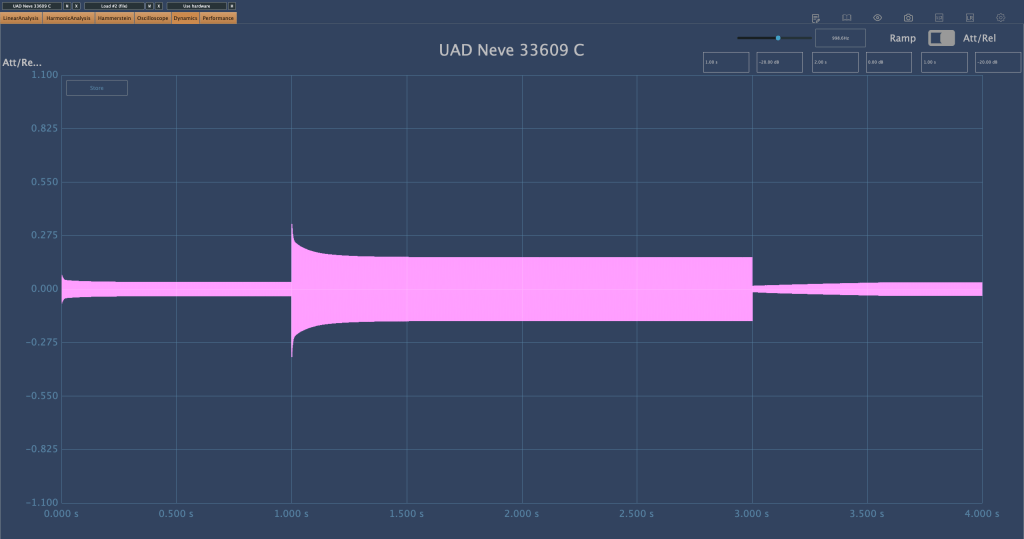
You can set how quickly the compressor reacts when the sound exceeds the threshold (Attack) and how quickly it stops compressing when the sound drops below the threshold (Release).

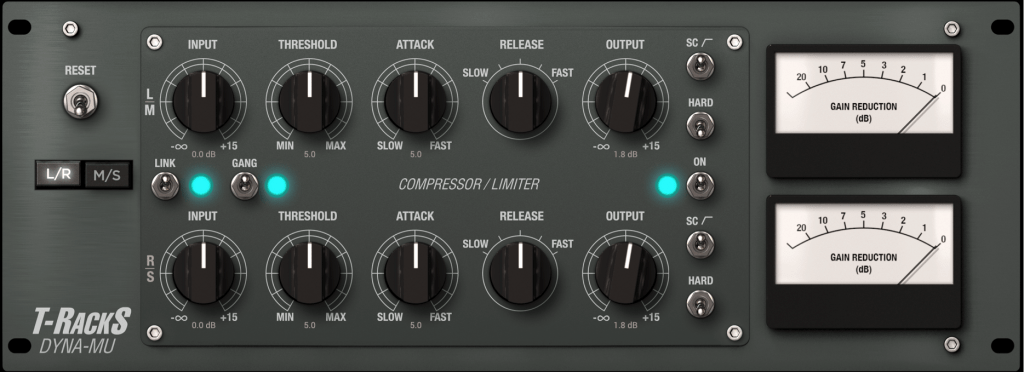
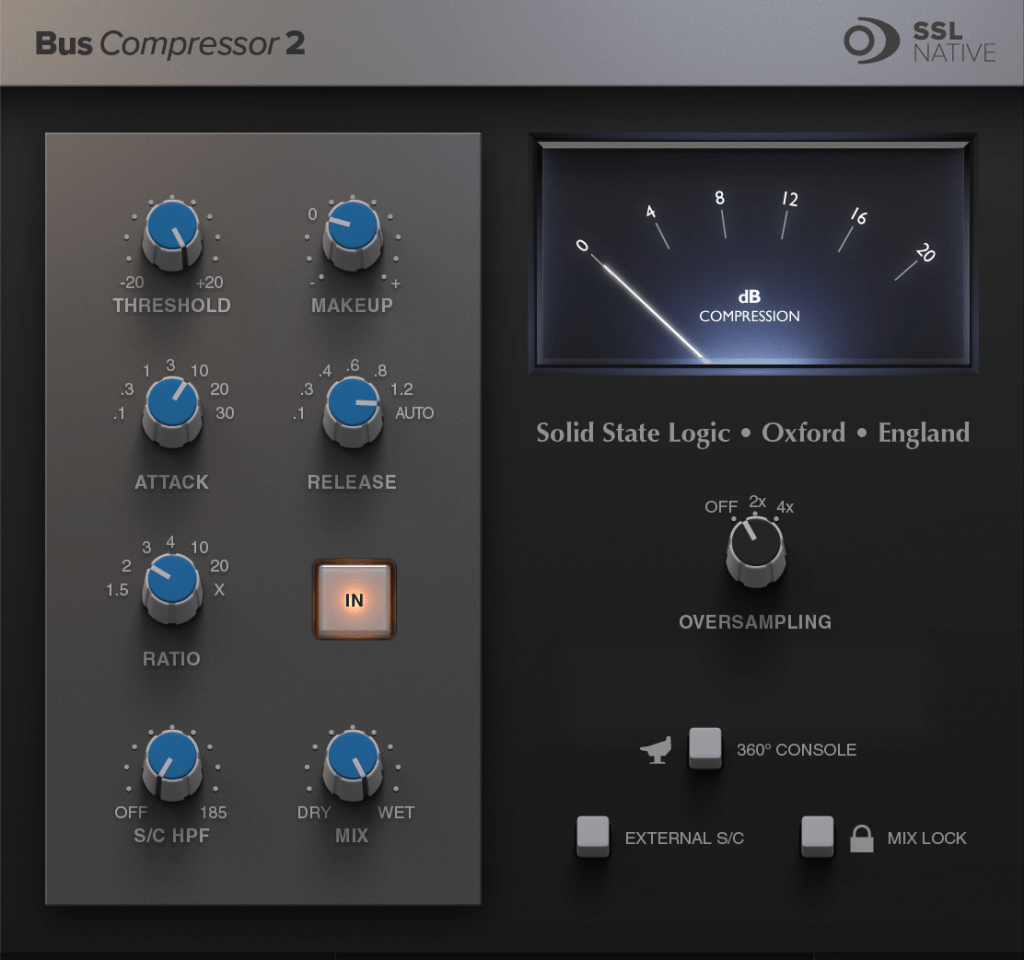
The four basic parameters of a compressor are Threshold, Ratio, Attack, and Release. By making louder sounds quieter and leaving quieter sounds as they are, a compressor helps to level out the volume.

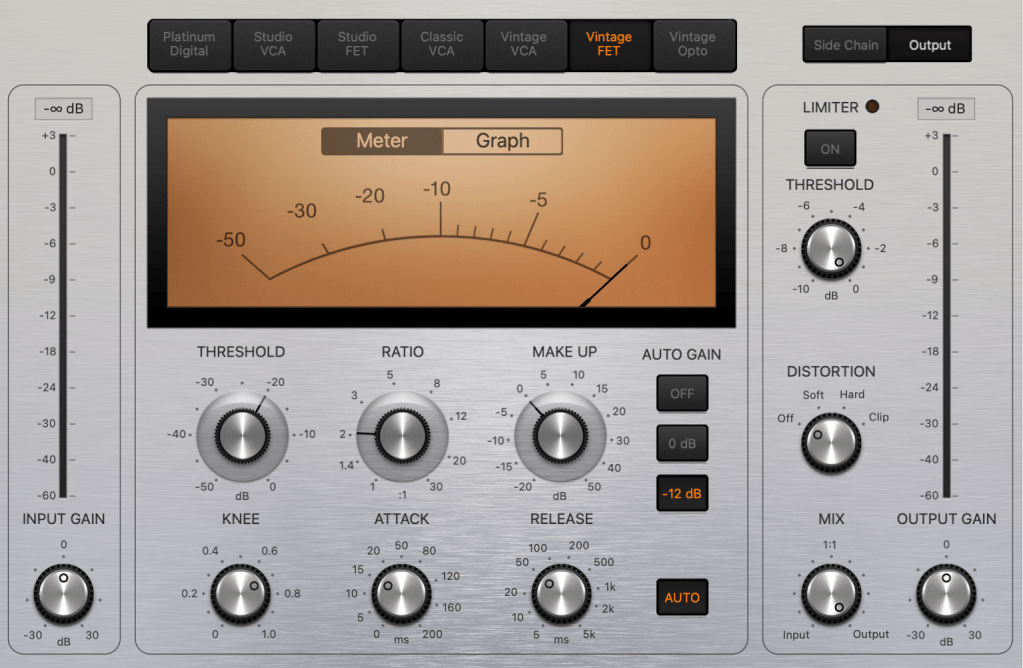
Compressed sounds tend to become quieter. Therefore, to match the volume back to the original level, you use the Output Gain parameter.

Many compressor plugins have an Auto Gain feature that automatically adjusts the volume, but in my experience, none of them have worked well enough. So, if your compressor has an Auto Gain feature, it’s best to turn it off.

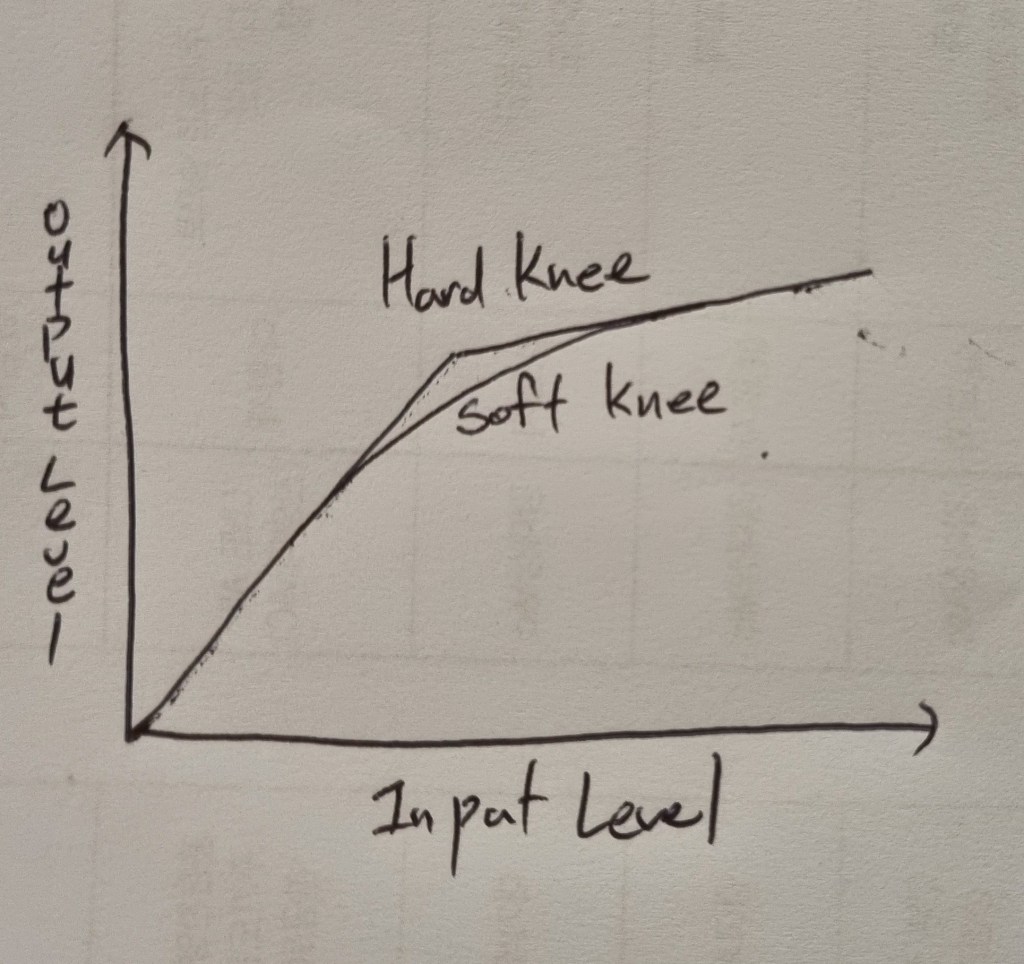
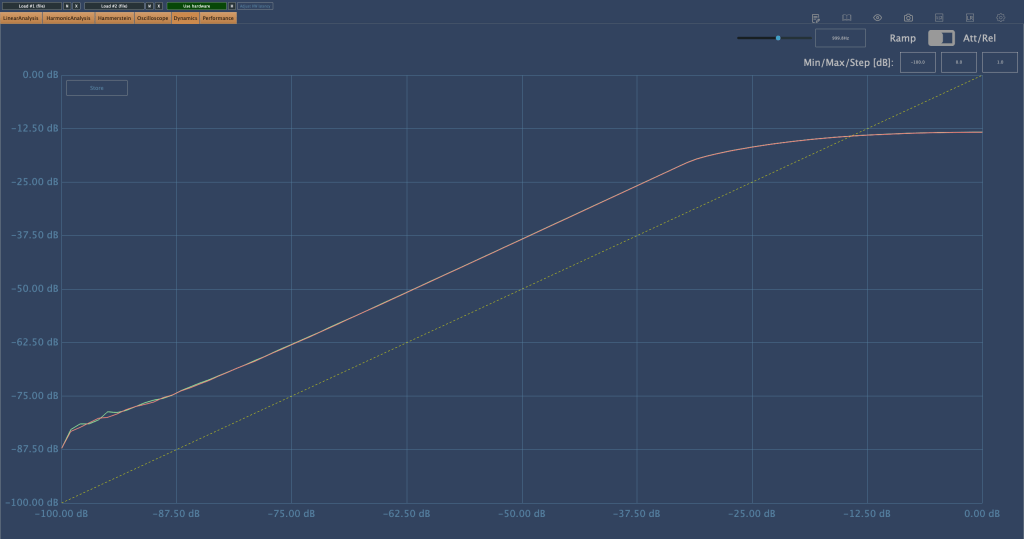
Another setting to consider is the Knee. Hard Knee means the compressor kicks in immediately once the threshold is exceeded, while Soft Knee allows for a more gradual compression as the sound approaches the threshold.

This covers the most basic operation and usage of a compressor.

However, just explaining the parameters and telling you to try them out isn’t enough guidance, right?^^;;

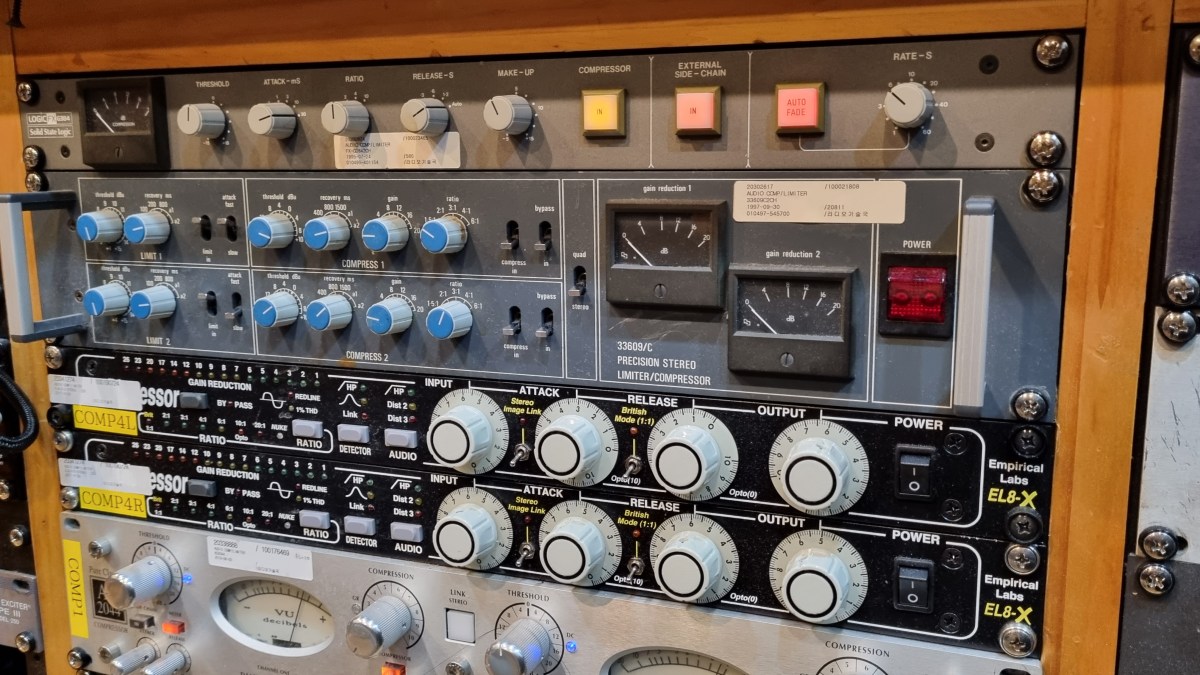
For example, the classic compressor LA-2A has a fixed ratio of 4:1.

Similarly, most versions of the 1176 compressor (excluding the AE version) start with a minimum ratio of 4:1. Starting around these settings can be a good approach.

The appropriate threshold setting varies greatly depending on the desired effect. If you’re new to this and have no idea where to start, try aiming for a Gain Reduction of around -3dB.

Other considerations include:

  1. Setting a fast Attack can change the transient feel of the sound, affecting the instrument’s groove.
  2. Setting a fast Release can cause the sound to pump as it recovers quickly.

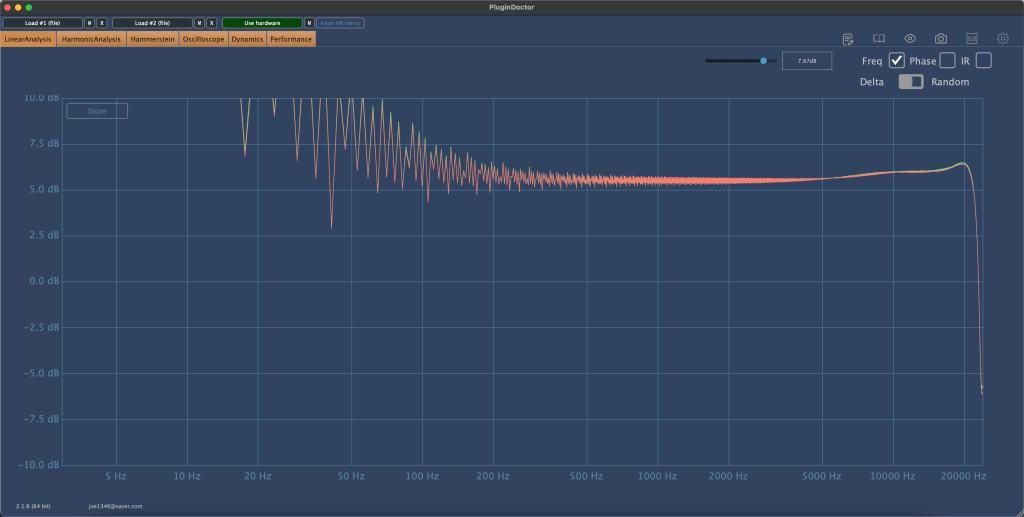
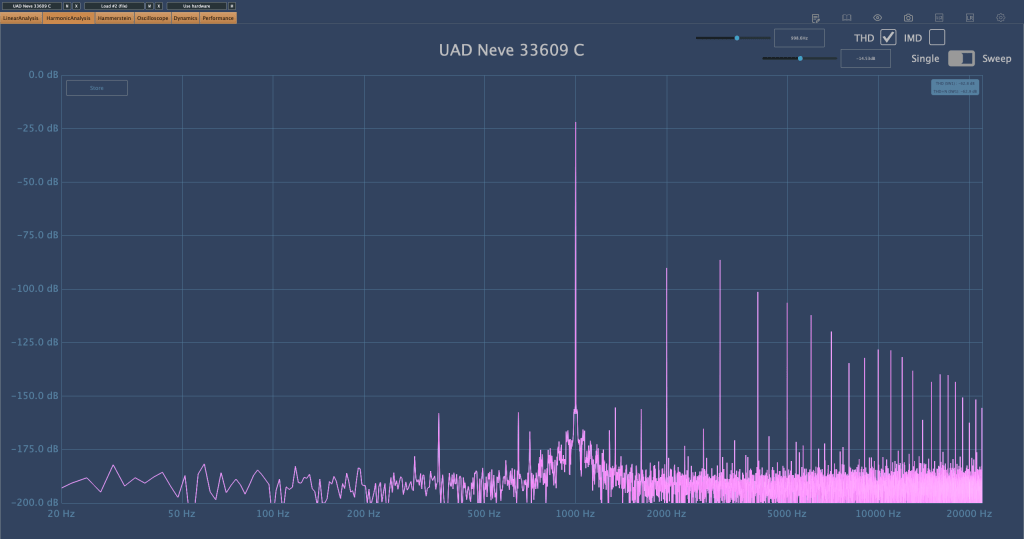
Each instrument and sound source is different, so there’s no one-size-fits-all guide. Additionally, many compressors include saturation, which adds coloration to the sound, so various factors need to be considered.

Still, it’s important to start experimenting! By testing out different compressors, you’ll begin to understand which settings work best in different situations.

In the next post, we’ll look at the different types of compressors. Understanding their characteristics will give you a better grasp of how to use them effectively.

See you in the next post!

Basics of Mixing – 6.1 Compressor

Hello, this is Jooyoung Kim, an engineer and music producer.

Today, I’d like to talk about compressors.

Why do we use compressors in mixing?

First, the most fundamental role of a compressor is to level the dynamics.

When the dynamic range (the difference between the loudest and softest sounds of an instrument) is large, it can cause issues where vocals or individual instruments are not clearly heard. It can also result in instruments sounding like they are moving forward and backward in the mix when listening through speakers. By controlling dynamics well, it becomes easier to increase the overall loudness during mastering.

Second, compressors can change the groove of the music.

Depending on when the compressor kicks in and out, and how it compresses, it can alter the groove of the instrument source.

Third, compressors can change the tone of the source through saturation.

Based on the harmonic distortion and frequency response characteristics of the compressor, it can add different textures to the original source.

Fourth, compressors can provide a sense of unity.

A compressor applied to a bus can impart its unique saturation and groove to the entire group of instruments, helping them blend well together.

For these various complex reasons, we use compressors.

In this sixth chapter of Mixing Basics, we will cover:

  1. How to use a compressor
  2. Types of compressors based on their operating principles
  3. Noteworthy compressors
  4. Various other dynamic processors (decompressors, expanders, gates, de-essers, multiband compressors, etc.)

In the next post, we’ll start by discussing how to use a compressor.

Stam Audio SA4000 mk2 Compressor Review

Hello, I’m Jooyoung Kim, an audio engineer and music producer.

Today, I’d like to share my thoughts after using the SA4000 mk2 compressor for a couple of months.

  • Appearance

The back panel is equipped with XLR connectors throughout, and the sidechain input is a stereo unbalanced connection via XLR.

The exterior is quite standard for rack equipment, with a solid and heavy build. It’s a 1U unit and features a British Mod, noticeable by the two red Carnhill transformers on the right side.

The unit is relatively deep, so I had to connect a right-angled power cable to mount it properly.

For the sidechain, I used my Send Return TRS to TS cable, converting the TRS to XLR to create an unbalanced stereo XLR to TS cable.

  • Usage

The left side shows the frequency response without the transformers, and the right side shows it with the transformers.

The difference isn’t drastic; the transformers slightly reduce the low frequencies and overall volume.

In terms of harmonics, there isn’t a significant difference except for the volume change. Again, the left side is without the transformers, and the right side is with them.

I examined the Ratio settings for any peculiarities and found that the Knee is slightly softer. The primary difference with and without transformers seems to be the volume.

In practical use, I noticed:

  1. The high frequencies are considerably tamed, making it suitable for use as a bus compressor on harsh hi-hats.
  2. Recording with the transformers engaged reduces the high frequencies, which isn’t to my taste.
  3. When gain-matched, the version with the transformers engaged sounds slightly more pronounced.

These are the main points I’ve gathered.

Among the SSL clone compressor plugins I’m familiar with, I’ve never encountered one with this specific frequency response. It has a unique character.

In particular, I find it effective with BFD drums, where overheads or hi-hats often have excessive high frequencies. Using this compressor effectively tames those troublesome areas. It would also work well on a master bus for retro-style tracks, preserving that vintage feel.

  • Conclusion

Using hardware can be cumbersome. You need to prepare recall sheets for future mix adjustments, carefully manage equipment routing, and more. Despite these hassles, hardware is employed to capture its unique color and character.

This compressor, with its distinct features, has become a regular part of my setup. I’m using it frequently.

However, I don’t want to suggest that hardware is inherently superior. Both plugins and hardware are merely tools. As long as they suit your purpose and deliver the desired tone, it doesn’t matter whether it’s a plugin or hardware.

In that sense, I’m very keen on getting a tube preamp. I’ve been eyeing Oz Design, but it’s a little-known brand, so reselling might be challenging.

That’s all for today. See you in the next post!

I’m always open to reviewing hardware products! If you’d like me to review a product, please feel free to reach out at joe1346@naver.com.

Neve 33609 Compressor Story

Hello, this is engineer, music producer Jooyoung Kim.

Recently, I saw a Neve 33609 C hardware compressor listed for 7500$ on a second-hand trading site. Since I often use the plugin version, I was tempted to buy it, which led me to share some thoughts about the 33609 on my blog.

The 33609 is widely used as a master or bus compressor. There are five versions: the original 33609, and the C, J, JD, and N versions.

https://vintageking.com/blog/2016/06/neve-33609-compressor

You can find detailed differences between these versions in the link above. Here’s a brief summary:

  1. Original 33609: A rack-mounted version of the Class A/B 2264, 32264, and 33314 (broadcast version) compressor/limiter console modules.
  2. 33609/C: This version replaces the original’s Maranair/St. Ives transformers with Belclere ones, improves the power supply, and swaps the Discrete BA440 circuits with BA640 ICs.
  3. 33609/J: Introduced in response to high demand from Japan after the C version was discontinued. It uses the same BA640 ICs as the C version, though many preferred the original Discrete BA440 circuits.
  4. 33609/JD: Created to satisfy those preferring the Discrete BA440 circuits, denoted by the ‘D’ in JD.
  5. 33609/N: The current version, featuring custom-made transformers from Maranair, closely resembling the original 33609 transformers. It includes a switchable Attack Fast/Slow option not found in other versions and retains the Discrete BA440 circuits like the JD version.

While working at a studio, I measured the 33609/C hardware with a plugin doctor program. Unfortunately, I don’t remember the exact settings used, but:

  1. The Frequency Response (FR) graph was likely tested to see how the input values affect the output.
  2. The Harmonic Distortion (HD) graph probably measured how the harmonic content changes with different threshold settings.
  3. The Attack/Release Oscillator might have been used to observe how the release values change between Auto1 and Auto2 settings.
  4. The Ratio Compression graph was likely used to check for the presence of a knee.

This is the UAD 33609/C plugin. It looks a bit different, partly due to the screen size.

Although I’d love to share more insights, I haven’t had much hands-on experience with the 33609/C hardware, so I can only show you these measurements…😢

There are so many things I want to buy. Even if I can’t afford the 33609, I’d love to get a diode bridge compressor similar to it, and an SSL 4000-style compressor. I’ve already found a potential SSL 4000-style compressor, so I might buy that soon. As for the 33609, maybe when I earn more money…

Both compressors are ones I frequently use in my mixes, and having the hardware would be incredibly useful. The SSL is clean, while the 33609 has a nice coloration.

Lately, I’ve also been eyeing a tube preamp that’s been on my mind constantly…haha. I wish I could just buy all the gear I want.

See you in the next post! 🙂