Basics of Synthesizers (7) – Granular Synthesis

g

Hi! This is Jooyoung Kim, a mixing engineer and music producer. Today, I’ll introduce granular synthesis, which is composed of “grain” units.

The principle of this type of sound synthesis is very similar to the concept of sampling. Granular synthesizers take small parts of a sample and store them as units. Those units are called “grains.” That is where the name “Granular Synthesis” comes from.

The grains have lengths ranging from approximately 1 to 100 ms, and these samples can be played at different times, phases, speeds, and frequencies in a granular synthesizer. Thus, cloudy sounds that resemble long reverberations and continuous tails are produced by these manipulations.

In 1947, Dennis Gabor introduced this concept, which was first implemented in a computer in 1974 by Curtis Roads, an electronic music composer specializing in granular and pulsar synthesis. The spans are quite long, aren’t they?

The emergence of granular synthesizer hardware was significantly delayed due to the large computational requirements and high CPU speed needed for the calculations. Thus, the real-time version of this synthesizer emerged 12 years after the use of granular synthesizers in Curtis Roads’ music.

The real-time granular synthesis was invented by Barry Truax, a Canadian composer. This synthesis was processed by the DMX-1000 computer.

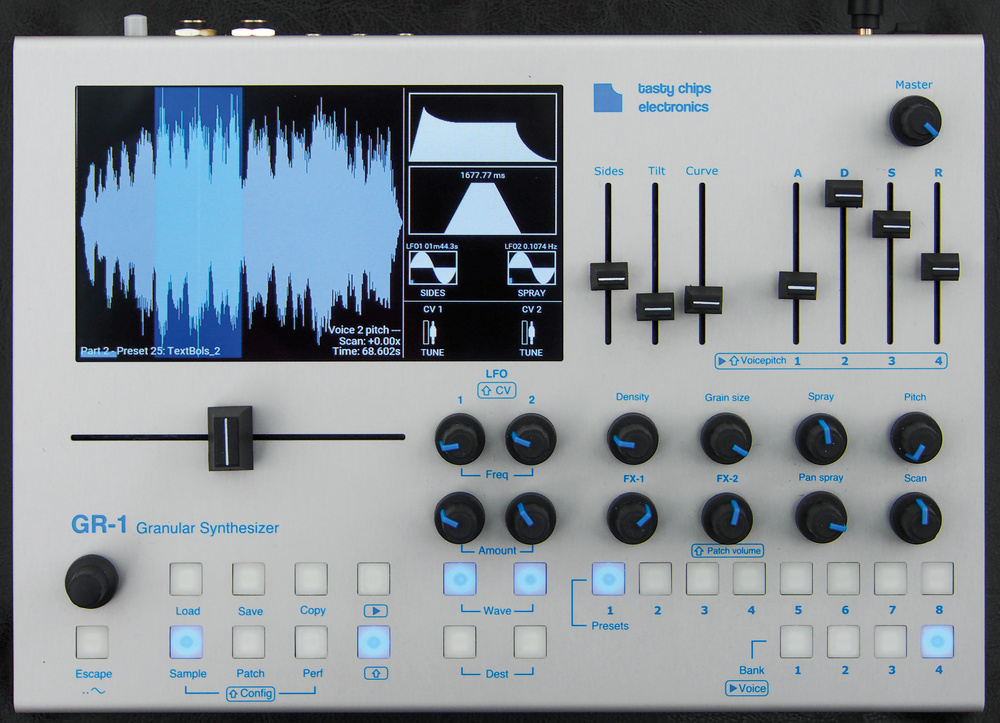
Naturally, you might wonder about the existence of physical hardware, as with other synthesizers. The upper photo shows the modern, dedicated granular synthesizer hardware, the GR-1, which was released in 2017.

This shows that this kind of synthesis processing requires a lot of computing resources. And this means that many virtual synthesizers using this method require significant computing power.

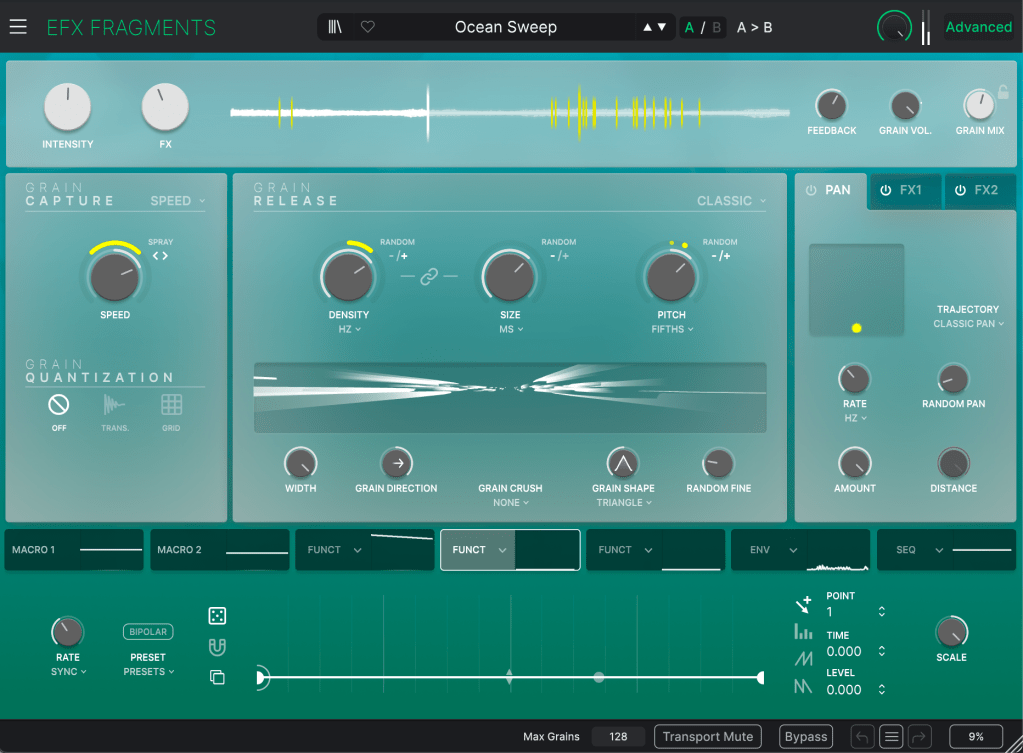
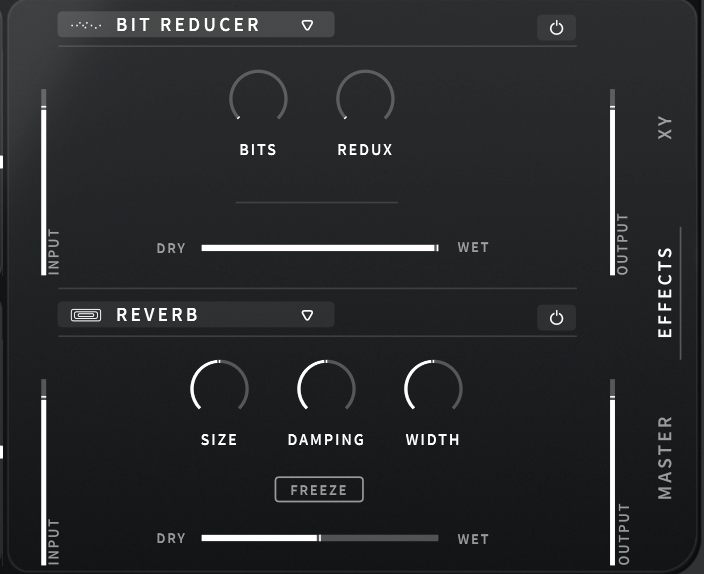
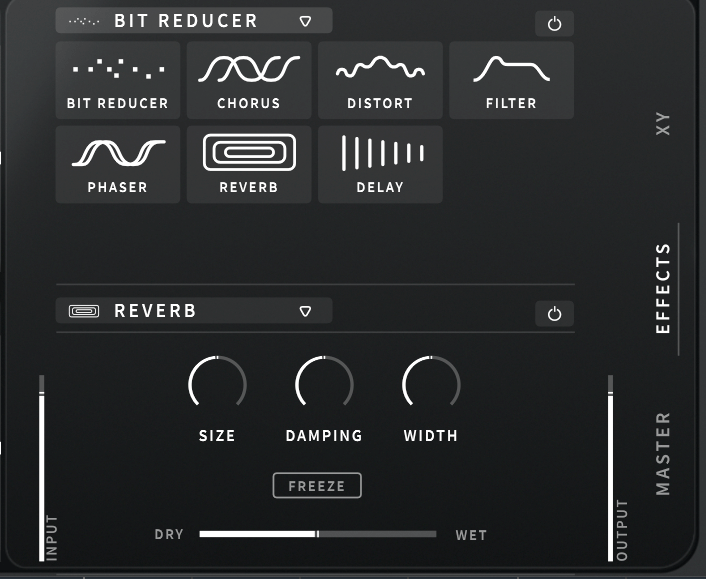
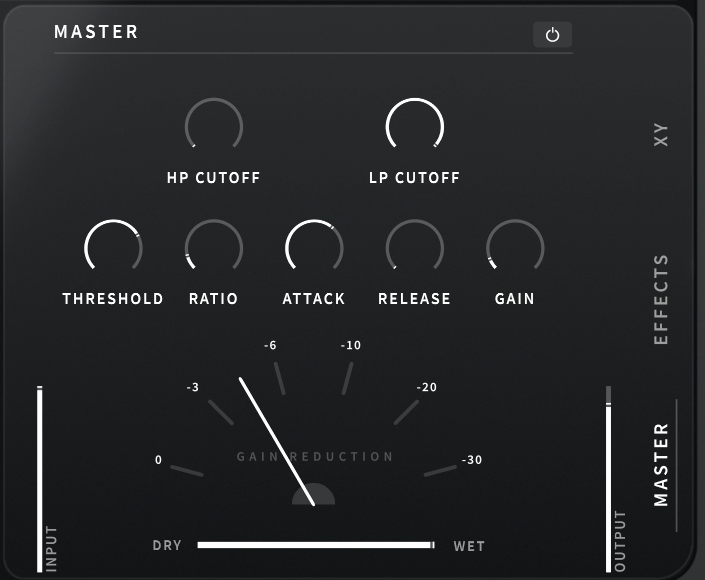
However, for implementation in DAWs (Digital Audio Workstations), no physical hardware is needed to use granular synthesis. Arturia’s EFX Fragments is a great example.

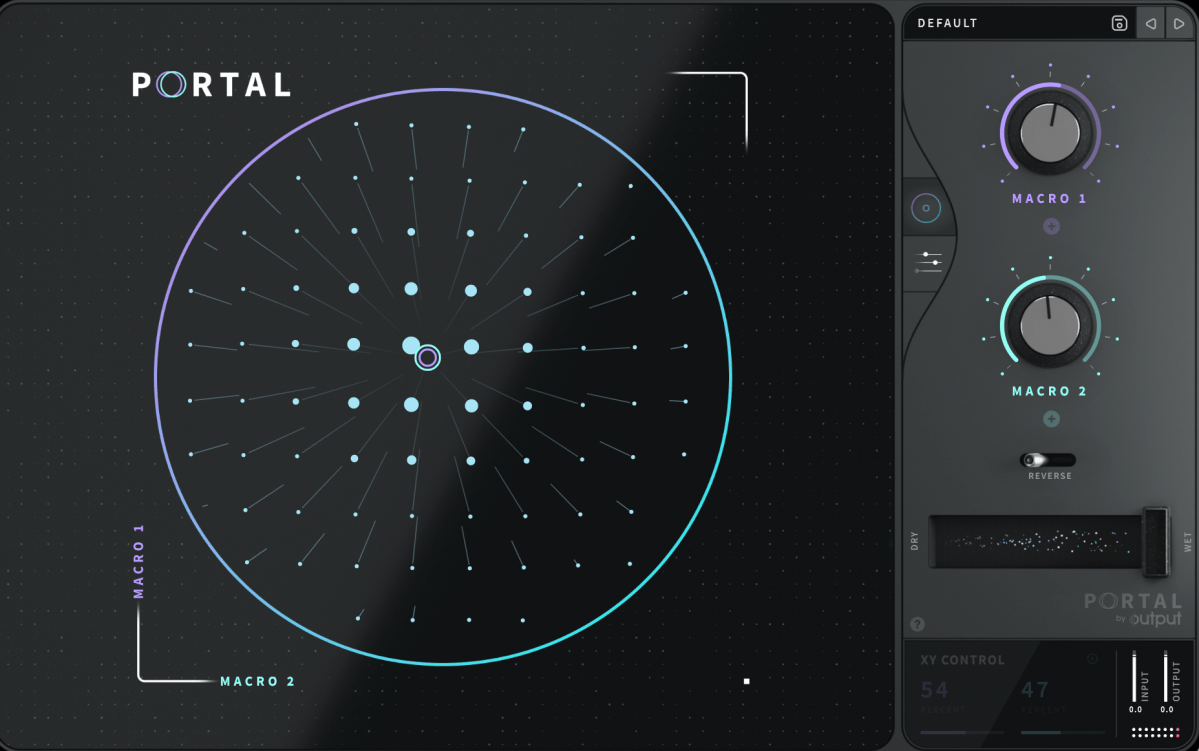
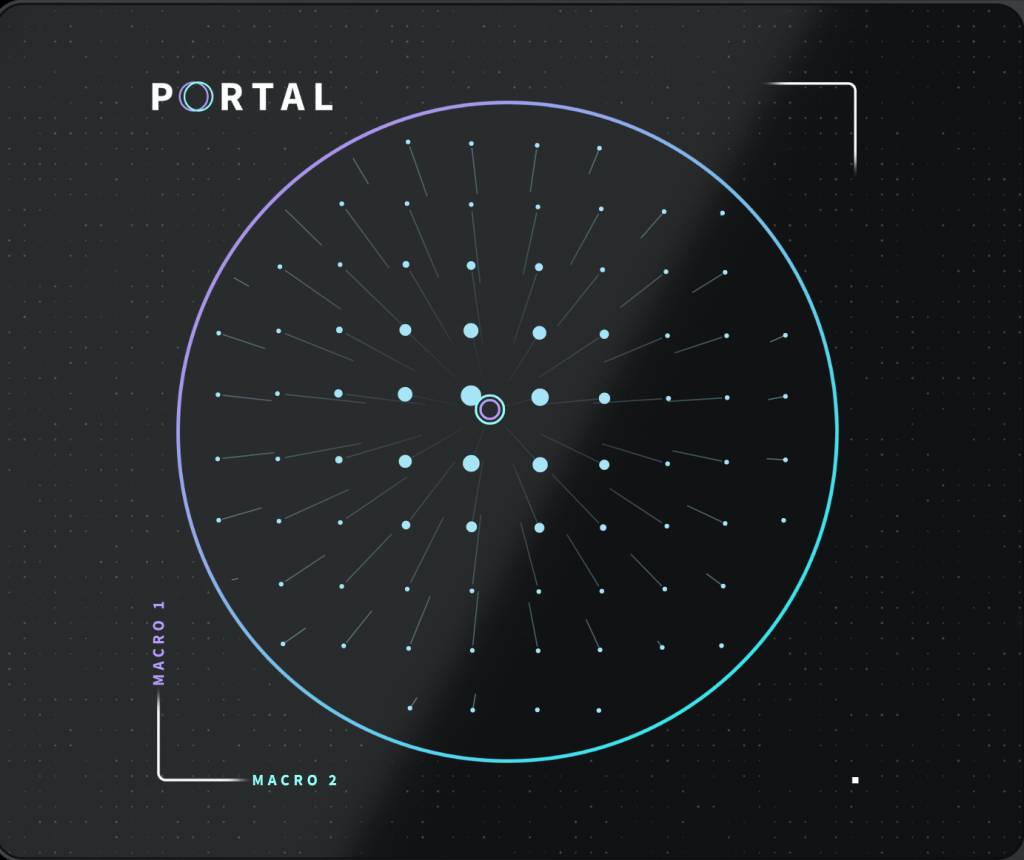
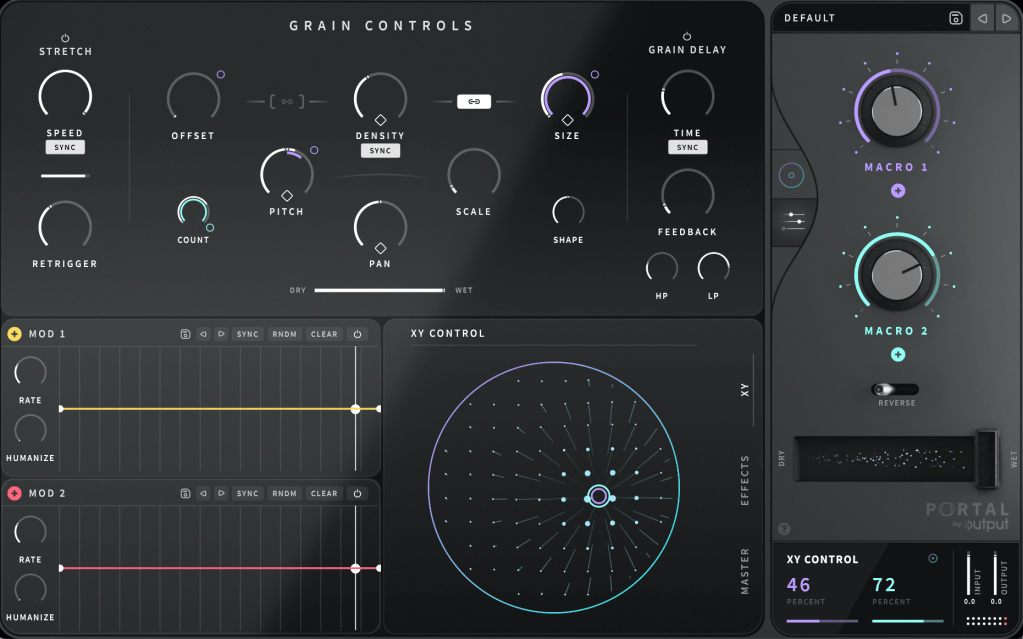
Output’s “Portal” plugin is another excellent granular effect.

This is the official video of the EFX Fragments. You might hear the “shimmering sound” from it.

This sound could be effective in ambient music that requires long tails on the sounds. I like these sounds, but I’ve never used them in my music… ^^;; However, someday I will…

OK, I’ll wrap this up today. See you in the next post!

Output Portal Granular FX 50% Off Sale (Until August 16th)

Hello, this is Jooyoung Kim, mixing engineer and music producer.

Today, I’m excited to share that Output is having a summer sale with 50% off on their plugins!

Output is a well-known company that creates fantastic plugins. If you’ve been into music production, you’ve likely heard of them.

Since this sale is a rare opportunity, I requested NFR (Not for Resale) codes for three of Output’s flagship plugins—Portal, Thermal, and Movement—from Plugin Boutique to review them.

Instead of covering them all at once, which might be overwhelming for both you and me, I’ll review them one by one. Let’s start with Portal!

Portal is a plugin that transforms incoming audio into a granular synthesizer-like sound. But first, let’s explore what a granular synthesizer is.

A granular synthesizer chops up a sample into tiny grains ranging from 1 to 100ms to synthesize new sounds. As shown in the image, you can slice and rearrange waveforms to create unique sounds.

This technique is particularly effective for creating atmospheric pads, making it a popular choice in movie soundtracks and instrumental genres.

Portal’s user interface is designed to resemble that of a vector synthesizer.

Joystick from a Prophet-VS vector synthesizer plugin

A vector synthesizer can be considered an early form of a wavetable synthesizer. It uses a joystick to blend different waveforms assigned to each direction.

In Output’s Portal, Macro 1 is placed on the vertical axis, while Macro 2 is on the horizontal axis. The values of these macros control various parameters.

You can connect Macro 1 and Macro 2 to different parameters in the Grain Control section. By double-clicking the macro names, you can even rename them.

To assign a macro, click the ‘+’ sign below the name of each knob (like Macro 1 and Macro 2), then drag it to a parameter. A small circle will appear next to the parameter, indicating the range of control the macro has.

Similarly, you can use the LFO in the bottom left to modulate parameters. Think of it as a traditional synthesizer, which should make it easier to approach.

At the bottom center, you can choose between the XY, Effects, and Master sections to adjust various parameters.

The built-in effects include Bit Reducer, Chorus, Distortion, Filter, Phaser, Reverb, and Delay, making for a total of seven options. All these parameters can be linked to the LFO modulation or macro functions for dynamic control.

The Master section includes a built-in filter and compressor, which can also be modulated with LFOs and macros.

Clicking ‘DEFAULT’ at the top right allows you to access various presets. Beginners might find it helpful to start here.

Portal is particularly appealing due to its ability to produce random, evolving sounds based on XY values. It’s an excellent choice for those who don’t already have a granular FX plugin.

Check out the demo video to hear what it can do.

The 50% off sale runs until August 16th! Here’s the purchase link:

Additionally, if you purchase from Plugin Boutique, you can get a free plugin. This month, you can choose between Softube’s VCA Comp or K7D’s Delay.

Softube previously offered the VCA Comp for free in March. It’s a great dbx160-style compressor, perfect if you don’t already have one.

The K7D Delay is a tape delay that sounds great on electric guitars and works well in mixes.

That wraps up the overview of Portal. In the next post, I’ll review another Output plugin, Thermal. Stay tuned!