Heavyocity MicroFX Intro Sale (Until 9/20)

Hello, this is Jooyoung Kim, music producer and audio engineer.

Today, Heavyocity has released a new set of plugins called MicroFX.

Heavyocity is known for selling virtual instruments and effects plugins, especially well-suited for film and video music production. However, the new MicroFX plugins can be used for a variety of purposes beyond those genres.

There are three plugins in the series:

  1. Obscene (Distortion)
  2. Filter
  3. Shimmer

Let’s take a closer look at each of them.

Obscene
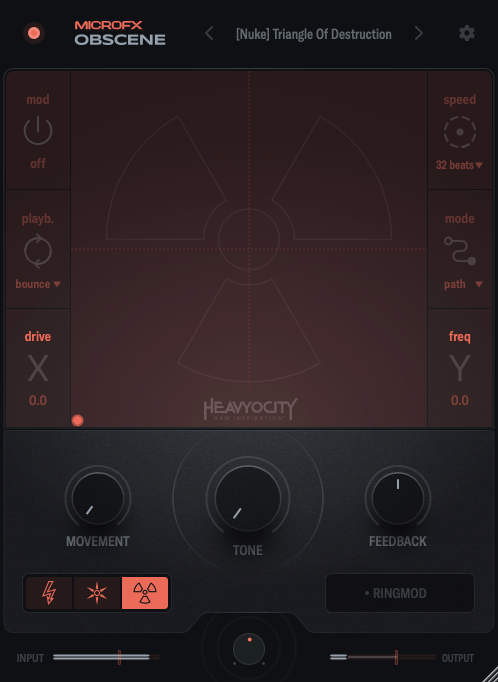
Obscene true to its name, this plugin delivers a powerful, in-your-face distortion effect.

There are three types of distortion to choose from: BLASTER, CRUSHER, and NUKE.

  • BLASTER offers a guitar pedal-style distortion.
  • CRUSHER adds bitcrushing to the distortion.
  • NUKE provides a fuzz-like distortion.

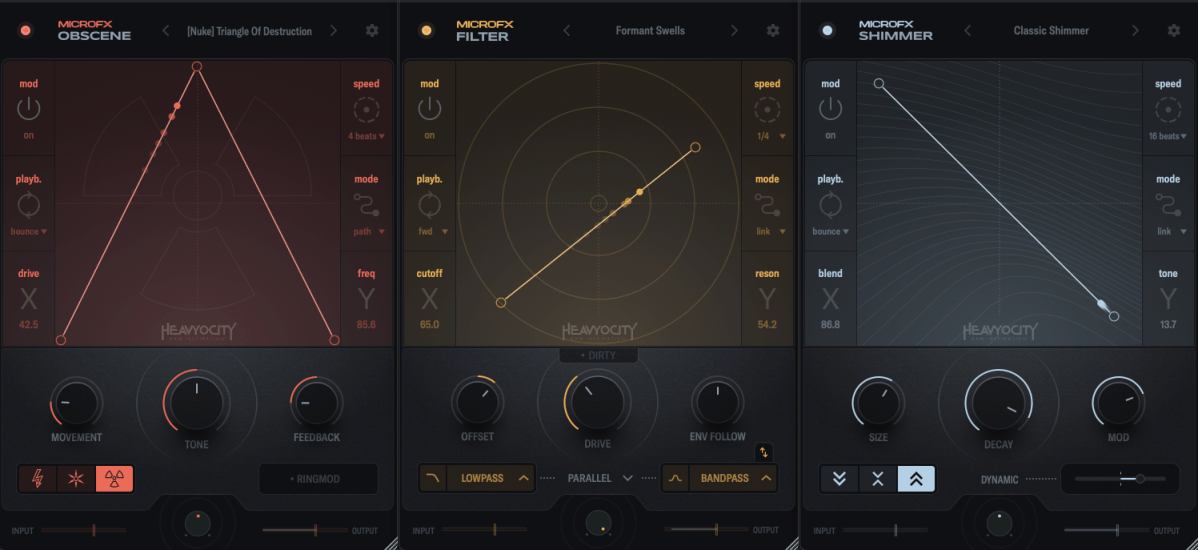
On the graph, the X-axis controls the amount of distortion, while the Y-axis adjusts ring modulation and internal filtering.
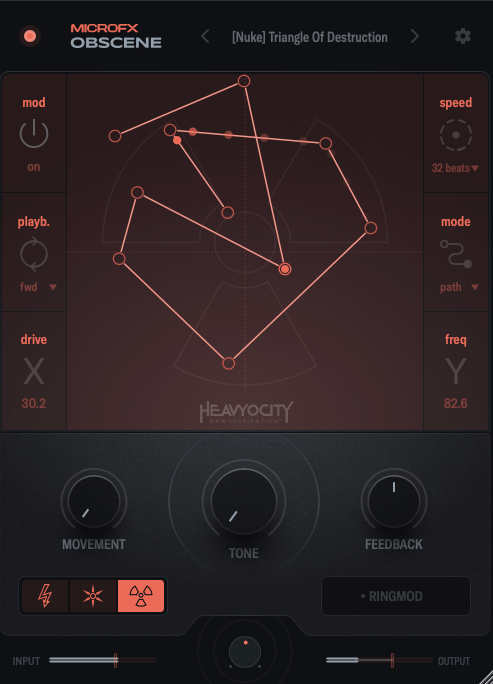
You can activate the Mod function, and by double-clicking on the screen, you can place points, which are influenced by the speed settings on the right. You can place up to 15 points.

When you adjust Movement, the frequency response and harmonics change over time. The Tone control acts like a tilt EQ, while Feedback may seem subtle at first but becomes more noticeable as the distortion increases. The large knob at the bottom center is the Mix control.

Filter
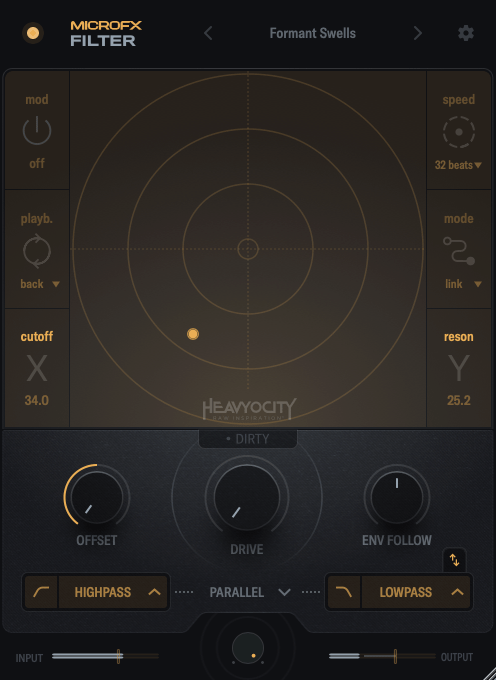
Filter is a simple but versatile plugin.

In this case, the X-axis controls the cutoff frequency, and the Y-axis adjusts the resonance.

Through the buttons below the central knob, you can choose which filters to apply to the high and low frequencies.
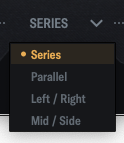
By clicking the center of the interface, you can choose whether to link the filters in series, parallel, LR (left/right), or MS (mid/side) modes.

When you adjust Movement, the frequency response and harmonics change over time. The Tone control acts like a tilt EQ, while Feedback may seem subtle at first but becomes more noticeable as the distortion increases. The large knob at the bottom center is the Mix control.

Shimmer
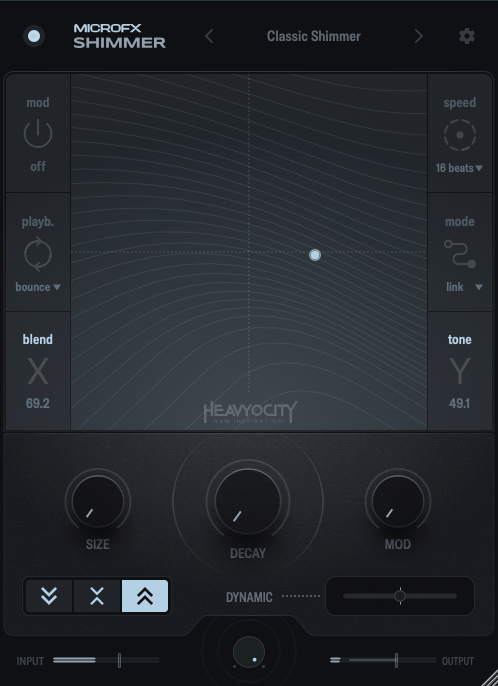
Shimmer reverb will be covered in more detail in my upcoming blog post on the basics of mixing. It’s a reverb plugin that incorporates pitch modulation, producing a bright, extended effect.

This shimmering, elongated reverb is particularly popular in instrumental and cinematic music, especially on guitars.

Shimmer captures that classic sound well.

The X-axis controls the blend of the pitch-shifted delay, while the Y-axis adjusts various internal reverb parameters to shape the overall tone.

The buttons on the lower left let you shift the pitch an octave down, an octave up, or both.

The Size, Decay, and Mod knobs function like typical reverb controls, so I won’t explain those further.

Dynamic is a fader that adjusts the internal dynamics. Pulling it to the left applies an expander to the reverb’s input and output, while pushing it to the right activates a ducking compressor.

Summary

All three plugins are well-crafted and highly useful for sound design. If you’re interested, I recommend checking them out!

These plugins are priced at $42.9 each, or $108.9 for the bundle. Additionally, if you purchase from Plugin Boutique this month, you’ll receive either the Pyros distortion plugin or Bloom Vocal Aether Lite for free.

Thanks for reading, and I’ll see you in the next post! 🙂

Excite Audio Lifeline Modules Plugin Sale (until 9/30) and Review Part 2: Lifeline Expanse

Hello, this is Jooyoung Kim, a music producer and audio engineer.

Following the previous review on Lifeline Console, today I’ll introduce you to the plugins included in Lifeline Expanse.

As I mentioned in my previous post, these plugins are not resource-heavy on your computer. They’re affordable, high-quality, and come with a clean, intuitive UI, making them a solid option if you’re considering basic third-party plugins.

Lifeline Expanse is also being reviewed with NFR (Not for Resale) codes provided by Plugin Boutique.

Let’s dive into Lifeline Expanse!

Lifeline Expanse includes five modules: Format, Dirt, Reamp, Width, and Space.

The Lo and Hi options in Expanse are simple cut-off filters, so I’ll skip explaining them.

The waveform on the left shows a de-esser-like effect where high frequencies are attenuated based on the incoming signal, while the shield in the middle acts as a limiter.

Unlike Console, Expanse doesn’t add various types of saturation, but even with the filter range maxed out, it still introduces tonal changes. Now, let’s take a closer look at the individual modules.

Format

click image to buy Lifeline Format

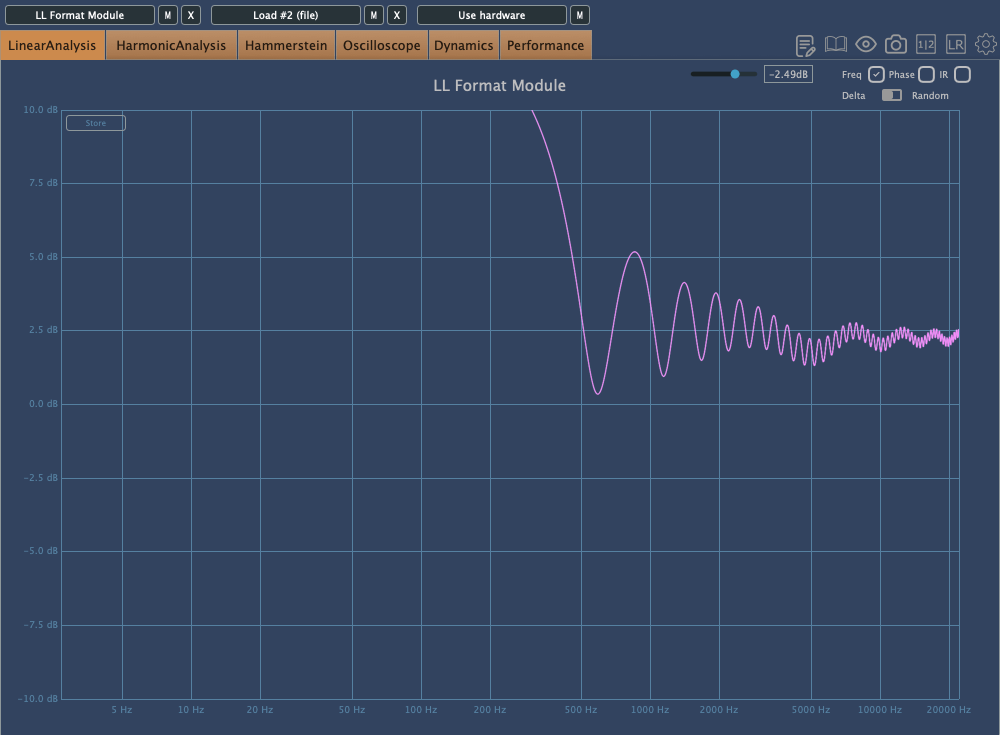
The concept of Format is “digital distortion.”

This plugin adds a characteristic digital distortion to your source.

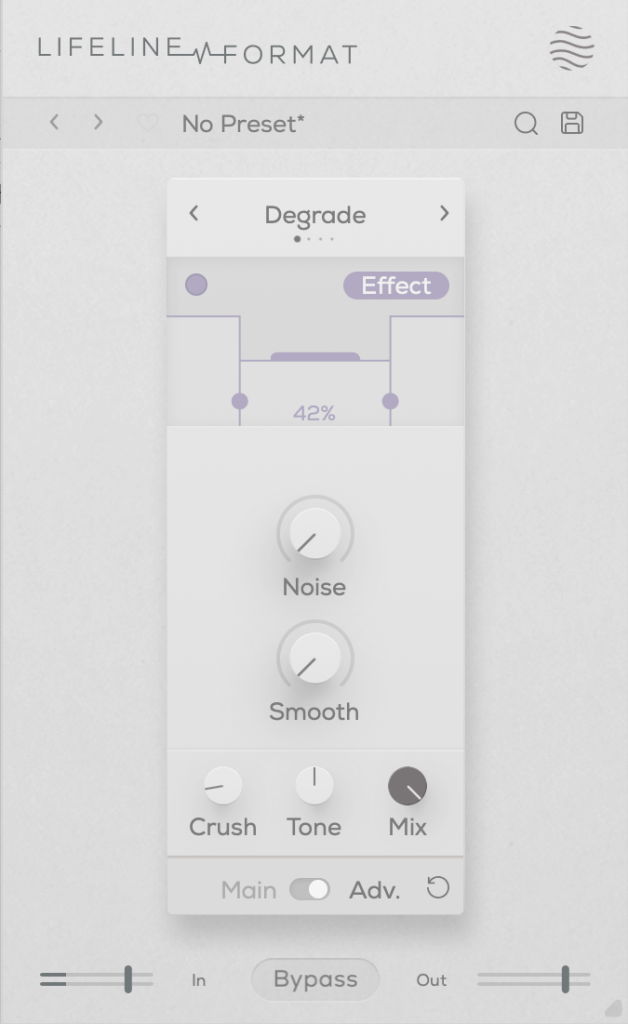
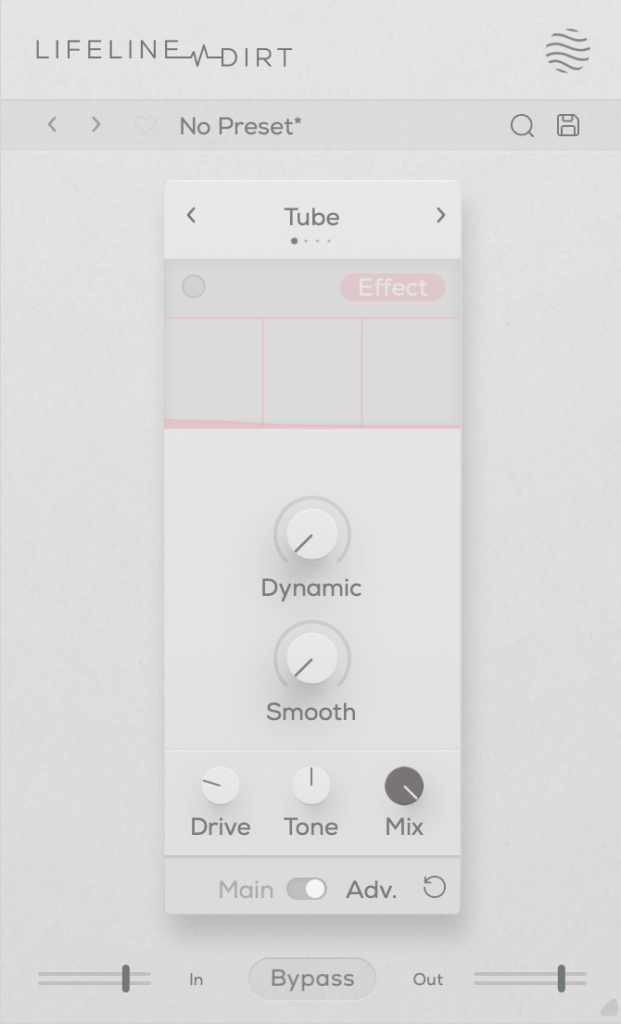
In the Advanced window, you can split the frequency range into three bands, adjust their volume, and even add noise. The Smooth option can make the changes less harsh.

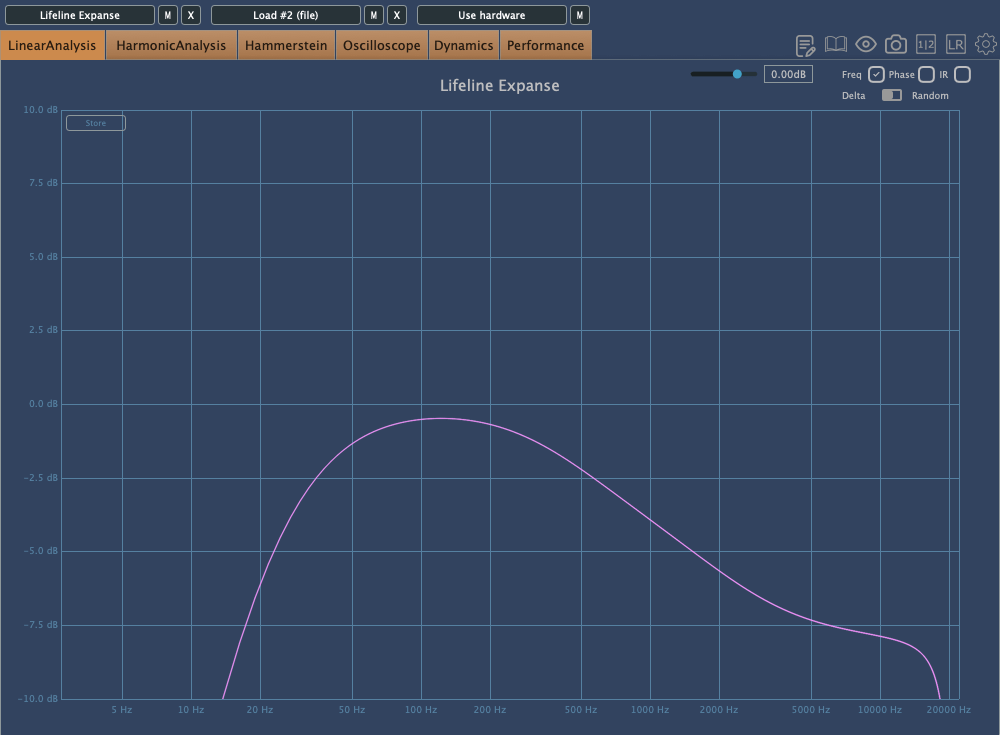
Other key controls include Crush, which adds the distortion, and Tone, a tilt EQ centered around 650Hz.

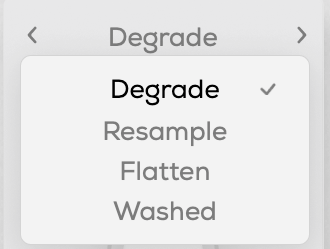
There are four modes:

  • Degrade: Reduces the bit depth of the incoming audio, creating digital distortion.
  • Resample: Lowers the sample rate of the audio, adding digital artifacts.
  • Washed: Simulates the sound of a degraded, low-quality MP3, creating an underwater-like effect.
  • Flatten: Combines gating and bitcrushing, reducing the resolution of the audio.

Let’s take a closer look.

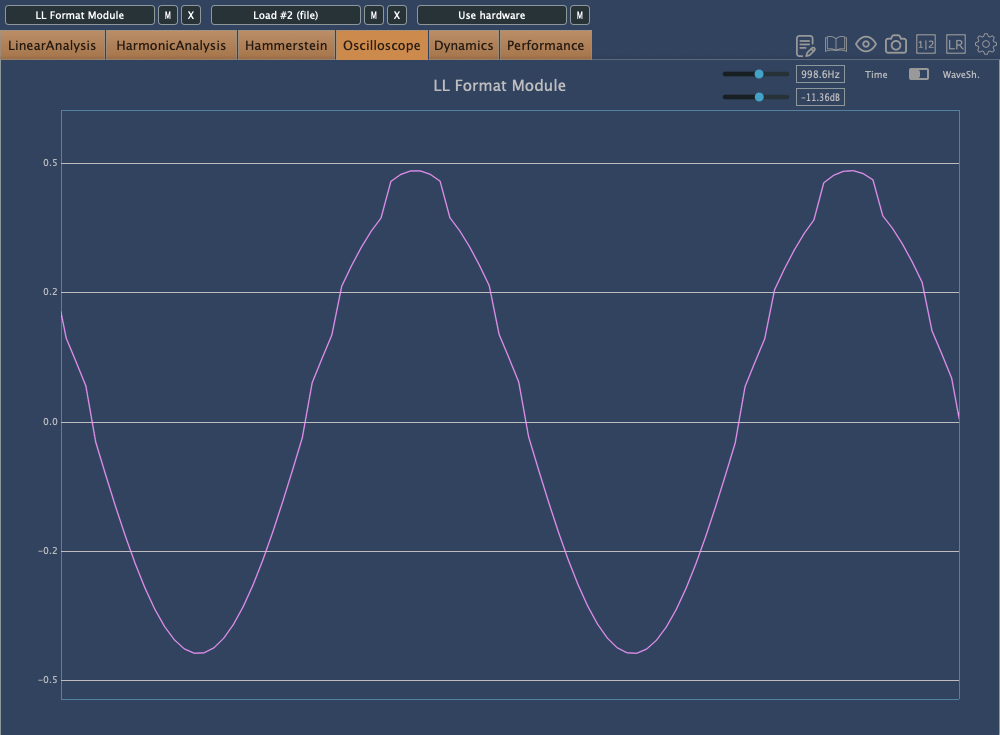
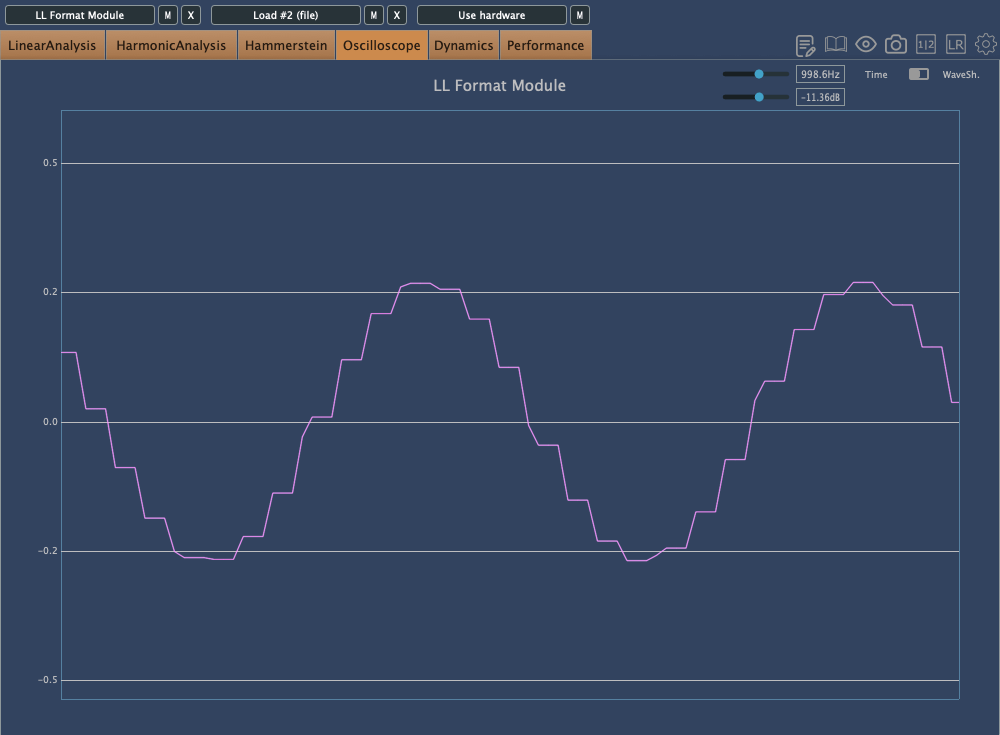
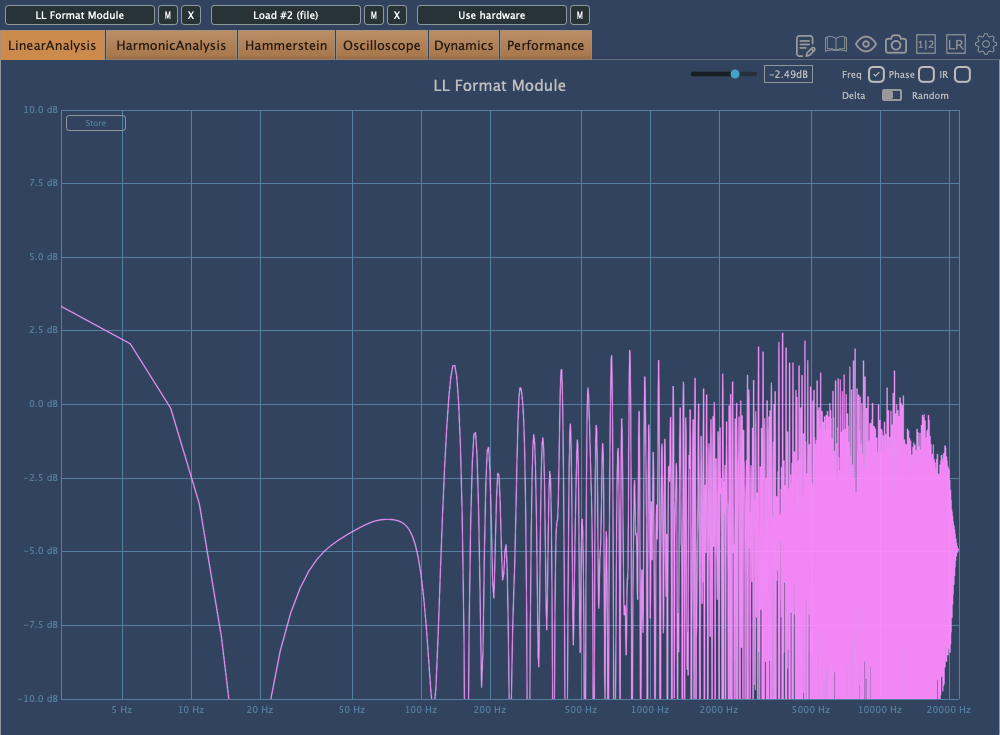
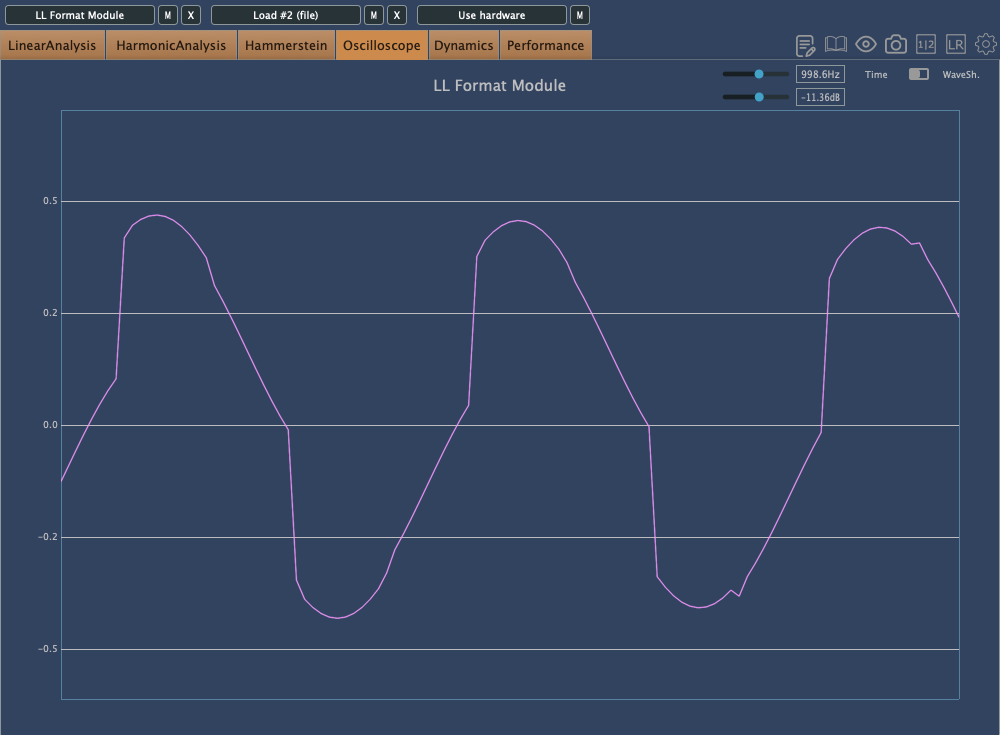
This is Degrade mode, where reducing the bit depth makes the waveform appear choppy in the oscilloscope.

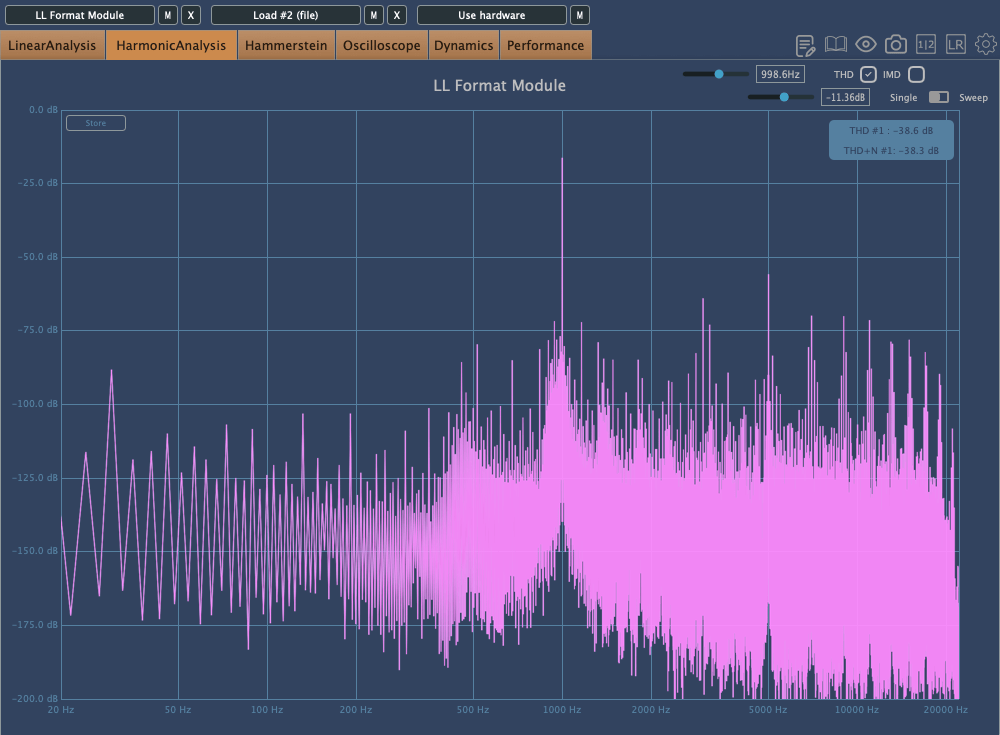
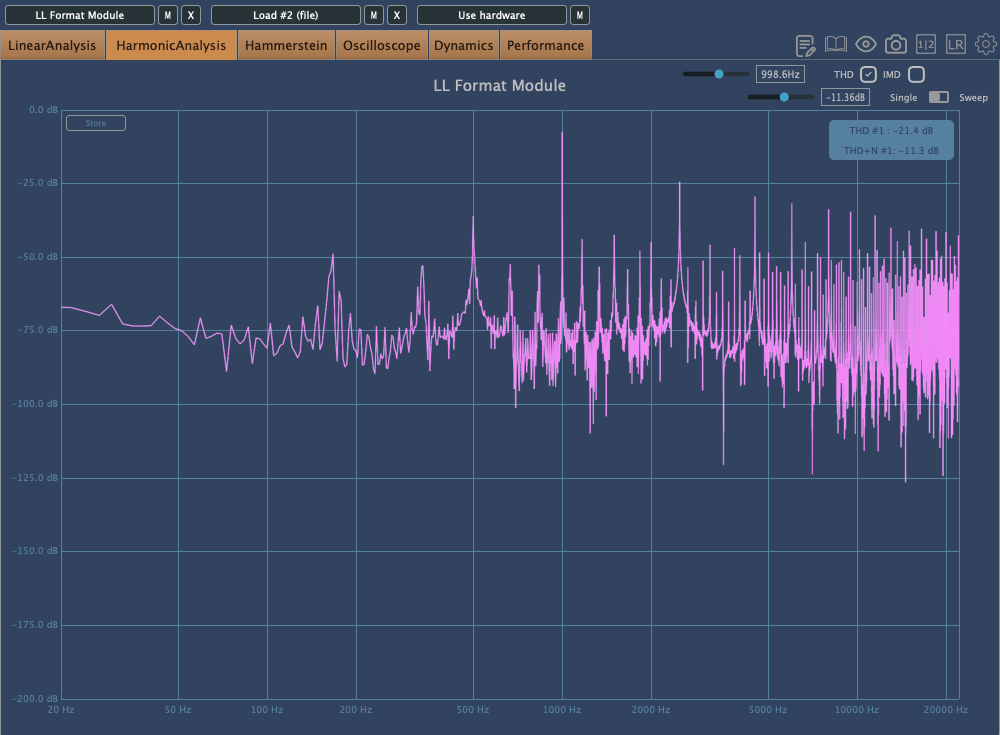
In Resample, harmonics reflect back at the Nyquist frequency, and those oscillations can be seen on the scope. It’s constantly in motion due to added frequencies.

Washed mode just smears everything.

Flatten shows harmonic reflections, indicating a resampling effect, combined with reduced bit depth, resulting in multiple distortions.

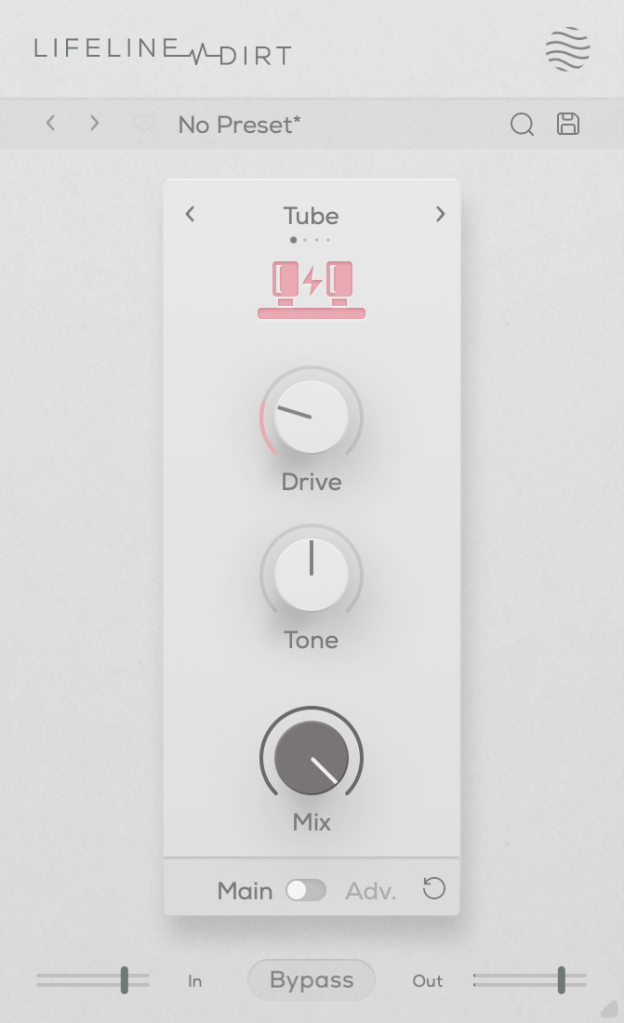
Dirt

click image to buy Lifeline Dirt

The Dirt module focuses on “analog distortion.”

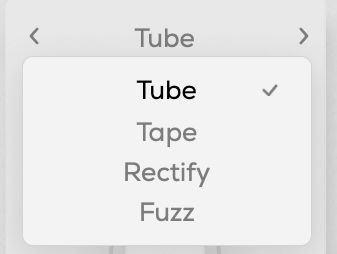
You can choose from four types: Tube, Tape, Rectify, and Fuzz. The controls are the same as in Format, so I won’t repeat the explanation.

All four modes emphasize low and mid frequencies while cutting highs. As the name “Dirt” suggests, pushing the Drive knob can make it act almost like a compressor or limiter at higher levels.

Re-Amp

click image to buy Lifeline Re-Amp

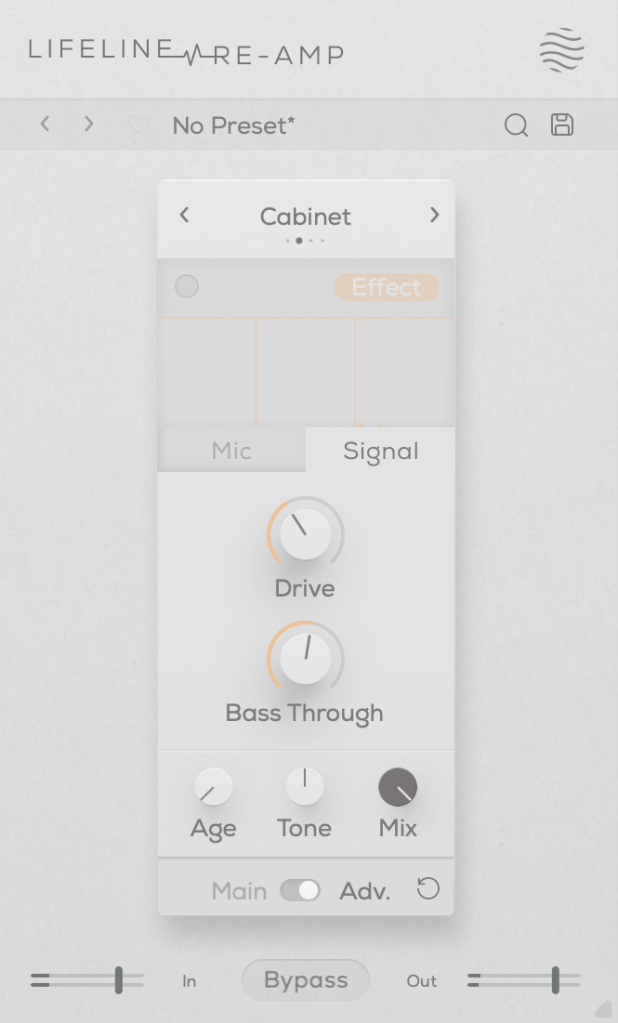
As the name suggests, Re-Amp is designed to simulate re-amping.

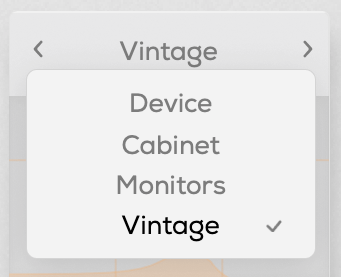
You can re-amp through small electronics, guitar cabinets, monitor speakers, or cassette recorders, with two speaker options in each category to choose from.

True to the re-amping concept, it allows you to adjust the distance of room and close microphones, and blend their sounds together.

Increasing the Age value causes the highs and lows to gradually roll off, eventually introducing wow and flutter effects.

The Drive knob adds harmonic distortion, while Bass Through prevents distortion from affecting the selected low-frequency range.

Width

click image to buy Lifeline Width

The Width module adjusts stereo imaging.

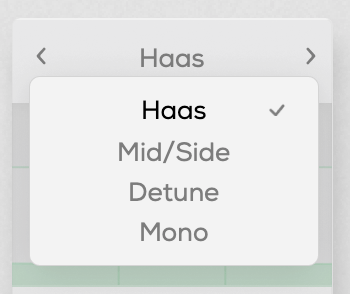
You can select from Haas, Mid/Side, Detune, and Mono modes.

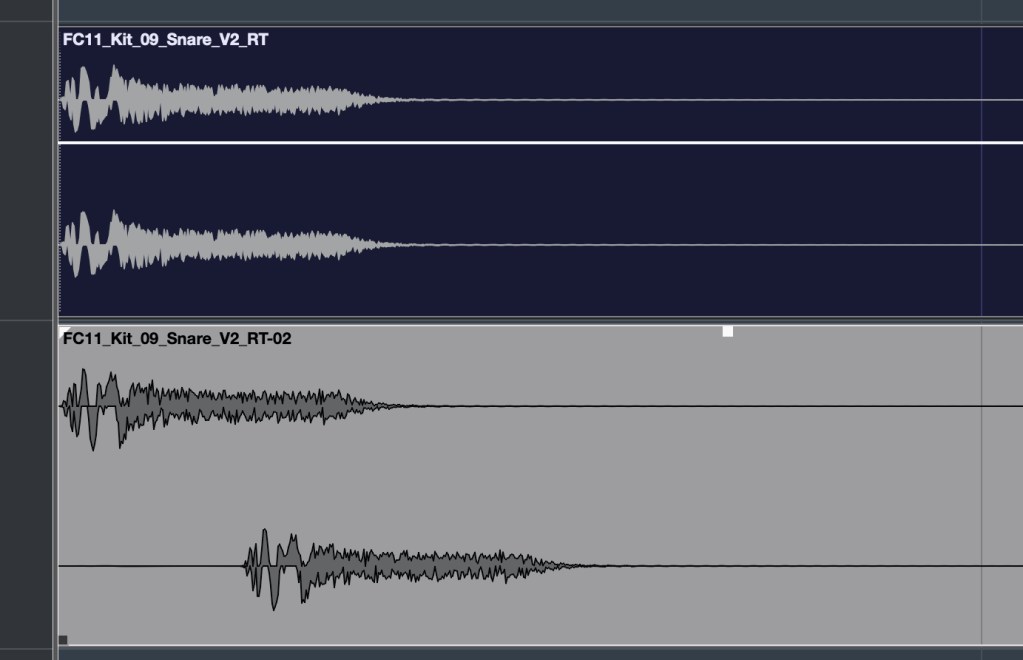
The Haas effect, as shown in the image, uses time delays to create a stereo image. Mid/Side enhances the side channels, Detune creates a wider image through pitch modulation, and Mono narrows the stereo field, gradually converting the sound into mono.

The Stereo knob enhances these effects, and Bass Mono ensures that frequencies below a set threshold are converted to mono.

I’ll skip further explanation, as the rest of the parameters are the same as in Format.

Space

click image to buy Lifeline Space

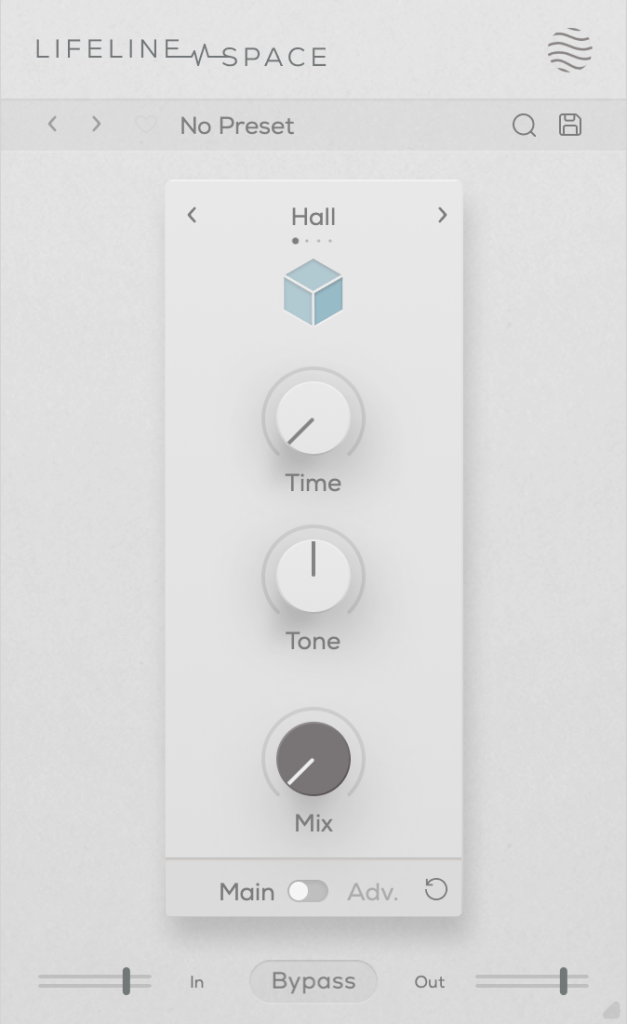
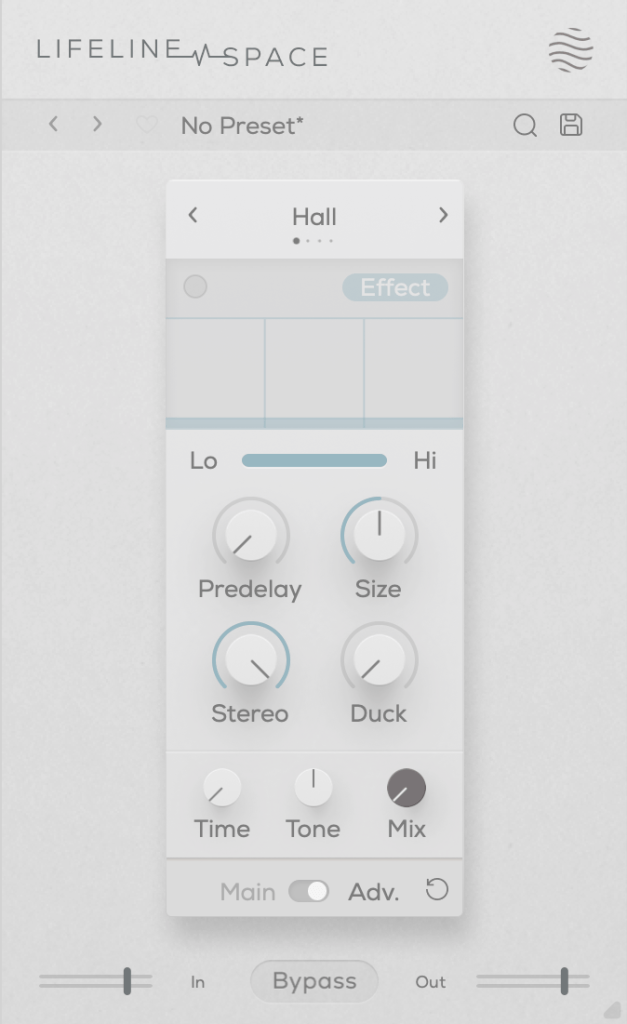
Space is a reverb module.

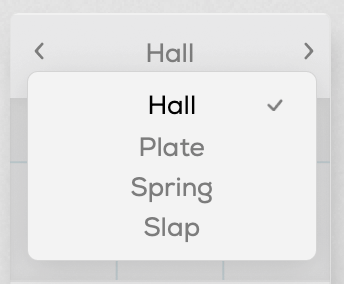
You can choose from Hall, Plate, Spring, and Slap reverb types, all offering solid digital reverb sounds.

Slap, in particular, has a delay with a significant amount of feedback, making it quite versatile.

A unique parameter here is Duck, which reduces the reverb based on the incoming input signal. Other parameters are typical for reverb plugins.

Each of these modules is priced at just $11, making them very affordable. Plus, if you purchase any plugin from Plugin Boutique, you’ll receive either the Pyros distortion plugin or the Bloom Vocal Aether Lite plugin for free.

Thanks for reading, and see you in the next post! 🙂
The Basics of Mixing – 8.1 What is Reverb?

Hello! I’m Jooyoung Kim, a mixing engineer and music producer.
Today, we’ll be diving into the topic of reverb.

Shall we get started?

What is Reverb?

Reverb is short for “reverberation,” which can be translated as “echo” or “resonance.”

In essence, reverb is an effect that creates echo or resonance.
But why do we use it?

Normally, when we speak to each other, we aren’t whispering directly into each other’s ears.
This means we’re always hearing a bit of natural echo from our surroundings.

But what about recordings?

While room mics can capture some of that natural reverb, most recordings are done quite close to the source, almost like someone is whispering directly into your ear. As a result, these recordings often lack natural reverb and can feel “dry.”

To add that missing resonance, we use reverb. However, it’s not just about simulating the sound of a room or a studio. Reverb can create the illusion of a concert hall or an entirely virtual space, making the music sound more musical and immersive.

To understand how to use it effectively, we need to dive into how reverb is actually created.

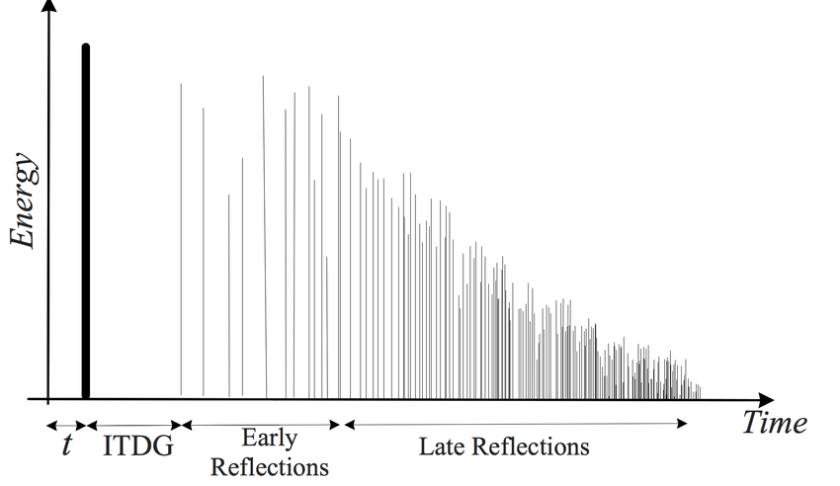
Kaplanis, Neofytos & Bech, Søren & Jensen, Søren & Waterschoot, T.. (2014). Perception of reverberation in small rooms: A literature study. Proceedings of the AES International Conference. 2014.

As I mentioned in the “7.3 How to Use Delay” section of the previous post, reverb is created when sound waves bounce off surfaces like walls.
The first reflections of sound that reach our ears after bouncing off a surface are called Early Reflections, and these are typically the loudest part of the reverb.

Afterward, the sound continues to reflect multiple times, gradually forming the full reverb. The time it takes for the reverb to decay by 60dB from its original level is called RT60.

There is also a natural delay between the original sound and when we hear the reverb. To control this delay in reverb plugins or hardware, we use a parameter called Pre-Delay, which allows us to set the time gap between the original sound and the onset of early reflections.

For orchestral instruments, it’s common to use reverb based on Impulse Response (IR). Since sound travels at about 340 meters per second at room temperature, we can map out how reverb behaves based on the distance of the space, and calculate the time difference between the original sound and the reverb start time.

For example, if there’s a 2-meter distance, you can calculate the delay as 2m ÷ 340m/s = 0.005s, or a 5ms difference.
Setting the Pre-Delay to around 5ms can simulate this effectively.

In mixing, when a sound is intended to be closer, it’s good practice to have a larger gap between the original sound and its reverb (larger Pre-Delay). For distant sounds, a smaller Pre-Delay works better.

At the end of the day, if it sounds good, that’s what matters most!

In the upcoming posts, I’ll cover the history, types, and practical applications of reverb.

See you in the next post! 🙂
Cableguys FilterShaper XL Sale (Until 8/31)

Hello! I’m Jooyoung Kim, a mixing engineer and music producer.

Today, I wanted to share an exciting deal from one of my favorite companies, Cableguys, who are currently offering a discount on their FilterShaper XL plugin.

As with my recent plugin reviews, I received an NFR (Not for Resale) code from Plugin Boutique for this product.

Let’s dive in!

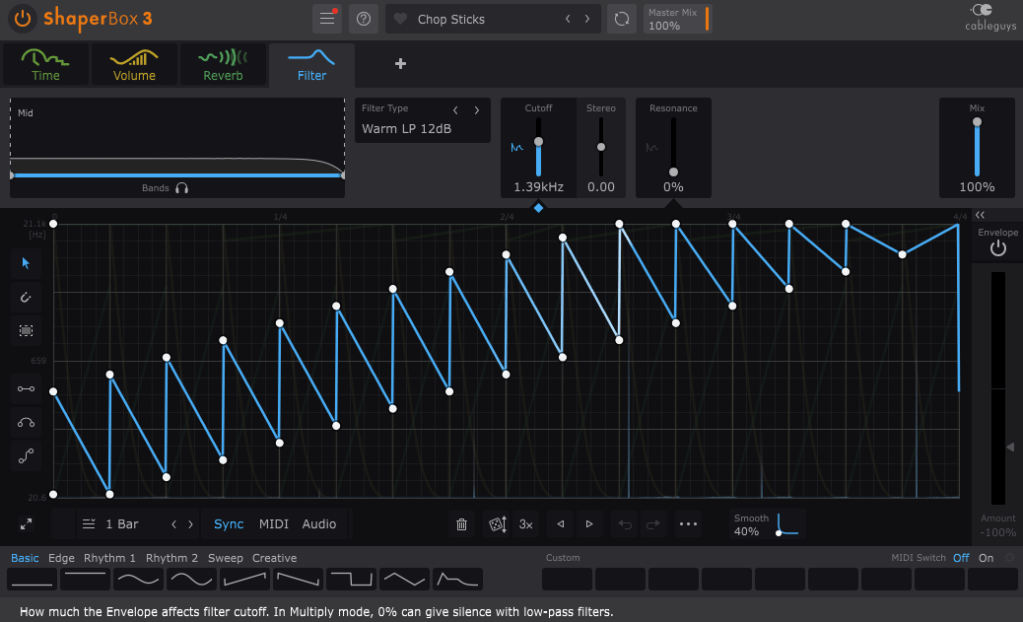
FilterShaper Core in ShaperBox 3

Cableguys is known for their best-selling product, ShaperBox.

ShaperBox can inject an artificial groove into your instruments, and I found it so compelling that I purchased it myself before I even partnered with Plugin Boutique.

Within ShaperBox, there’s a tool called FilterShaper Core. FilterShaper XL is essentially an enhanced version of FilterShaper Core, with additional parameters and features.

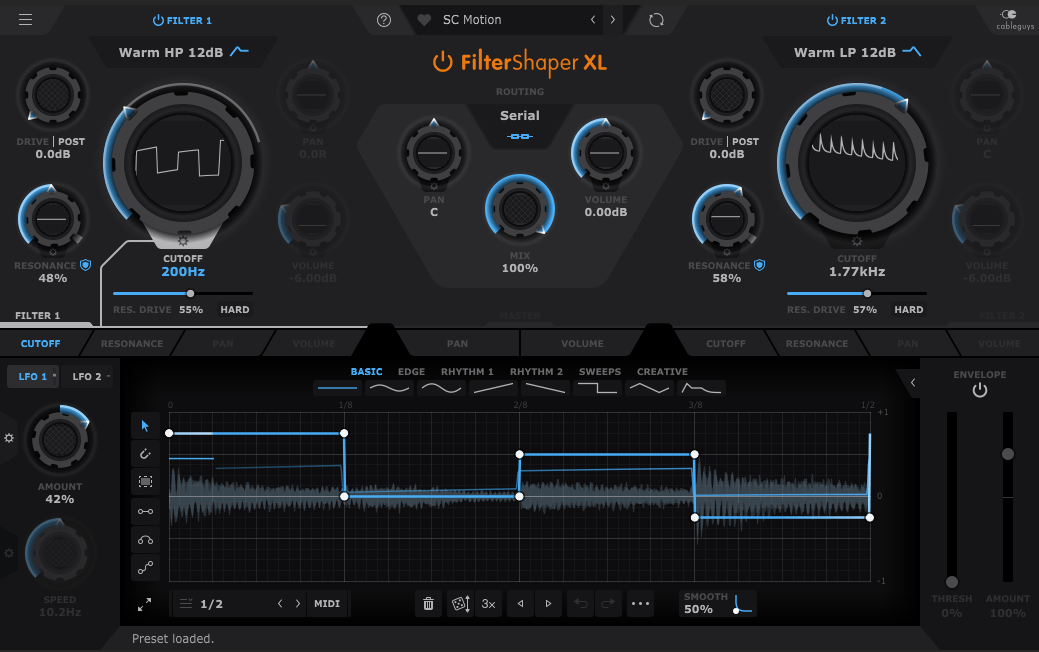
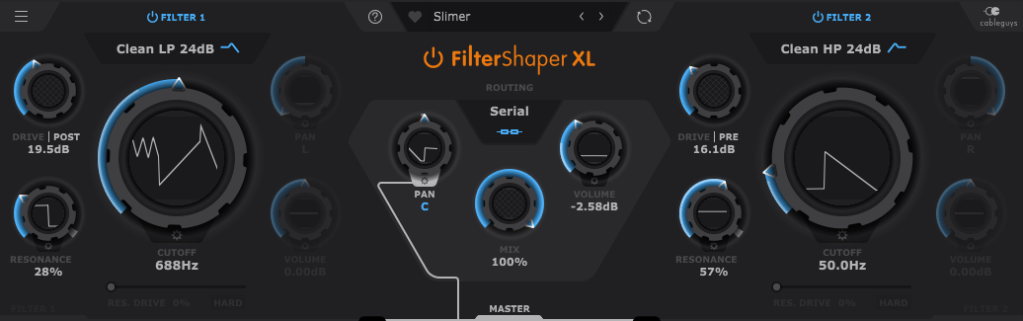
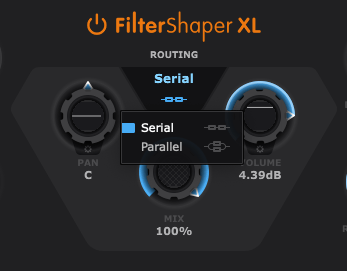
Looking at the UI, you’ll notice it’s split into left and right sections. Both sides represent filters, and the central Routing button allows you to choose between serial or parallel connections.

Pan, Mix, and Volume controls are likely familiar to most of you, so I’ll skip explaining those..:)

Now, let’s explore the filters!

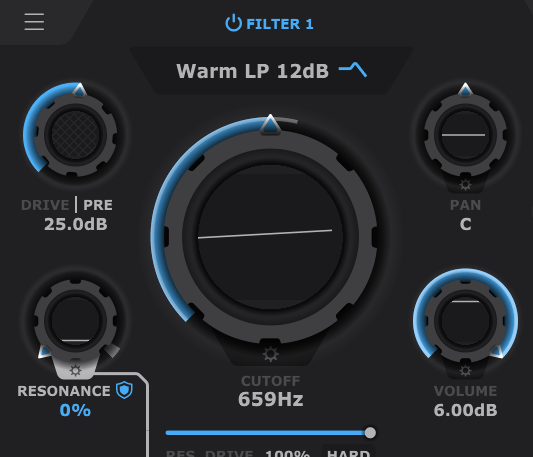
If you’ve used filters before, this should feel intuitive. Even if you’re less experienced, you’ll probably grasp the basics of Cutoff (which determines the frequency at which the sound is attenuated), Pan, and Volume.

The Drive control allows you to choose between Pre and Post settings. Adding Drive enhances harmonics and can act somewhat like a compressor as the sound level increases and then decreases at a certain point.

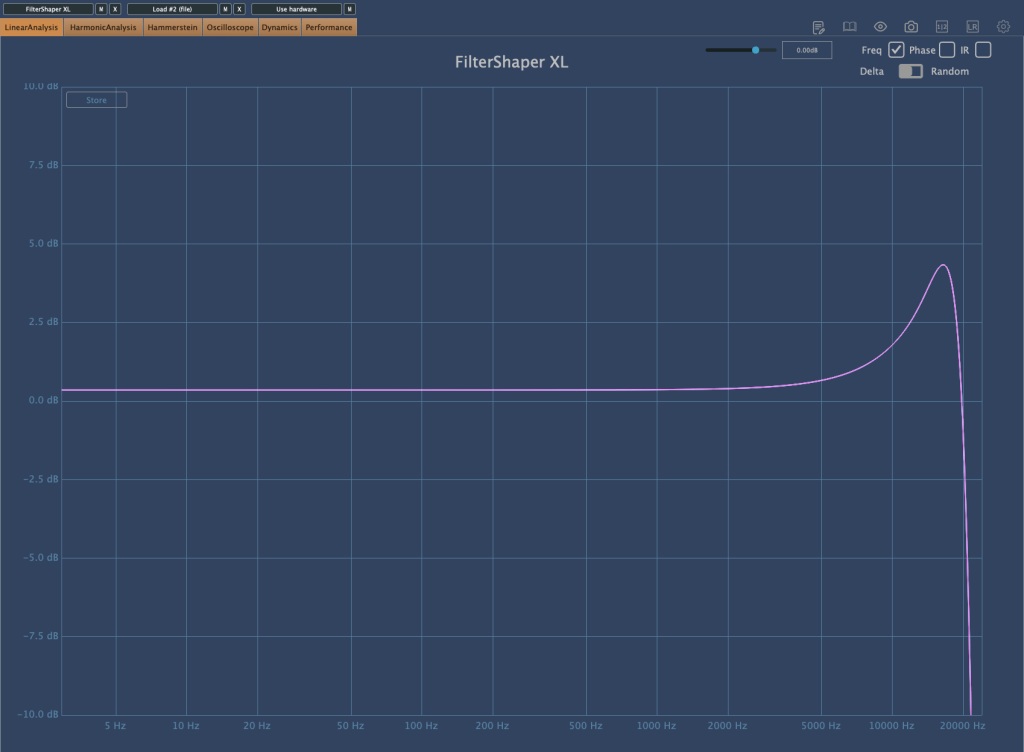
Resonance, as shown in the image above, determines the amount of emphasis around the cutoff frequency.

Filter 2 off, Filter 1 with Drive 0, Resonance 0, Res. Drive 0, Volume 0, Cutoff Frequency at maximum (21.1kHz)
Res. Drive at 50%
HARD button enabled with Res. Drive at 0

The Res. Drive below Resonance applies Drive specifically to the resonance band, creating harmonics and adding compression. The HARD button intensifies these effects.

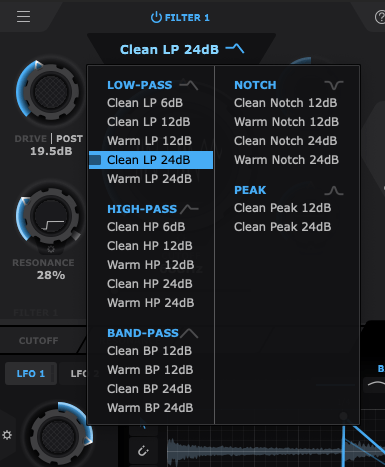
Also, by clicking the text right below the Filter Power button, you can select the type of filter you want to use. That’s pretty much everything about the filter window!

Now, let’s move on to the lower section.

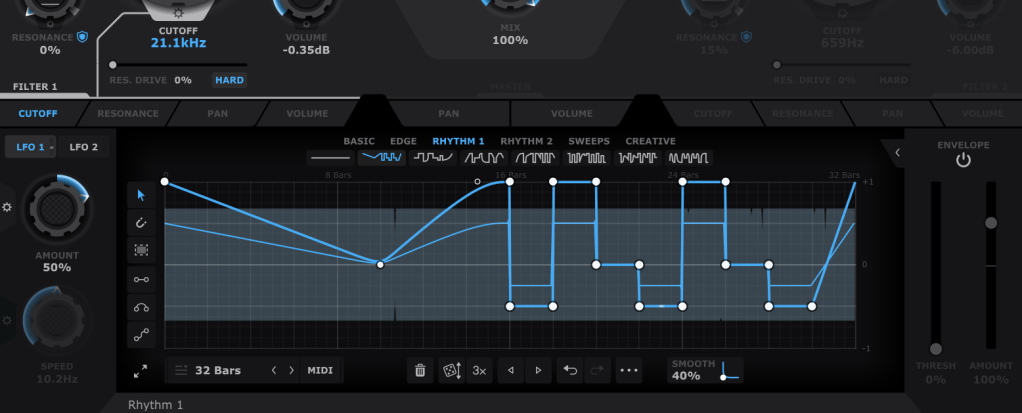
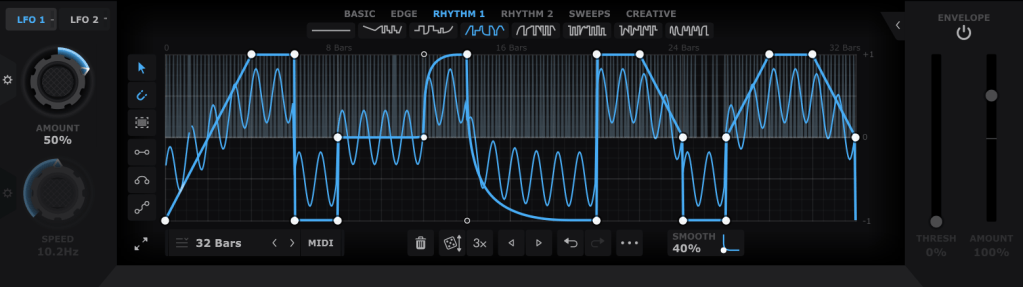
In the bottom section, you can draw automations for each filter’s parameters, allowing them to repeat automatically. You can create points by double-clicking with the mouse and drag them to shape the automation. Various cursor tools on the left can make this easier, and you can also start with presets available at the top.

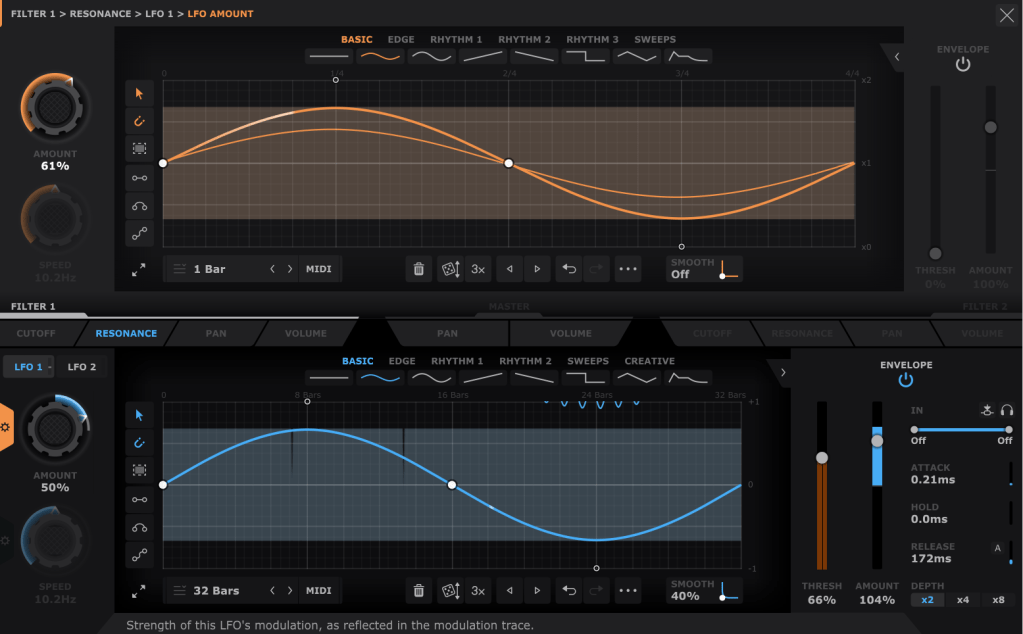
Using both LFO 1 and LFO 2 (located at the top left), you can modulate LFO values like this. The thin blue line in the background represents the LFO that will modulate the parameter.

The Pan and Volume controls in the center manage the panning and volume of the master output. You can also adjust the amount of LFO modulation by clicking the settings button on the Amount knob in the bottom left corner.

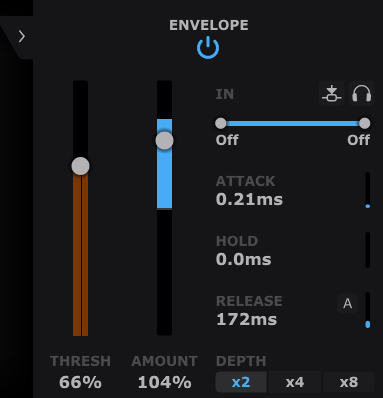
Lastly, the Envelope Follower in the bottom right lets you change the intensity of the LFO based on the input signal. You can also set the LFO’s LFO in the same section, giving you more control.

It may seem complex at first, but it’s very intuitive once you start using it.

If you’d like to hear how it works, check out the demo video by Cableguys.

This sale is valid until the end of the month.

This plugin is versatile and can be creatively used in any genre, whether you’re into acoustic music, rock, dubstep, D&B, K-Pop, or anything in between. I highly recommend it to all music producers.

I primarily use acoustic instruments, and with a bit of tweaking—using a minimal Mix value—you can add a tight groove to your instruments that would be impossible to achieve with just human performance.

Having at least one or two plugins like this is essential, in my opinion. If I had to recommend just two, I’d go with this one and Volume Shaper. If your budget allows, picking up ShaperBox 3 during a sale would also be a satisfying purchase.

Also, if you buy any plugins from Plugin Boutique this month, you’ll receive either Softube’s VCA Comp or Imagine Audio’s K7D delay for free.

If you don’t have a dbx160-style compressor, I’d recommend the VCA Comp. If you need a versatile delay for guitars, electric pianos, or analog delay, go for the K7D.

See you in the next post!