Hey there! I’m Jooyoung Kim, a mixing engineer and music producer.
Now that my “Mixing Basics” series is wrapped up, I’m scratching my head about what to write next… haha. Maybe something about synthesizers? Lately, I’ve had a lot on my mind, and it’s been a bit overwhelming.
Anyway, today I’m excited to talk about two delay plugins from SSL’s X series—X-Delay and X-Echo—which are currently on sale. Let’s check them out!
I received these plugins as NFR (Not for Resale) copies from Plugin Boutique. If you buy through the links in this post, I’ll earn a small commission that really helps me keep going—thanks so much for the support!
Ready? Let’s get started.
X-Delay

X-Delay draws inspiration from 1980s hardware digital delays. My guess? It’s channeling vibes from the iconic AMS DMX 15-80—those big, bold delays from back in the day… haha.
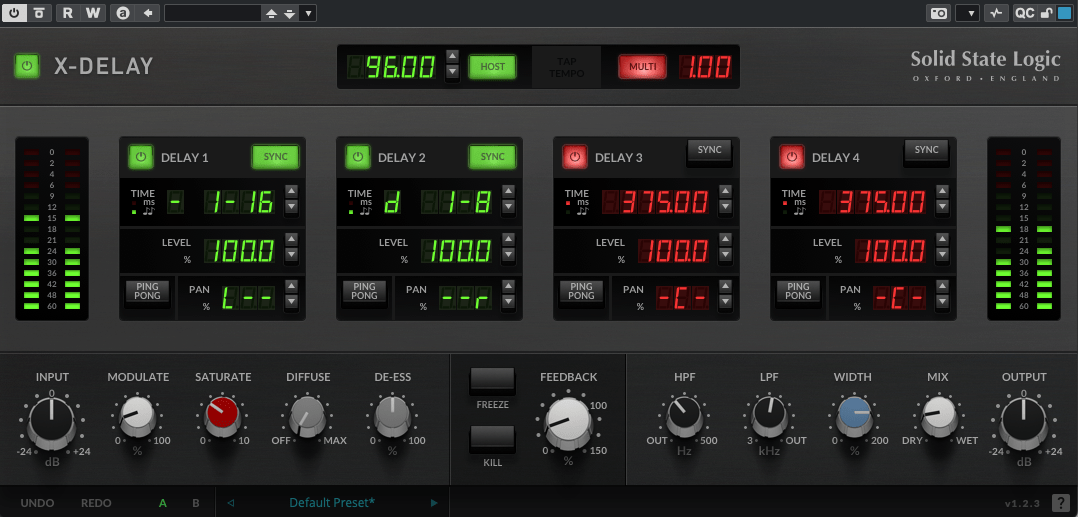
This plugin lets you run up to four delays at once, packed with a bunch of extra features. Let’s break it down.
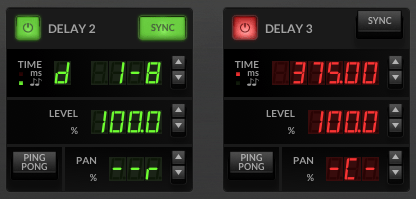
Up top, you’ve got a power button on the left and a Sync button on the right to switch between milliseconds (ms) and BPM sync. Below the “Time” label, it shows whether you’re in ms or BPM mode. To the right, you can tweak delay length in beats or ms—BPM mode offers options like straight (-), dotted (d), or triplet (t). In the screenshot, it’s set to dotted.
Then there’s Level control, a Ping Pong delay toggle, and Panning adjustments. Pretty simple, right?
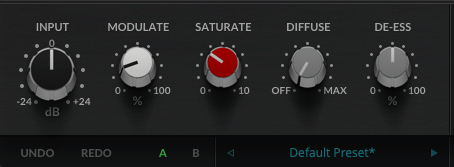

Now, let’s peek at the bottom section:
- Modulate: This applies an LFO to the delay time, adding some wobble. Crank it up a bit, and your sound gets lush and full.


- Saturate: Adds saturation (duh!). Max it out, and you’ll hear harmonic distortion kick in with a gentle soft-knee compression starting around -12.5 dB (it’s subtle, so hard to pin down exactly). It colors the sound nicely—turn it up for some rich warmth.
- Diffuse: A room reverb effect.
- De-Ess: Tames harsh highs.
- Freeze: Locks the feedback sound in place.
- Kill: Cuts all feedback instantly.
This thing’s a beast. It’s perfect for wet, dreamy tones but versatile enough for all sorts of uses. At a sale price of $24.99, it feels like a steal.
X-Echo
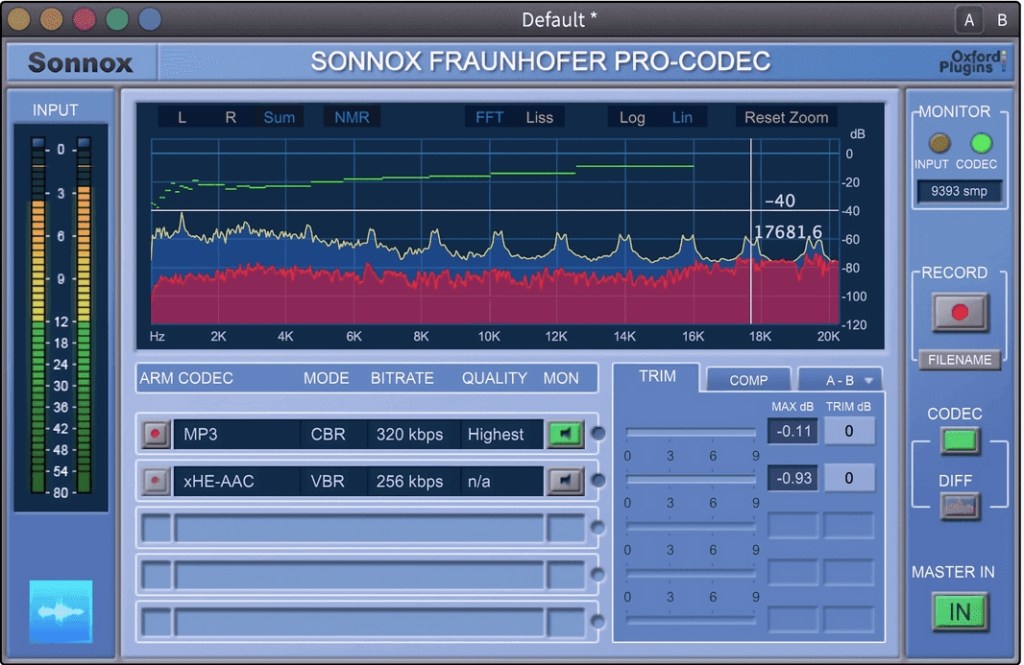
X-Echo takes its cues from 1960s tape delays—think Echoplex vibes, maybe? Haha. Unlike tape hardware built for playback, these old-school delay units often rolled off the highs due to slower tape speeds. You can see it in the frequency response—everything above 13 kHz just drops off.


It’s got that classic tape delay character—slight harmonic distortion included. One listen, and you’re like, “Yup, that’s tape delay!” Haha.
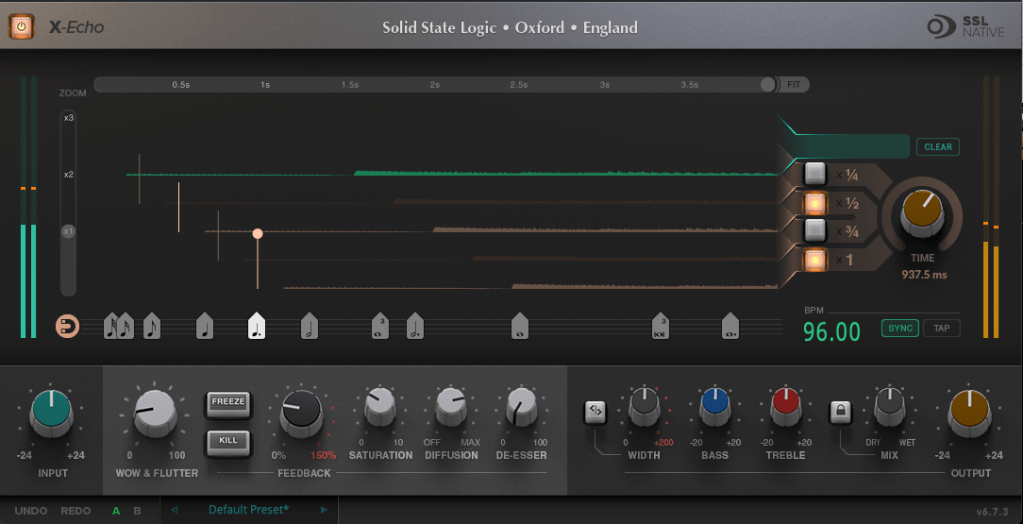
The controls are similar to X-Delay, but here’s what’s different:

- Zoom: A scope to magnify the waveform for a closer look.
- Grid: Adjusts delay time to your BPM with a grid—pick a note value (like quarter or eighth), or drag the connected circle to fine-tune.
- Fit: Tweaks the waveform’s horizontal length.
- Four Delay Buttons: Toggle between four delay lines, each with its own light.
- Sync/Tap: Set BPM manually or tap it in.

The bottom section’s mostly the same as X-Delay, except for Wow & Flutter—that’s the tape-style distortion from uneven movement, like stretched tape, wobbles, or dust. Think vintage quirks!
- Freeze: Holds the feedback sound.
- Kill: Stops all feedback.
At $24.99 on sale, X-Echo nails that tape delay tone you’d expect—great for anyone hunting for that retro sound.
Bundle Deal & Bonus
The X-Delay & X-Echo Bundle is just $39.99. If you’ve been wrestling with spatial effects in your mixes, this is a fantastic deal worth considering.
Plus, this month, any plugin or virtual instrument purchase from Plugin Boutique comes with a free synth, MOK Miniraze. Don’t forget to grab it when you check out!
Wrapping Up
Both X-Delay and X-Echo bring something special to the table—vintage-inspired delays with modern flair. At these prices, they’re hard to pass up. The sale runs until April 14th, so now’s the time to jump in.
That’s it for now—see you in the next post! 😊