Basics of Mixing (End) – 14.5 The Codecs of Music Files

Hello? This is Jooyoung Kim, a mixing engineer and music producer. Today, I’ll talk about the music file codecs, final article of basics of mixing series. Those posts are based on my book, Basics of Mixing, published in South Korea.

Let’s dive in!


Codec

The term codec stands for coder-decoder—a hardware or software that encodes and decodes digital signals. There are three main types of codecs:

  1. Non-compression: WAV, AIFF, PDM(DSD), PAM
  2. Lossless Compression: FLAC, ALAC, WMAL
  3. Lossy Compression: WMA, MP3, AAC

Non-compression codecs retain 100% of the original audio data with no compression applied.

Lossless compression codecs reduce file size while preserving all original data. This means they sound identical to uncompressed formats like WAV.

Lossy compression codecs remove some audio data to achieve a much smaller file size, which can affect sound quality depending on the compression level.

In the music industry, WAV, MP3, and FLAC are the most commonly used formats for mastering and distribution.


How is file size determined?

For WAV files, size is determined by sample rate and bit depth. How about mp3 and FLAC?

MP3 files use bitrate, rather than sample rate and bit depth. You’ve probably seen MP3 files labeled 256kbps or 320kbps. This means 256,000 bits or 320,000 bits of audio data are processed per second. Higher bitrates result in better sound quality but larger file sizes.

FLAC files use compression level to control file size. A higher compression level takes longer to encode but results in a smaller file. However, since FLAC is lossless, the sound quality remains unchanged regardless of the compression level.

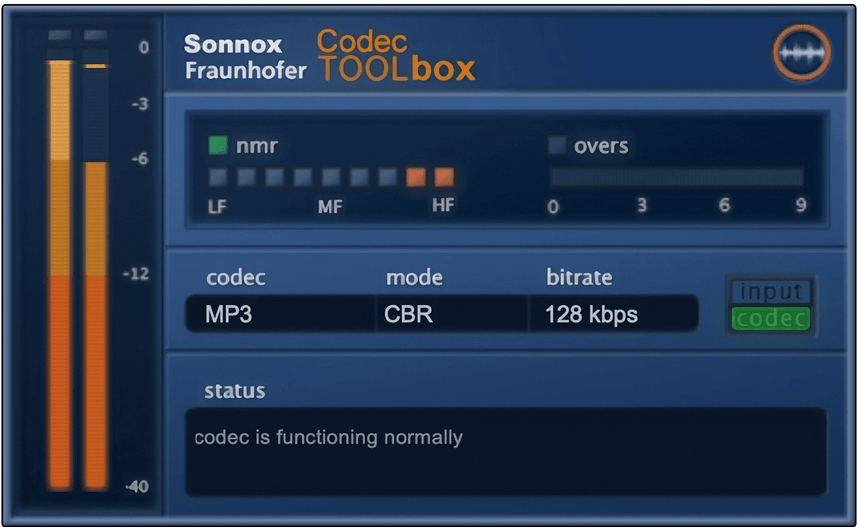
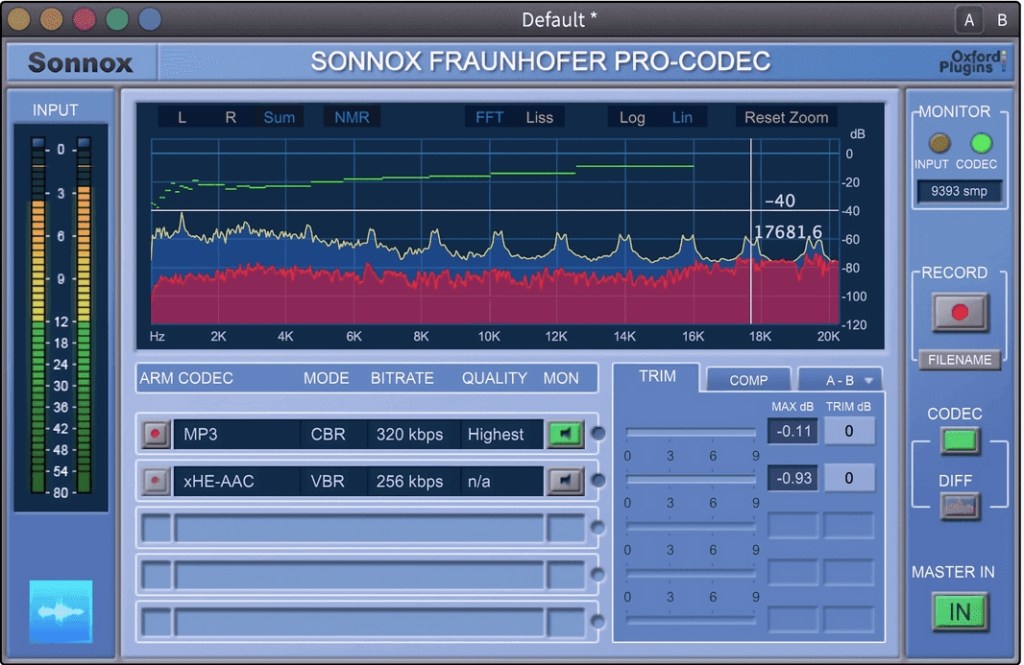
If you want to compare how different codecs affect sound quality, you can use tools like Sonnox Codec Toolbox or Fraunhofer Pro-Codec.


This is the last article for the ‘Basics of Mixing’ series. Time is really quick..haha.

I hope these posts have helped expand your knowledge and improve your mixing skills.

Thanks for reading, and I’ll see you in the next post!

Brainworx Mixing Month Plugin Sale (2): Black Box Analog Design HG-2 (~3/31, $31.90)

Hey there! I’m Jooyoung Kim, an engineer and music producer.

Today, I’m picking up where I left off to talk about more of the Brainworx plugins on sale this month:

  1. Shadow Hills Mastering Compressor – Compressor
  2. Shadow Hills Mastering Compressor Class A – Compressor
  3. Black Box Analog Design HG-2 – Saturator
  4. Black Box Analog Design HG-2MS – Saturator
  5. Mäag Audio EQ4 – EQ
  6. SPL Transient Designer Plus – Transient Shaper

In this post, I’ll be diving into the Black Box Analog Design plugins from that list—specifically HG-2 and HG-2MS.

As I mentioned last time, I personally bought and have been using 1, 3, and 5. For this round, I received NFR (Not for Resale) licenses for 2, 4, and 6 from Brainworx via Plugin Boutique.

Also, if you purchase through the links in this blog, I’ll earn a small commission, which really helps me keep going—so thank you in advance! ㅜㅠ

Ready? Let’s get started!


3 & 4) Black Box Analog Design HG-2 and HG-2MS

Click image to purchase Black Box Analog Design HG-2Ms

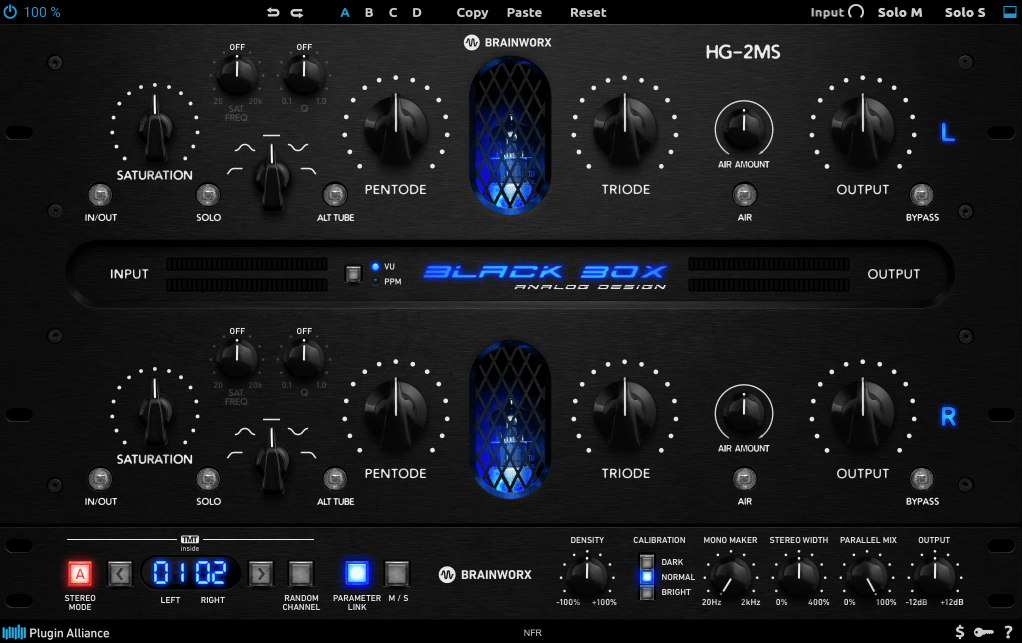
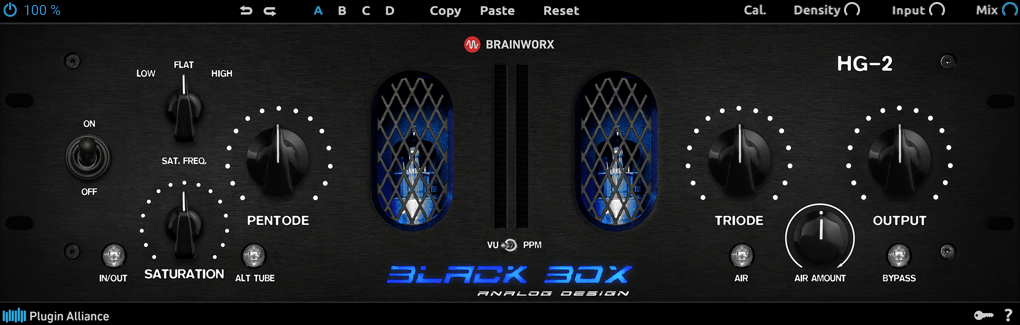
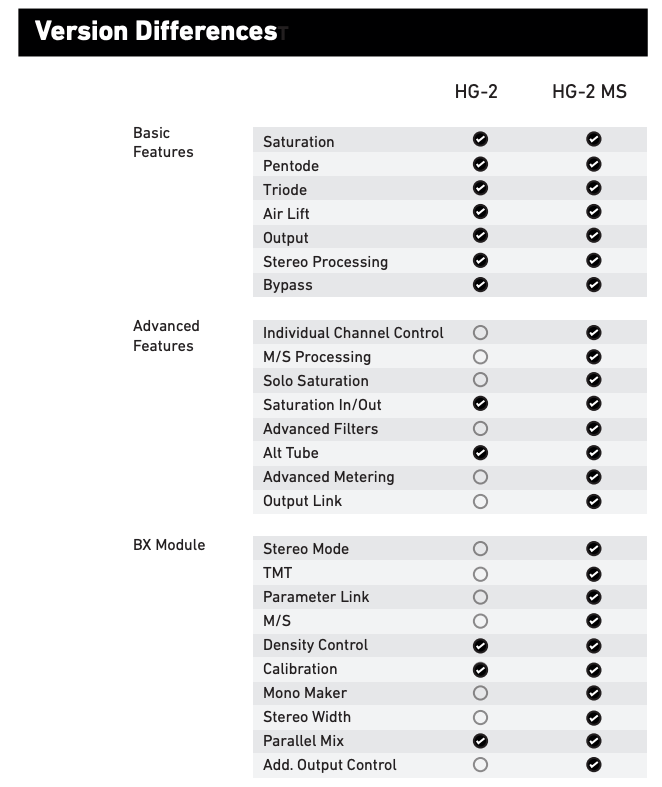
When I tested these two, I noticed that with the same parameter settings, their responses are pretty much identical. The differences are outlined in the manual, but since they’re so similar, I’ll explain them together using the HG-2MS as the reference point.

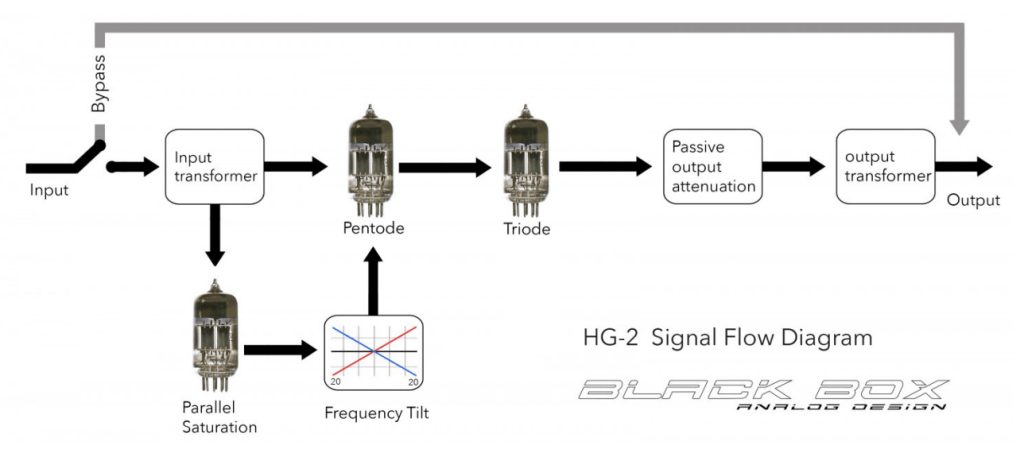
First off, these plugins are recreations of the HG-2 hardware from Black Box Analog Design. As you’d expect, it’s all about those glorious vacuum tubes front and center. The HG-2 uses a combination of pentode and triode tubes, running your signal through both for that signature tube saturation—that’s the core of what this hardware (and plugin) is about.

It also has an extra triode tube you can blend in. The original hardware’s signal routing looks something like this:

The output stage features a Sinemag transformer, while the parallel saturation path uses a pair of 12AX7 triode tubes.

Looking at the parameters, the “Saturation” knob on the far left controls the amount of parallel saturation. The IN/OUT button toggles whether this parallel processing is active, and the ALT TUBE button switches the tube manufacturer for the parallel saturation path, altering the harmonic distortion character.

Even if you turn off the Saturation knob, the signal still passes through the pentode and triode tubes in series, so this is a piece of gear (or plugin) that’s inherently heavy on saturation. That means if you set either Pentode or Triode to 0%, you’ll get no sound at all.

Let’s break down how it works:

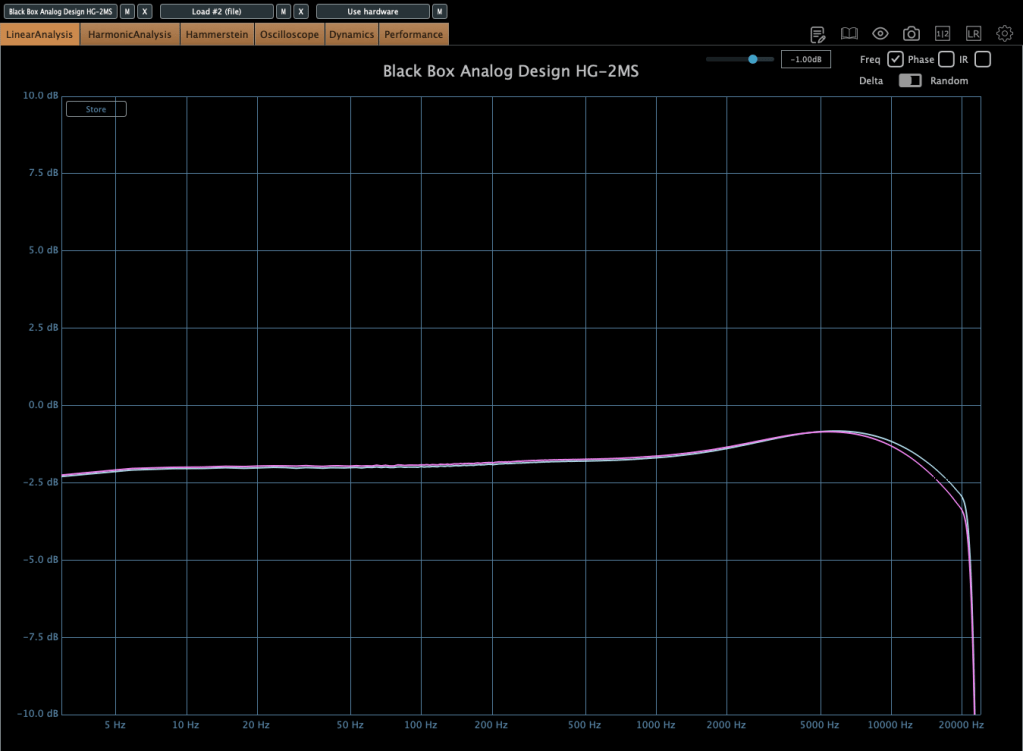
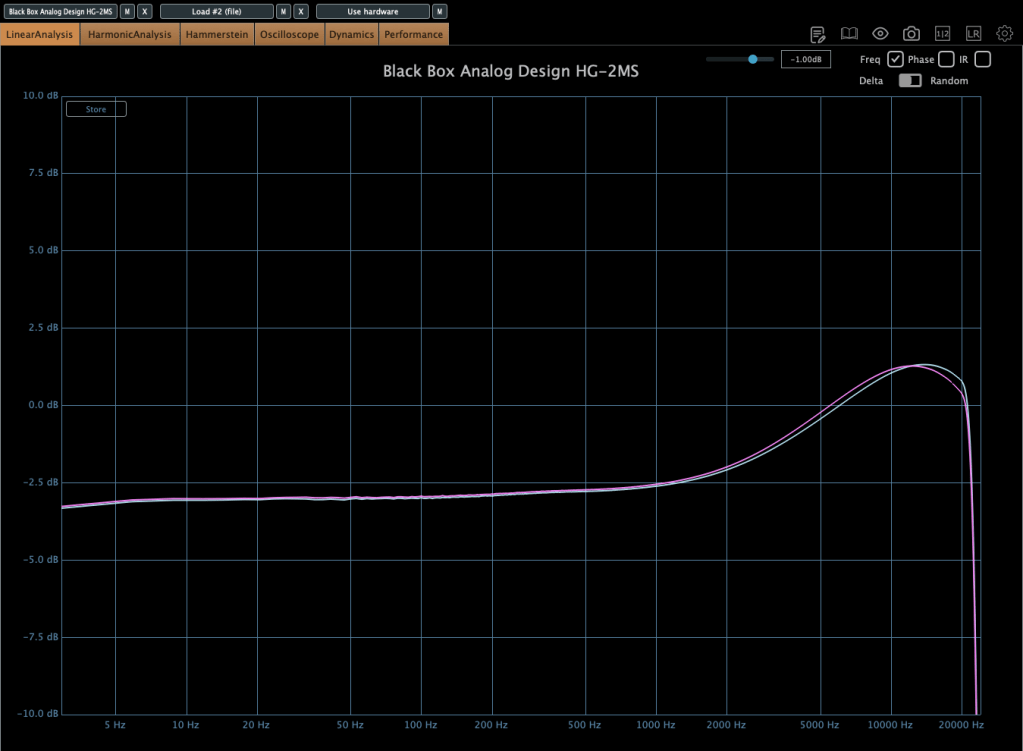
Photo: Frequency response—Default state, Saturation In, Alt Tube pressed, from top to bottom

This shows the frequency response in the default state, with Saturation turned on, and with Alt Tube engaged.

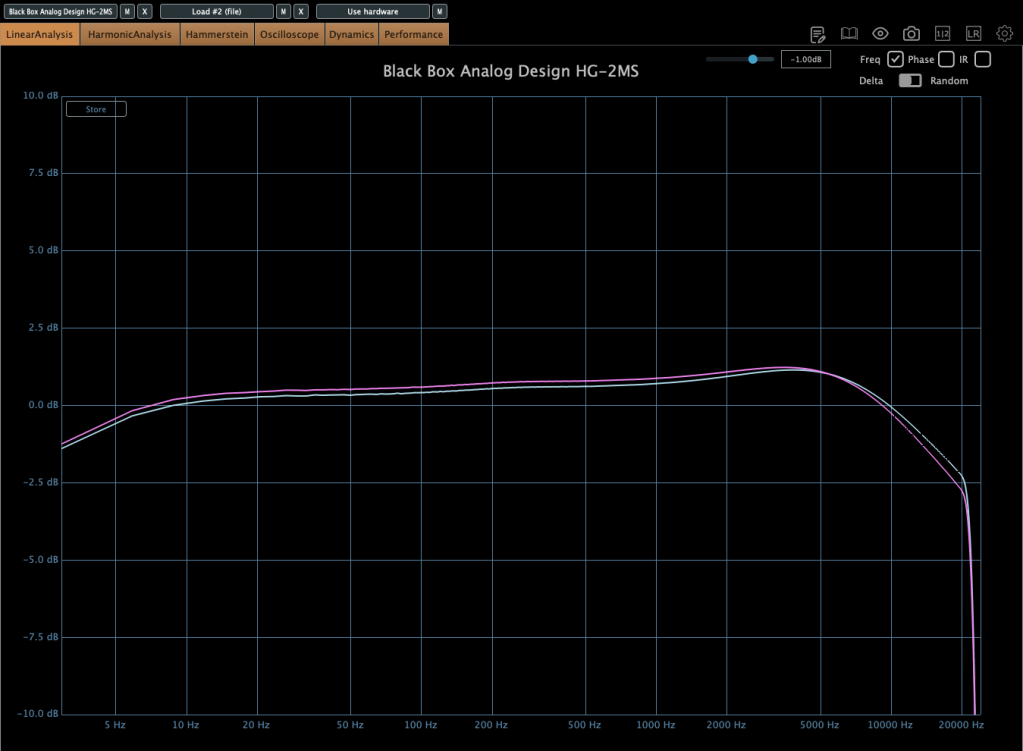
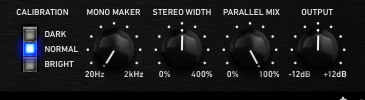
Photo: Frequency response—Dark vs. Bright calibration, from right bottom

Here’s the response with the Calibration knob set to Dark and then Bright.

Photo: Frequency response—Air Amount at 100%

This is with the Air Amount cranked to 100%.

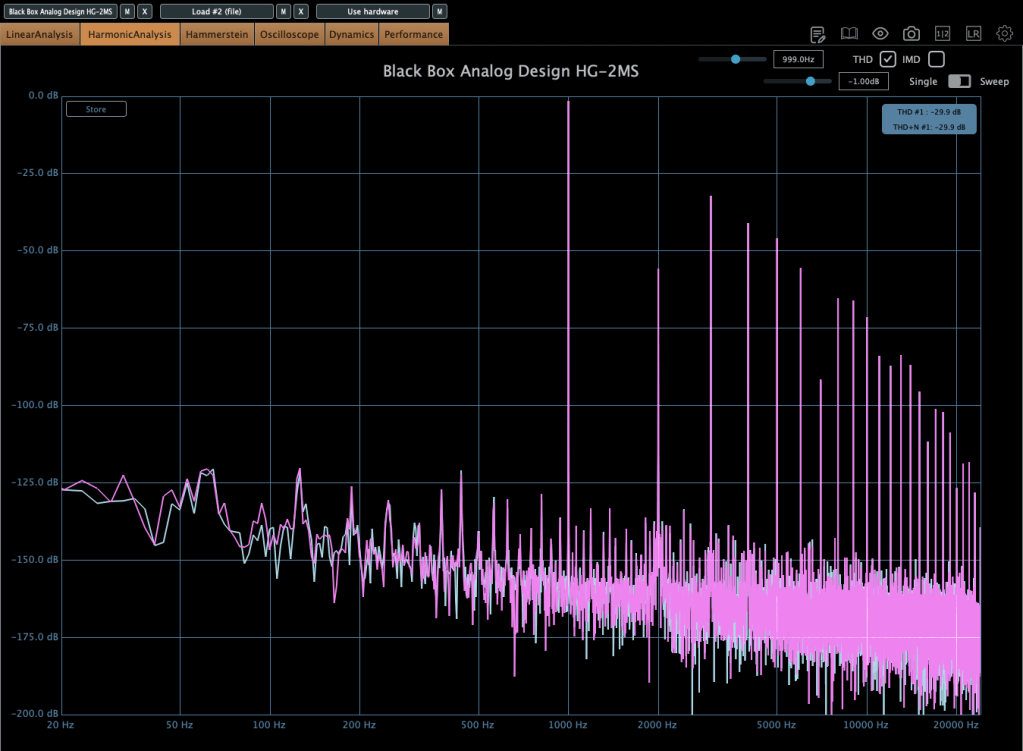
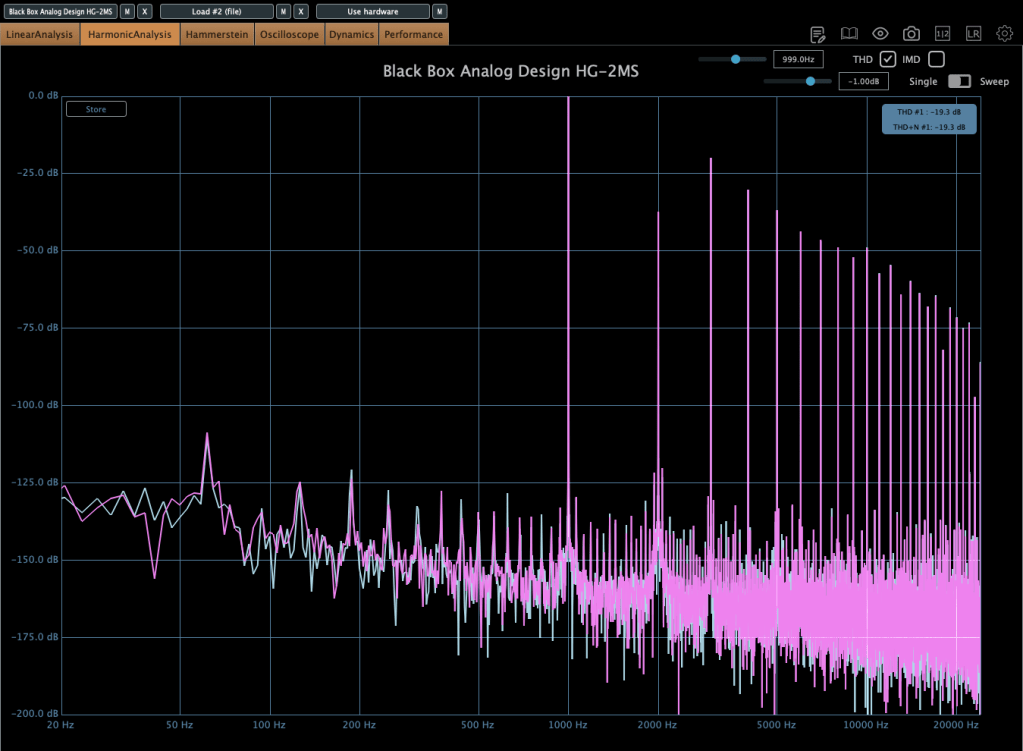
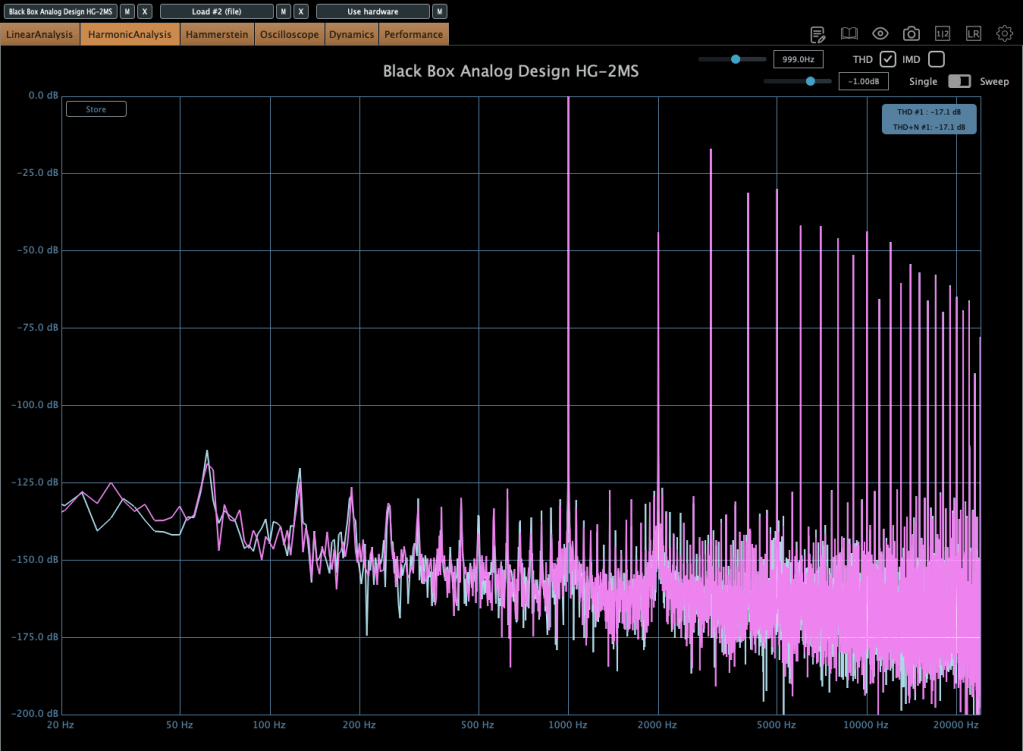
Photo: Harmonic distortion—Default state, Saturation In, Alt Tube pressed, from top to bottom

These show harmonic distortion in the default state, with Saturation on, and with Alt Tube pressed. You can see the distortion really jumps when you add parallel saturation—it’s noticeable in the harmonics, and you can hear it too; the overtones come alive.

Photo: Default state vs. Saturation In, left and right

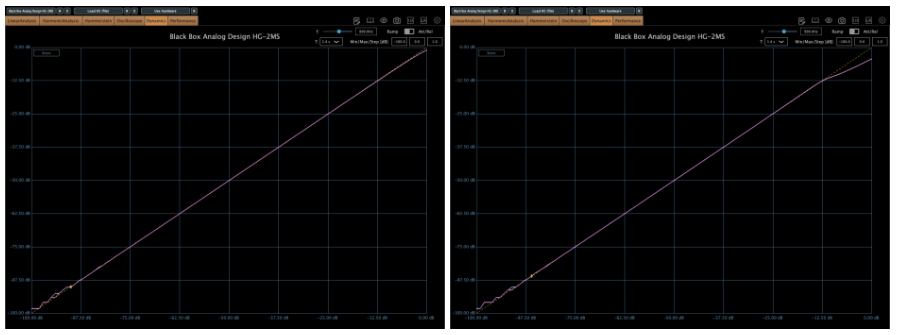
Interestingly, even though this isn’t a compressor, it starts to subtly compress when the input gets loud enough. The left is the default state, and the right is with parallel saturation active.

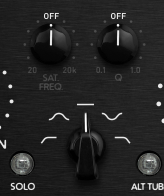
Now, these parameters let you shape how the parallel saturation sounds. Hit the Solo button, and you can isolate just the parallel saturation signal.

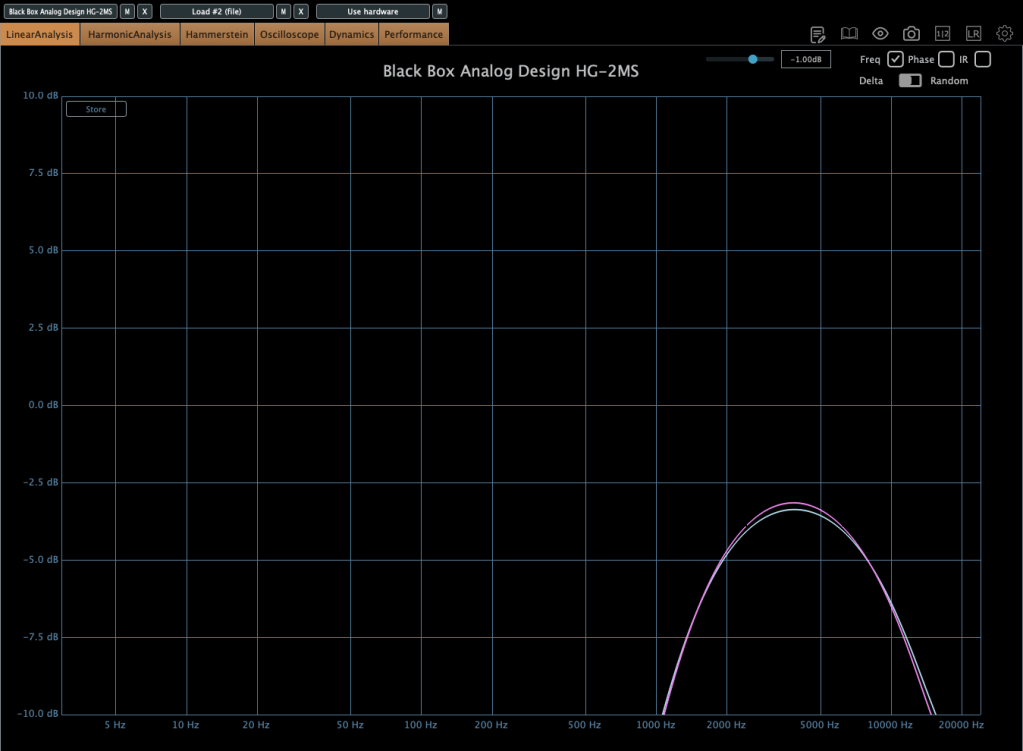
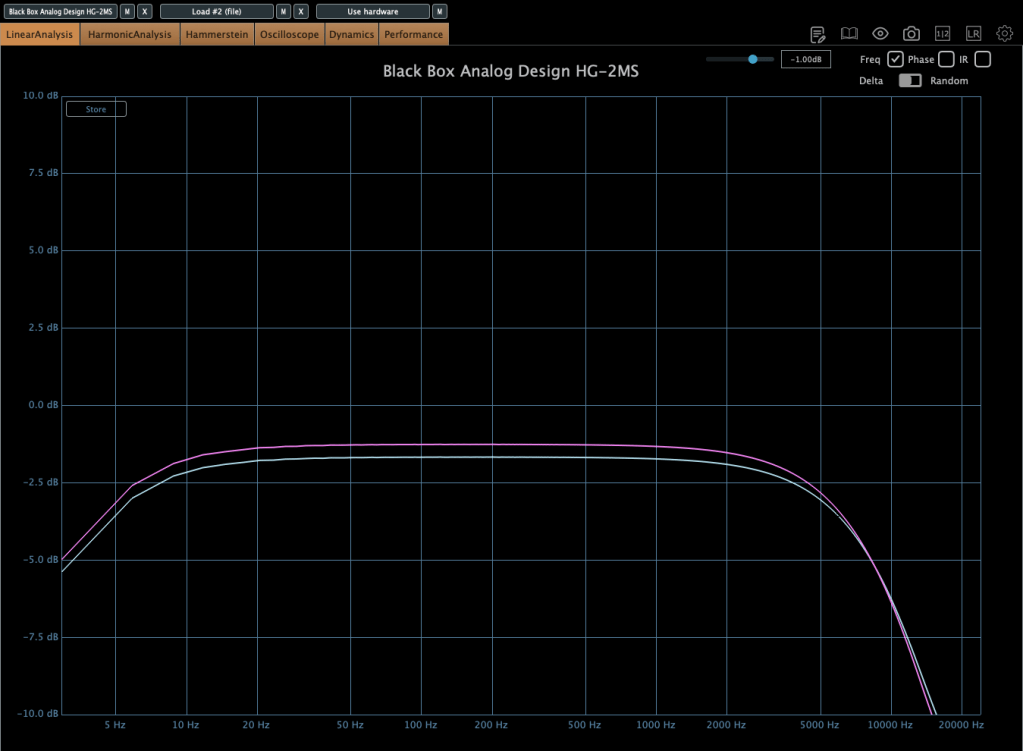
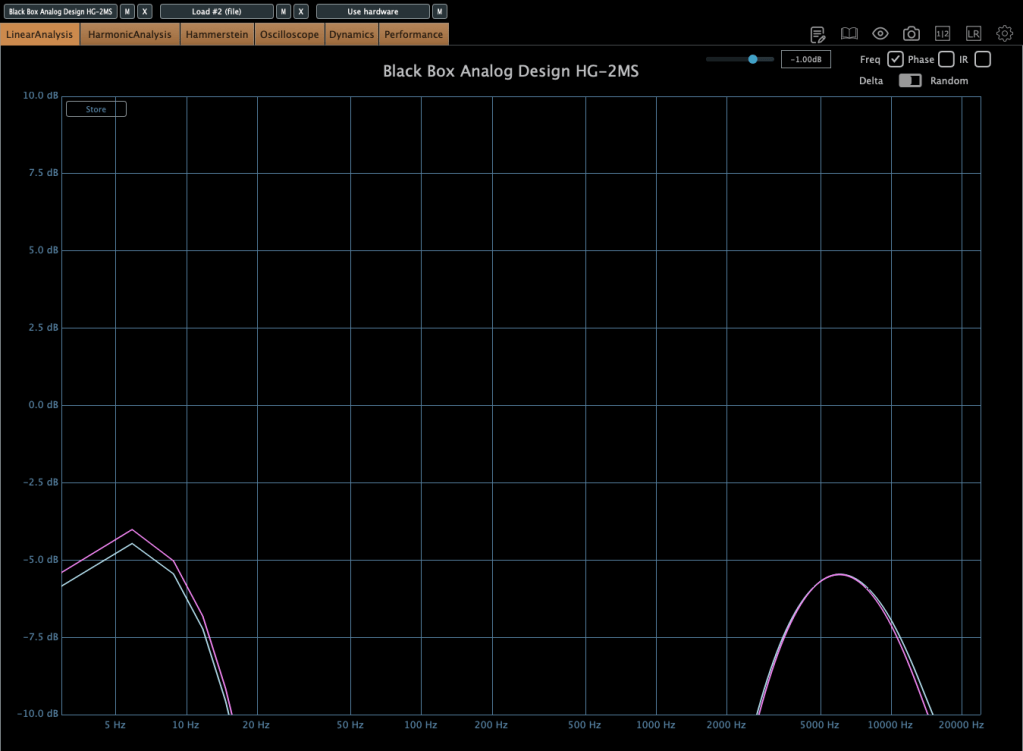
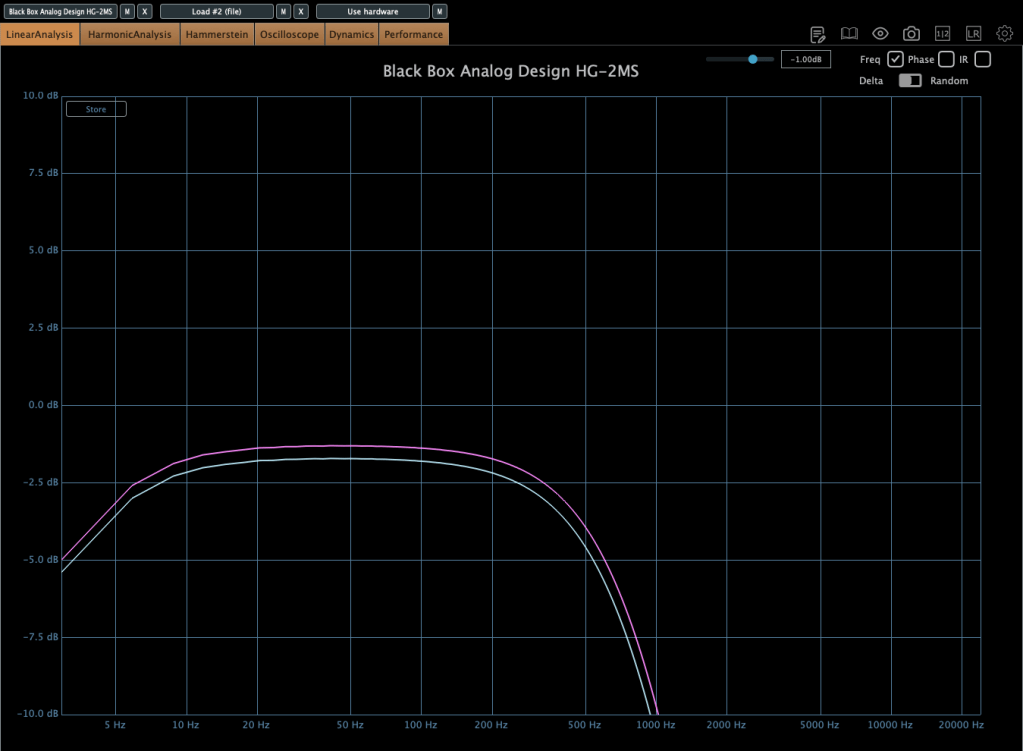
Photo: Frequency response by parameter—High Pass, Band Pass, Flat, Band Stop, Low Pass, from up to down

I measured the frequency response for each setting to show which frequency bands they affect—High Pass, Band Pass, Flat, Band Stop, and Low Pass.


Add colorful, frequency-selective tube saturation with M/S processing. Made by Brainworx, this is your mix bus’ best friend. Celebrated mix engineers like Dave Pensado, Bob Horn, and Jack Douglas rely on the sweet tubes and creamy-sounding transformers of the HG-2.

Personally, I like setting the Saturation to Flat, dialing back the Pentode a bit, and boosting the Triode. It gives a really nice sound—perfect for adding a touch of saturation at the final stage, like a sweet seasoning for your track.

If you’ve been thinking about a tube saturation plugin, this is a great chance to snag one at a discount.

That’s it for now—see you in the next post!

5 Brainworx Bettermaker Plugins Review (Bus Compressor, C502V, EQ232D, Passive Equalizer, BM60)

Hello! This is Jooyoung Kim, a mixing engineer & music producer.

Today, I’d like to talk about some plugins from Brainworx’s Bettermaker lineup:

  1. Bus Compressor DSP – Compressor
  2. C502V – Compressor
  3. EQ232D – EQ
  4. Passive Equalizer – EQ
  5. BM60 – Reverb

I originally planned to introduce these plugins last month when they were on sale, but things got a bit hectic, and now I’m sharing them when they’re not discounted… oops! 😅 Still, after testing them out, I can confidently say they’re really well-crafted plugins. If you’re interested, it’s worth keeping an eye out for a sale.

These plugins were provided to me by Brainworx via Plugin Boutique in NFR (Not For Resale) format. If you purchase through the links I’ll include later, I’ll earn a small commission, which genuinely helps me keep doing what I do. 😊

Ready? Let’s dive in!


1) Bettermaker Bus Compressor DSP

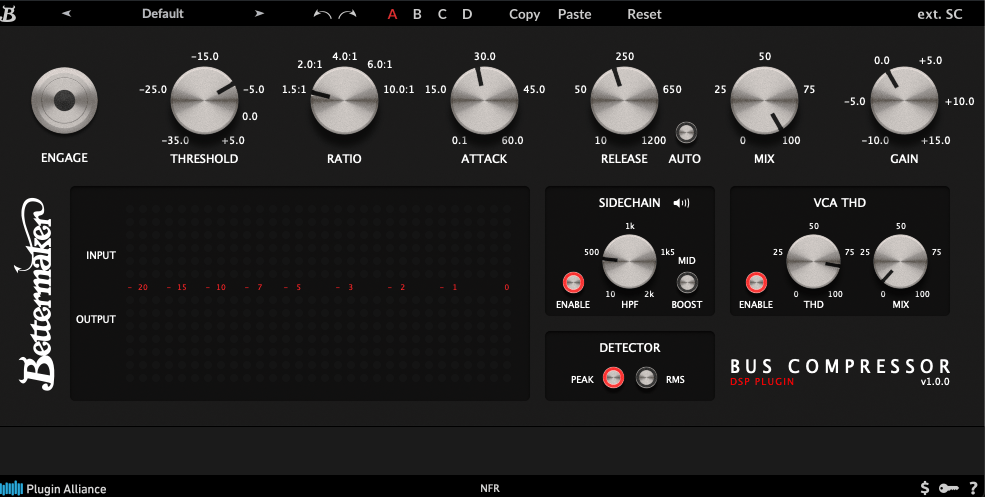
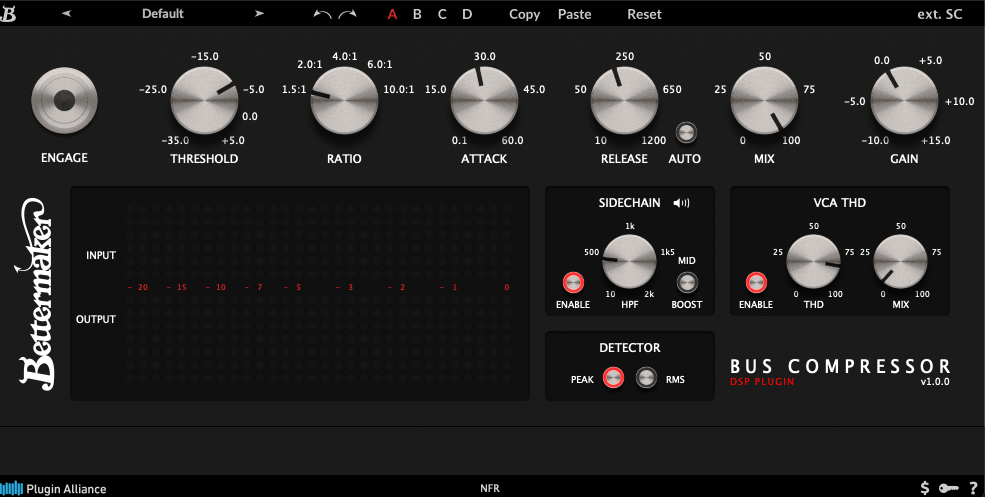
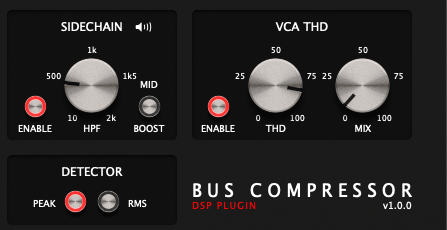
The Bettermaker Bus Compressor is a plugin recreation of Bettermaker’s hardware Bus Compressor. The original hardware allows digital recall and adjustments, and the plugin’s interface mirrors that design pretty closely.

The plugin’s parameters are similar to most compressors, but a few features stand out:

  1. You can listen to the sidechain.
  2. You can choose between Peak Level or RMS detection.
  3. You can dial in the amount of THD (Total Harmonic Distortion).

These three features are the heart of the Bettermaker Bus Compressor DSP. The sidechain splits the incoming signal, applies a filter, and uses the filtered signal as the key—pretty standard for bus compressors, but super useful.

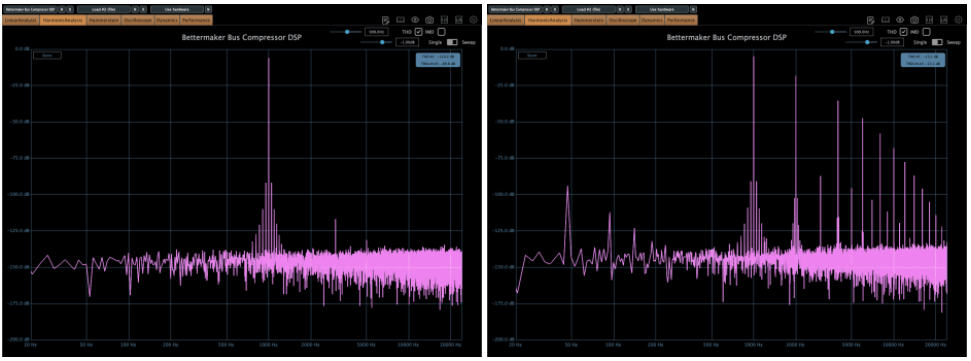
The VCA THD feature adds harmonic distortion.

On the left, you’ve got the clean signal; on the right, it’s with THD applied. Looking at an oscilloscope, you’ll notice more changes—sonically, it starts to feel very mechanical. A subtle touch adds an edgy vibe, but crank it too much, and it feels overly distorted.

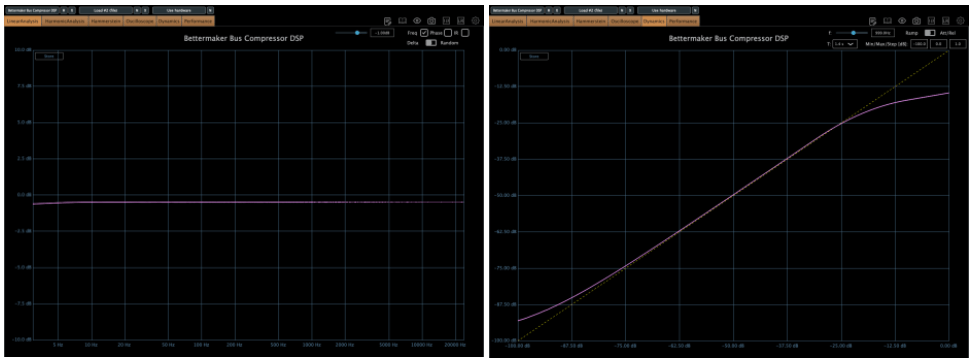
The frequency response is flat except in the ultra-low end, and the compression curve is smooth as butter. After messing around with it, I think it’s an incredibly well-made bus compressor. SSL-style compressors sometimes smear the low end or feel a bit hollow, but this one keeps the lows tight and solid without eating them up.

This one’s a winner. Out of the five plugins I’m covering today, it’s my favorite. It’s usually a steal during sales (probably around $29, so I’d recommend testing it out and grabbing it when it’s discounted.


2) Bettermaker C502V

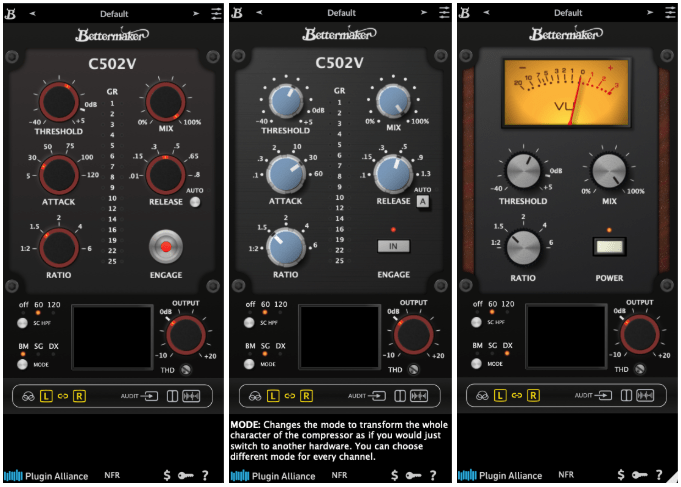
This is another plugin modeled after Bettermaker’s C502V hardware. It offers three modes:

  • BM – Bettermaker Compressor
  • SG – SSL G-Compressor
  • DX – dbx 160 Compressor

Switching modes even changes the UI, which is a nice touch.

After testing, I could hear what each mode was going for. The SSL mode feels clean and polished, while the dbx mode has that signature gritty snap. The Bettermaker mode, though, sounds a bit different from the Bus Compressor DSP—it’s more forward and punchy, at least to my ears.

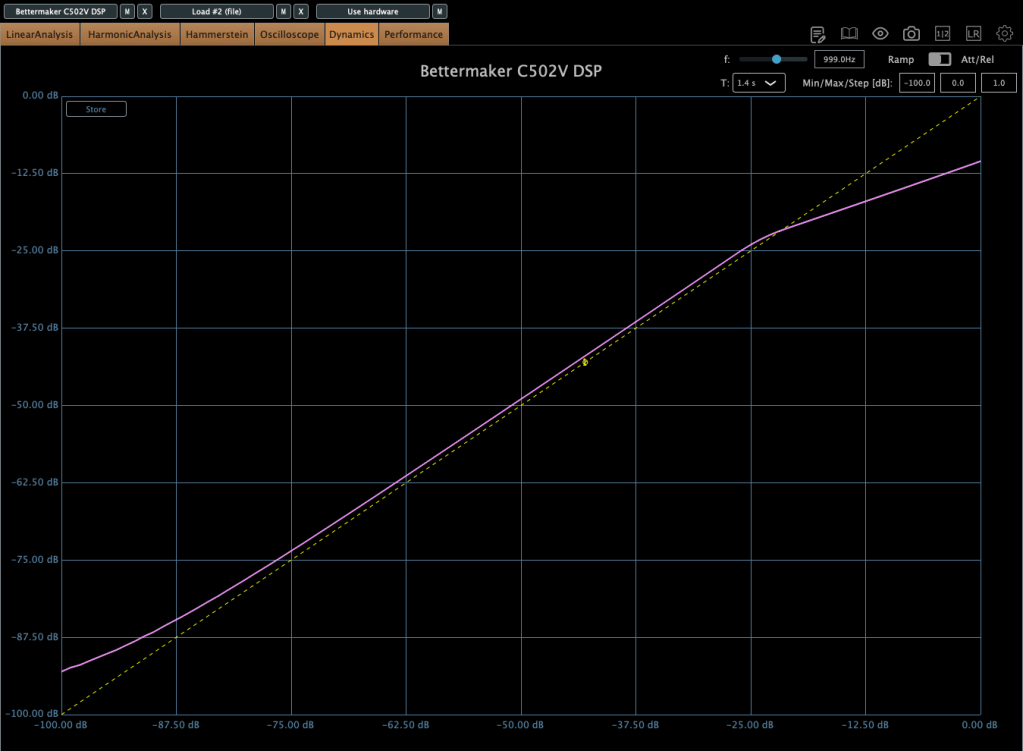
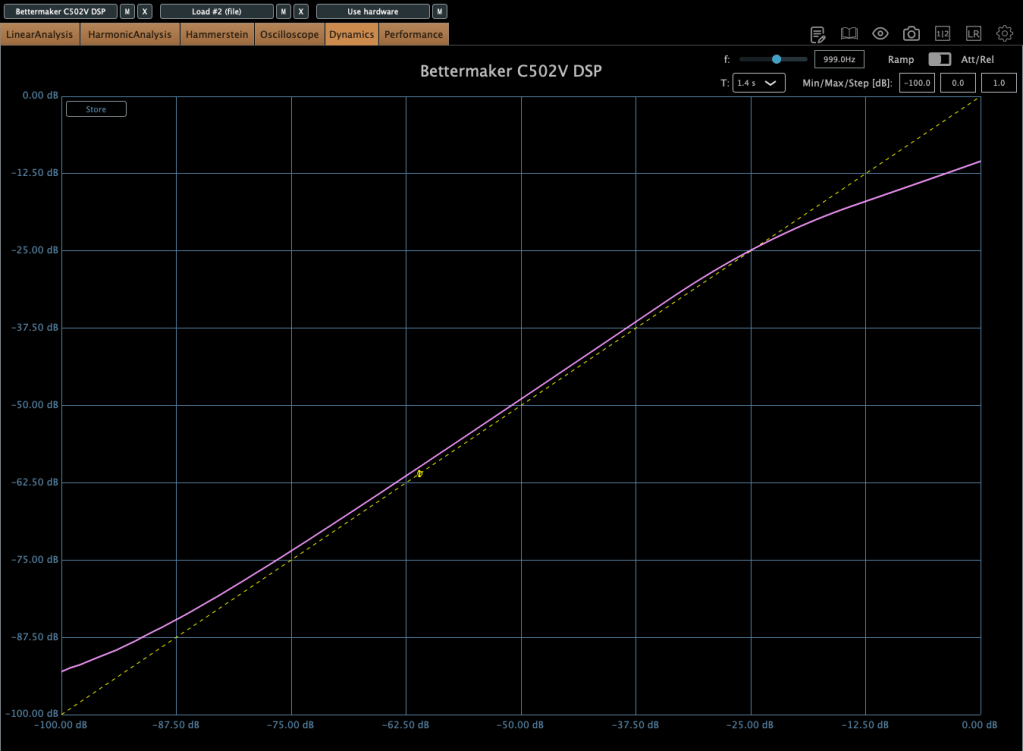
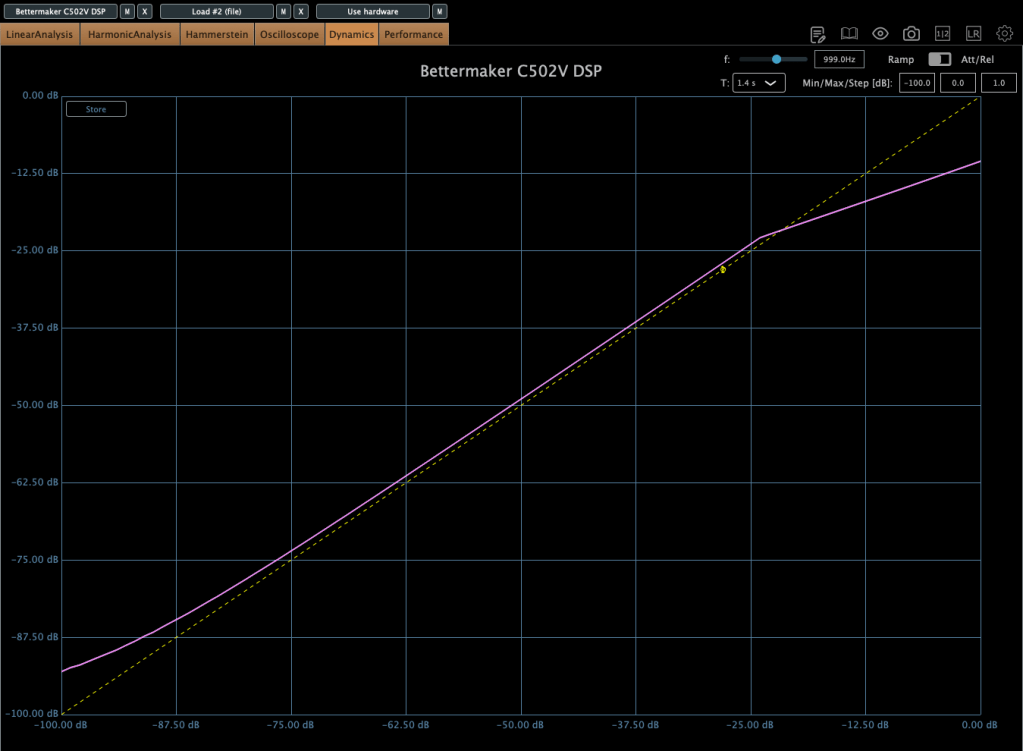
Here’s the harmonic distortion in BM mode with THD maxed out.

First is BM mode, second is SG, and third is DX. The differences in harmonic distortion and compression curves explain why this plugin sounds distinct from the Bus Compressor DSP. The C502V has a steeper knee, and it varies by mode.

I’d recommend this one too—it’s like having three compressor flavors in one. I especially liked the BM and DX modes. If you don’t already own a dbx-style compressor, this could be a solid solution.


3) Bettermaker EQ232D

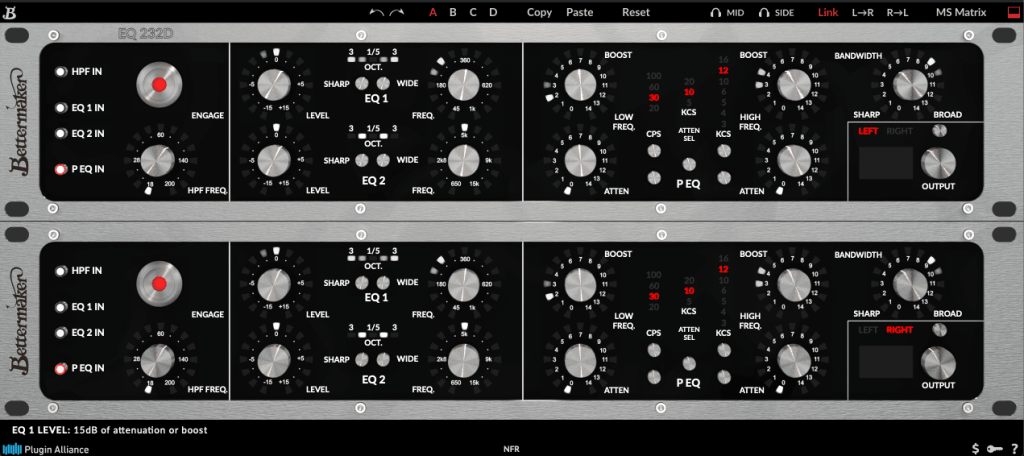
This plugin recreates Bettermaker’s EQ232P MKII hardware—a super clean EQ with no THD, just pure frequency shaping.

It’s split into sections:

  1. A high-pass filter (HPF) for cutting lows.
  2. EQ 1, handling lows to mid-highs.
  3. EQ 2, covering mid-highs to ultra-highs.
  4. A P EQ section with Pultec-style frequency response.

Think of it as a mastering EQ (sections 1–3) plus a Pultec-inspired EQ combined into one.

On the left, I activated just the P EQ section and tweaked it a bit. The curve is as complex as you’d expect from a Pultec-style EQ. Harmonic distortion is pristine, and there’s no compression curve to speak of—it’s just an EQ, plain and simple.

It’s perfect for mastering when you need something ultra-clean. Definitely worth checking out.


4) Bettermaker Passive Equalizer

This one looks like a Pultec clone at first glance, but it’s actually Bettermaker’s unique take on a valve-based passive EQ, turned into a plugin. The hardware allowed computer-based recall, and the plugin follows suit with a similar UI.

The frequency response is close to the Bus Compressor DSP.

But as a valve design, the saturation is intense! Left is the default state; right is with Heat engaged.

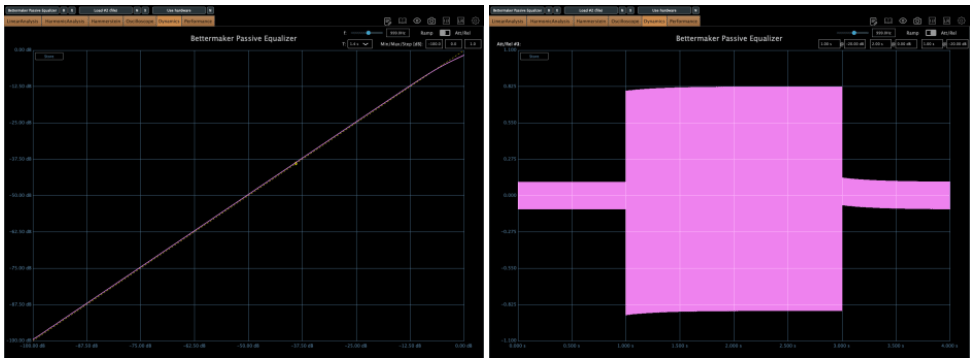
Looking at the compression curve and oscilloscope, it’s far from flat.

Honestly, it feels more like a saturation box with EQ tacked on than a pure EQ. And as a saturation tool, it’s got charm—the Heat setting is pretty tasty.


5) Bettermaker BM60

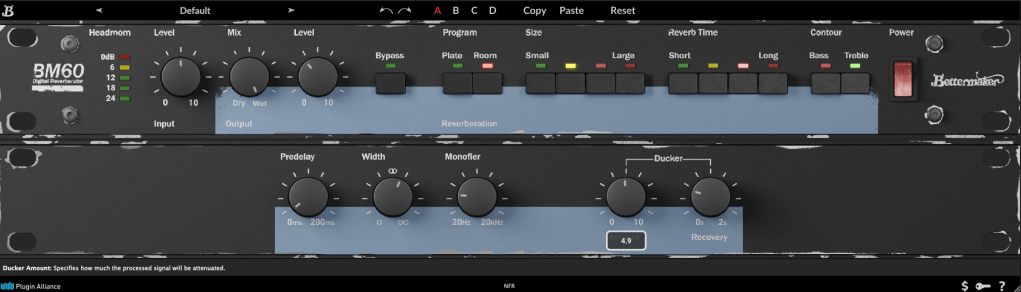
The BM60 is a reverb plugin based on the Lexicon PCM 60. The original hardware had intuitive controls, and this plugin adds extras like Predelay, Width, Monofilter, and a Ducker, making it really versatile.

It offers two reverb types—Room and Plate—with Size and Reverb Time split into four steps. The parameters are straightforward, and the sound feels just as intuitive.

It’s great for light, easy reverb duties. Reverbs and delays are tough to describe with numbers, but I’d recommend this one as much as the Bus Compressor DSP.


They’re not on sale right now, but I’ve left a link to Brainworx’s plugins for future reference. Take a look when you get a chance!


Bonus: This month, if you buy anything from Plugin Boutique, you can snag either Audiomodern’s Freezr (a freeze sequencer plugin) or Heavyocity’s MicroFX Refiner (a bus processor plugin) for free. Don’t miss out when you shop!

That’s it for now—see you in the next post! 😊

Basics of Mixing – 14.3 Oversampling and Upsampling

Hi! This is Jooyoung Kim, a mixing engineer and music producer.

During my undergraduate studies in physics, I often used my extra credits to take music courses. Looking back, I regret not taking any Python classes—especially now that I’m studying plugin development, data processing, and methodology. Without AI tools, I wouldn’t have been able to start coding at all.

Currently, I’m in the final semester of my master’s program in the Department of New Media Music. I’m not too worried about my thesis, so this semester, I’m focusing on a personal project: developing a saturation plugin in my own way. I know it will be challenging, but I also aim to write a paper introducing a new methodology for building audio plugins.

Now, let’s talk about oversampling and upsampling. This article is based on my book, ‘Basics of Mixing‘, released in South Korea.

What are oversampling and upsampling?

Many audio plugins offer oversampling, but what exactly is it, and how does it work?

  • Oversampling: Increasing the existing sample rate by an integer multiple (e.g., ×2, ×4, ×8, etc.).
  • Upsampling: Increasing the existing sample rate, but not necessarily by an integer multiple.

In oversampling, the process inserts zeros into the empty values and interpolates them using a low-pass FIR (Finite Impulse Response) filter..

It’s me! The right one is the photo on the left doubled horizontally.

Think of it like stretching an image by an integer factor: the blank spaces are filled in through interpolation. After processing the audio, the plugin then downsamples the result back to the original rate.

On the other hand, upsampling converts the sample rate to another rate through interpolation. This is a different process from oversampling.

Why do we use oversampling and upsampling?

Oversampling helps reduce aliasing and creates a more natural-sounding result, while upsampling is primarily used for changing the sample rate.

However, does an oversampling function always make a plugin sound better? That’s a different discussion.

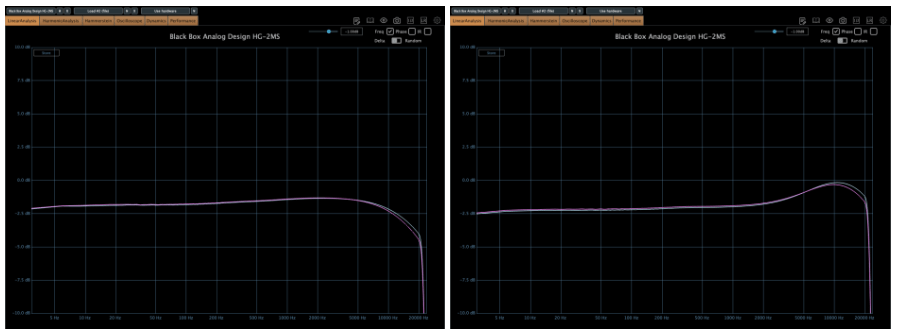
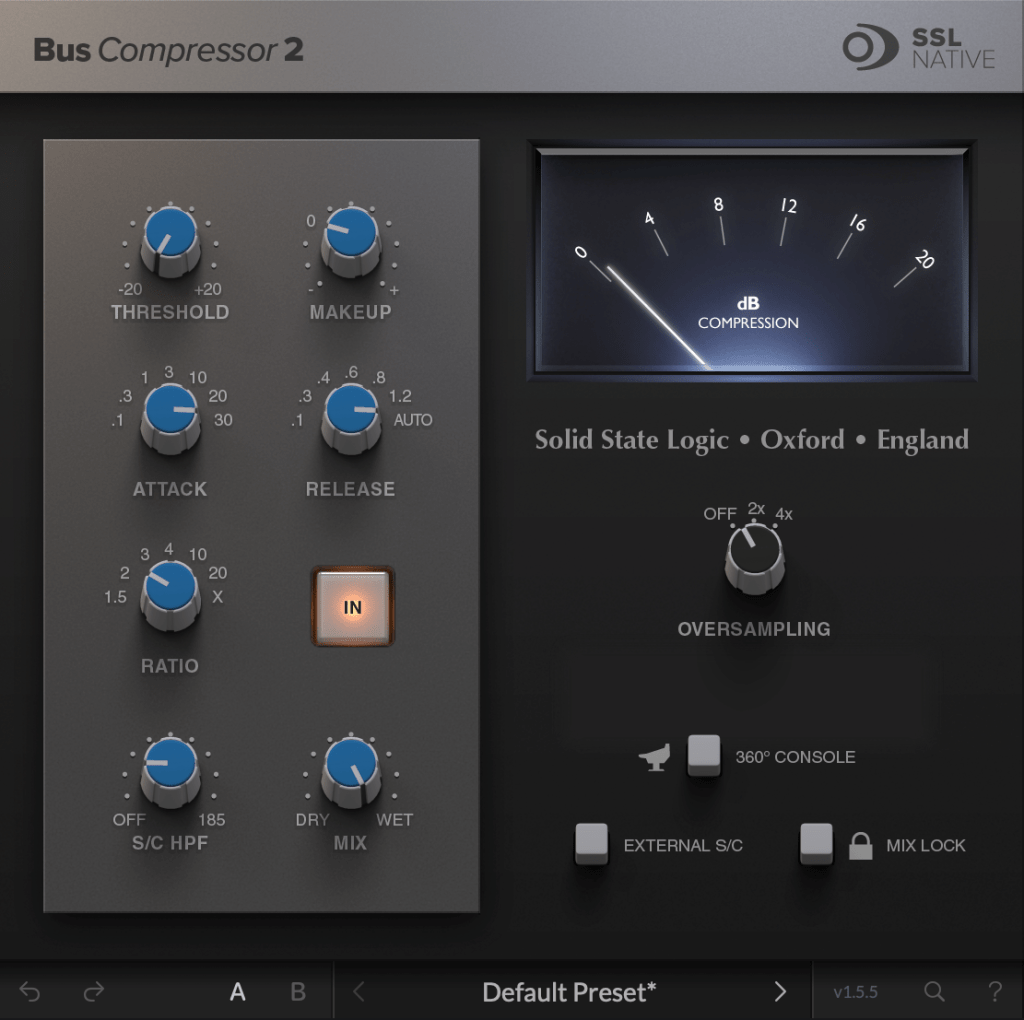
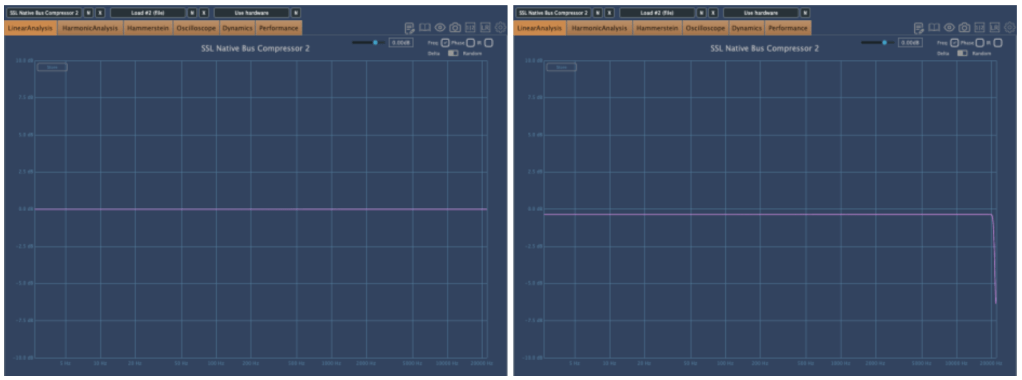
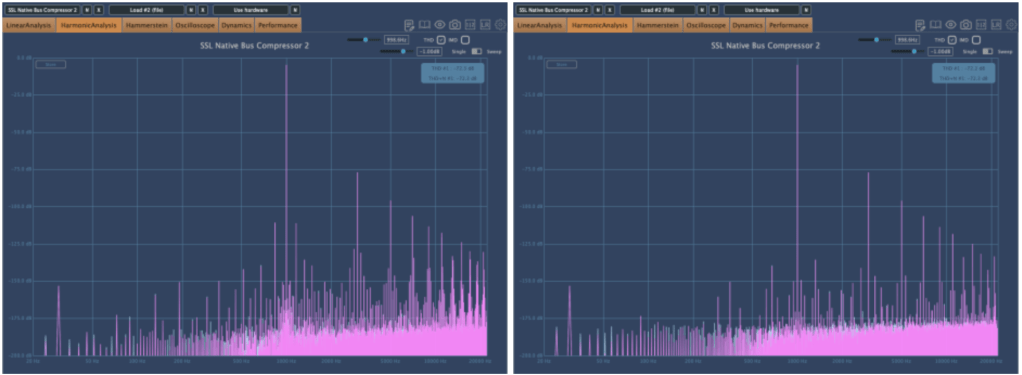
For example, the SSL Bus Compressor 2 plugin provides an oversampling option. Below, you can see the frequency response of the plugin:

The left graph shows the response without oversampling. The right graph shows the response with 2× oversampling.

Both graphs exhibit harmonic distortion at the same positions. While other measurements appear similar, even small differences between the two can result in noticeable changes in sound. In my experience, non-oversampled processing often sounds better.

That was a brief explanation of oversampling and upsampling! See you in the next post!