Zynaptiq Pitchmap Sale (until July 28)

Hello, I’m Jooyoung Kim, an engineer and music producer.

Today, I want to introduce Pitchmap, a plugin by Zynaptiq that’s frequently used in color bass music.

For this review, I requested an NFR (Not for Resale) code for Pitchmap from Plugin Boutique. Thankfully, Zynaptiq provided me with the ZAP IV bundle code. I’d like to express my gratitude to them. Besides Pitchmap, I’ll be reviewing other Zynaptiq plugins during their sale periods.

Let’s get started!

Pitchmap is a pitch correction plugin created by Zynaptiq in 2013.

While pitch correction is commonly associated with vocal tuning, Pitchmap is more often used in remixing and sound design.

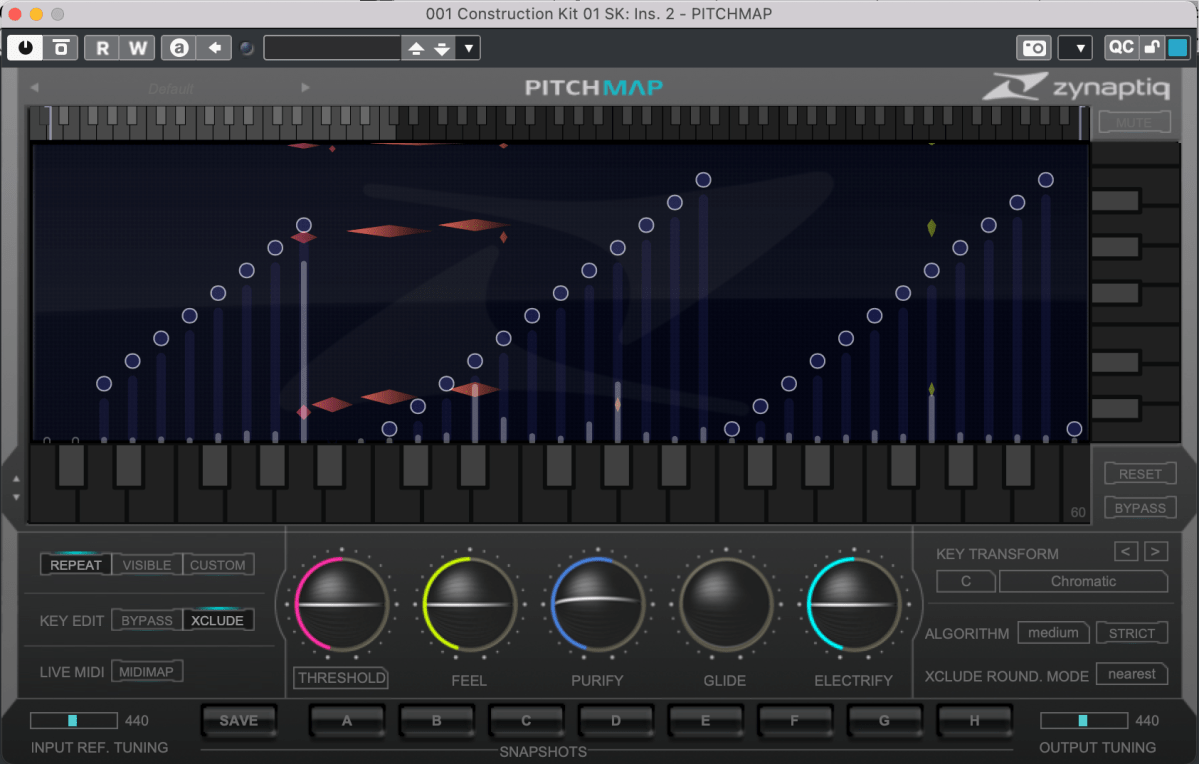
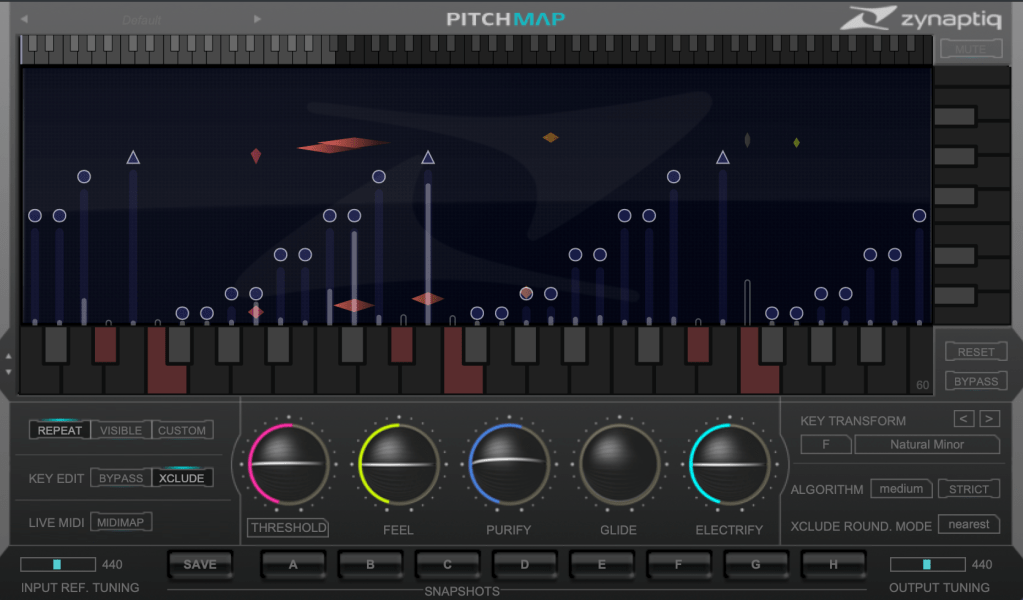
The horizontal axis represents pitch, similar to a keyboard roll.

Although only three octaves are shown,

you can adjust the display by clicking the light gray area at the top to navigate to the desired pitch range.

The vertical axis represents time, with red/orange markings indicating the pitch at that specific time. Essentially, the X and Y axes are flipped compared to typical vocal tuning plugins.

The white bars show relative volume, and the circles indicate pitch shifts.

For example, moving a circle representing F# upwards changes the sound from F# to G.

This allows you to change the key of the entire piece arbitrarily.

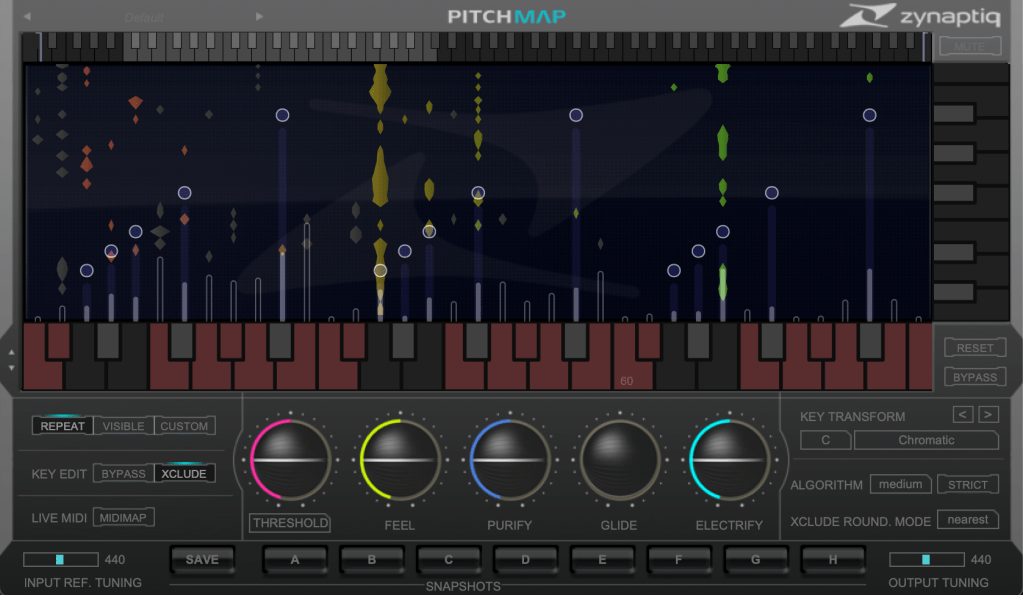
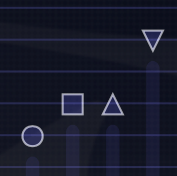
Double-clicking on a circle transforms it into various shapes: inverted triangle, triangle, square, etc.

  1. A square maintains the pitch within the same octave.
  2. A circle shifts to the nearest pitch (up by 9 semitones or down by 3 semitones).
  3. An inverted triangle always shifts downwards.
  4. A triangle always shifts upwards.

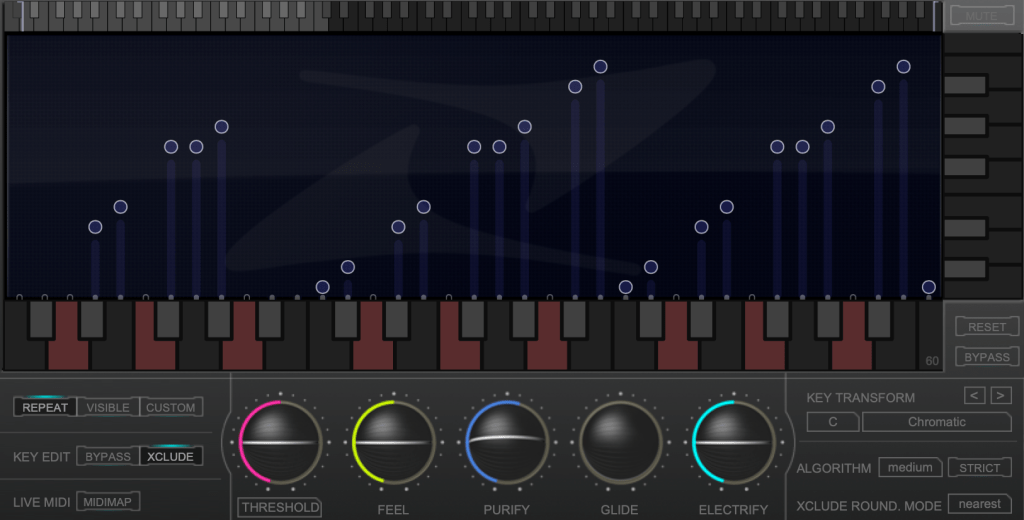
In Key Edit mode, you can click on notes in the piano roll to exclude them from playback.

Clicking Bypass and selecting notes in the piano roll means those notes will bypass the effect.

You can also allow MIDI input to select pitches in real-time through a MIDI channel.

You might wonder if these changes would make the sound awkward, but surprisingly, the result is quite cohesive, making Pitchmap ideal for remixing.

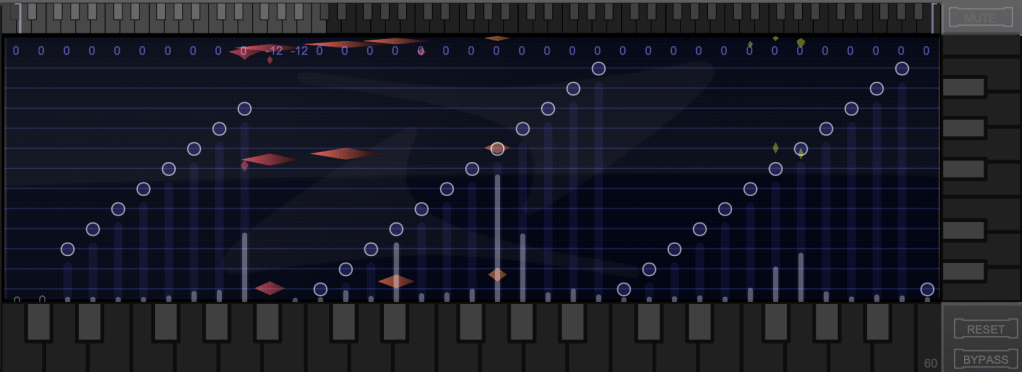
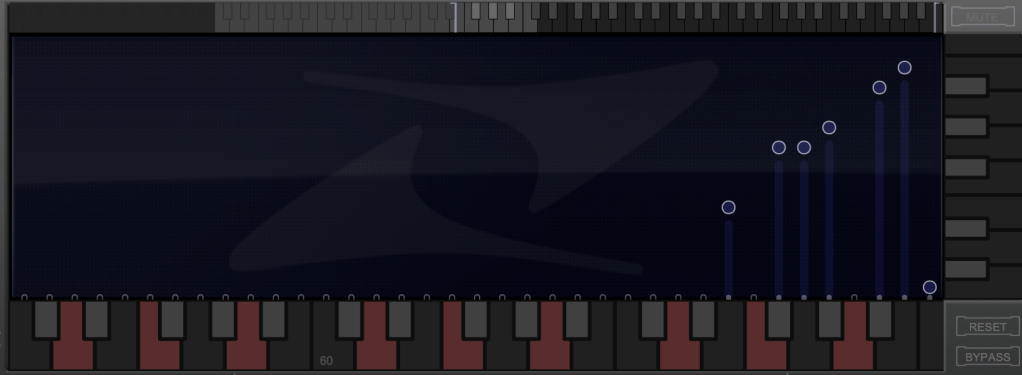
The white bars in the top piano roll can be moved to set a specific pitch range. The image above sets the range from Eb downwards to be excluded.

Other parameters include:

  1. Threshold: Determines the extent of tuning (lower values mean more comprehensive processing).
  2. Feel: Controls subtle pitch variations after tuning (higher values retain more nuance).
  3. Purify: Reduces noise above 50% and increases noise below 50%.
  4. Glide: Adds glide/portamento effects.
  5. Electrify: Enhances the synthetic feel or optimizes signal processing.

Exploring the rest of the features will help you understand their functionalities better.

This plugin is not only useful for contemporary music, often centered around remixes and bass, but also for creating unique sounds in other genres. Personally, I enjoy blending these elements into string or band sections for a sophisticated and effective sound.

I’ll share some YouTube videos demonstrating how I use Pitchmap.

The current sale lasts until July 28, and the discount is substantial. If interested, I highly recommend purchasing.

Additionally, purchasing from Plugin Boutique entitles you to a free plugin. This month, the options are Frostbite 2 by AudioThing or EQuivocate by Newfangled Audio.

Frostbite 2 offers various modulation effects, and EQuivocate is a graphic EQ with auditory filters and a Match EQ feature. Personally, I’d choose Frostbite 2.

See you in the next post!

Create Your Own Virtual Instrument with NI’s Kontakt!

Hello everyone! This is Jooyoung Kim, an engineer and music producer.

Today, I’d like to share a simple guide on creating your own virtual instrument using Kontakt 6 (often just referred to as Kontakt).

While Kontakt 7 is the latest version, I haven’t upgraded to the newest Komplete bundle due to the lack of significant new libraries. Therefore, I’m using Komplete with Kontakt 6 for this tutorial. The process should be similar across versions, so I hope this will still be helpful.

Given Kontakt’s extensive features, I will not cover every detail here. For in-depth editing, I recommend checking the manual.

Let’s get started!

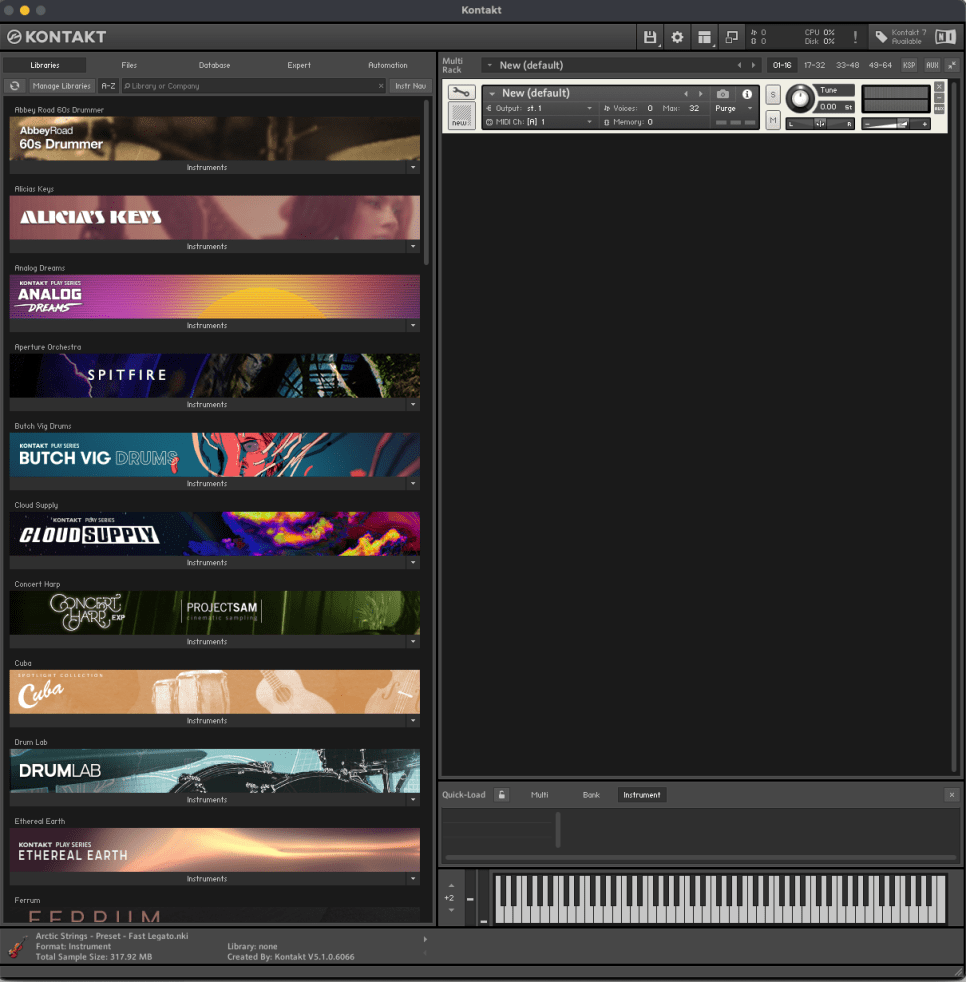
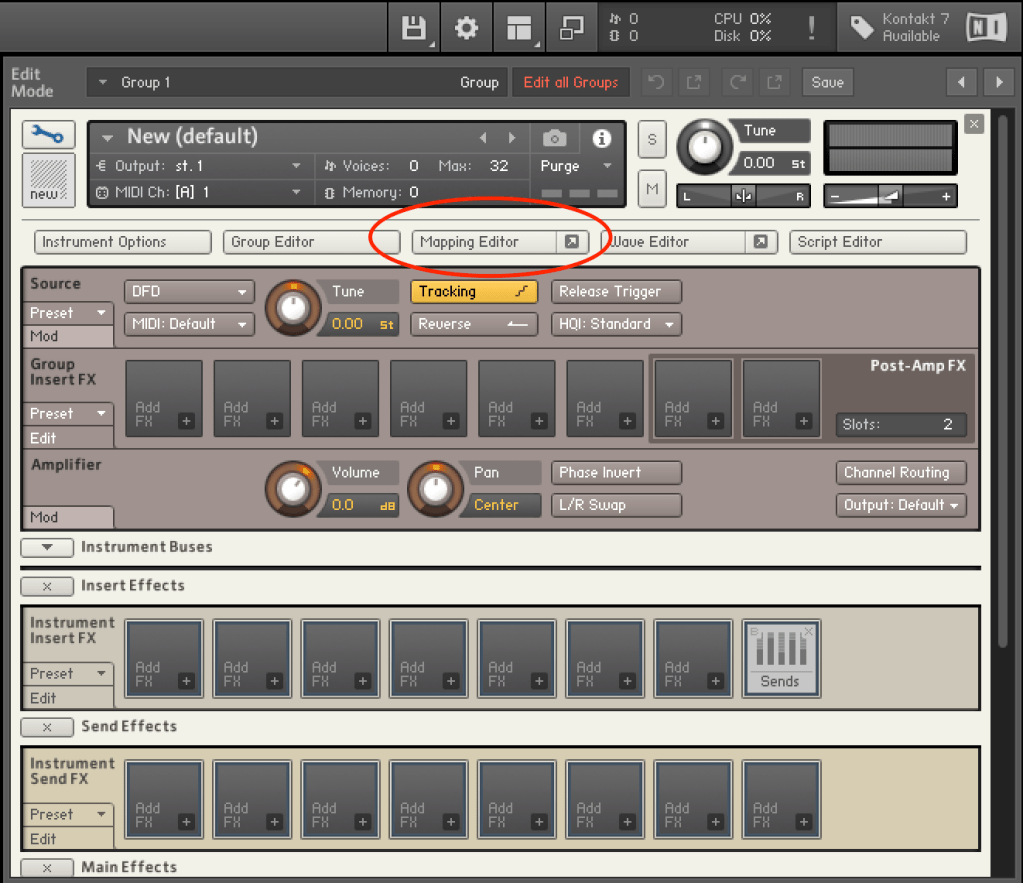
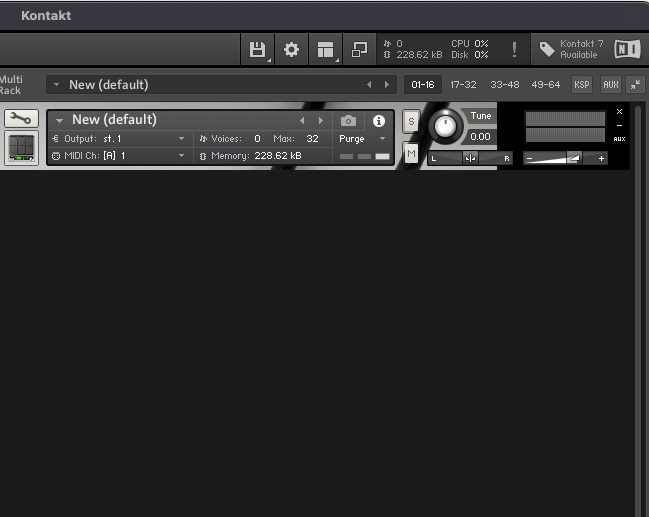
First, open Kontakt and double-click the empty space on the right to create a sampler. Click the wrench icon in the upper left corner to open the settings tab, as shown above. There are a lot of settings available!

First, let’s open the Mapping Editor highlighted in the picture.

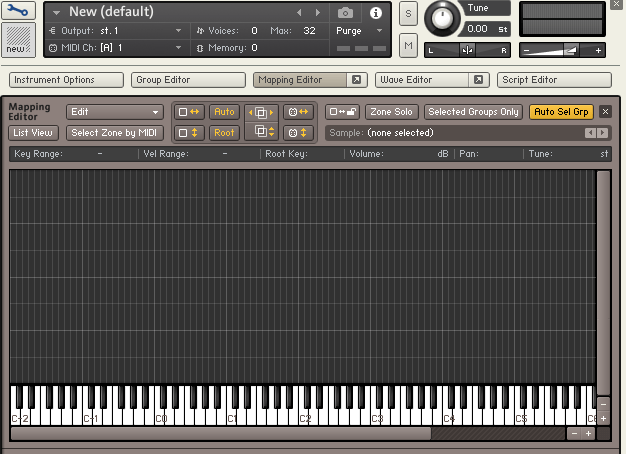
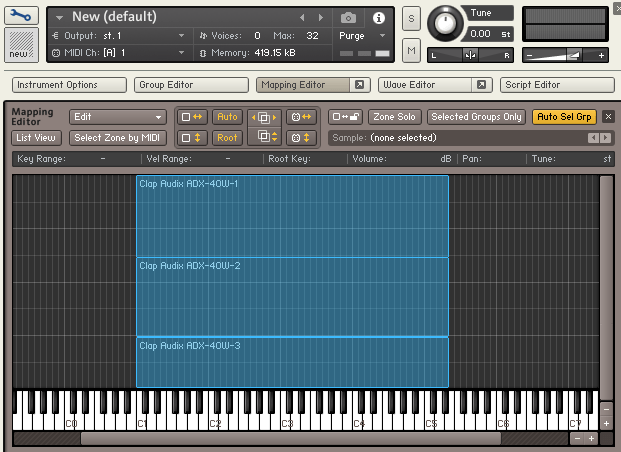
You’ll see a piano roll screen along with a grid that looks like an Excel spreadsheet. The horizontal axis represents pitch, and the vertical axis represents velocity. Load your desired sample onto this grid.

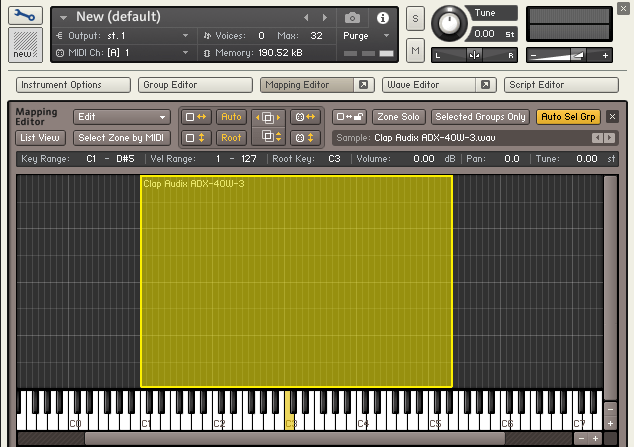
The grid and the piano roll will be colored like this. Pressing the colored keys on the piano roll will play the original sample, while pressing other keys will change the pitch.

You can adjust the highlighted areas with your mouse.

By properly adjusting the areas, you can set different samples to play depending on the velocity when you press a key, as shown above.

Similarly, you can click and drag the colored areas on the piano roll to adjust the pitch range.

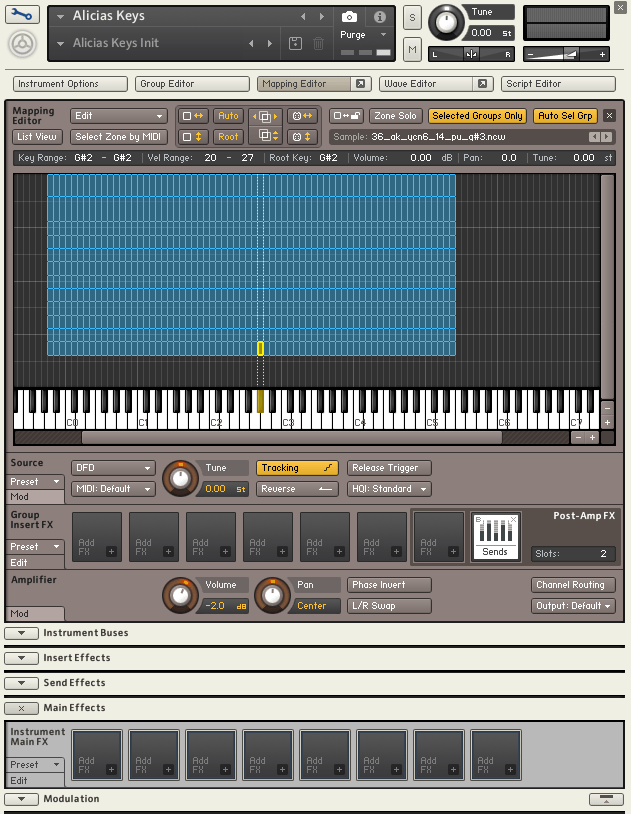
For example, if you open the settings for Alicia’s Keys, a commonly used instrument, and examine the mapping, you’ll see 12 velocity layers for each key. Instruments created with Kontakt often have such detailed velocity mappings. The more sophisticated the instrument, the fuller the mapping editor will be.

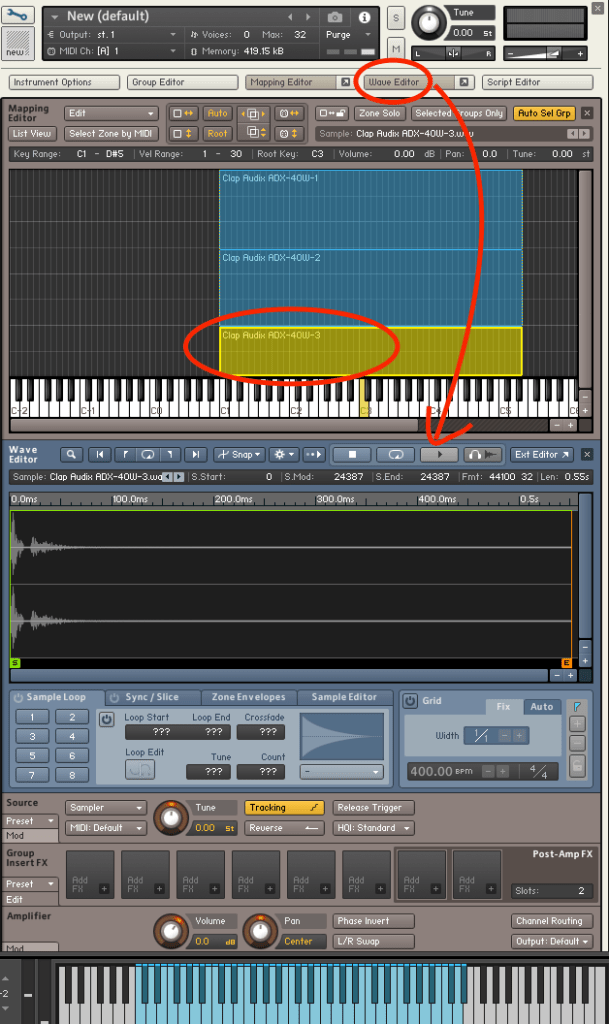
After completing the mapping, you can use the Wave Editor to fine-tune the samples to your liking.

You can loop the sample or perform various other edits.

The parameters are similar to those of general samplers, so if you’re familiar with samplers, you should find it easy to use.

If you’re new to samplers, exploring Kontakt can help you understand the structure of virtual instruments created with it, which can be useful when purchasing such instruments.

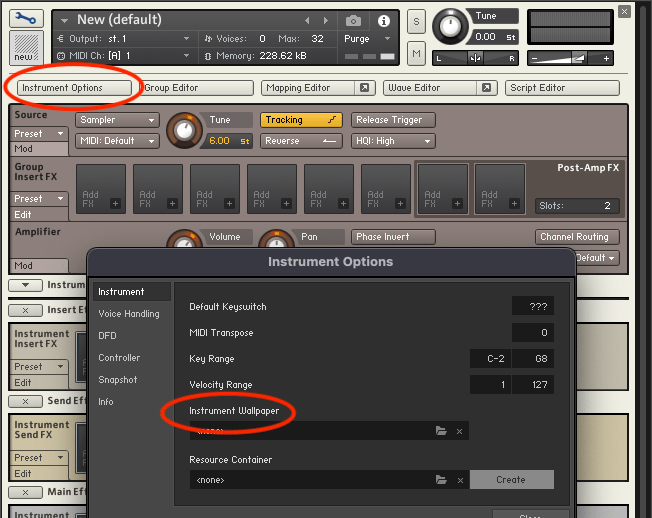
After some basic editing, the sound of your virtual instrument is complete. Finally, select Instrument Options and add a wallpaper with a TGA or PNG file (the manual suggests a width of 633 pixels).

This gives you a virtual instrument with a polished look. But what if you want adjustable parameters like other Kontakt instruments?

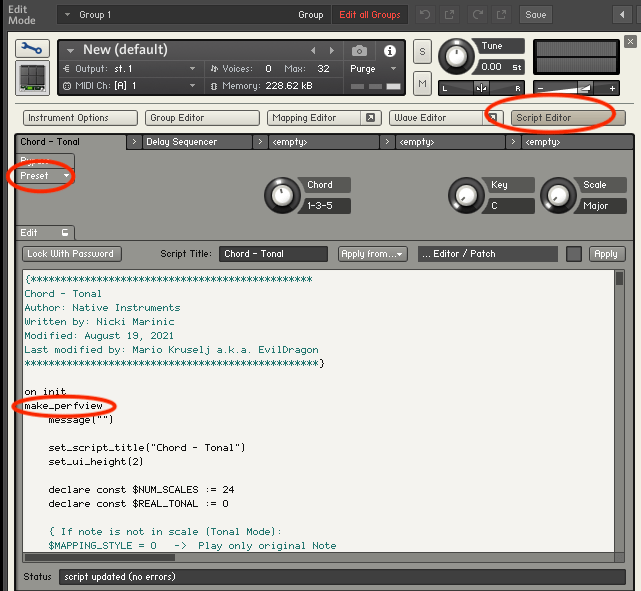
You need to use the Script Editor to add those features.

If you don’t want to dive too deep, you can simply select a factory preset from the side and add the “make_perfview” command between the “on init” and “end on” lines.

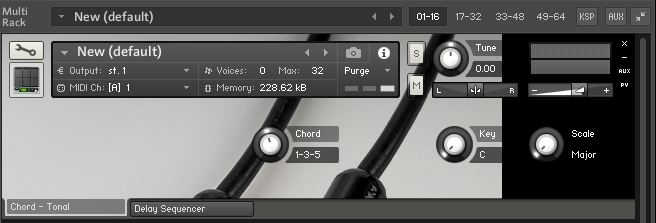
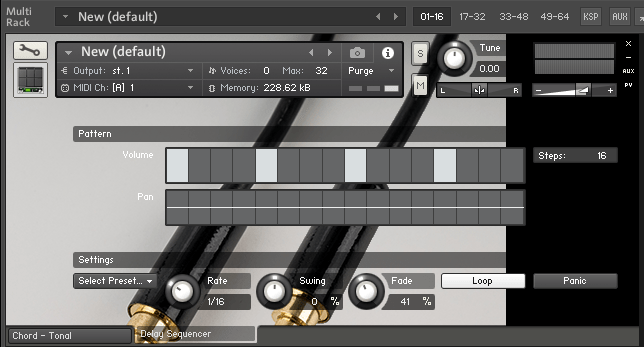
This will display the factory preset script in the main window, known as the performance view. To create a more customized performance view, you’ll need to learn scripting from various forums.

https://community.native-instruments.com/categories/scripting-workshop

For those who want to explore further, NI has a community that’s worth checking out.

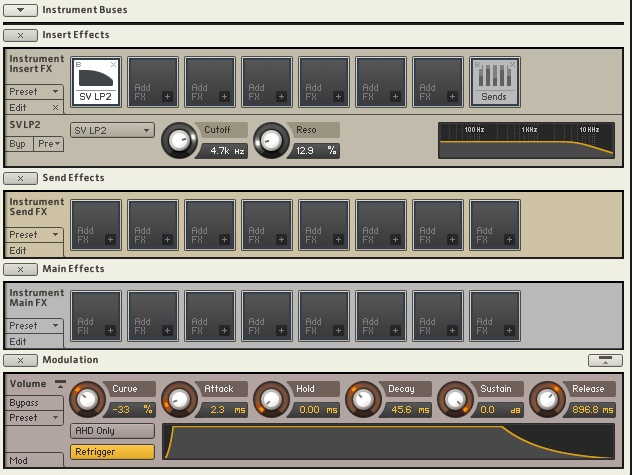
Other settings like Effects, Envelopes, and Buses are similar to those in other samplers or track settings, so I won’t explain them in detail here.

It may seem challenging at first, but once you understand it, you’ll be able to use other Kontakt-based virtual instruments more flexibly. If you’re into music production, it’s definitely worth studying.

I hope this post is helpful for those dealing with virtual instruments.

See you in the next post!

DC Snares (Drum Machine) Virtual Instrument Release Sale (Until July 31st, $31.9)

Hello, This is Jooyoung Kim, an engineer and music producer.

Today, I want to introduce a new virtual instrument developed by Plugin Boutique.

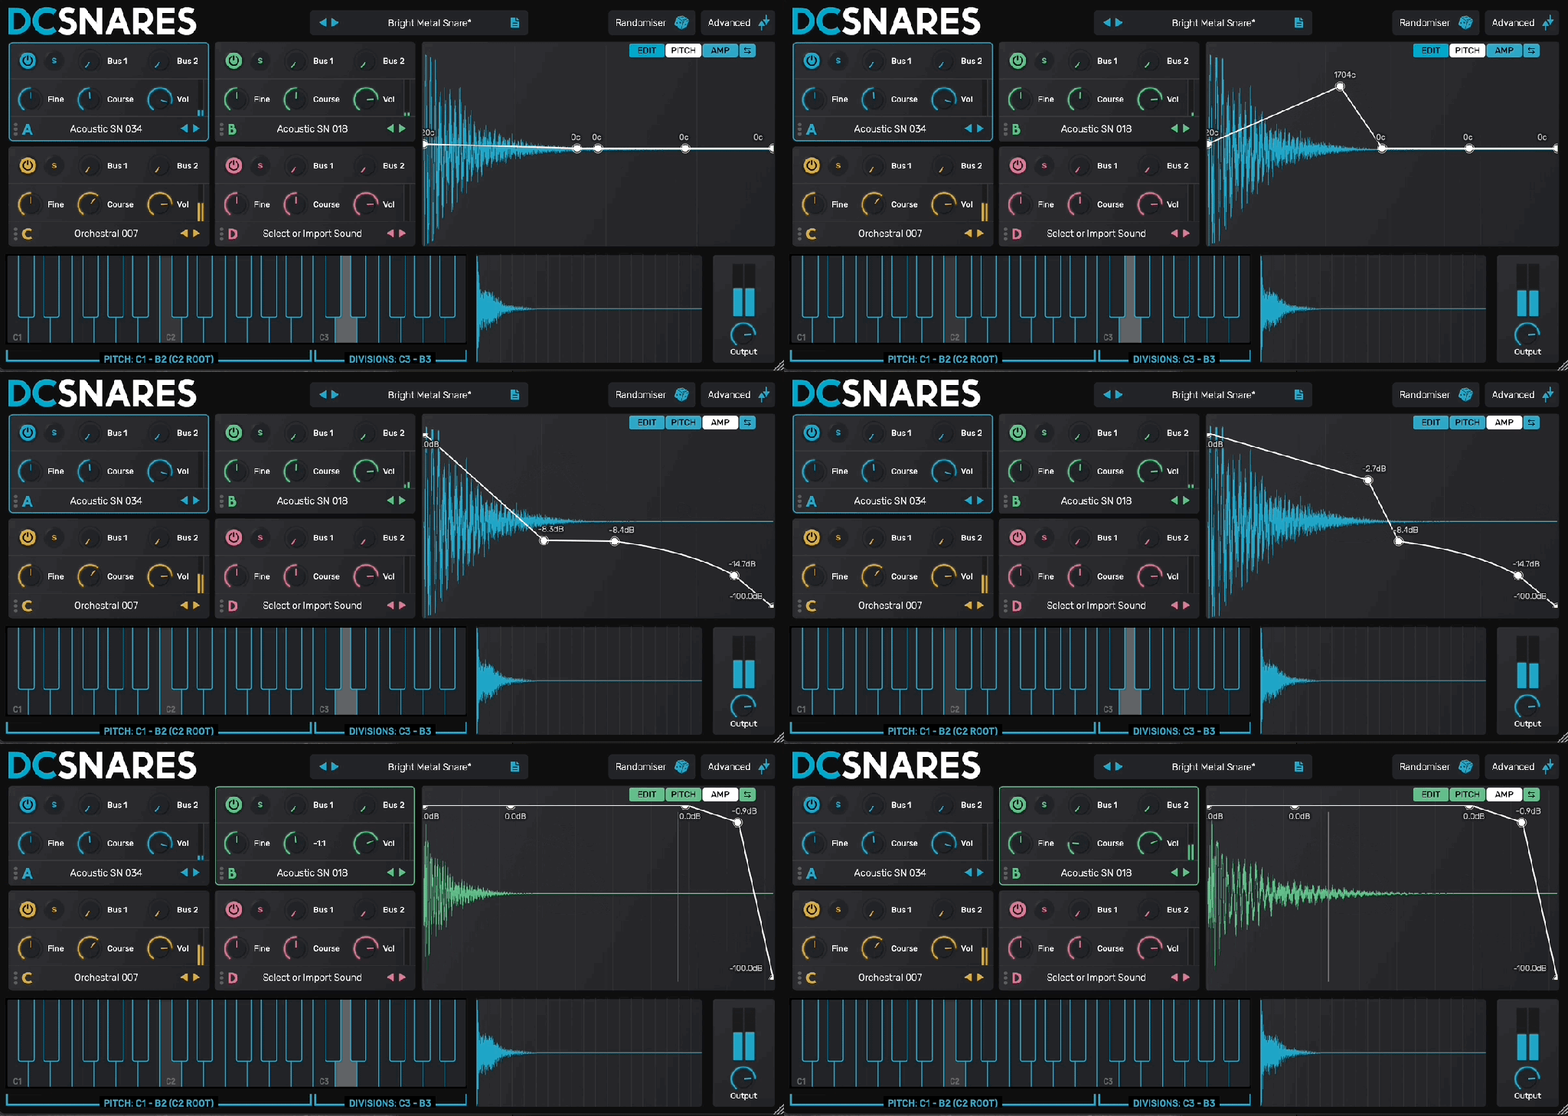
The newly released DC Snares is a virtual instrument that allows you to create sounds by synthesizing four different samples. You can use the Randomizer in the top right corner to generate sounds randomly.

There are a total of 10 built-in FX, allowing you to apply FX to individual samples, FX to the bus, and FX to the master track separately through the Advanced controls.

Each sample can be individually adjusted for envelope, pitch, and volume over time, and you can also set the start and end points of the samples to your preference.

In modern music production, it’s crucial to refine drum sounds meticulously to create a good groove. DC Snares offers all the necessary features for this and has a simple UI that makes sound creation convenient.

Despite its name, DC Snares is not limited to creating snare sounds. It can also be used to create hi-hats, kicks, bass, and other drum machine-like sounds. The presets are quite usable, making it a worthwhile purchase for around $30.

The sale runs until the end of July, so if you frequently work with samples, I recommend giving it a try. It also supports loading personal WAV files, adding to the fun and versatility.

See you in the next post!

IK Multimedia T-Racks Max v2 Unprecedented Discount (Until June 30th)

Hello, this is Jooyoung Kim, an engineer and music producer. Today, I’ve come across an amazing discount, and I requested an NFR (Not for Resell) code from Plugin Boutique to review about those plugins.

The T-Racks 5 Max on sale this time is a package of plugins from IK Multimedia used for mixing and mastering. It includes a total of 53 plugins, and it has never been offered at such a low price before. You can think of it as getting each plugin for about $1.

Personally, I’m amazed that they’re offering all these reverbs at this price. If I remember correctly, Sunset Sound Studio Reverb was initially sold at a launch discount of $99, and Fame Studio Reverb wasn’t bundled with T-Racks and had to be purchased separately.

In addition to that, there are well-known emulation plugins such as Urei 1176, LA-2A, SSL Bus Comp, SSL Channel Strip, Neve 33609, Manley Vari-Mu, Empirical Labs Distressor, Neve 1073, 1081, Sontec 432c, Fairchild 670, Pultec EQP-1A, API 550a, b, API 560, etc. The names might be slightly different, but they are familiar and famous emulation plugins.

In the past, I used to recommend the Waves Horizon bundle for beginners due to its cost-effectiveness, but at this price, I would now actively recommend IK Multimedia.

I wish I could measure and test all the processors and upload the results, but there’s too much data, so I’ll focus on the well-known ones like 1176, LA-2A, Neve 33609, Fairchild 670, and SSL Bus Comp.

  • Black 76

First, the Black 76 which emulates the 1176. The harmonics come out well, and it slightly compresses with a Soft Knee. When applied, it seems to reduce the low-end power and emphasize the attack.

  • White 2A

The White 2A, emulating the LA-2A, shows in its Release time that it faithfully reproduces the characteristics of an Opto compressor. It also slightly cuts the extreme low-end. Note that when first applied, the Limit/Compress switch is set to Limit, so switch it to Compress if you want to use it as a compressor.

  • Precision Comp/Lim

The Precision Comp/Lim, which copies the Neve 33609, seems to boost the high frequencies when applied, possibly due to its harmonics. It’s quite good, and I find myself using it often.

  • Bus Compressor

The Bus Compressor, emulating the SSL Bus Comp, operates with a Soft Knee when selecting ratios of 1.5 and 2, compressing very smoothly. It also gently tidies up the high frequencies, which I really like.

  • Vintage Tube Compressor/Limiter Model 670

The Vintage Tube Compressor/Limiter Model 670, emulating the Fairchild 670, has a high ratio and is set with a Hard Knee. It slightly trims the frequency range, which sounds natural and not bad for acoustic tracks. However, for modern tracks that emphasize high and ultra-low frequencies, it might not be as suitable.

There are many other plugins that can be immediately used for your projects, so if you have the budget, I highly recommend this bundle.

As I’ve mentioned before, buying from Plugin Boutique adds about 10% tax, making it slightly more expensive than other places. Here it’s $54.99.
However, the benefits of buying from Plugin Boutique include:

1) Free plugin giveaways with purchases (the free plugins change every month)
2) Points accumulation

I usually buy expensive plugins from other places, but for plugins under $100, I decide whether to buy from Plugin Boutique or elsewhere based on the free plugin offered.

This month, the free plugins are Rhodes V-Pan, a unique Auto Pan, or Dehumaniser Simple Monsters, which creates monster-like voices used in special effects. Both can be quite useful musically.

Especially for Logic Pro users who lack a built-in Auto Pan and often use the Tremolo plugin instead, getting the feature-rich Rhodes V-Pan for free with the purchase of T-Racks 5 Max would be a very satisfying deal.

I rarely recommend sales or plugins this strongly, but this one is genuinely worth buying.
Writing this makes me feel like a salesperson…^^;;

See you in the next post!