Hello! This is Jooyoung Kim, an audio engineer and music producer.
Now that the semester is over, I have a few weeks to rest and prepare materials for my next classes. Even so, I still have a lot of work to do on my new research, my DIY hardware projects, and my English studies. It will be very busy holidays.
By the way, recently, I decided that I need to sell my compressors, the Heritage Audio Successor and the Stam Audio SA-4000 MK2, and replace them with a mastering-grade compressor to mix and master music better.
Fortunately, last week I sold both of them, and I have been happily considering which mastering-grade compressor I should buy. There were several options to choose from, but I finally decided to buy the Manley Nu Mu Stereo Limiter/Compressor.
This decision came from my experience with the SPL IRON, the SPL Venos, and the Chandler Limited RS660 compressors, which are vari-mu-style compressors. They sound great across many genres, but they aren’t within my budget. (If I bought them, I’d have to live on cup noodles for about three months! :))
I also had an experience with the original Neve 33609/C compressor/limiter and the Chandler Limited EMI TG12413 Zener Limiter. These are diode-bridge compressors that have really great saturation; however, they are also unaffordable.
I found two reasonably priced compressors: the Rupert Neve Designs 5254 Shelford Diode Bridge Compressor and the Manley Nu Mu Stereo Limiter/Compressor. I ultimately chose the Manley because it was more affordable. Also, having previously owned a diode-bridge compressor—the Heritage Audio Successor—I was ready to explore a different style.
I was also attracted to the WesAudio ngBusComp, which features a handy digital recall system. However, it is a VCA-style compressor, which is the same type as the Stam Audio SA-4000 MK2 that I used to own.
Therefore, I decided to buy the Manley Nu Mu Stereo Limiter/Compressor!
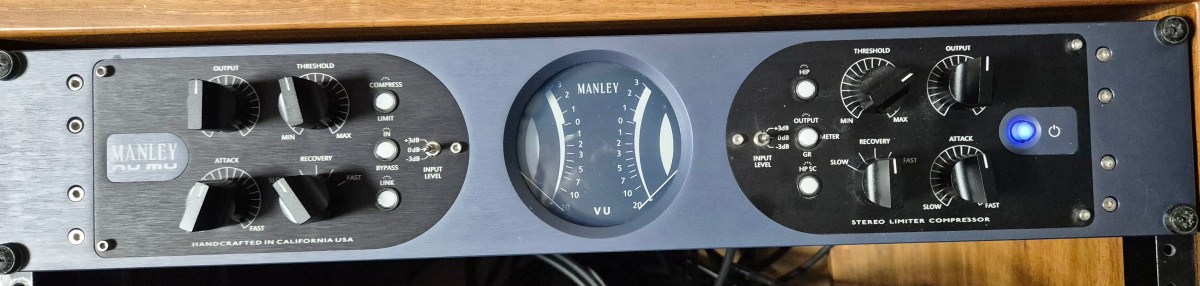
Build Features
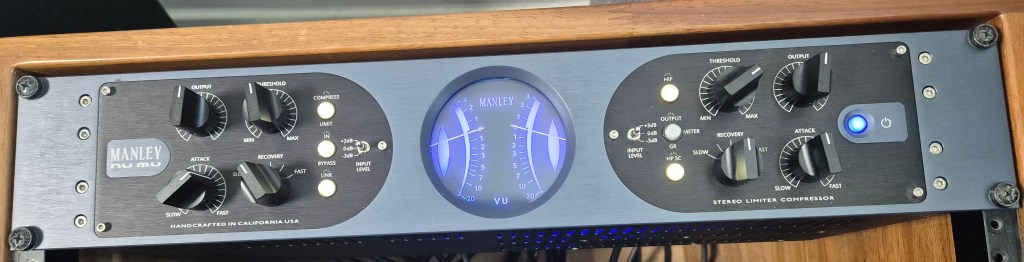
The Manley Nu Mu features eight knobs, six buttons, and two switches, excluding the power switch. The knobs (Threshold, Output, Recovery (Release), and Attack) and switches (Input Level) on the left side are identical to those on the right, allowing for independent adjustment of the left and right signals.
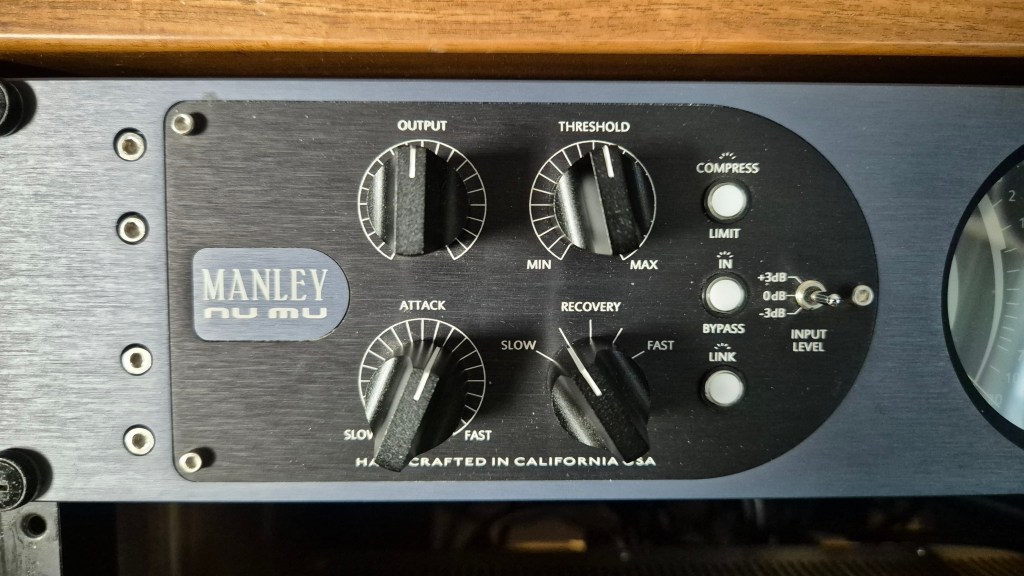
The Link button couples the left and right signal control knobs, with the notable exception of the Output controls. Consequently, these must be matched manually via measurement. Furthermore, apart from the Recovery knob, all controls feature continuous rotation, which makes precise recall of previous settings difficult.

The HIP (High Impact Preservation) control compresses quieter sounds while leaving loud peaks untouched. It processes these signals internally to achieve results similar to parallel compression. I found that the audio sounds more natural when engaged, so I may leave this button on permanently.
The HP SC (Sidechain High Pass Filter) button activates an internal filter with a 100Hz corner frequency and a 6dB/octave slope. This prevents the compressor from reacting to low-frequency energy below 100Hz, ensuring more stable gain reduction.
Measurments
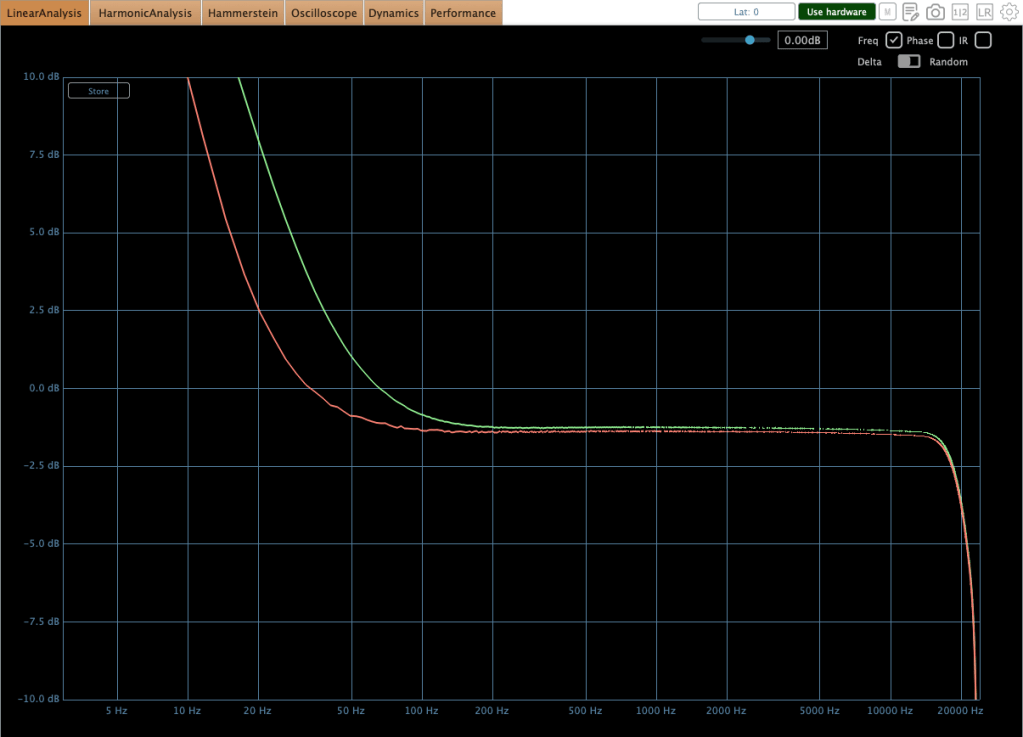
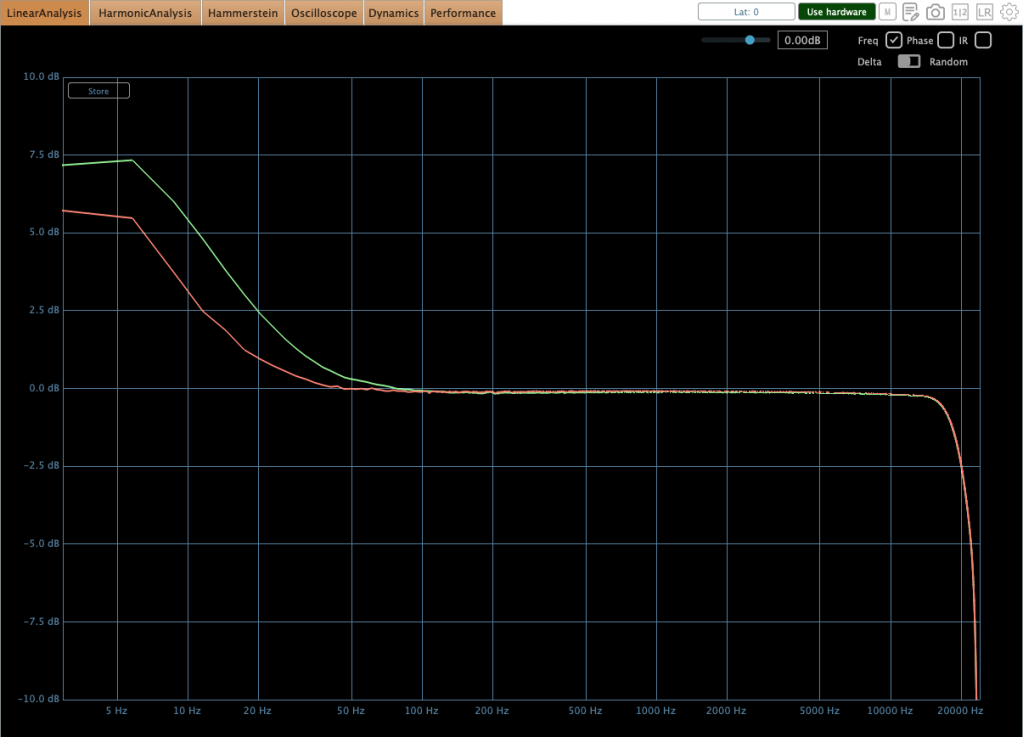
This equipment exhibits characteristic behaviors. Variations in input gain, threshold, attack time, and release time significantly affect the low-frequency response. Additionally, there is a slight amplitude discrepancy between the left and right circuits in the low end. This difference is easily observed in many compressors that do not naturally exhibit a low cut in their frequency response. For instance, when I demoed the SPL Venos, I found a significant discrepancy in the low-frequency output. Furthermore, an engineer peer of mine mentioned struggling with the same low-end inconsistency after purchasing an SPL Iron.
So, this level of discrepancy is acceptable.
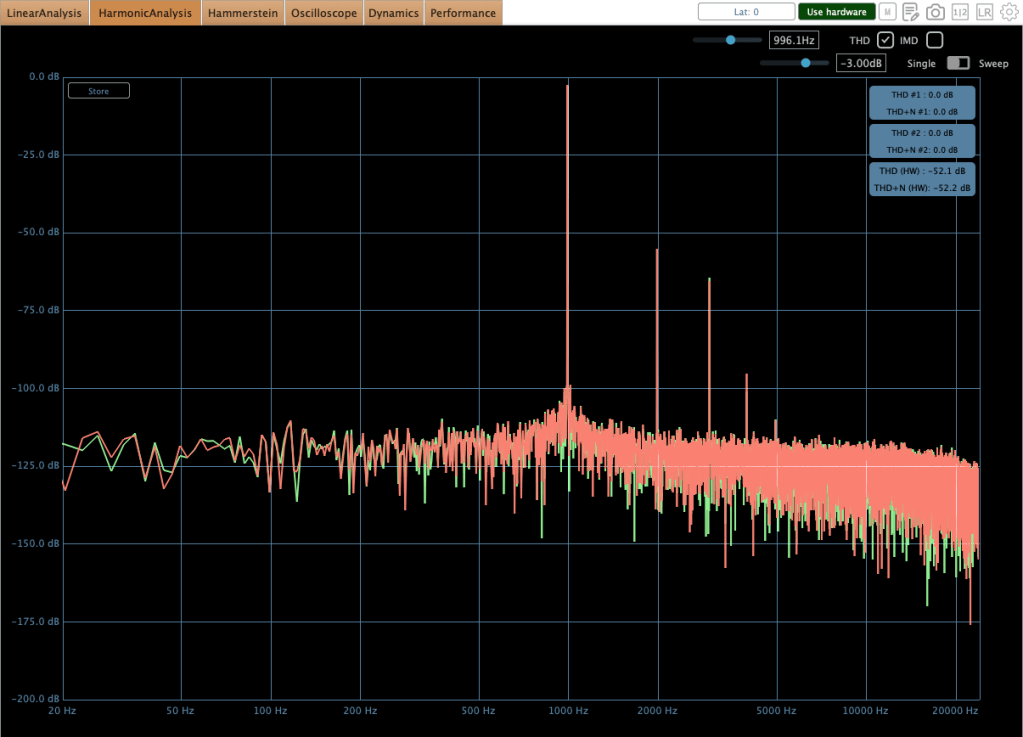
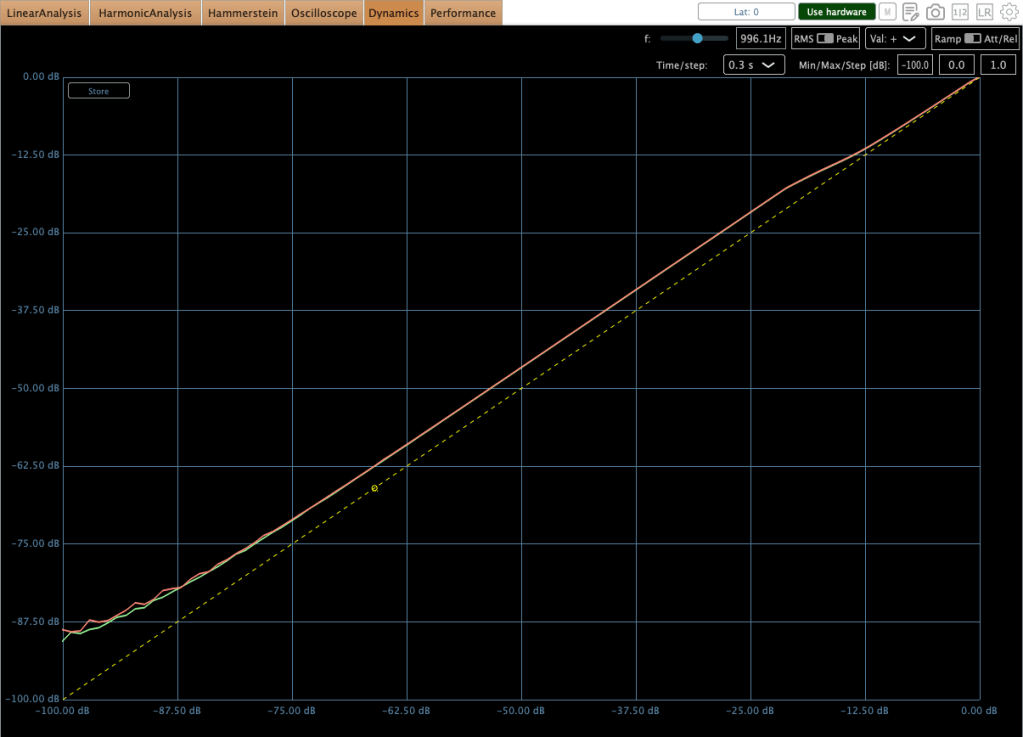
As shown in the image above, harmonic distortion levels are relatively low; however, they remain sufficient to noticeably alter the timbre of the sound.


Regarding the compression curves, the unit provides a smooth transition in both modes; however, the Limiter mode utilizes a hard knee, whereas the Compressor mode employs a soft knee.
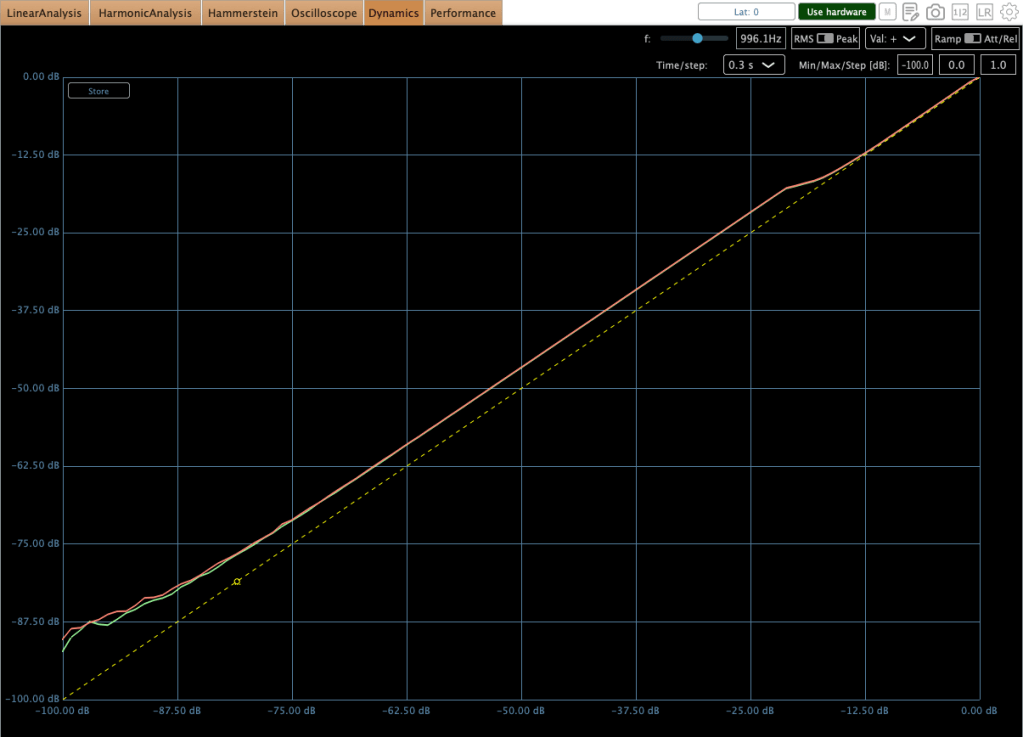
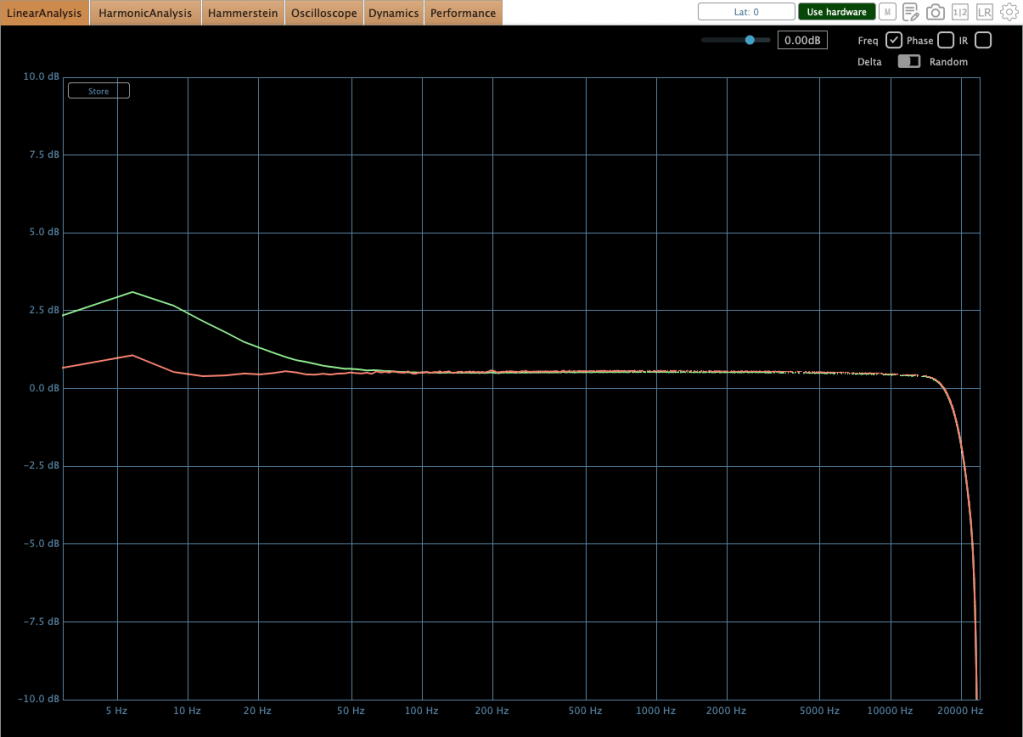
The images above illustrate the behavior of the unit in HIP mode
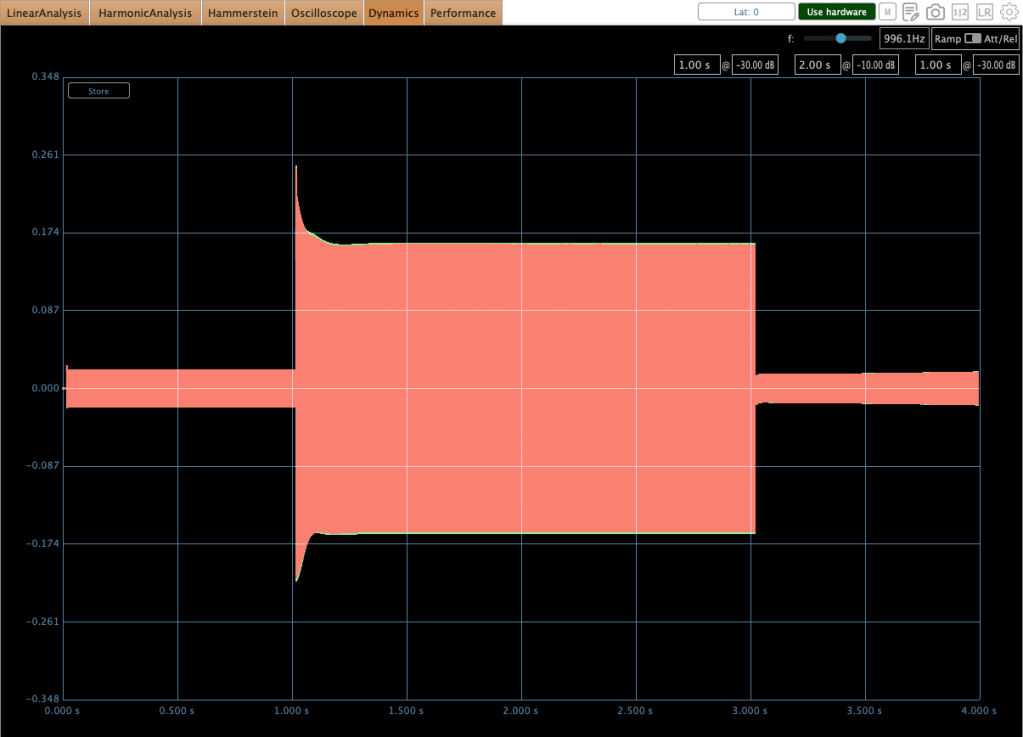
Furthermore, some peculiar behaviors occur during operation. Engineers typically target 0–2 dB of gain reduction on a mastering or mix bus compressor to achieve effective ‘glue.’ However, in this range, audible ‘pumping’ occurs. You can observe this specific behavior in the second photo above.
I encountered numerous discussions regarding this issue while researching the compressor prior to purchase. Although I anticipated the behavior, the audible effect was more critical than I had expected upon testing it myself.
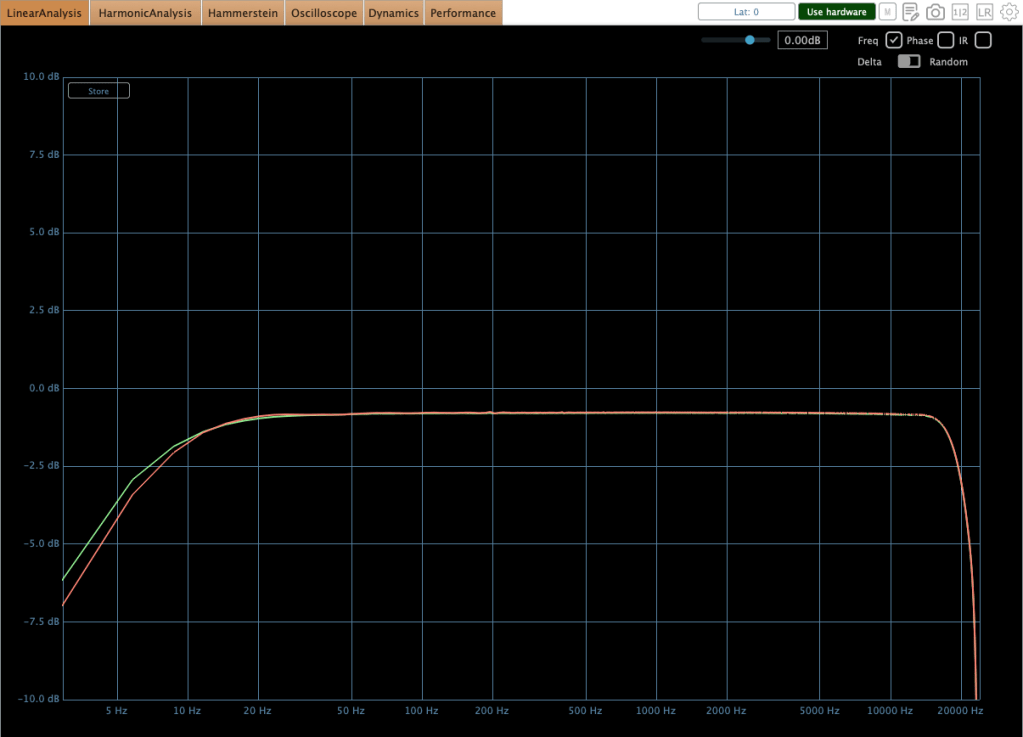
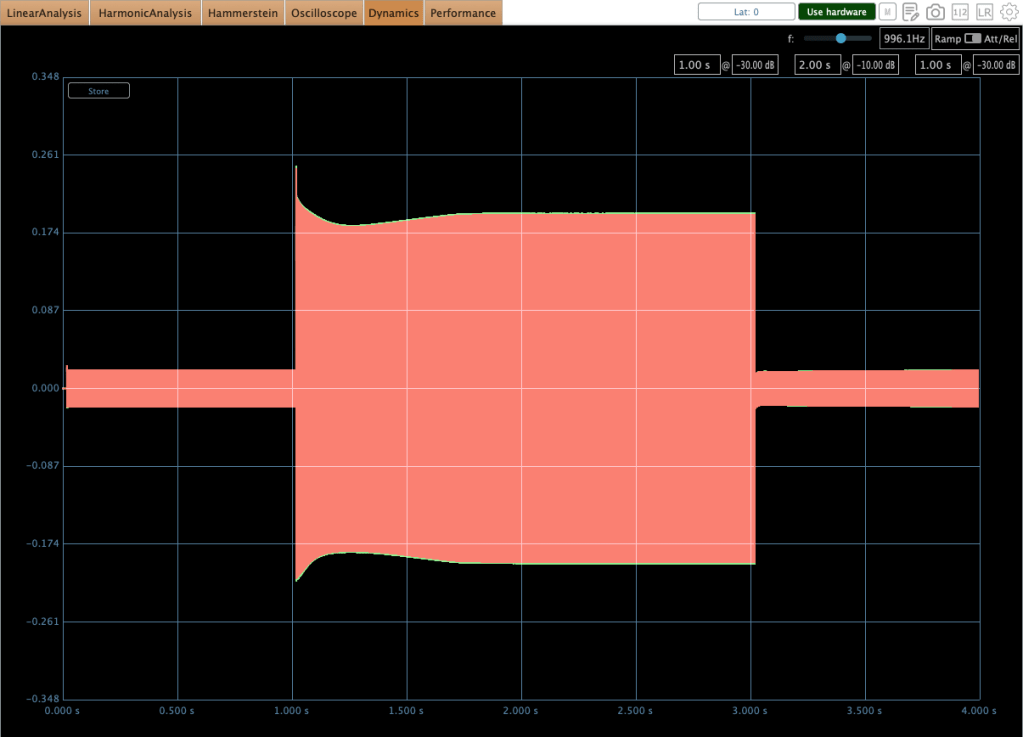
Ultimately, I realized that the 0–2 dB gain reduction range is not ideal for this unit. Interestingly, pushing the gain reduction to 2–3 dB yields much better results, where the behavior stabilizes significantly in both compressor and limiter modes. This performance difference is illustrated in the first photo above.
It has a great sonic taste! It adds rich saturation and harmonic distortion across all frequency ranges, which fills out the empty spaces within the stereo field—a quality that is clearly audible.
However, because the character is so flavorful, I believe that applying a stereo imaging processor will help ‘release’ the sound that has become dense from the harmonic distortion, resulting in a more open and balanced result for mixing or mastering. To this end, I am looking forward to acquiring either an SPL Vitalizer MK3 or a Big Studio.
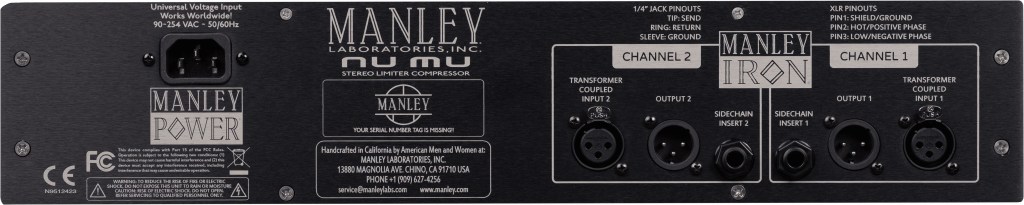
The unit features a 100 Hz high-pass filter with a 6dB per octave slope for internal signal detection, while also providing sidechain send/return inserts for external processing.
When the sidechain send/return inserts are connected, the internal detection circuit is bypassed, and the unit derives its detection exclusively from the external sidechain signal.
Therefore, a simple EQ connection is recommended for this function. To facilitate this, I am currently seeking a cheap used 1U rackmount EQ (like the Behringer FBQ1502HD) to utilize specifically with this sidechain insert.
Final Thought
It’s really great gear! I think it can be used in three ways:
- As a saturator: Running signals through the Manley Nu Mu without any gain reduction.
- For characteristic grooves: Using the sidechain function to create unique grooves with rhythmic signals.
- As a bus compressor: Using it for mixing or mastering.
I’ll be writing a follow-up post once I acquire an EQ or stereo imaging hardware for my setup. Thanks for reading! See you in the next post.

The Manley Nu Mu has been on my radar for a while and this review really breaks down what makes it special. The stereo linking feature is particularly interesting for mastering applications
LikeLiked by 1 person
Thanks for your comment! I think a few more months of use will give me a deeper perspective on it, but my impressions so far have been very positive. 😊
LikeLike