Hello, I’m Jooyoung Kim, an audio engineer and music producer.
Today, I’d like to share my thoughts after using the SA4000 mk2 compressor for a couple of months.
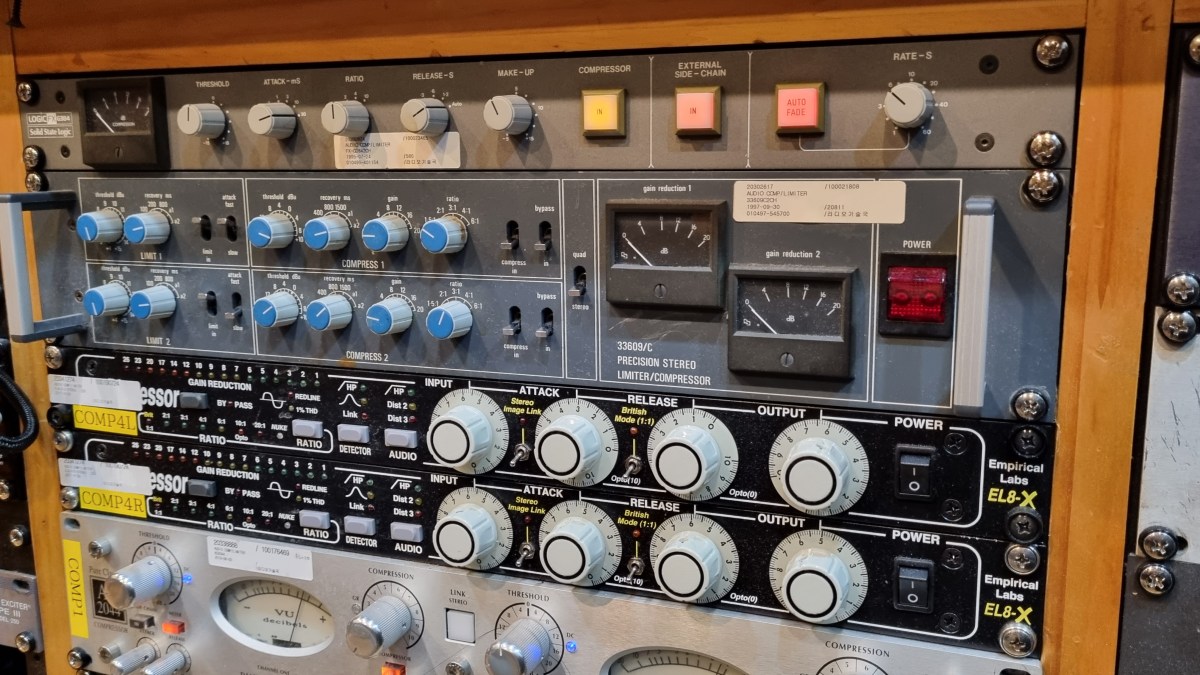
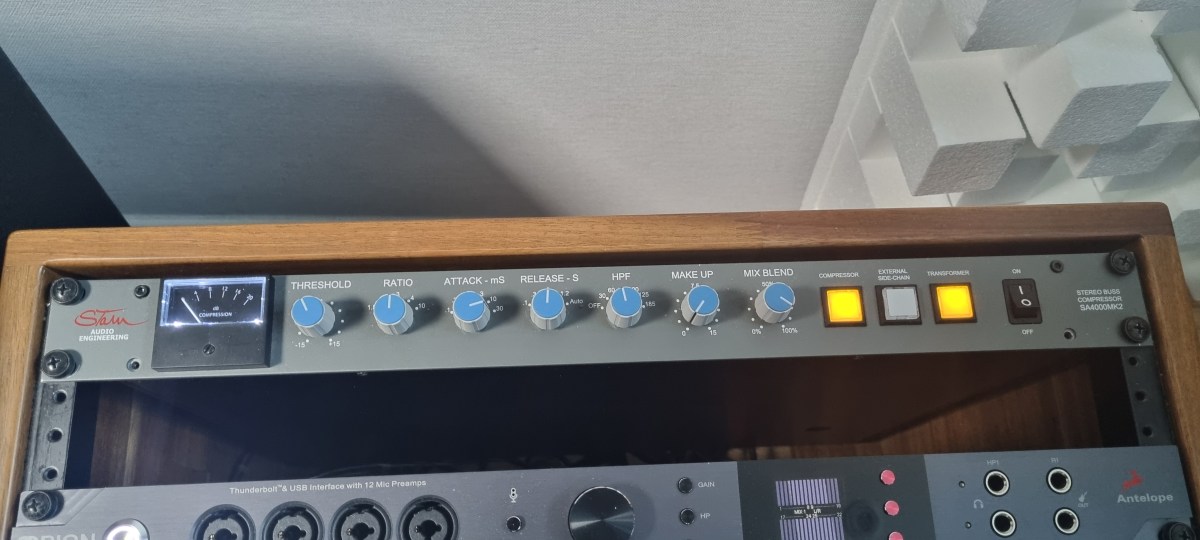
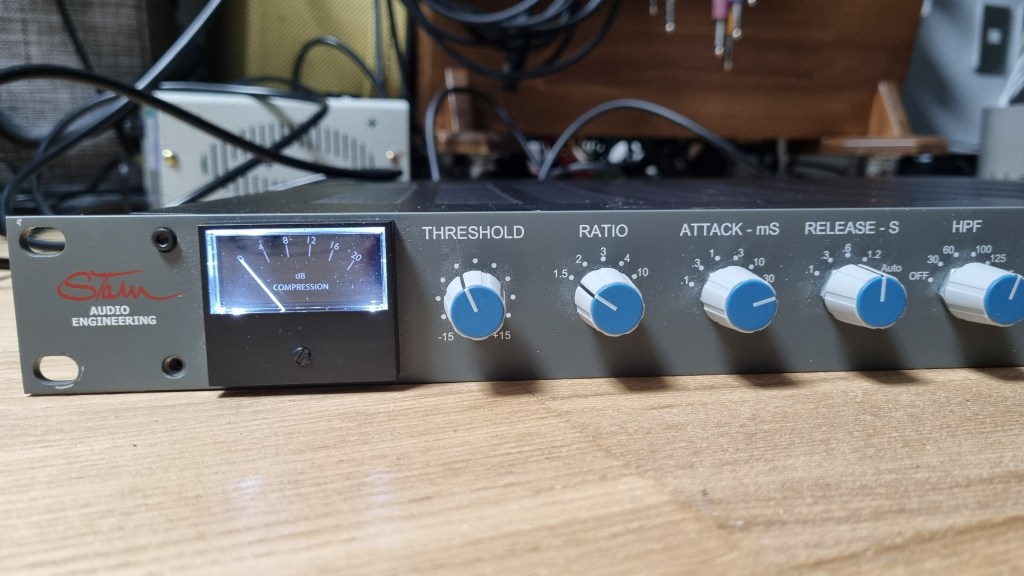
- Appearance
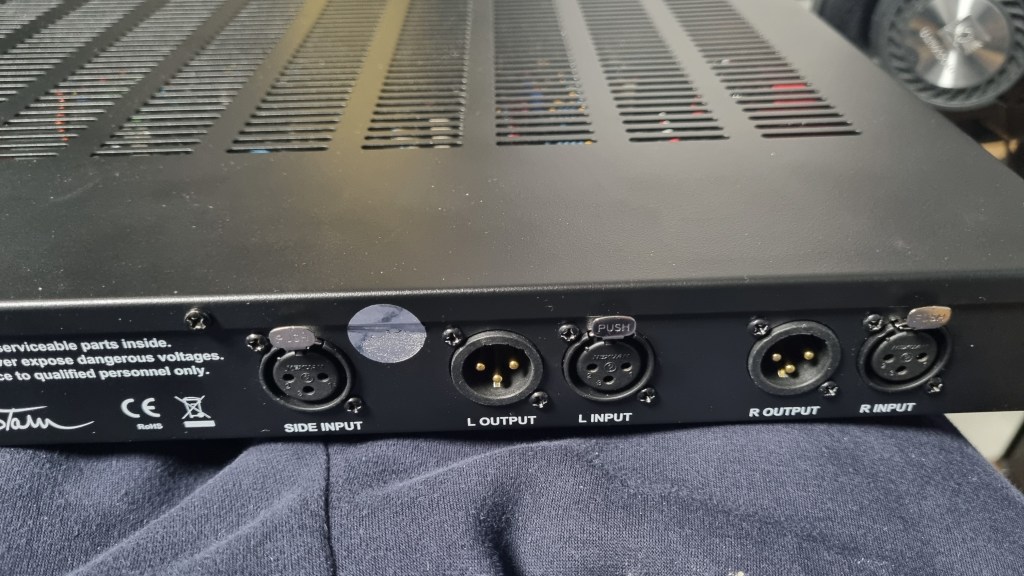
The back panel is equipped with XLR connectors throughout, and the sidechain input is a stereo unbalanced connection via XLR.
The exterior is quite standard for rack equipment, with a solid and heavy build. It’s a 1U unit and features a British Mod, noticeable by the two red Carnhill transformers on the right side.
The unit is relatively deep, so I had to connect a right-angled power cable to mount it properly.

For the sidechain, I used my Send Return TRS to TS cable, converting the TRS to XLR to create an unbalanced stereo XLR to TS cable.
- Usage
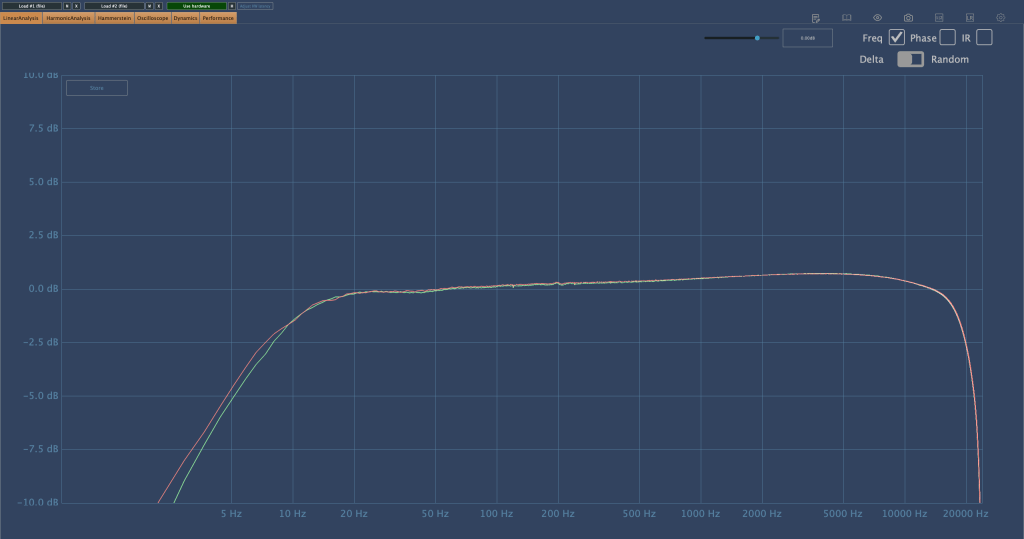

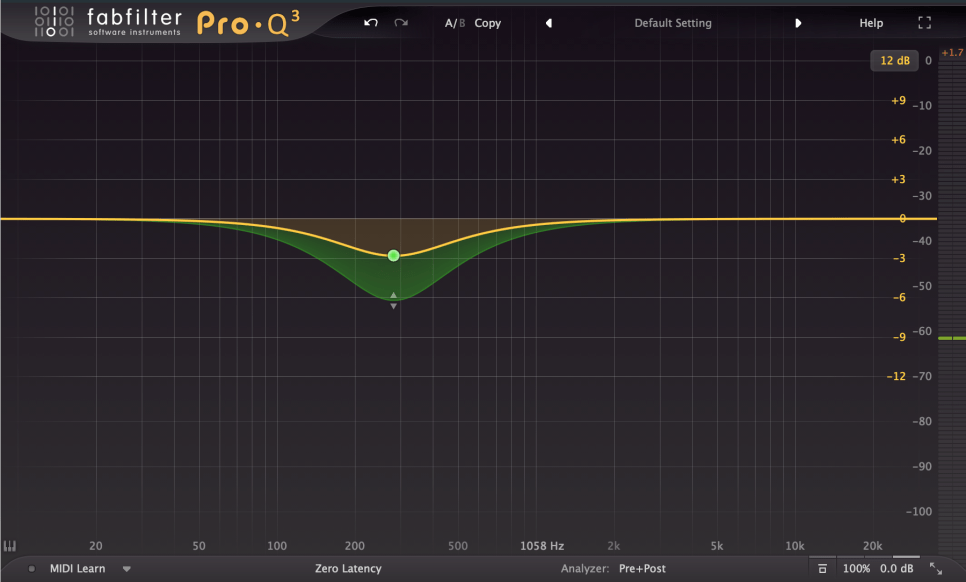
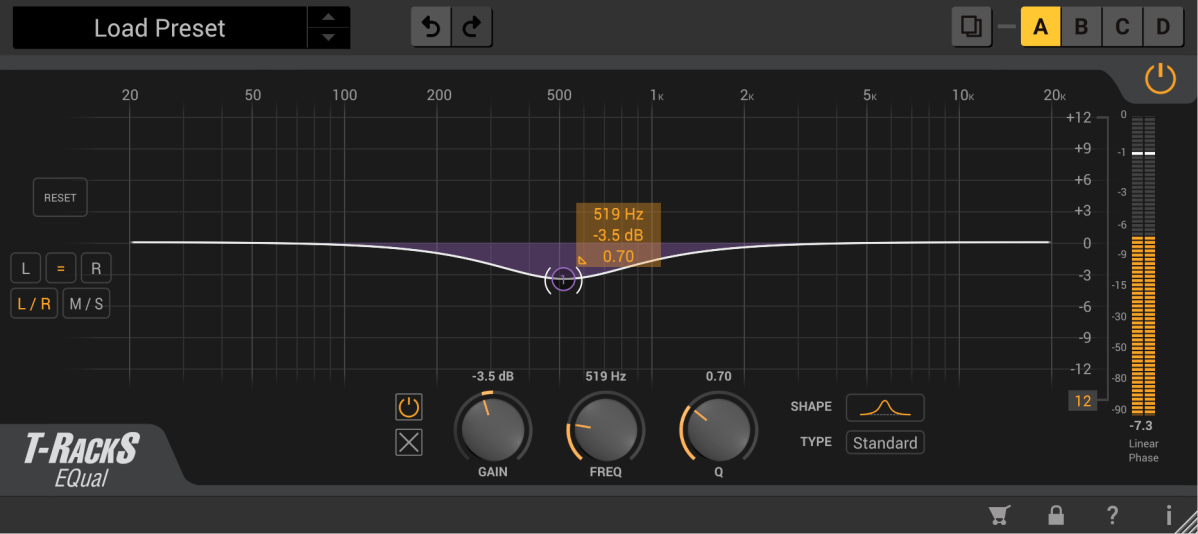
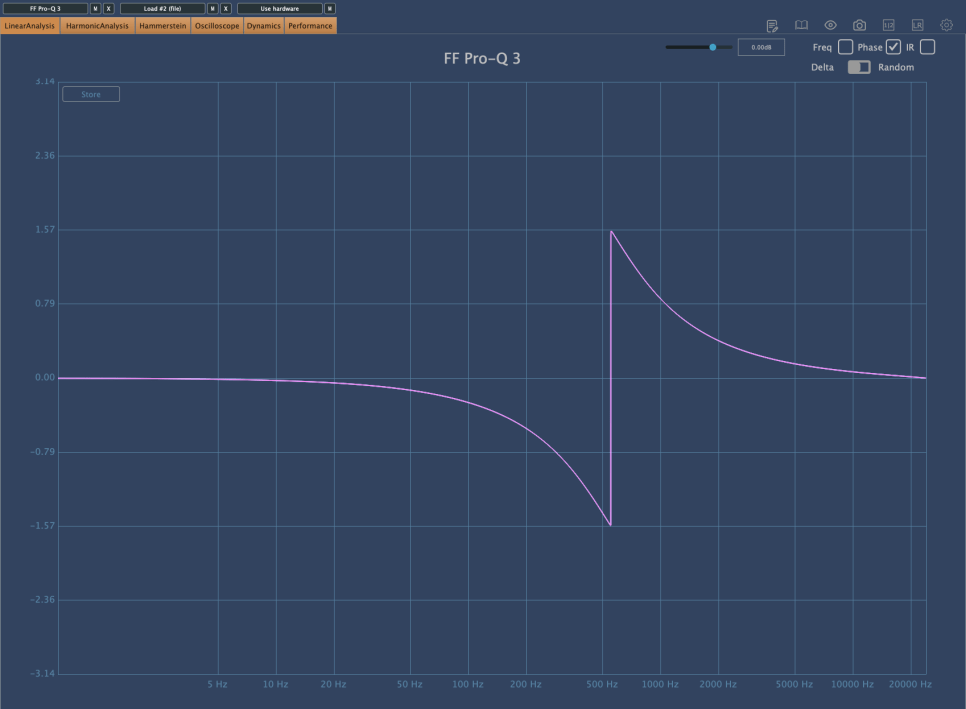
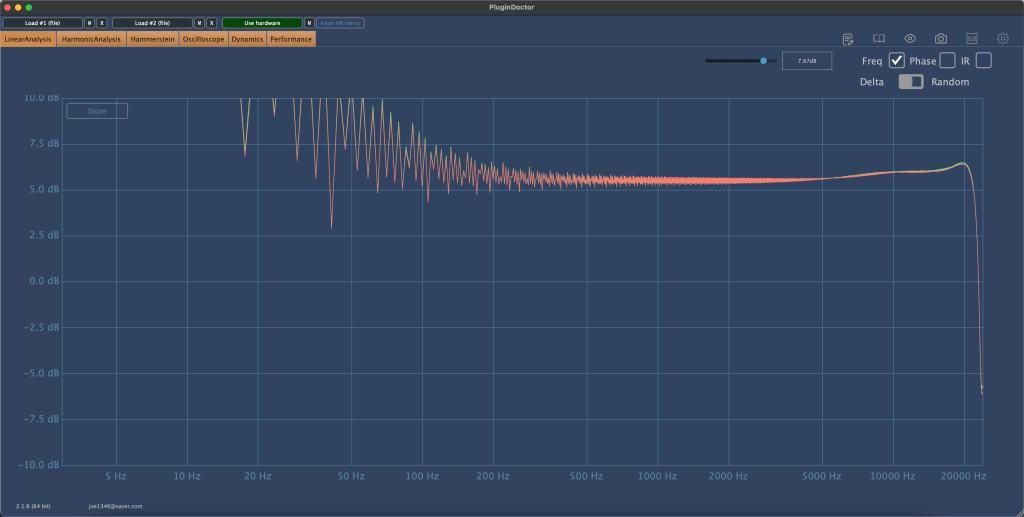
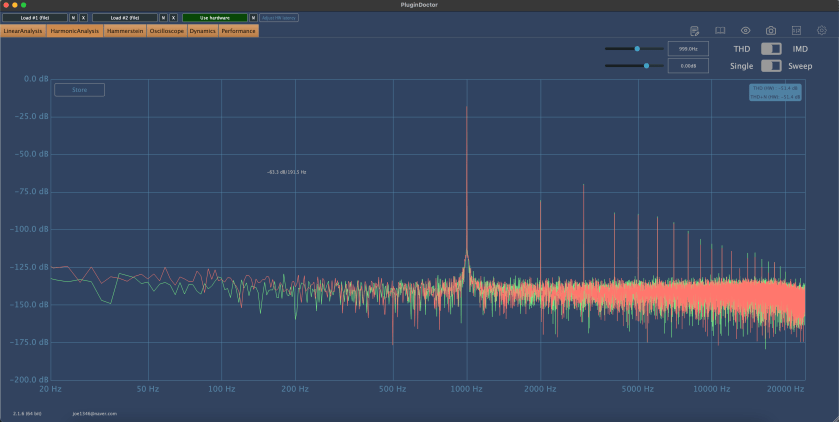
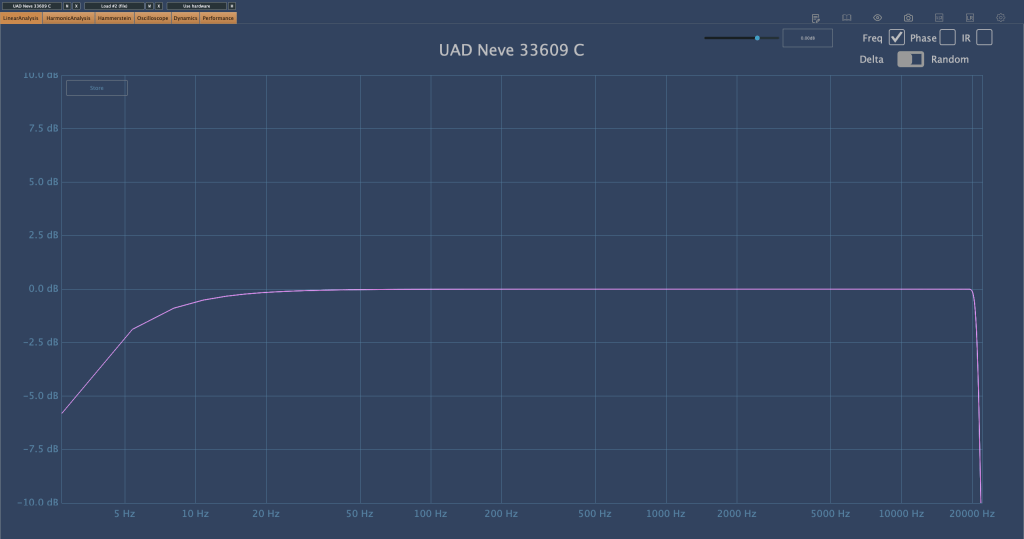
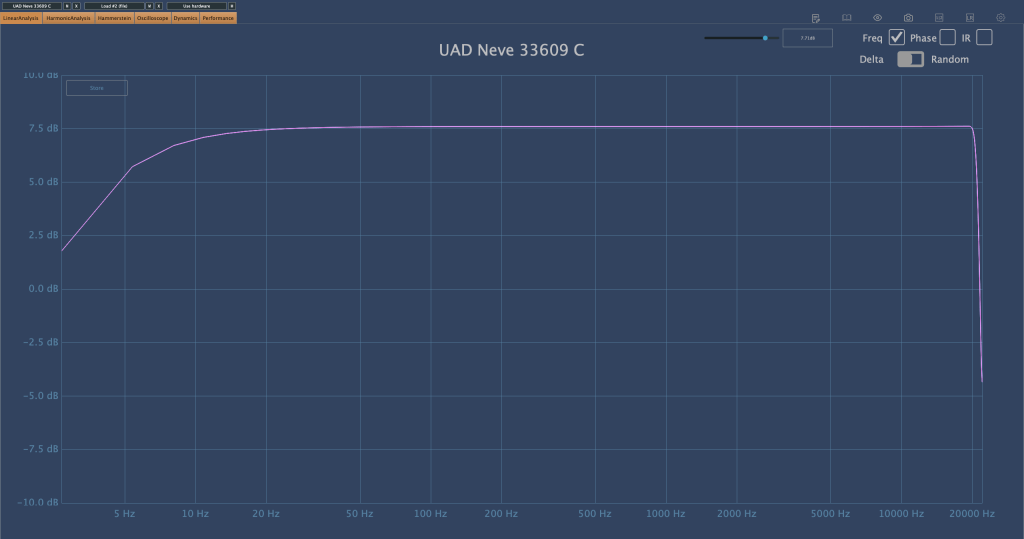
The left side shows the frequency response without the transformers, and the right side shows it with the transformers.
The difference isn’t drastic; the transformers slightly reduce the low frequencies and overall volume.
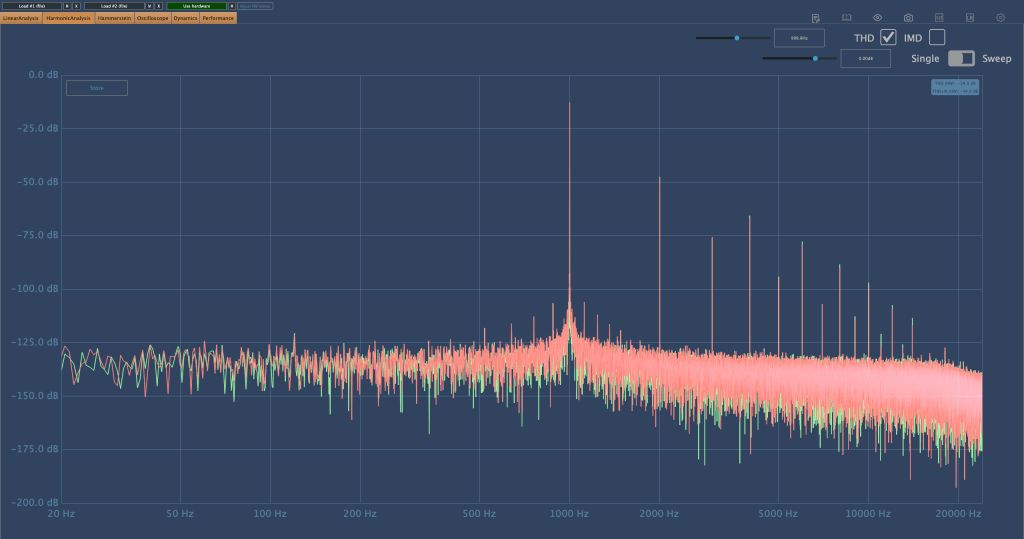


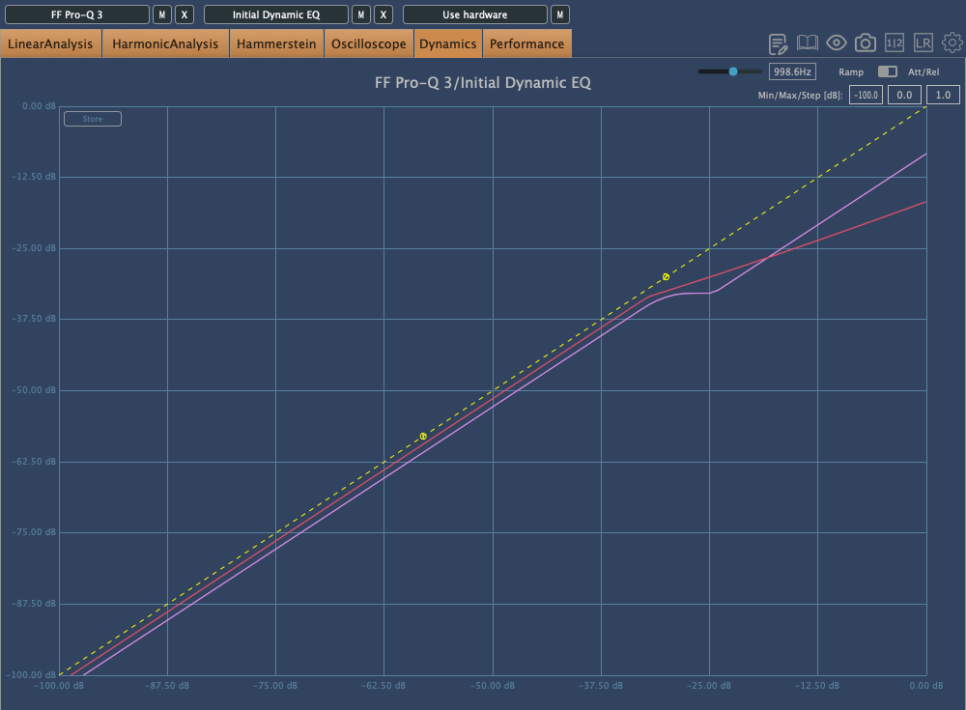
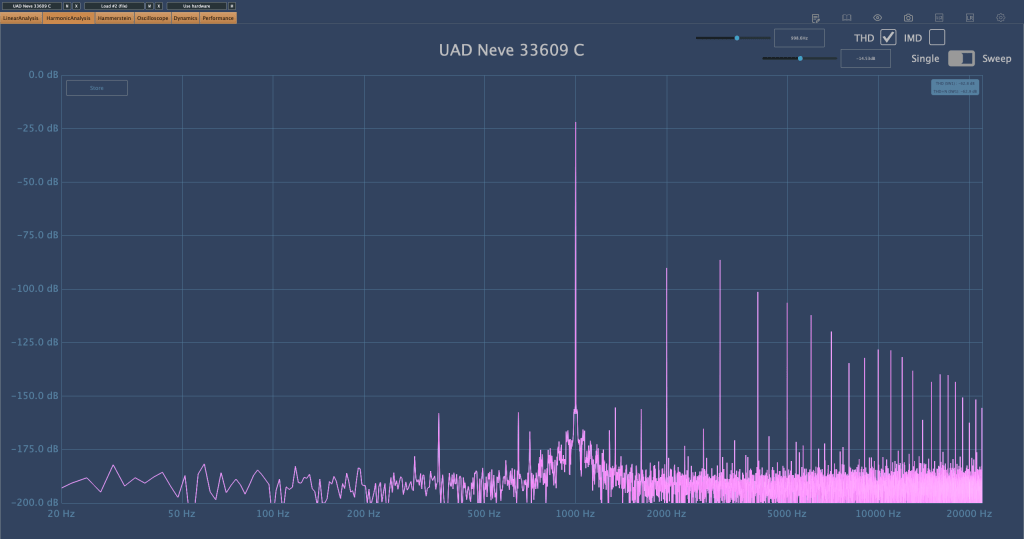
In terms of harmonics, there isn’t a significant difference except for the volume change. Again, the left side is without the transformers, and the right side is with them.
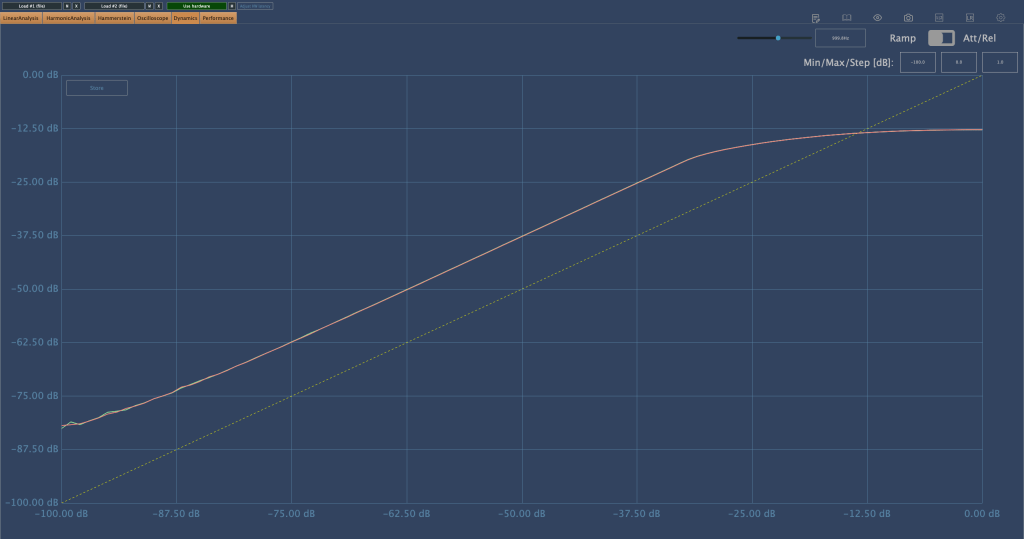
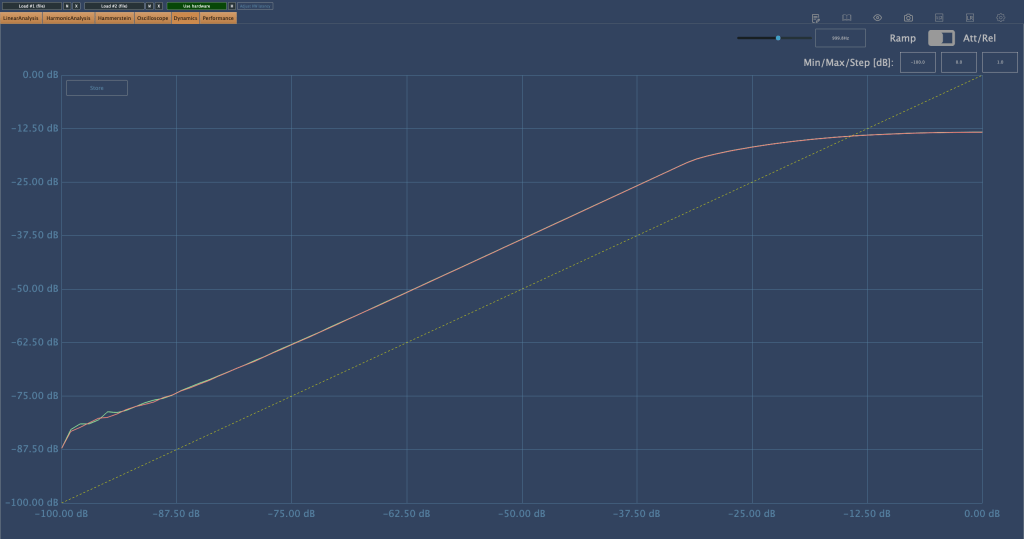
I examined the Ratio settings for any peculiarities and found that the Knee is slightly softer. The primary difference with and without transformers seems to be the volume.
In practical use, I noticed:
- The high frequencies are considerably tamed, making it suitable for use as a bus compressor on harsh hi-hats.
- Recording with the transformers engaged reduces the high frequencies, which isn’t to my taste.
- When gain-matched, the version with the transformers engaged sounds slightly more pronounced.
These are the main points I’ve gathered.
Among the SSL clone compressor plugins I’m familiar with, I’ve never encountered one with this specific frequency response. It has a unique character.
In particular, I find it effective with BFD drums, where overheads or hi-hats often have excessive high frequencies. Using this compressor effectively tames those troublesome areas. It would also work well on a master bus for retro-style tracks, preserving that vintage feel.
- Conclusion

Using hardware can be cumbersome. You need to prepare recall sheets for future mix adjustments, carefully manage equipment routing, and more. Despite these hassles, hardware is employed to capture its unique color and character.
This compressor, with its distinct features, has become a regular part of my setup. I’m using it frequently.
However, I don’t want to suggest that hardware is inherently superior. Both plugins and hardware are merely tools. As long as they suit your purpose and deliver the desired tone, it doesn’t matter whether it’s a plugin or hardware.
In that sense, I’m very keen on getting a tube preamp. I’ve been eyeing Oz Design, but it’s a little-known brand, so reselling might be challenging.
That’s all for today. See you in the next post!
I’m always open to reviewing hardware products! If you’d like me to review a product, please feel free to reach out at joe1346@naver.com.