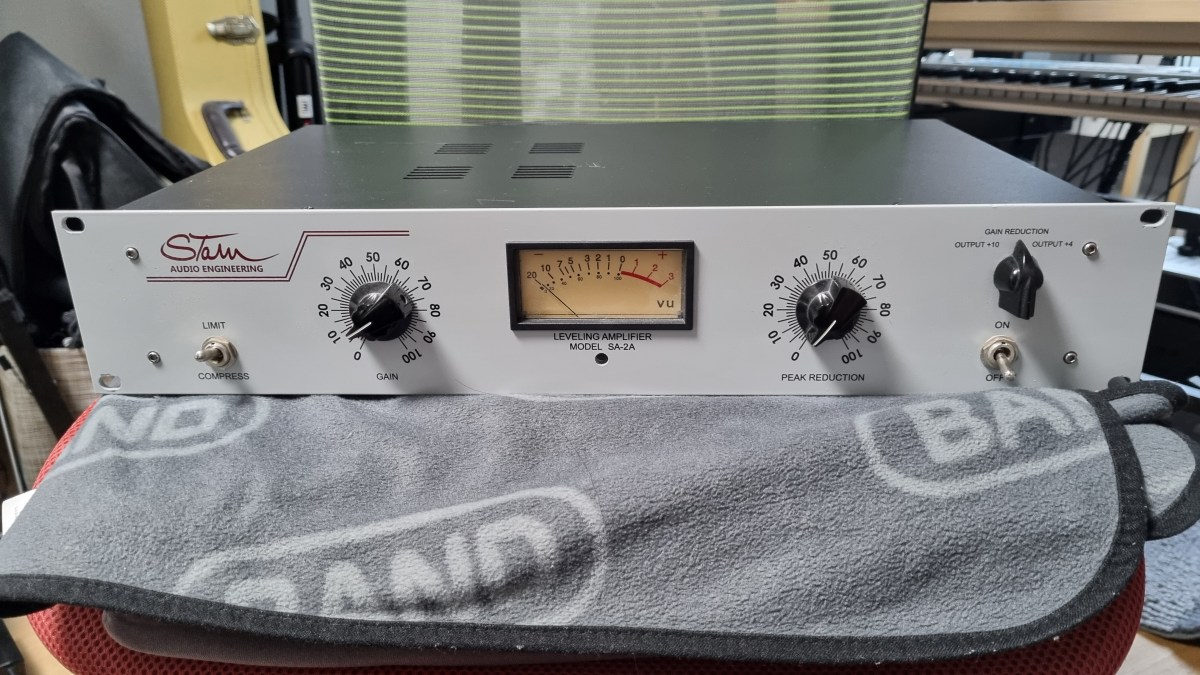
Hello, I’m Jooyoung Kim, a mixing engineer and music producer.
Today, I’m excited to share my review of the SA-2A, something I’ve been eagerly anticipating! Let’s dive right in.
The Struggle with the Gear
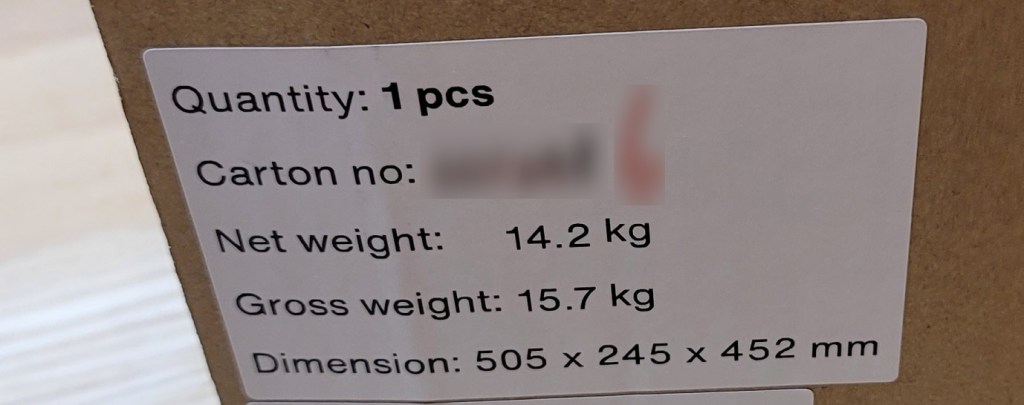
If you’ve been following my blog, you might know that this unit had quite a journey before it landed in my studio. Initially, I bought a faulty one with the idea of enhancing my understanding of circuits and practicing some soldering by fixing it myself.
I thought it might just be a simple fuse issue… But after blowing through about five fuses, I took a closer look at the circuit board.
Despite my inspection, I couldn’t find any blown capacitors or burnt resistors. So, I decided to take it to a repair shop after seeking advice.

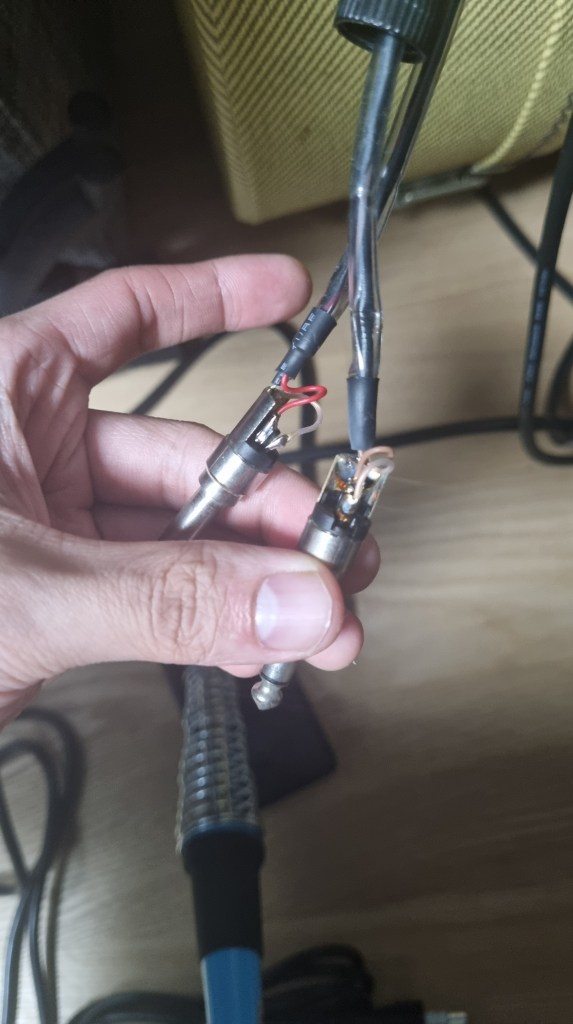
The culprit turned out to be a burnt toroidal transformer, damaged by overcurrent.
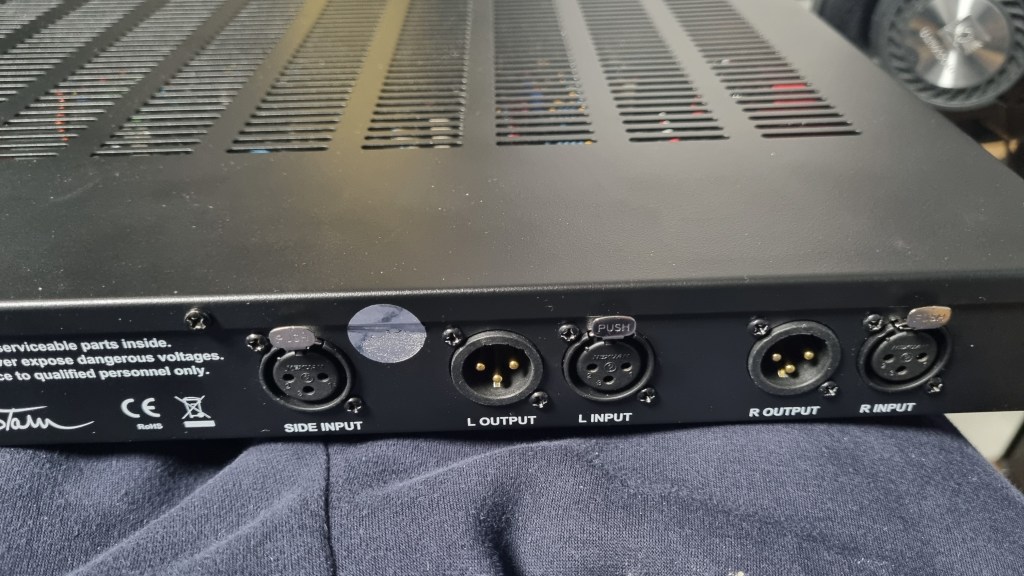
The challenge was that this early version of the SA-2A used a Cinemag transformer, and Stam Audio wasn’t sure if they had any spares left.
After two weeks of waiting for a response with no luck, I asked them to send me the specifications so I could have a custom transformer made.
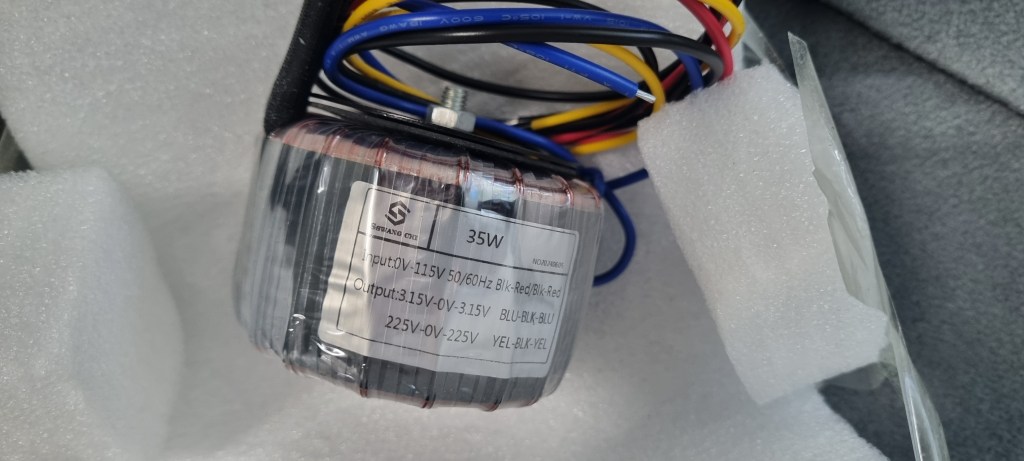
After installing the custom transformer, the unit finally came to life!
I purchased the broken unit in January, and the repair was completed by early July, marking a nearly six-month battle.
Of course, I was a bit busy, which contributed to the delay, but it was quite the saga nonetheless!
Measurements
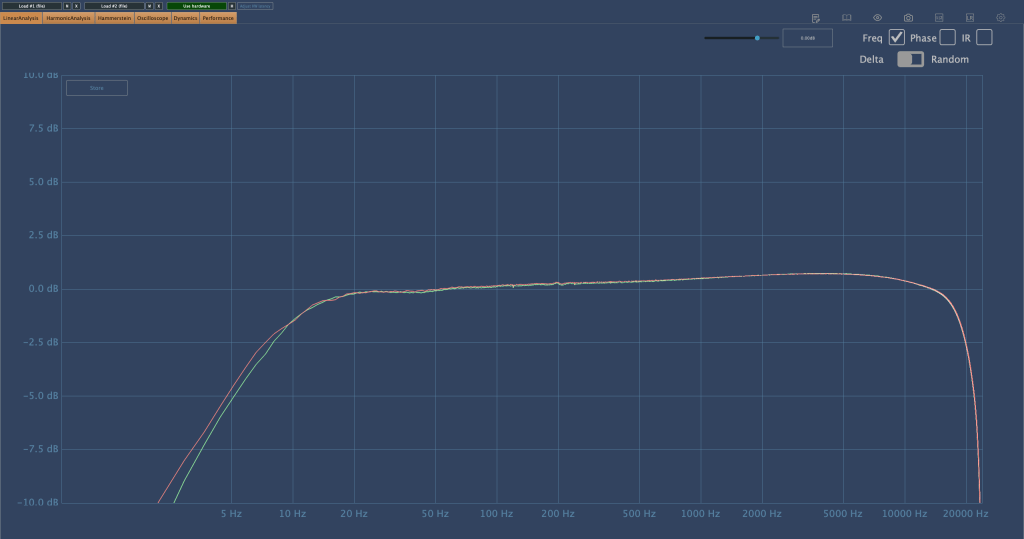
As regular readers of my blog know, I like to run measurements on gear, whether it’s hardware or plugins. While measurements don’t tell the whole story, they do help in explaining things more clearly.
I find it especially useful to compare my impressions from using the gear with the measured data, which can sometimes reveal if my ears are having an off day.
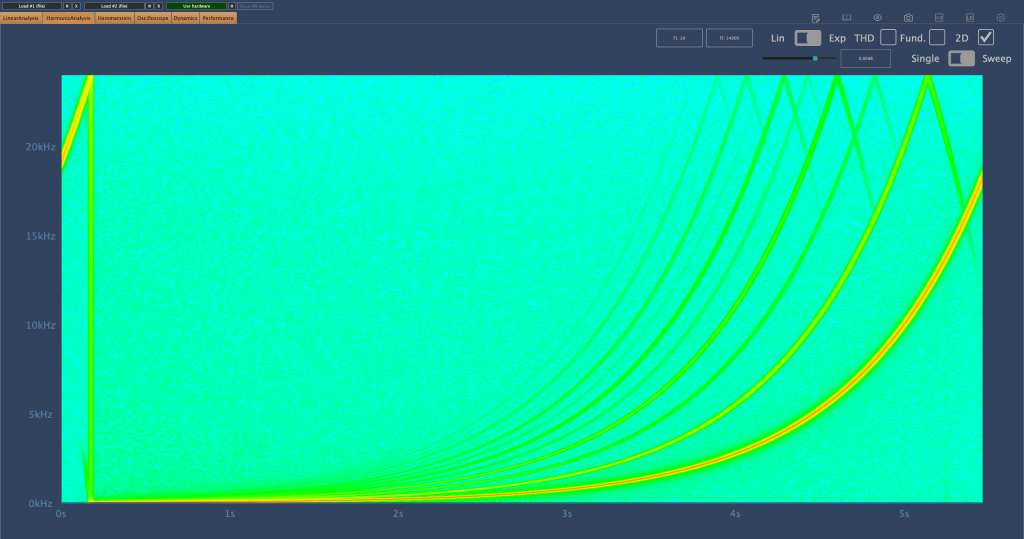
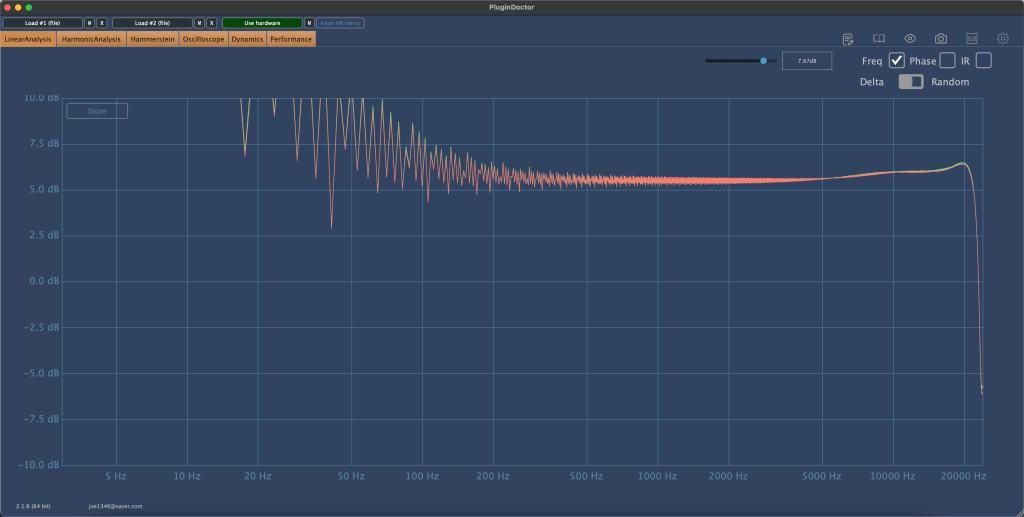
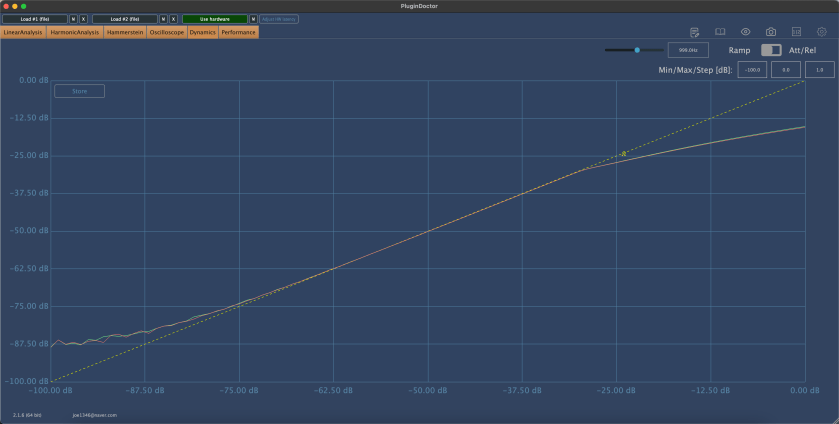
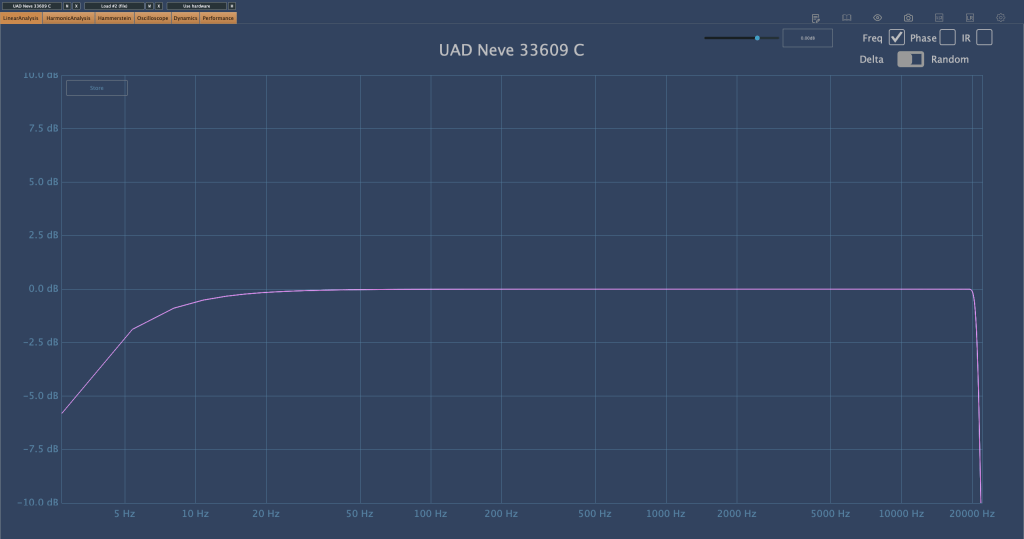
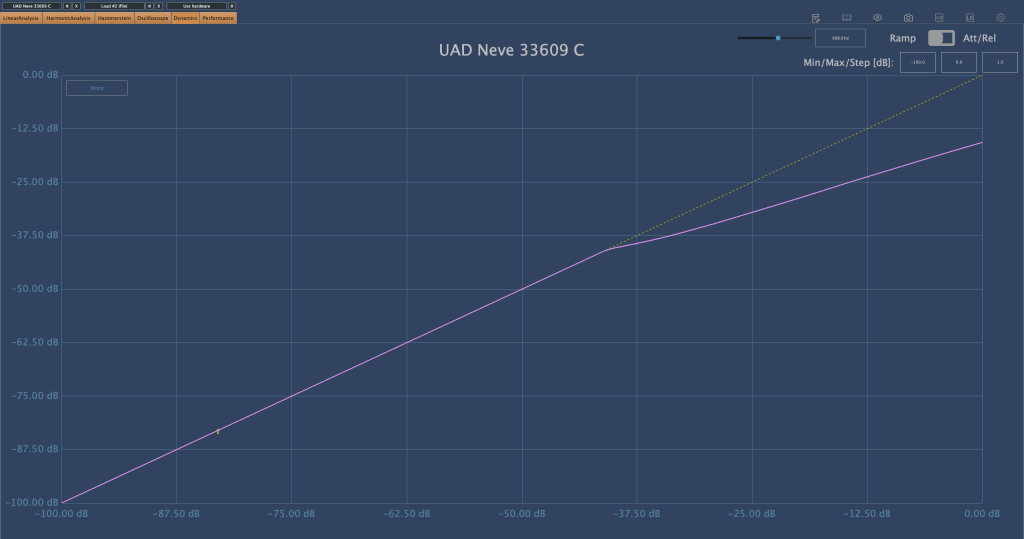
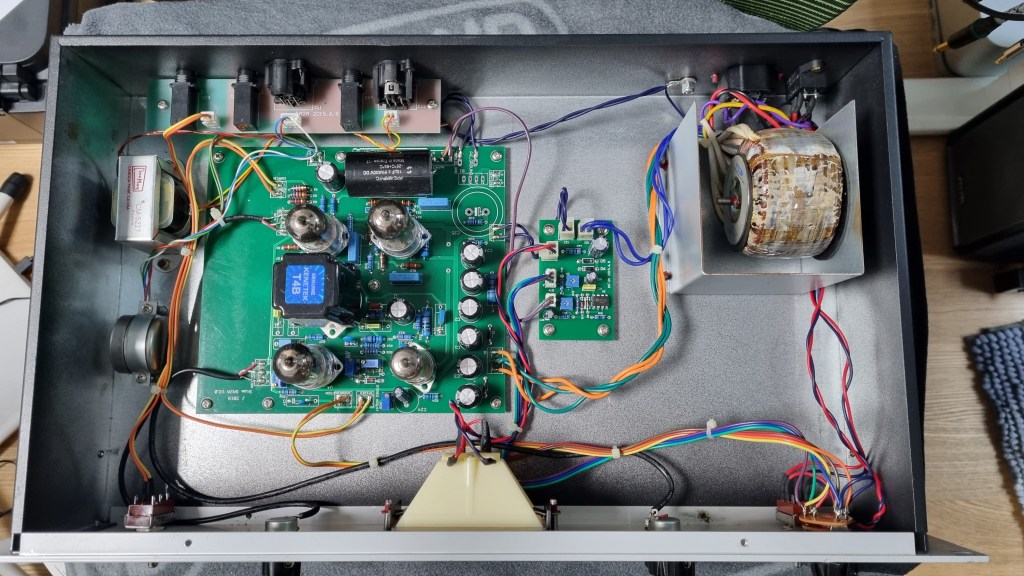
The frequency response graph above shows the response with no compression applied. (Keep in mind the peaks and valleys you see are typical of analog gear.) You can see a noticeable roll-off in the high frequencies.
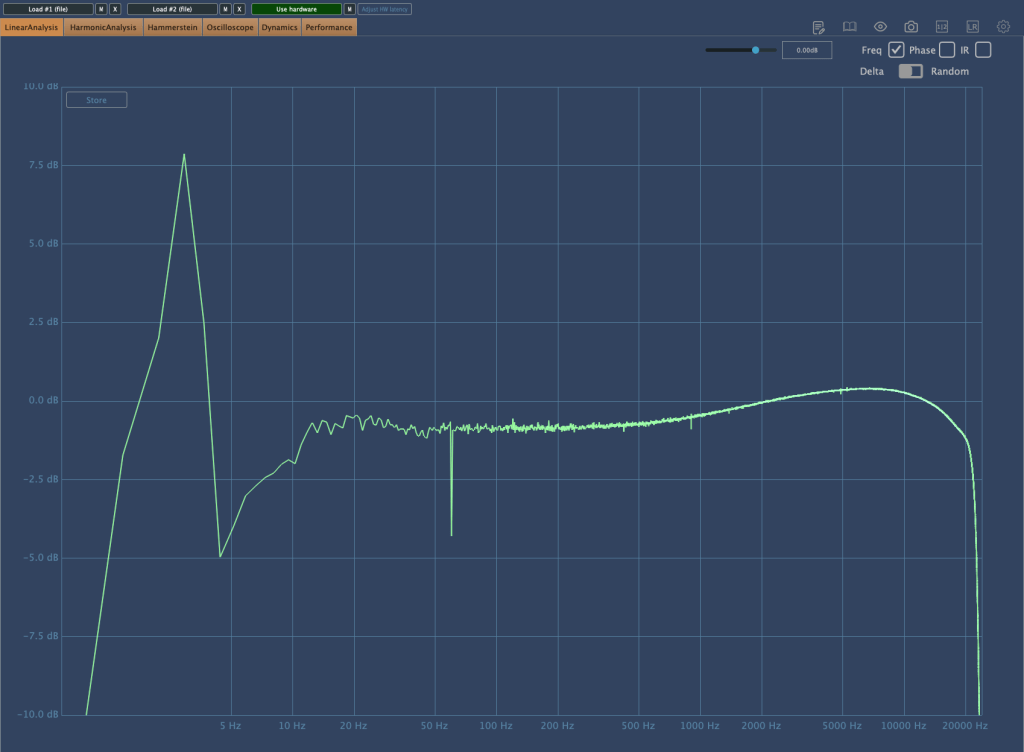

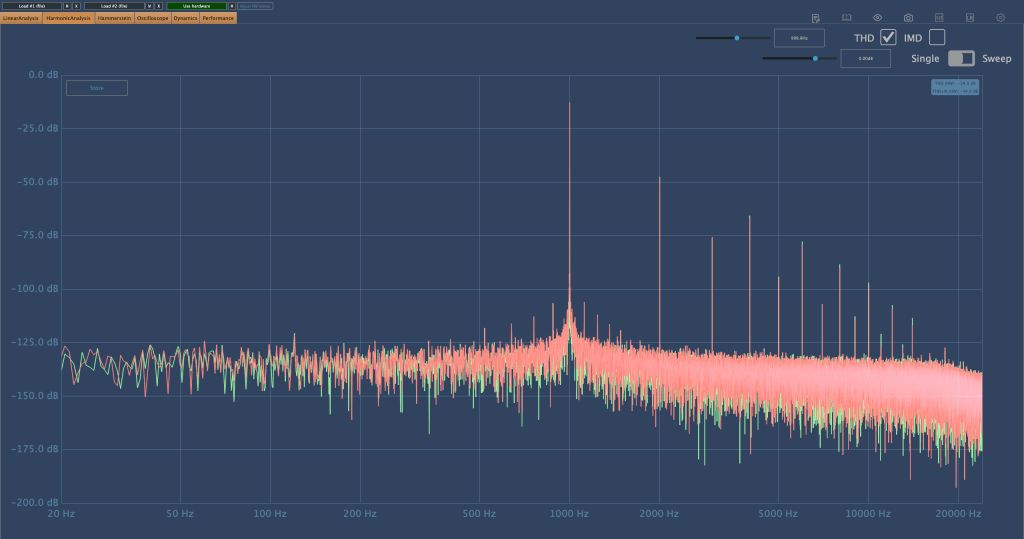
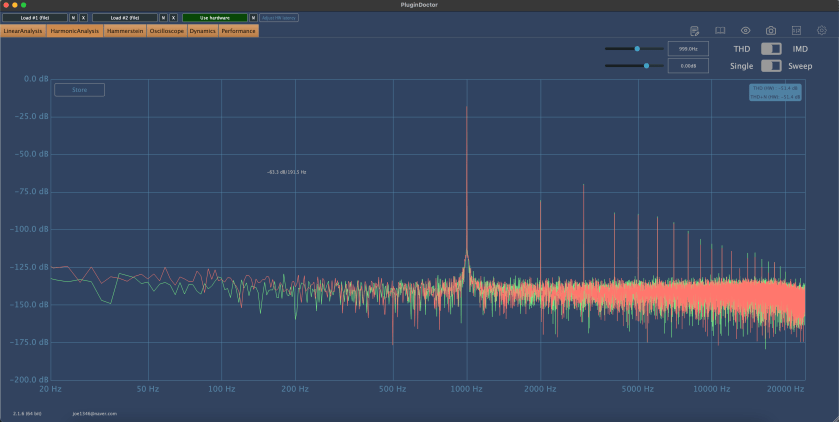
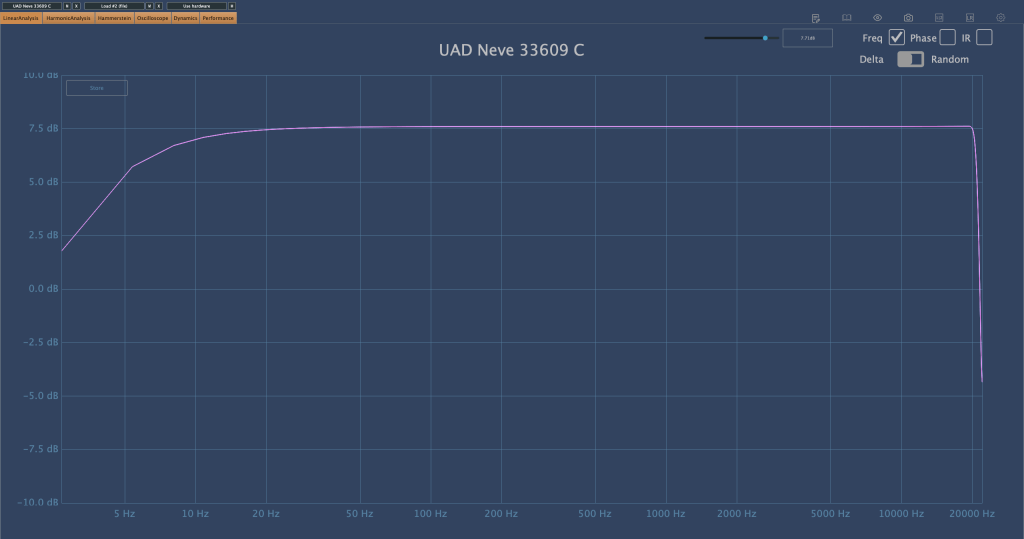
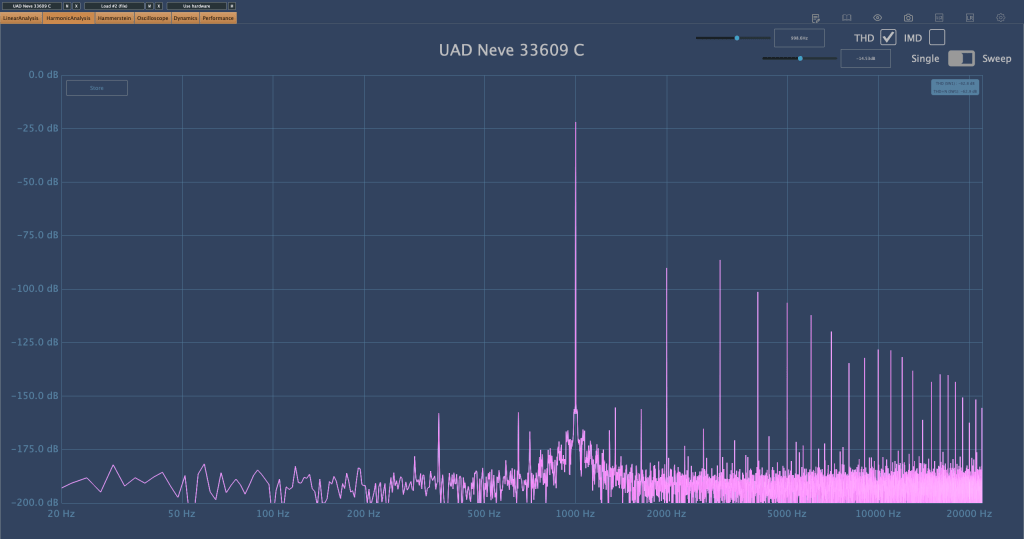
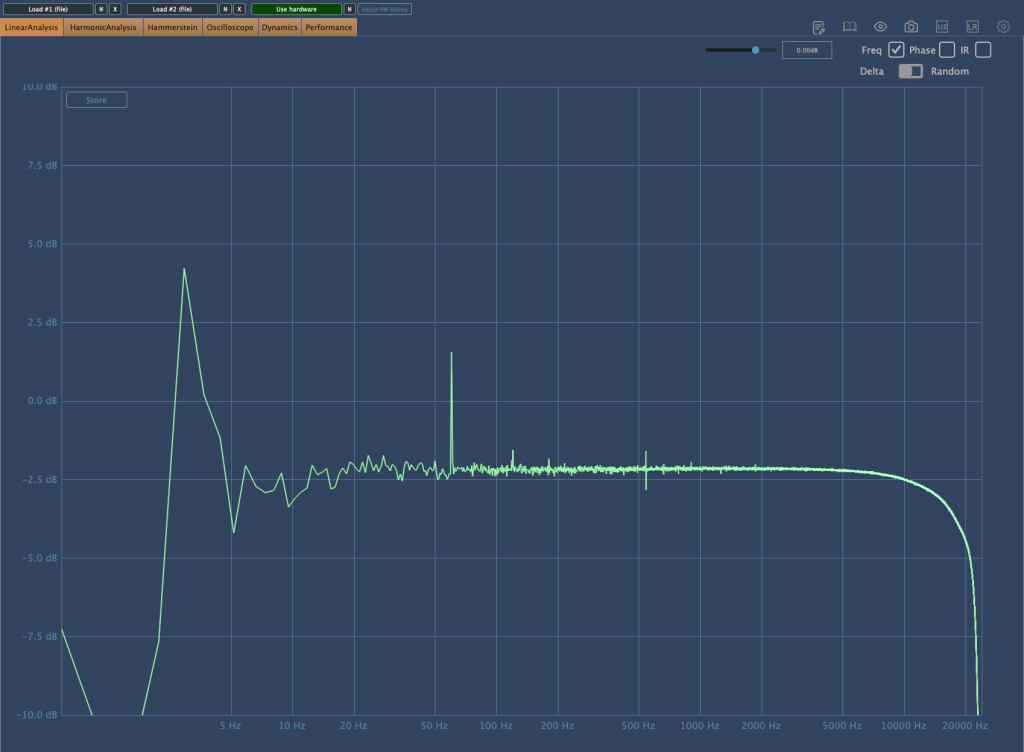
Here’s the frequency response graph with compression applied and gain compensated. There’s a rise in the high frequencies, and the right-hand graph shows noticeable distortion.

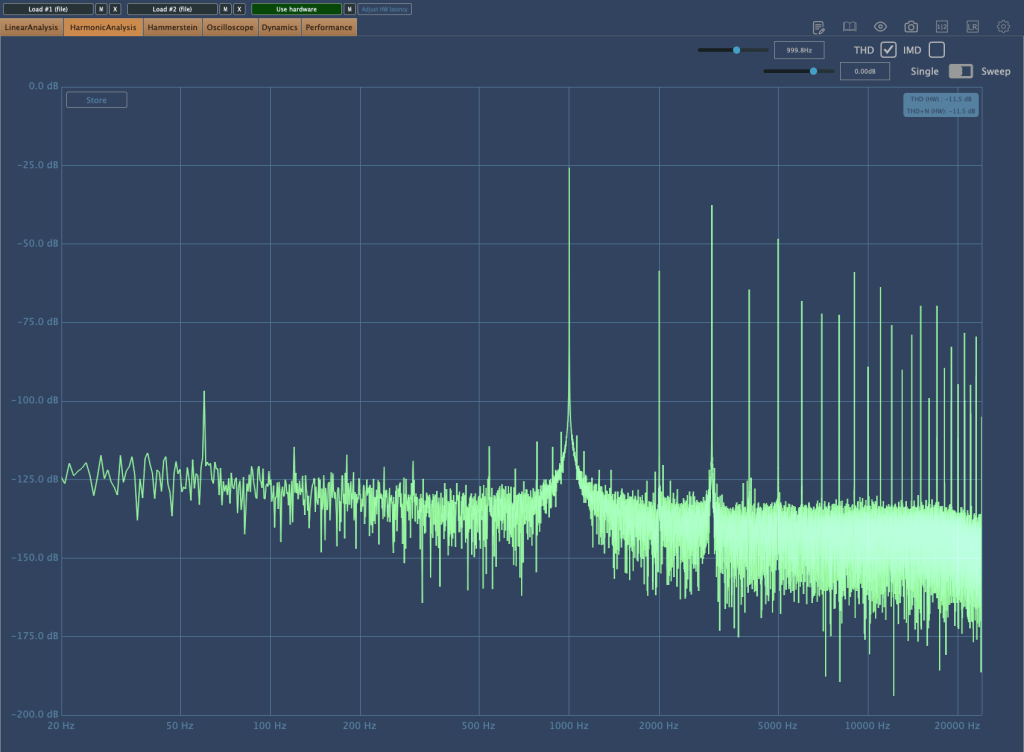
As the Peak Reduction increases, harmonic distortion also changes. It seems much more dynamic than using a plugin.
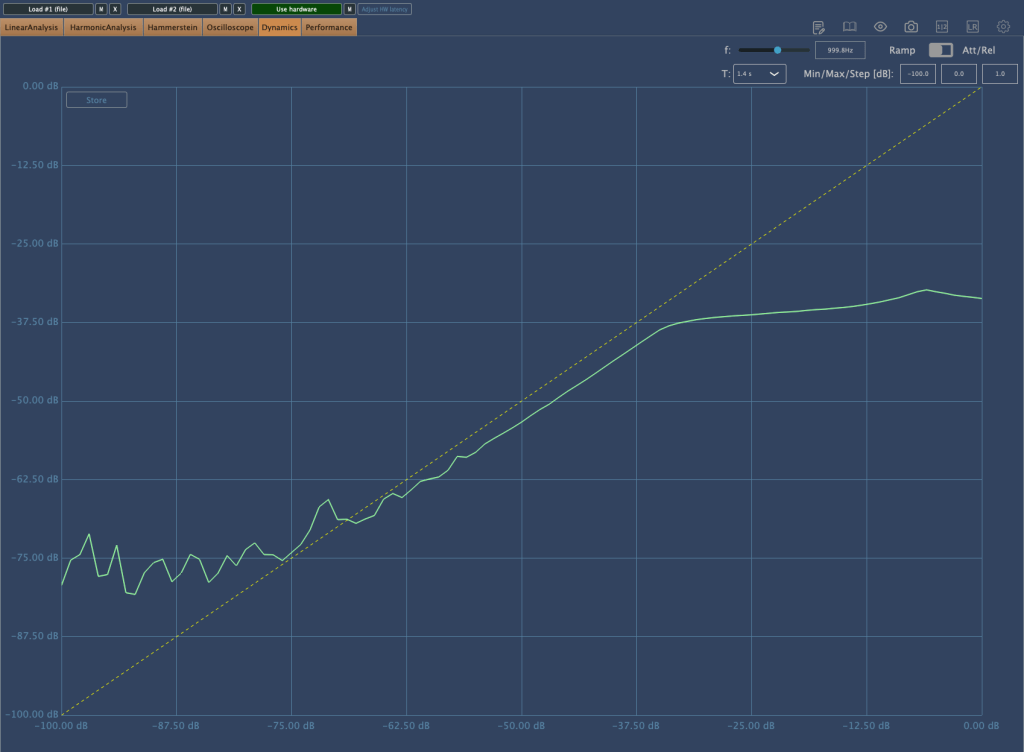


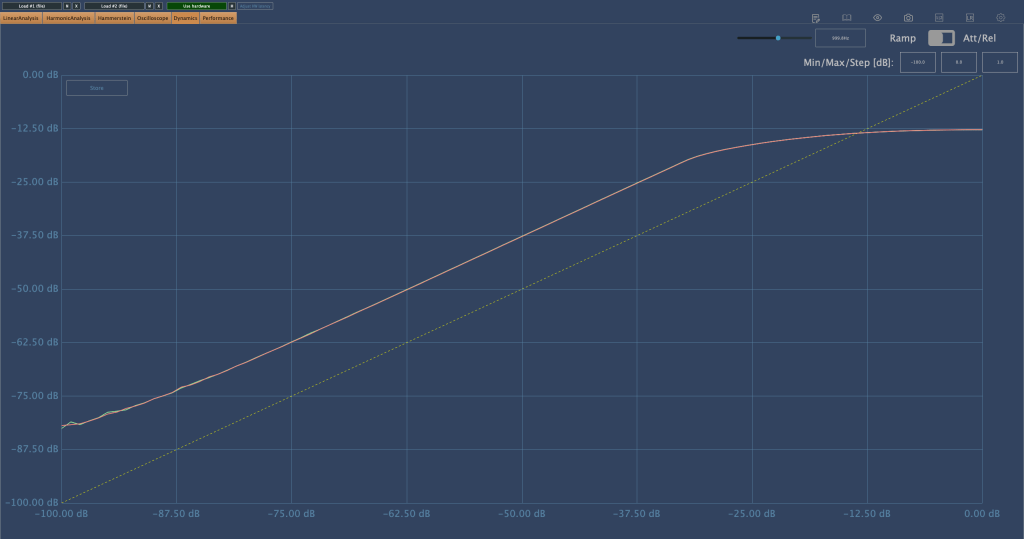
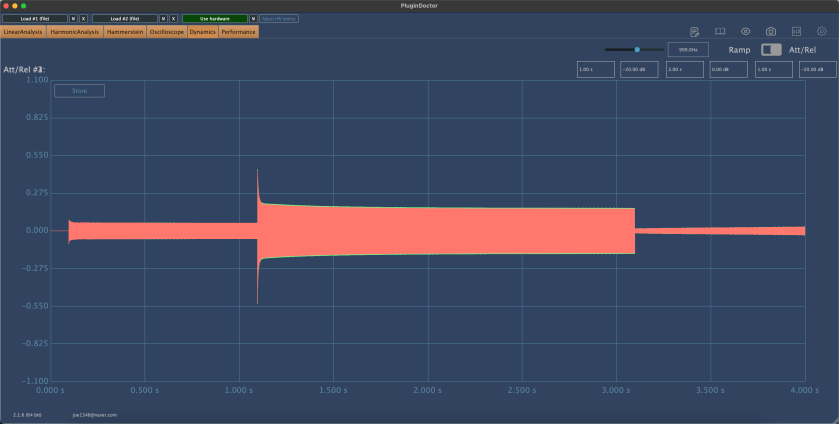
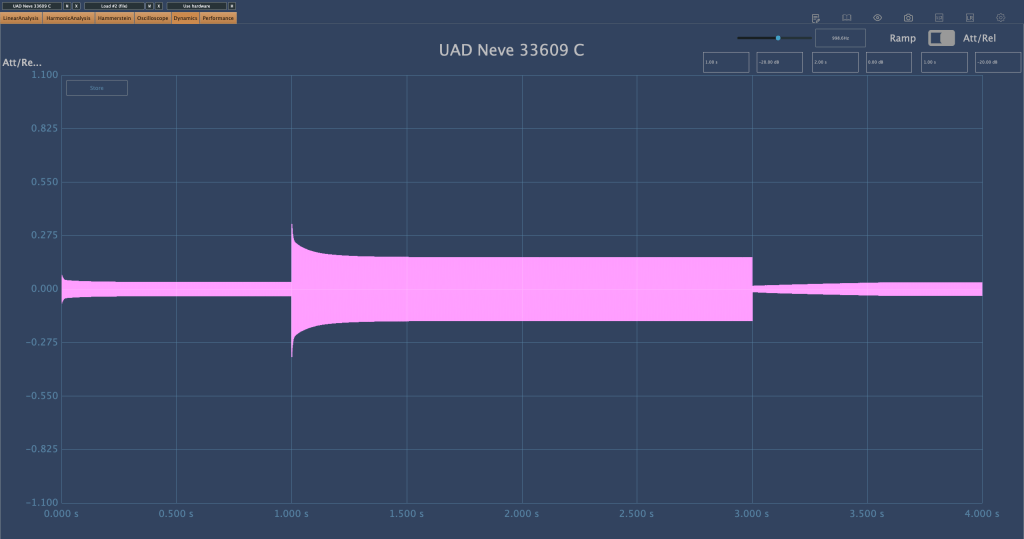
This is the compression curve graph. Strangely, the left side shows the settings for “Comp,” and the right side shows the settings for “Limit.” They seem switched, don’t they? Perhaps it’s just a labeling issue.
Even when using the device, it felt like the settings were somewhat reversed.
Practical Use
I tested the SA-2A on vocals and lead acoustic guitar in a project I’m currently mixing, as well as on some demo vocals for a production I’m working on. Additionally, I conducted a few simple tests.
My observations are as follows:
- It’s a saturation machine that adds a hefty amount of color.
- It can sound a bit rough, so careful EQing or the use of de-essers/multiband compressors may be necessary to tame it.
- As you increase the Peak Reduction, the high frequencies rise, so setting the Input Gain properly beforehand is crucial.
- It’s challenging to use on sources that are already colored.
- The lack of an Emphasis knob is a drawback.
I wouldn’t say I’m in love with it, but it certainly has its uses.
Since 2017, there’s been an option to use Sowter transformers, and it seems they’ve started custom ordering these transformers from the two companies they work with.
While the raw sound isn’t spectacular, it integrates nicely into a mix. I plan to experiment more with transformer and tube swapping in the coming months.
I hope you enjoyed reading this review. See you in the next post!
I’m always open to reviewing hardware products! If you’d like me to review a product, please feel free to reach out at joe1346@naver.com.