Hello! This is Jooyoung Kim, an audio engineer and music producer.
As I told you in the last post, I’ll resume the audio/virtual instruments plugin review. Today, as part of this series, I’d like to talk about the Evertone Project’s plugins.
On the internet, I found that the Evertone Project team is a combination of guitar artisans, studio owners, and audio programmers. In early 2026, they released a few plugins, which are included the Evertone Project Bundle. It contains Expander v2, Compressor v2, Metro v2, MORG Vintage 81, MORG-81 EQP3, and MORG AMP 5A.
While testing these plugins, I was truly impressed by how much effort was put into the MORG series to capture the original hardware’s frequency response. Additionally, the compressor and expander clearly showed a deep consideration for a beat and timing.
By the way, the plugins shown in this post were provided by Plugin Boutique in NFR (Not For Resale) form. Also, if you purchase the plugins through the links in this post, I will receive a small commission that helps me keep this blog going.
Let’s start!
Evertone Compressor / Expander
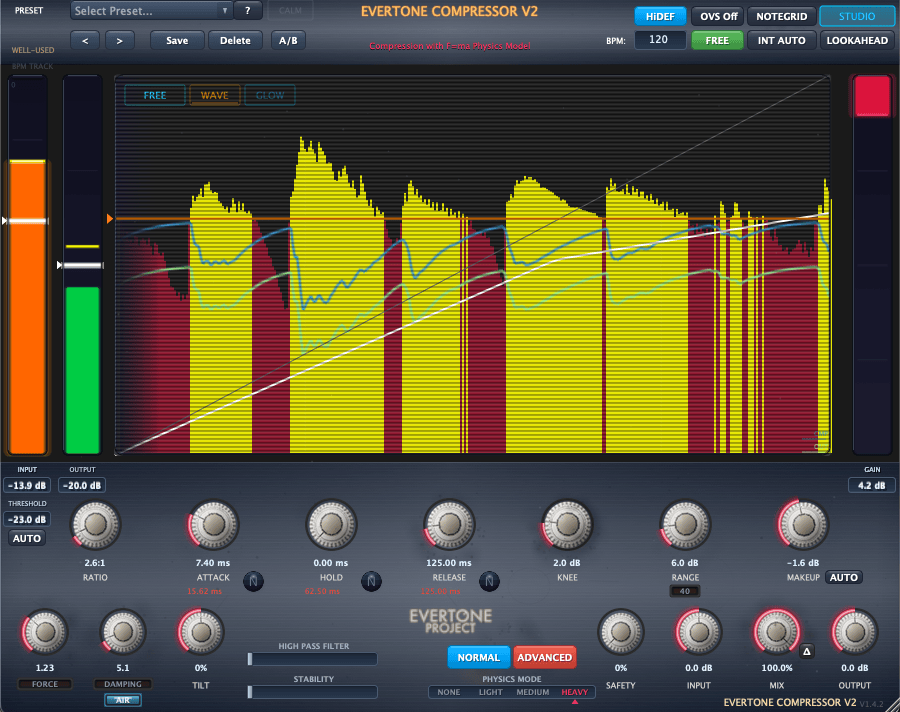
The Evertone Compressor is an exceptionally transparent tool. While real hardware compressors typically feature non-linear compression action that generates harmonic distortion, each mode (it has four different modes) in this plugin delivers remarkably clean dynamic behavior.
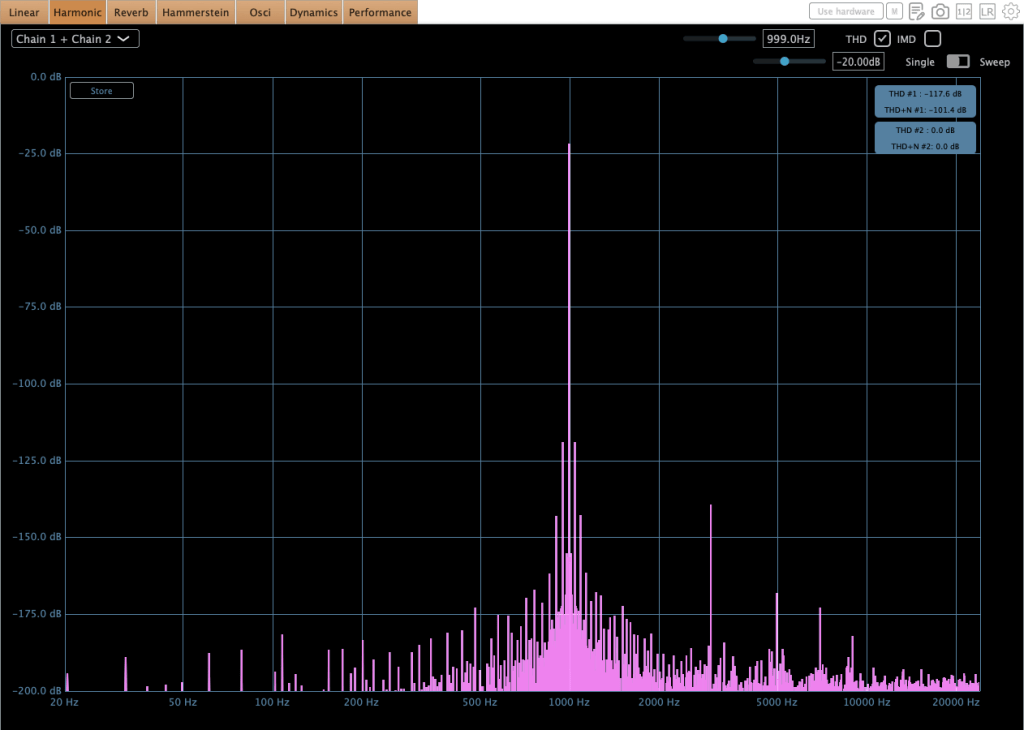
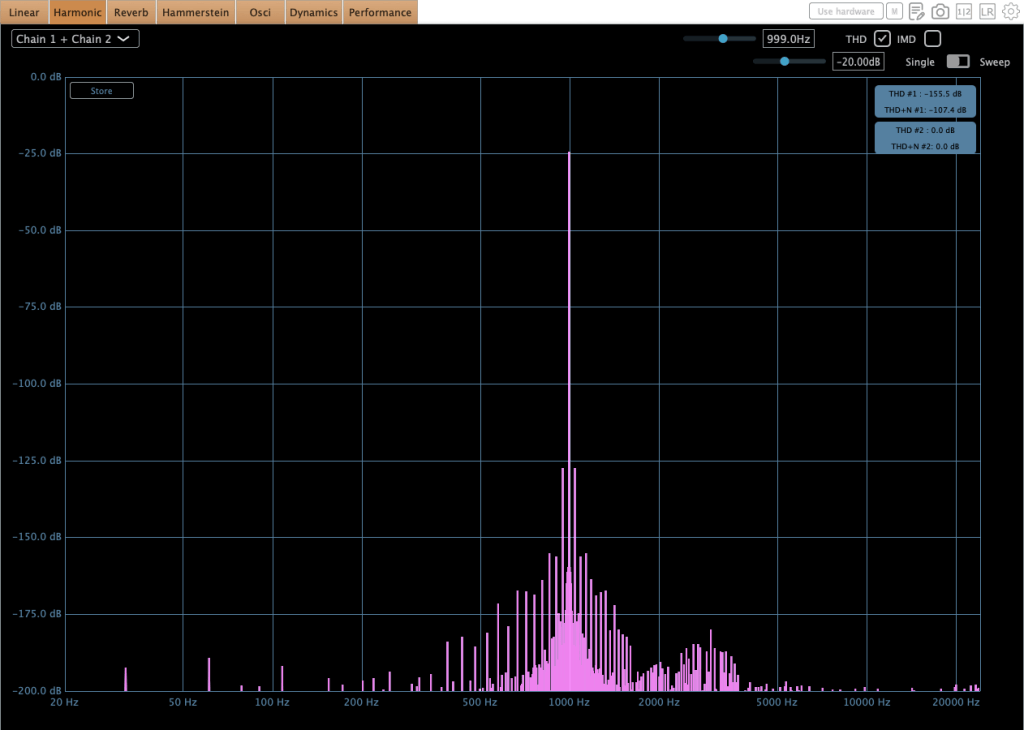
The knobs are quite small, but thanks to its Live Mode, they can be adjusted intuitively.
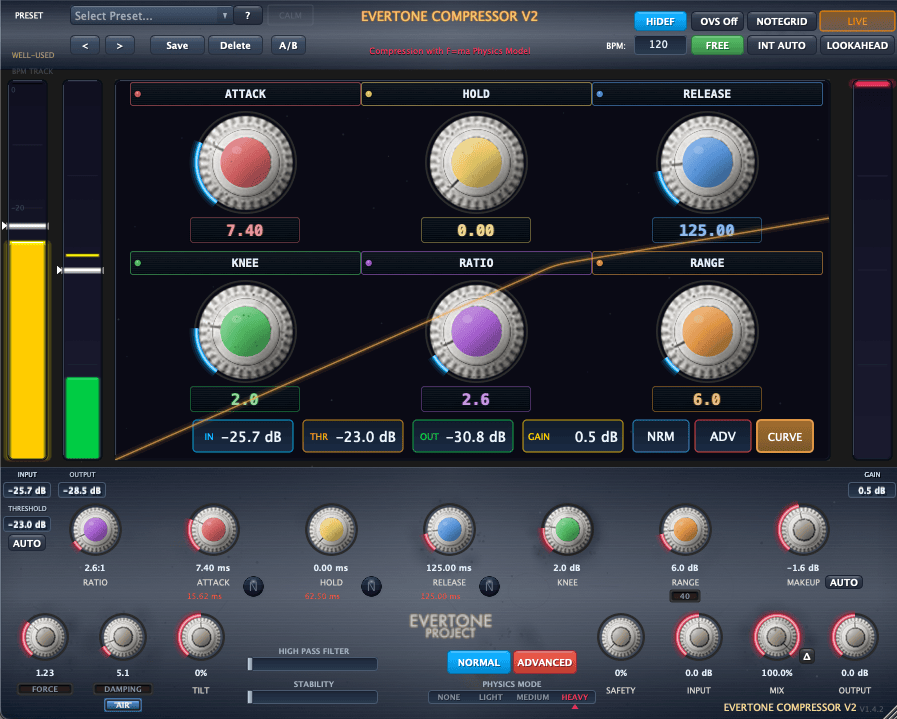
During my testing, it became clear that this plugin aims for extreme transparency. By offering tempo-synced attack and release parameters, it allows you to control dynamics without adding coloration or breaking the groove. Given the omission of a sidechain input and the inclusion of oversampling, I believe it was designed primarily for final mix bus polishing or grouping stems together.
I feel it would work exceptionally well for classical music, as well as for jazz tracks with a steady, locked-in tempo rather than rubato performances.
These strengths shine through not only in the compressor, but also in the expander.
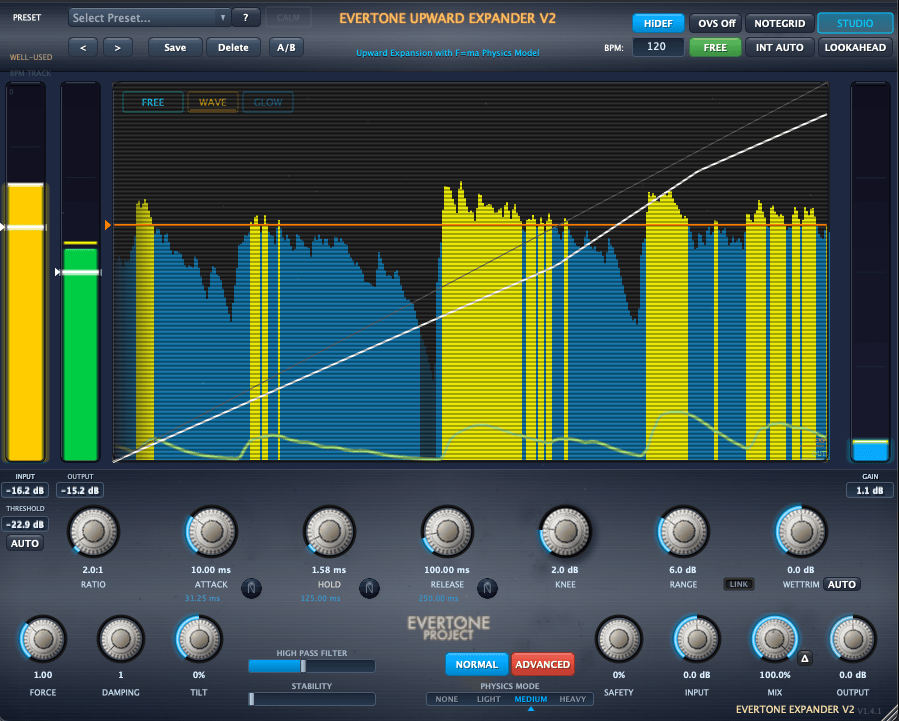
Generally speaking, an expander isn’t typically used on pristine sources. It’s usually reserved for tracks with background bleed or those that need lost dynamics restored.
If you need to recover dynamics on a stereo track that locks to a specific BPM, I would highly recommend this plugin. Its tempo-sync capability is particularly strong; while the processing might sound a bit unnatural when listened to in solo, it gets nicely masked in context because the dynamic changes fluctuate in rhythm with the BPM.
To be honest, the Plugin Boutique manager originally pitched the idea of framing this as a direct comparison between Sonnox and Evertone.
But during testing, it became clear that they serve fundamentally different purposes. In fact, combining them yields far better results than pitting them against each other: Sonnox handles the tonal character and loudness enhancement, while Evertone delivers transparent bus control and tempo-synced dynamic restoration.
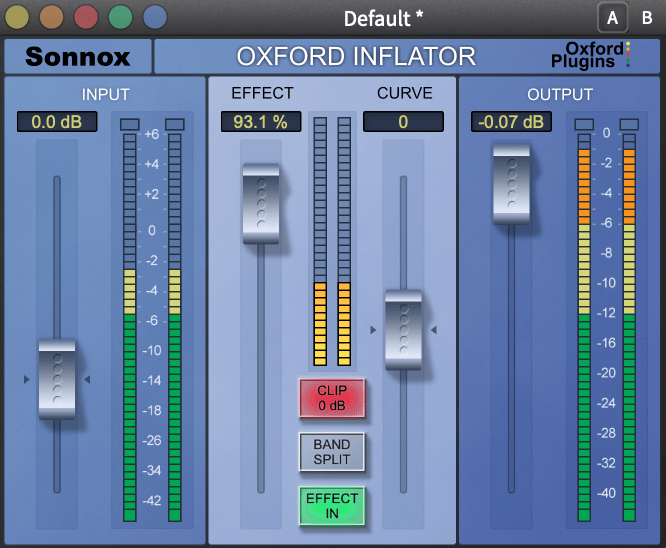
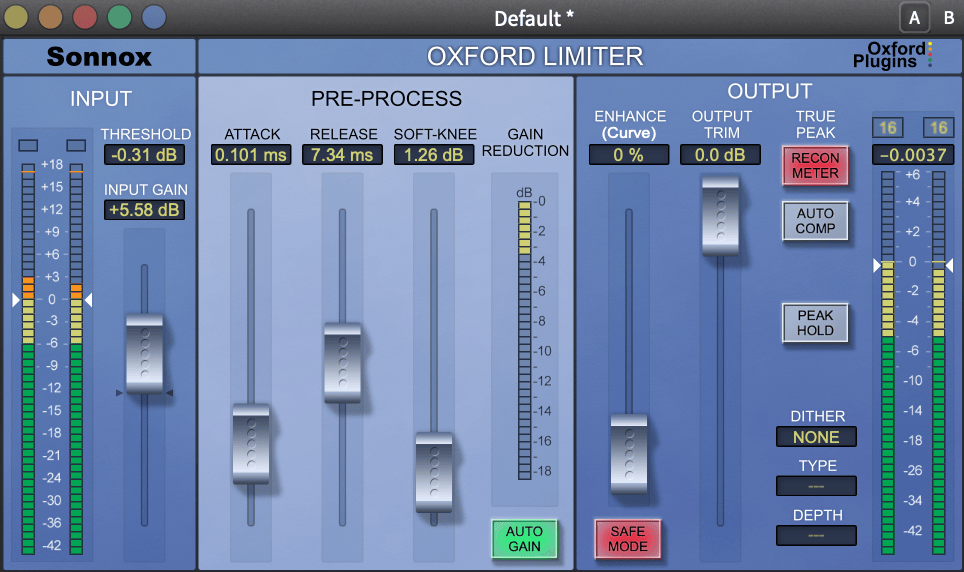
Sonnox’s Inflator and Limiter remain undeniable classics from the era of the Waves L2. That said, when compared to modern processing standards, driving them heavily for raw sound pressure can lead to subtle digital break-up.
To avoid this, setting up a transparent comp upstream to tame dynamic peaks is standard industry practice. This is precisely where the Evertone Compressor shines. It delivers a level of transparency that surpasses native DAW compressors, and yields an even cleaner drop-off than FabFilter Pro-C2 in Clean mode.
Through continuous testing during this review, I’ve found that pairing Evertone’s transparent control with Sonnox’s character creates an incredibly refined signal chain—particularly tailored for acoustic, classical, and jazz genres.
Using them together like this works remarkably well. Compared to other compressors, Evertone introduces far less harmonic coloration—which is presumably why the signal holds up so well without breaking up when pushed into the next stage.
MORG AMP 5A
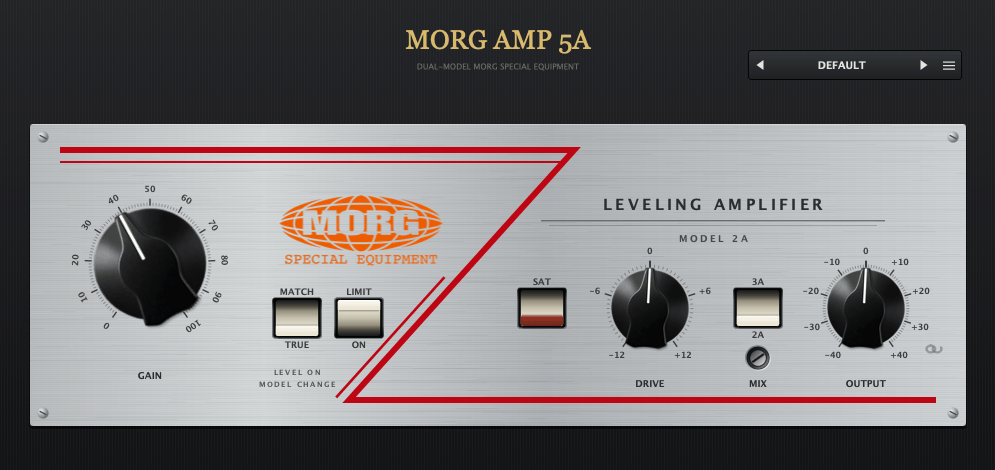
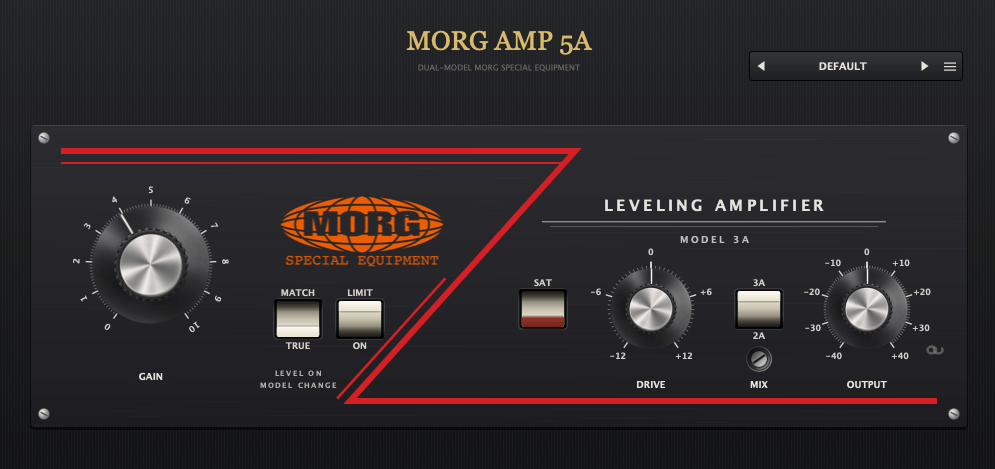
The naming is quite clever! LA-2A + LA-3A = LA-5A… 🙂 As the name suggests, it seems like an emulation of the Teletronix LA-2A and LA-3A. However, it doesn’t actually have a compression function.
At first glance, I was deeply impressed by this plugin. The sound is quite similar to my Stam Audio SA-2A hardware. It slightly emphasizes high frequencies and brings any audio source to the front of the mix. If it goes on sale, I highly recommend picking this up for LA-2A style saturation.
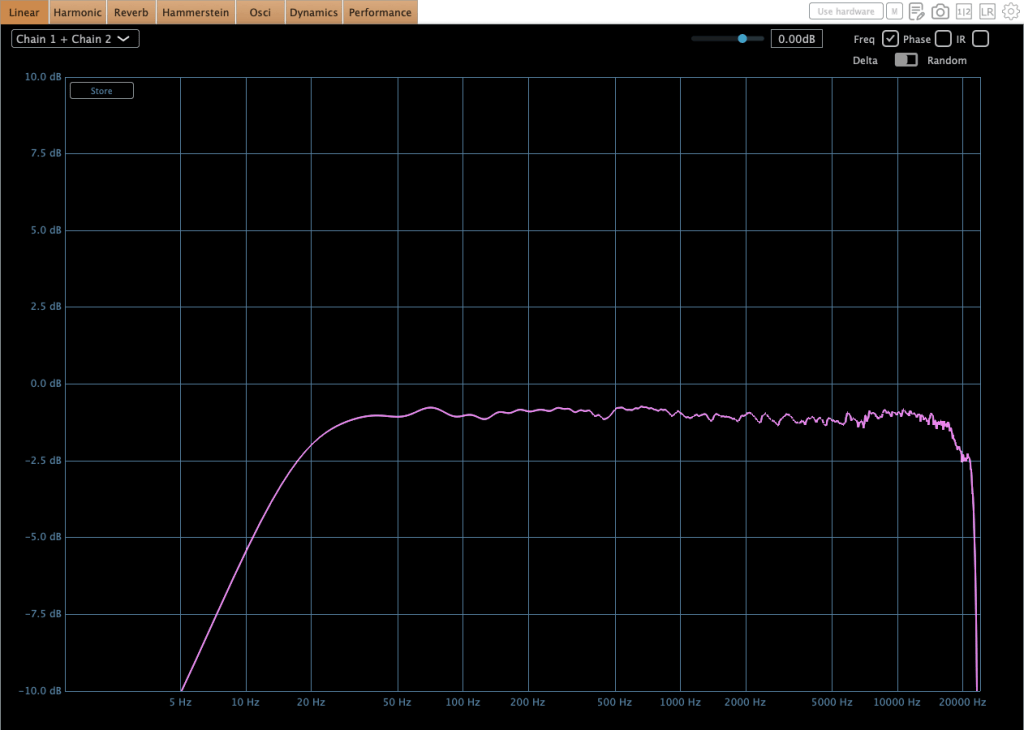
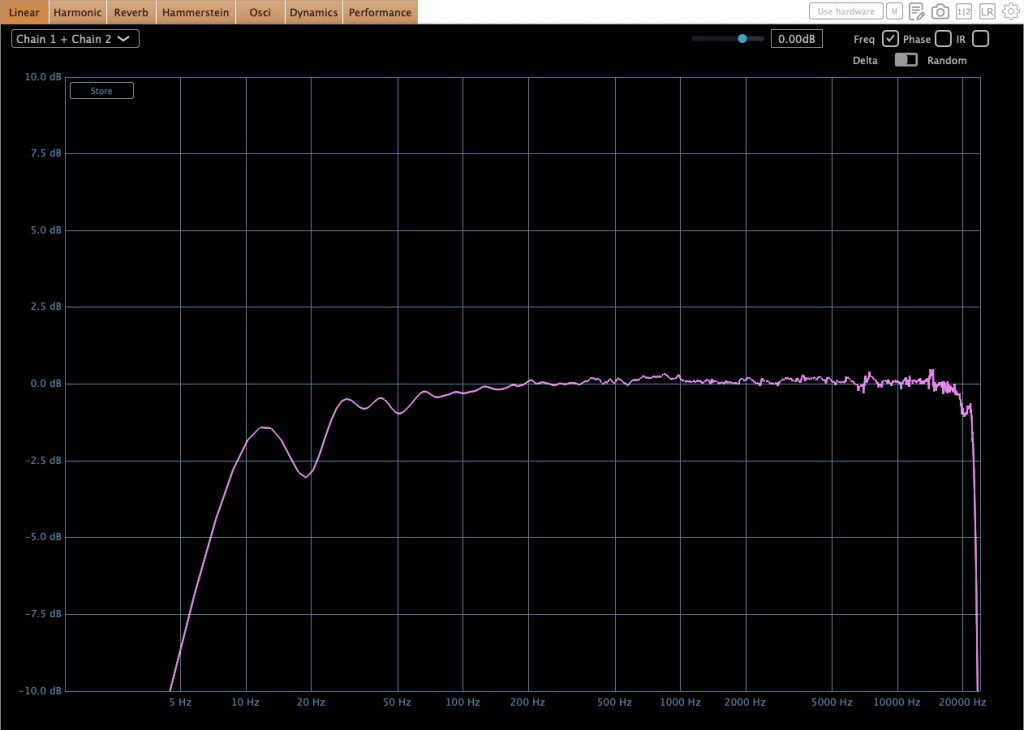
The frequency response changes dynamically depending on the input level. As you can see, it isn’t smooth and clean like what other companies’ plugins typically show—it has that raw, irregular curve just like real hardware.
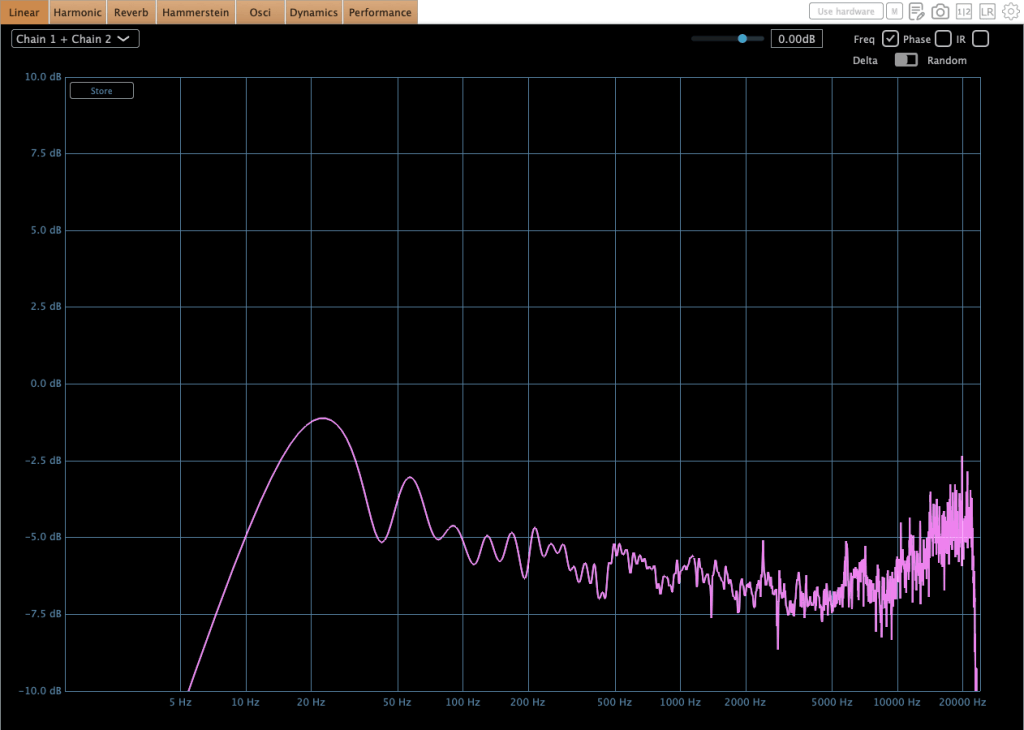
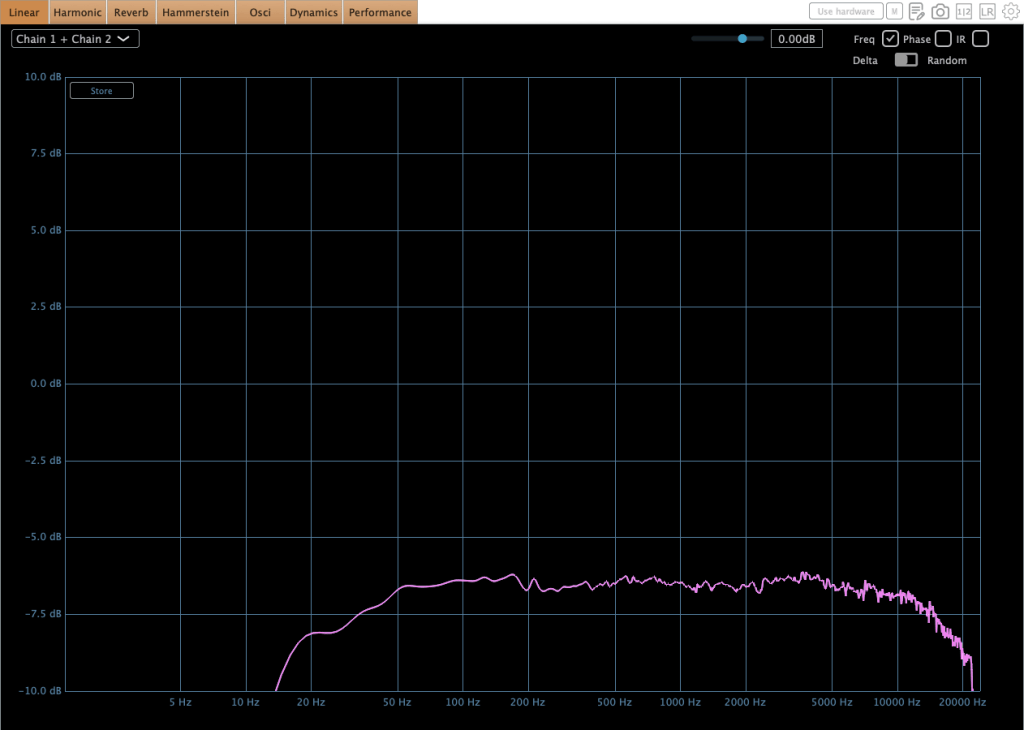
This is the 3A’s frequency response. Its output level is also different from that of the 2A.
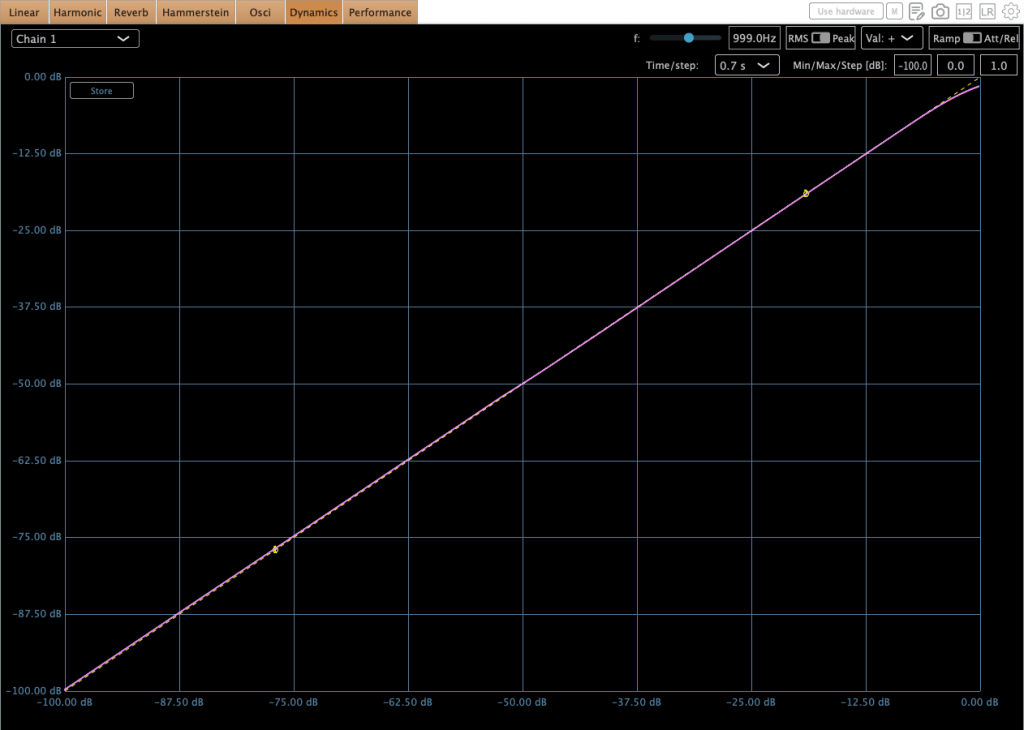
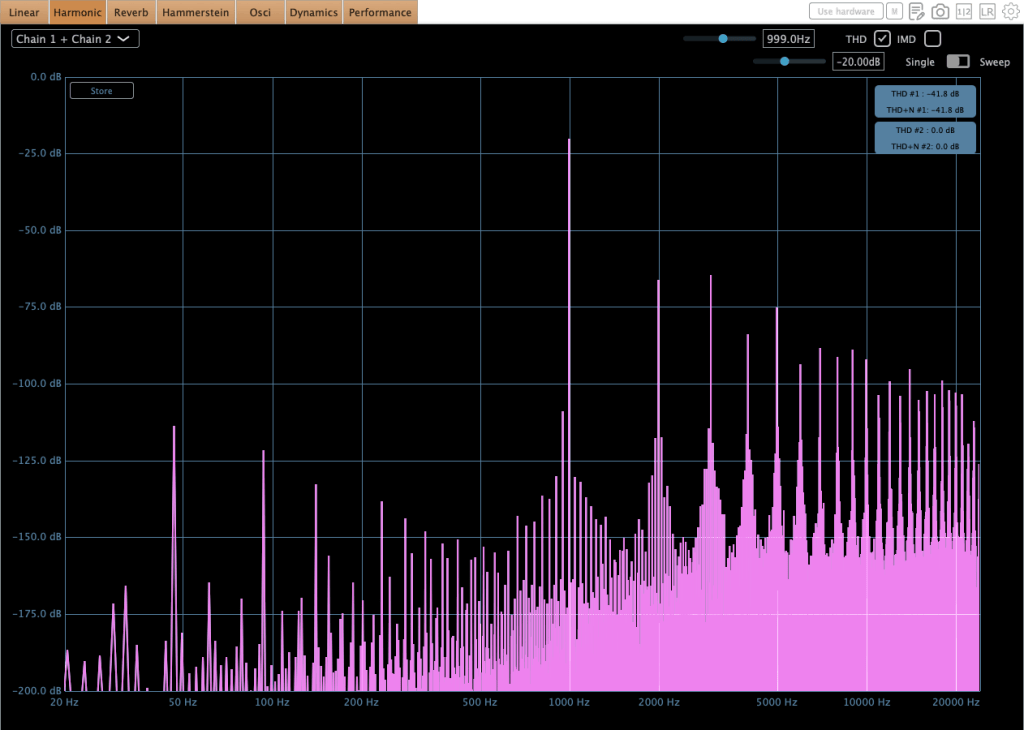
In 2A mode, there is a gentle compression (or possibly soft clipping) at high signal levels.
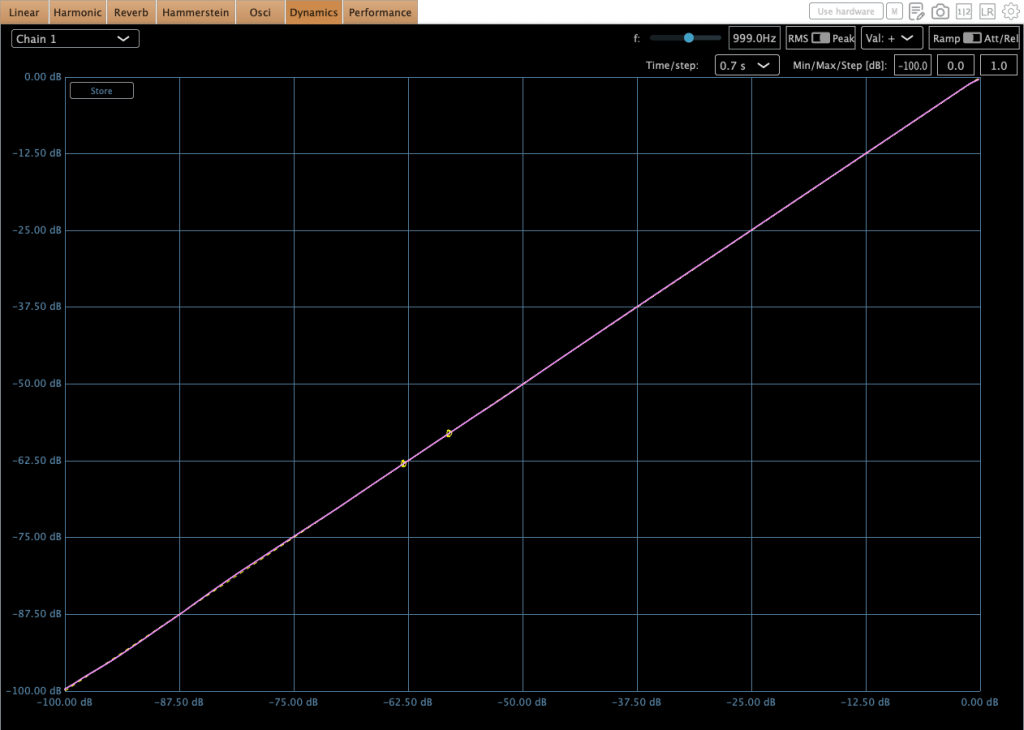
The 3A mode also shows a similar trend, but it is much more subtle.
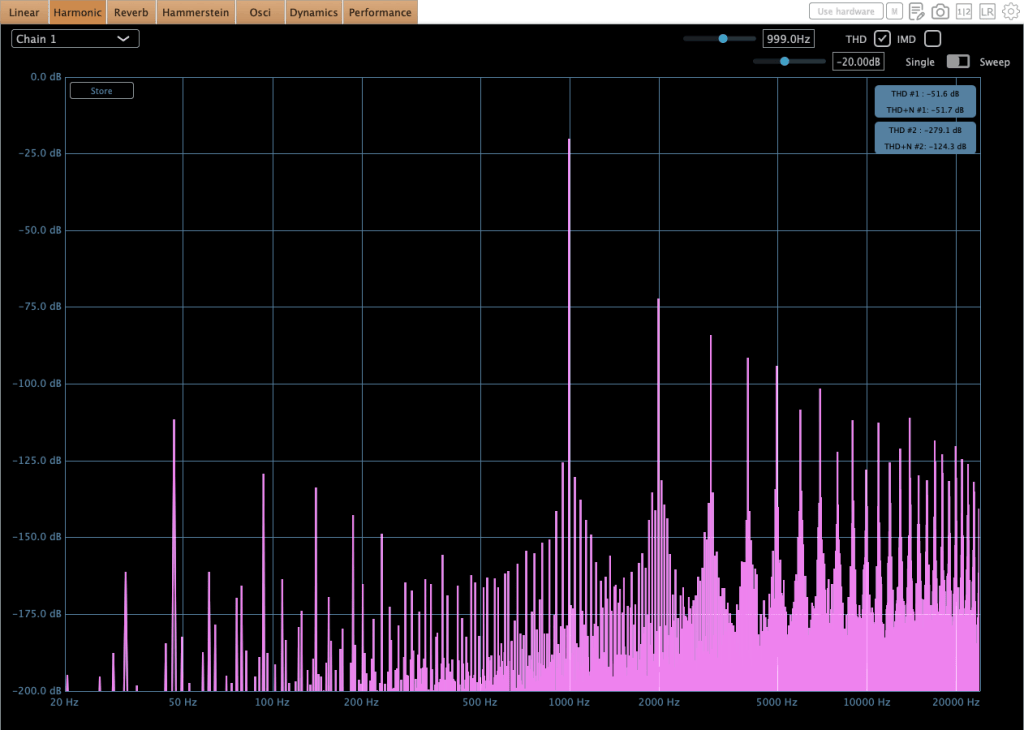
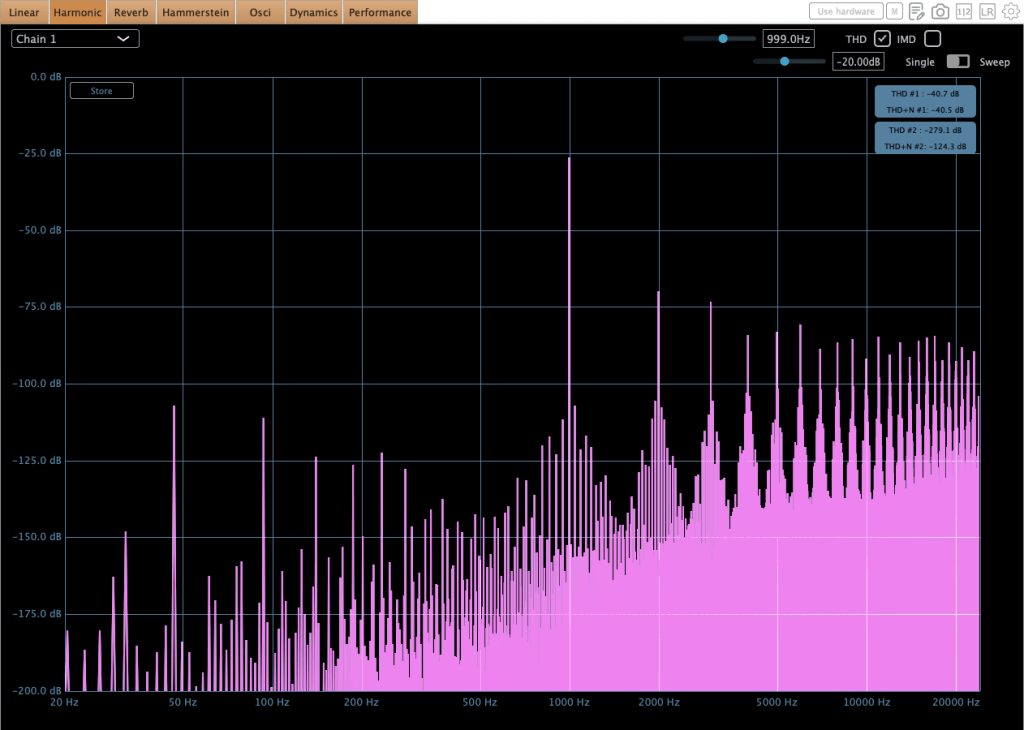
The 2A mode features gentle harmonic distortion. In contrast, the 3A mode has a more aggressive sound.
This plugin is not currently available on Plugin Boutique, but I will add the affiliate link once it goes live.
MORG Vintage 81
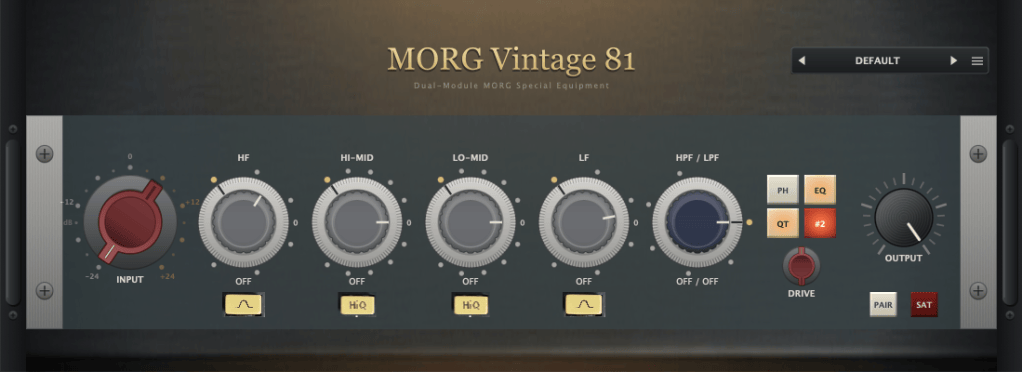
The MORG Vintage 81 is a digital clone of NEVE 1081 preamp.
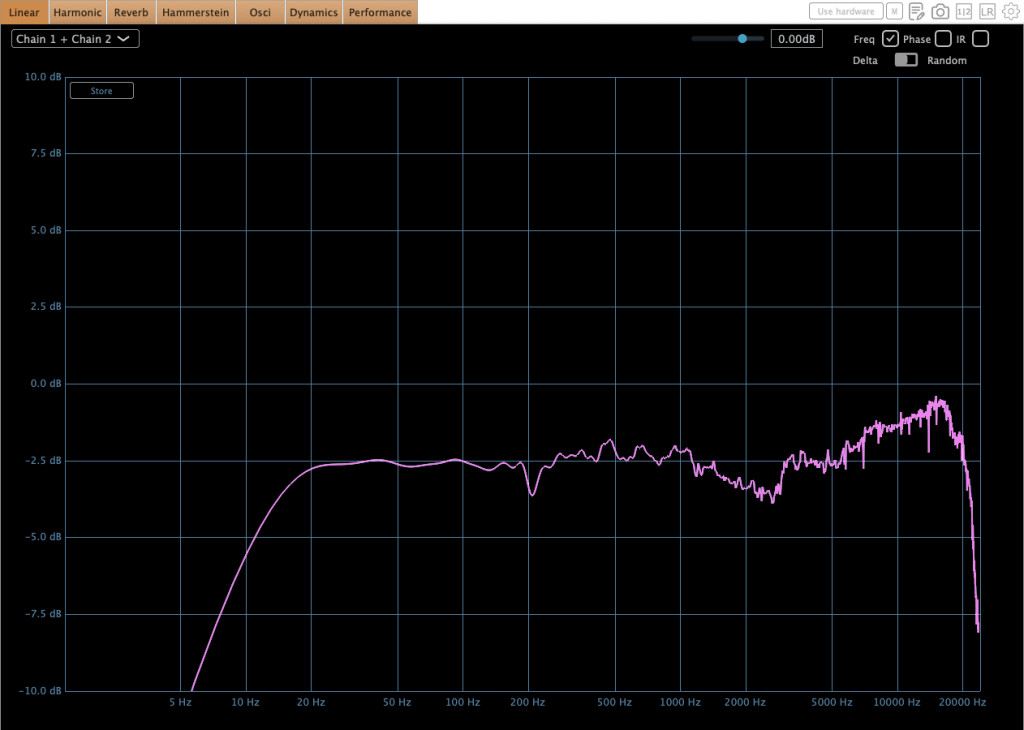
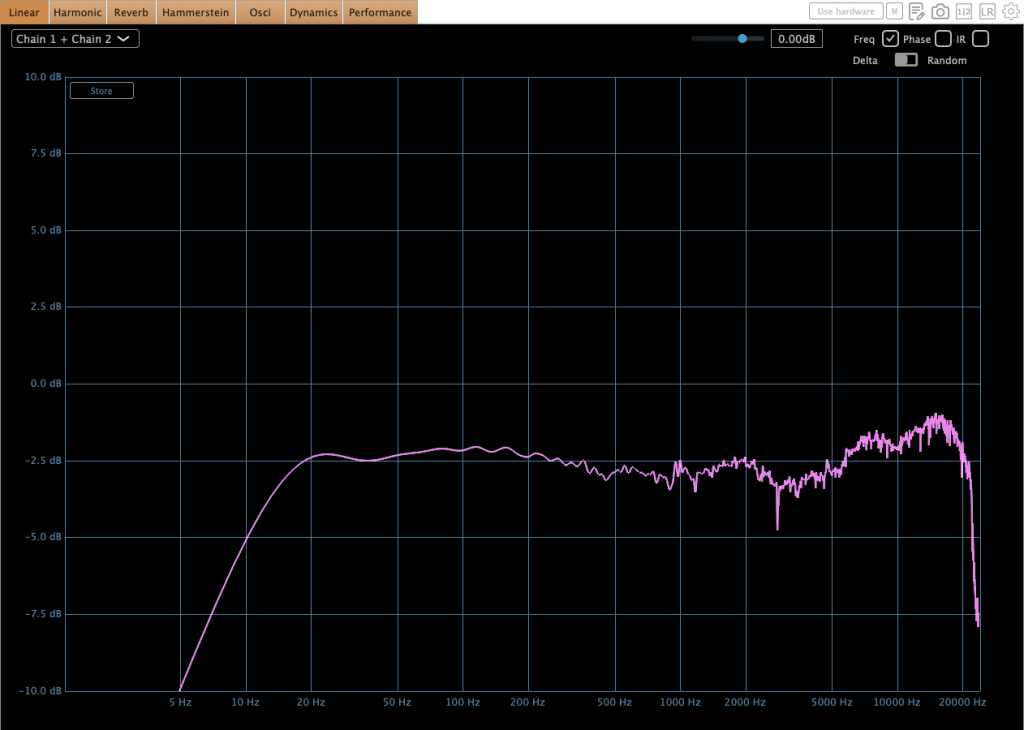
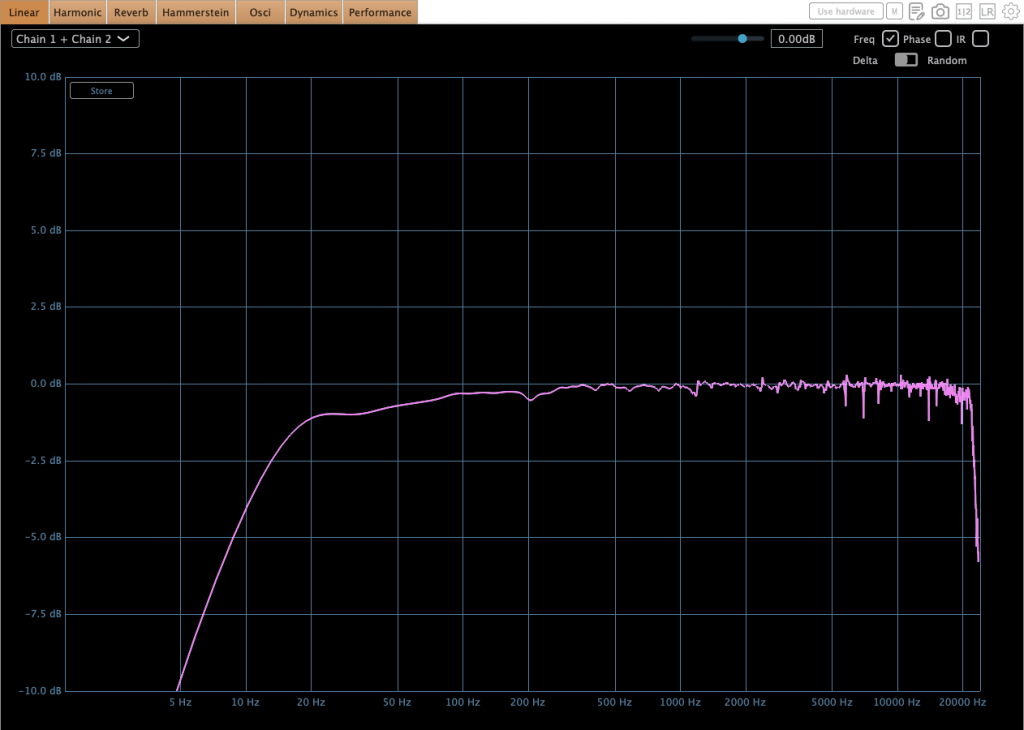
The frequency response also changes based on both the input level and the channel number.
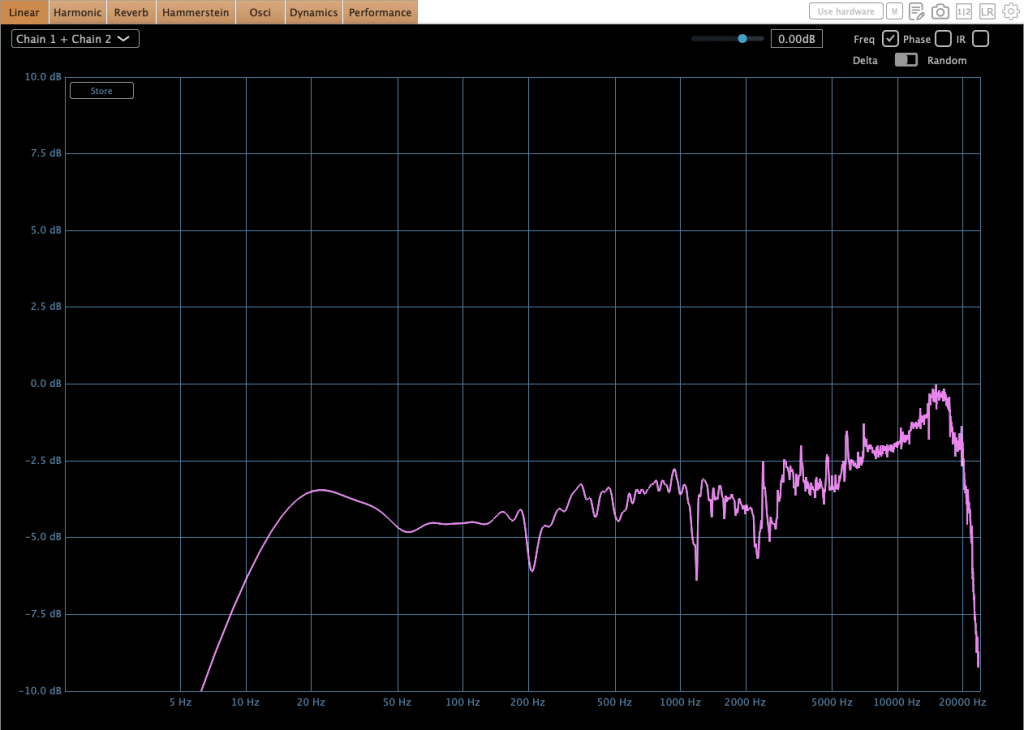
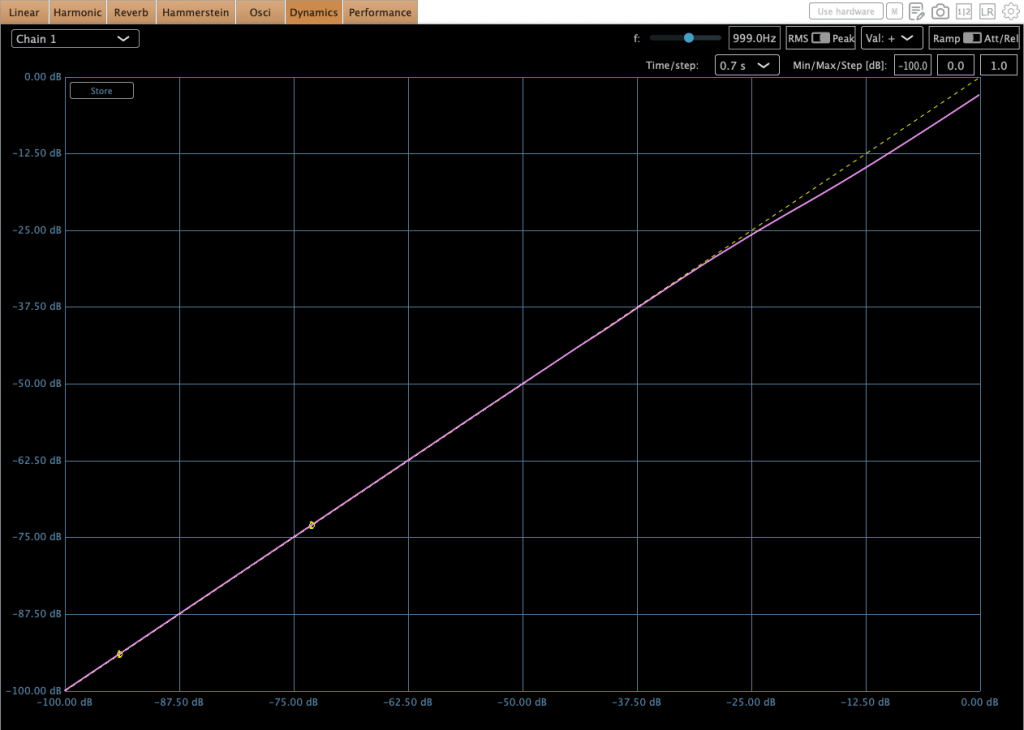
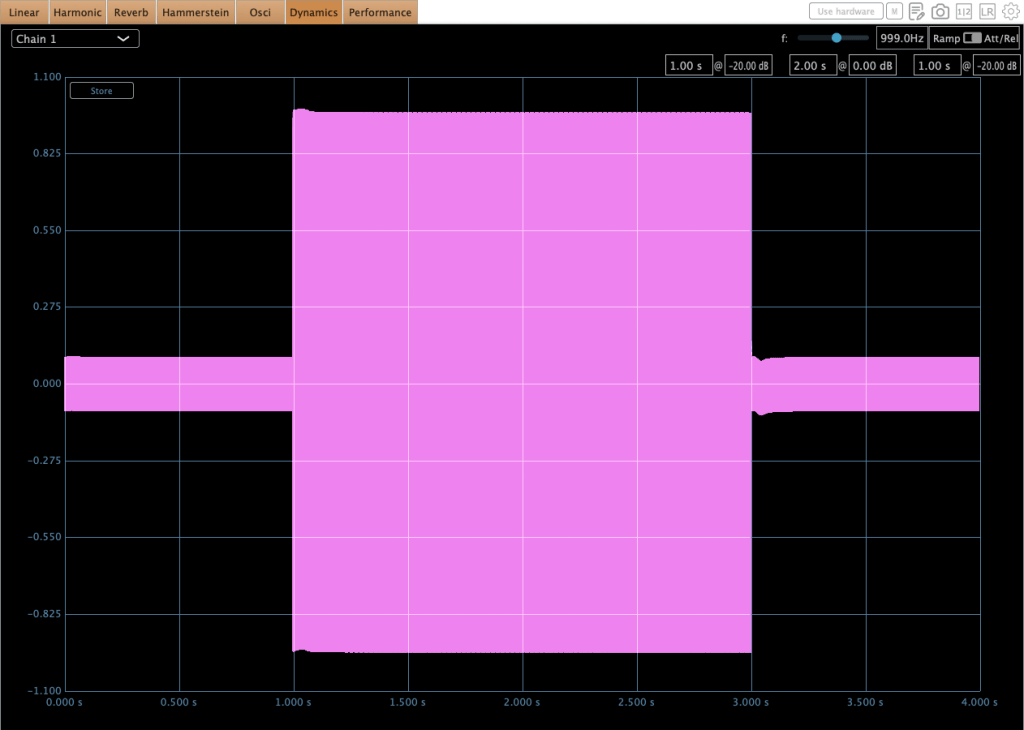
There is a slight compression or level loss at high signal levels.
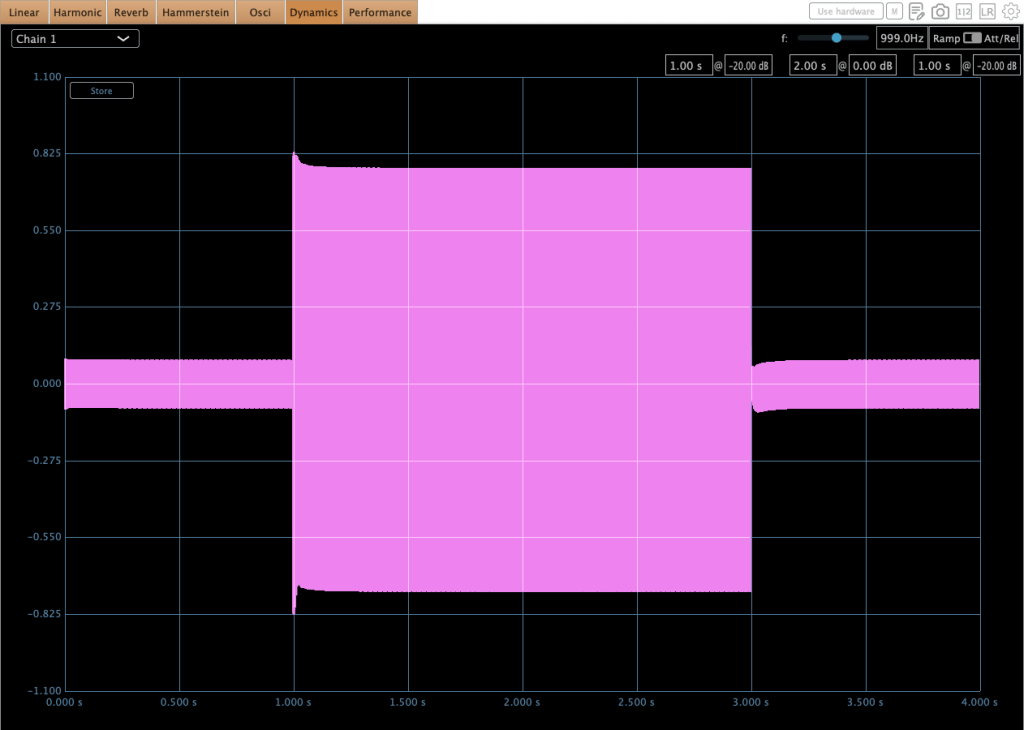
I was really surprised when I checked the oscilloscope. It showed a very similar behavior in this test.
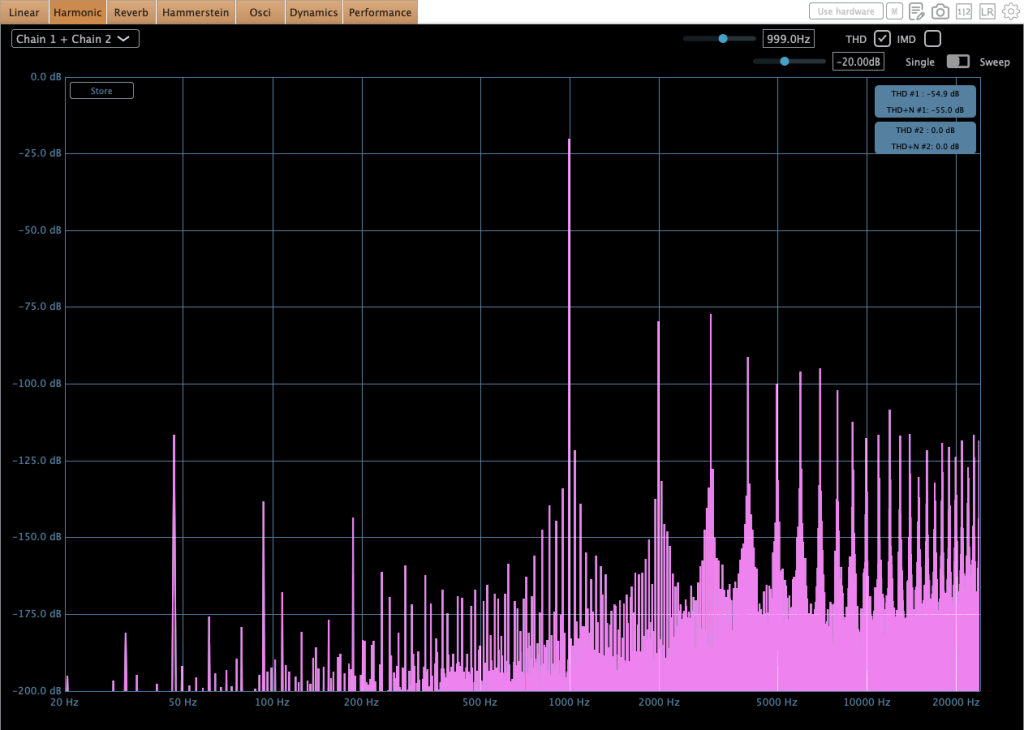
It isn’t a plugin that blows you away immediately upon insertion. Since the high frequencies can be a little prominent, polishing the top end with a subtle EQ move makes the underlying texture sound much better.
You can take a quick look through the link above.
MORG 81EQP3
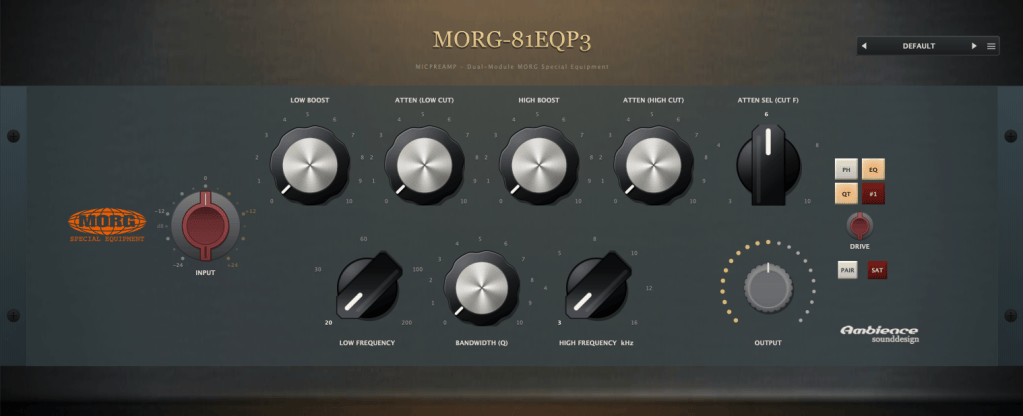
As you can tell from the name, it models the Pultec EQP-3 EQ. While there isn’t a vintage Pultec at the school where I teach, I do work with a Tube-Tech EQP-1A there. Surprisingly—and contrary to common belief—the physical hardware exhibits almost no high or low-end frequency loss.
In contrast, the MORG 81EQP3 slightly attenuates the low end and softens the top end upon insertion, giving it a gentle, rounded tone that I feel is tailor-made for jazz.
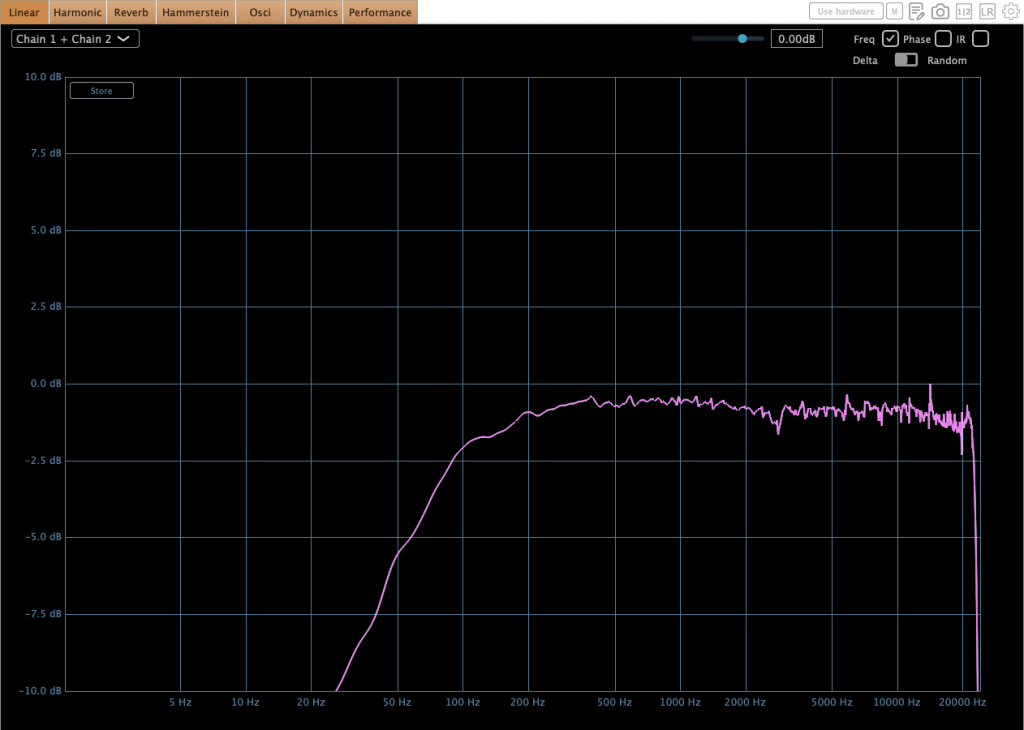
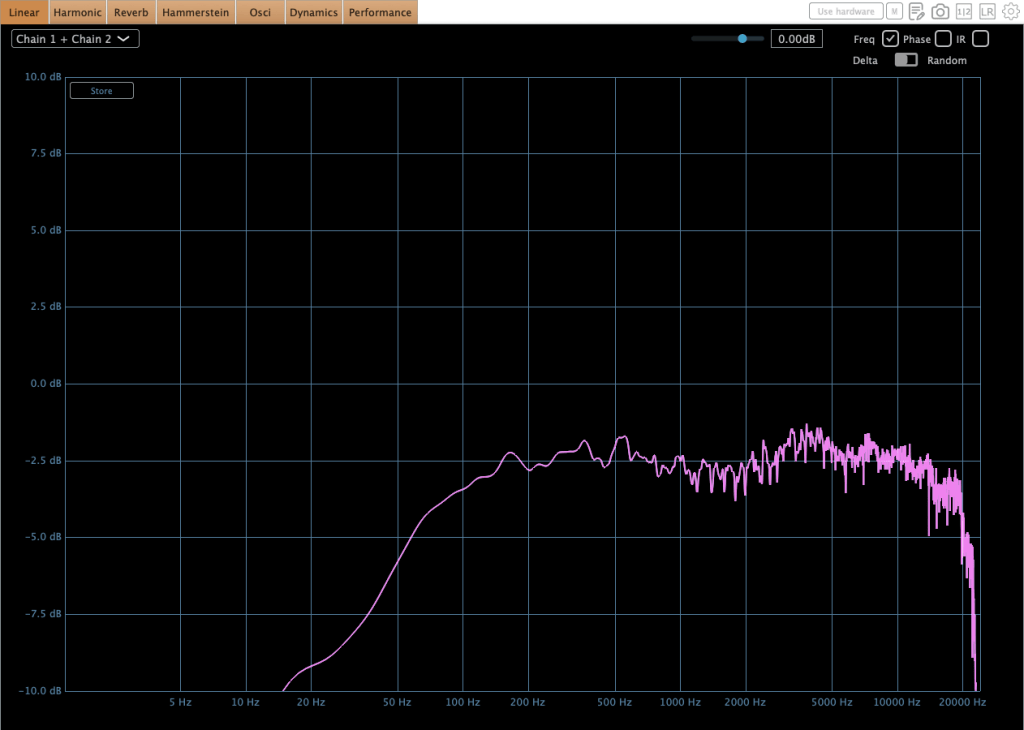
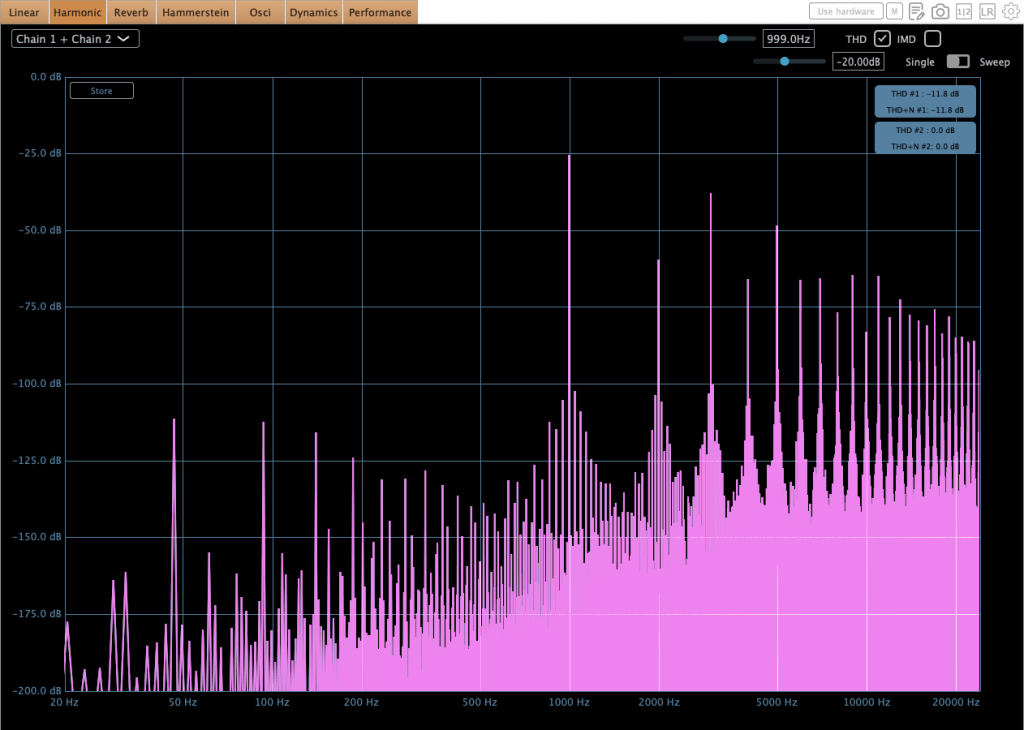
You can take a quick look through the link above.
Wrap Up
The Evertone plugin series is genuinely impressive. You can clearly see the dedication that went into modeling the MORG series, and the LA-5A made me stop and go ‘Woah….’ the moment I inserted it on a track.
Achieving this level of clean, transparent dynamics processing is by no means an easy engineering feat. Having the Evertone Compressor in your toolkit is ideal for placing right before final loudness processing—like Sonnox Inflator or Limiter—to ensure a pristine mix bus.
That’s all for today. See you in the next post!