DIY Audio Project #1 | Tube Saturator with Baxandall EQ (Part 1): Concept and Implementation in Digital

Hi! This is Jooyoung Kim, a mixing engineer and music producer. In the previous post, ‘Wrapping Up 2025‘, I mentioned that I was developing circuits for my personal audio hardware.

Now that the circuit design and simulation are finished and the components and PCBs have been ordered, I am writing this post to record the process—including the failures and successes along the way. To be honest, since the build isn’t finished yet, I can’t guarantee it will be a 100% success.

However, I thought it would be a great opportunity to share what is actually needed for the design process, starting from scratch. I want to explain things in a way that anyone, even those with zero prior knowledge, can easily follow along.

Let’s start!


Concepts

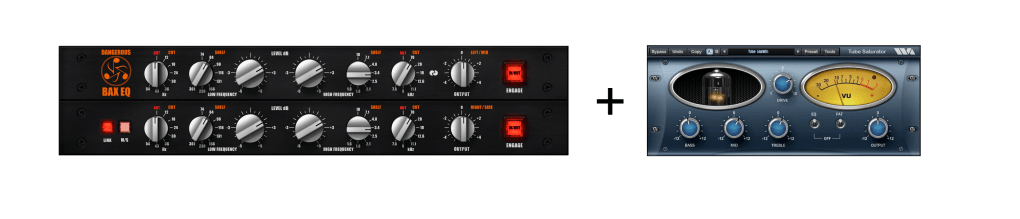
I really love the analog “tube” sounds. However, I don’t have any stereo tube saturator hardware. Also, I don’t have an EQ that can be used for mastering either.

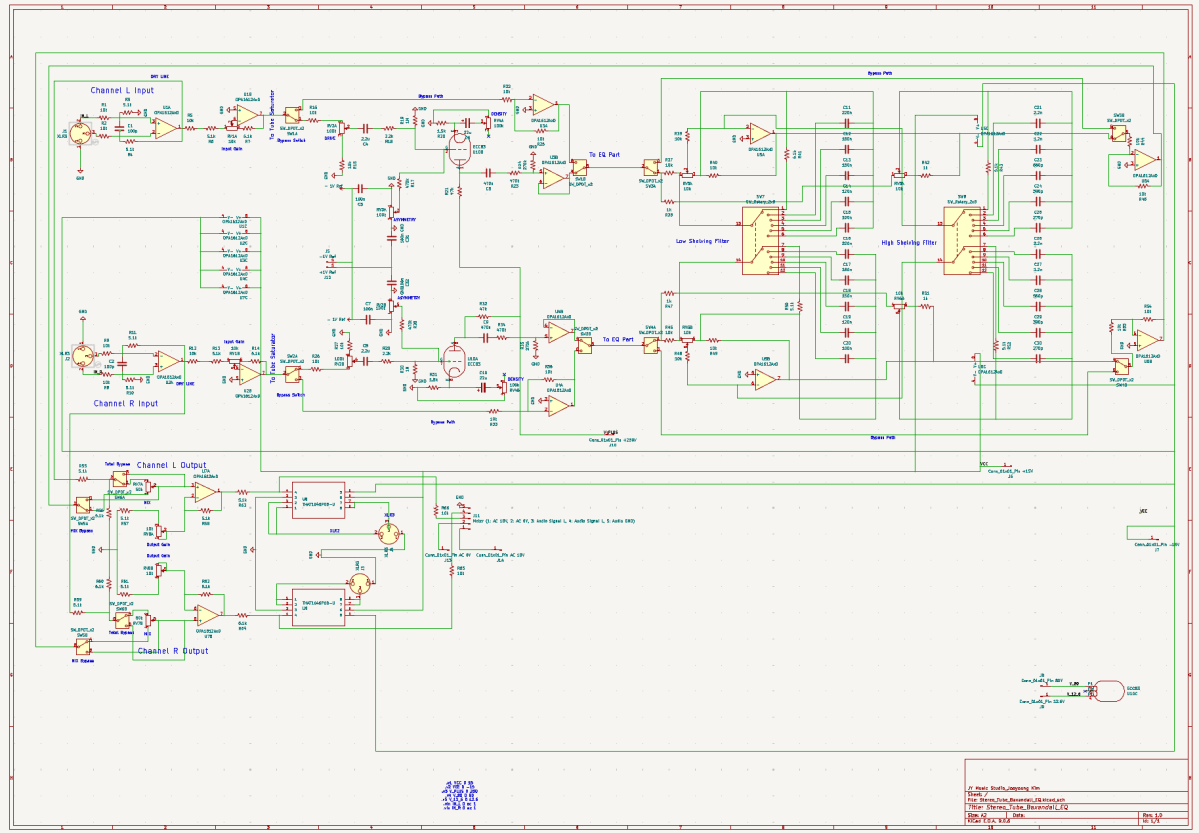
Therefore, I decided to make a stereo tube saturator with Baxandall EQ!
I used KiCad for this project. I highly recommend it because it allows you to seamlessly transition from circuit design to simulation, and finally to PCB layout. But that also means… once you’re done with the circuit, you still have two massive tasks waiting for you (hahaha…). I honestly had no idea what I was getting into until I finished the initial design!


Tube Parts
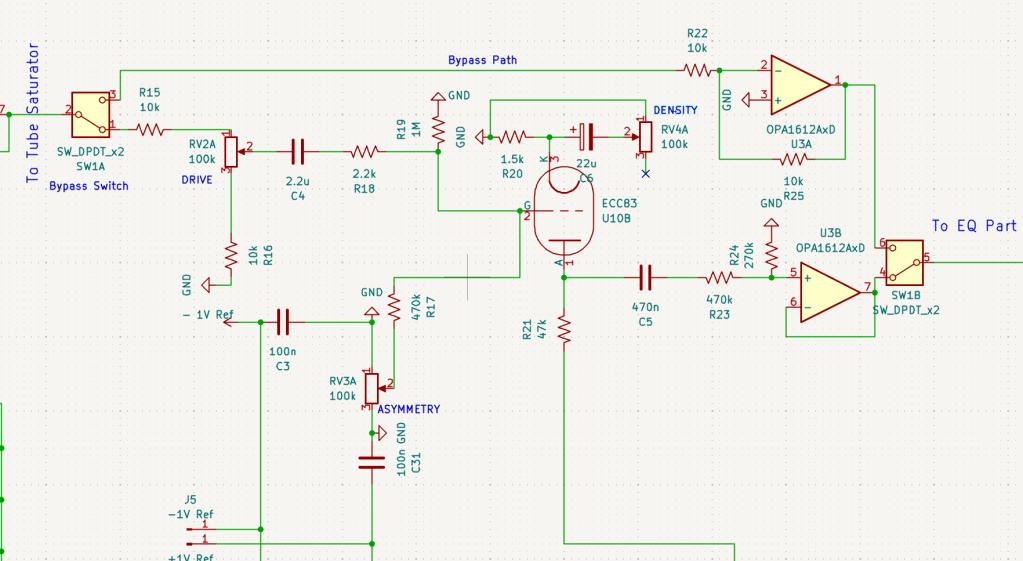
I already have two tubes (JJ Electronics’ ECC83) that were replaced from my Stam Audio SA-2A, so I wanted to use them for this project. Since I intend to use this gear in the mastering process, I decided to use just a single tube to drive the gain after the input stage.

I also designed the tube stage with adjustable ‘ASYMMETRY’ and ‘DENSITY’ parameters.

ASYMMETRY (Bias Adjustment) parameter controls the grid bias (+/-1V spans in my circuit)) of the vacuum tube. By shifting the bias point, it allows the waveform to clip asymmetrically, which generates even-order harmonics.

DENSITY (Saturation & Body) parameter adjusts the amount of feedback at the cathode stage. By controlling the effectiveness of the bypass capacitor, it pushes the tube to hit its saturation point harder or softer.

To develop this parts, I utilized Gemini (the free version) and referenced the manual of the Wave Arts Tube Saturator Vintage plugin for inspiration. Even though I majored in physics, it’s a field of pure science focused on fundamental principles, so I didn’t really cover practical applications like circuit design. As I mentioned, I actually had very little in-depth knowledge of electronic circuits starting out. But those tools were a huge help! Seriously, use AI tools—they can bridge the gap!


Baxandall EQ Parts
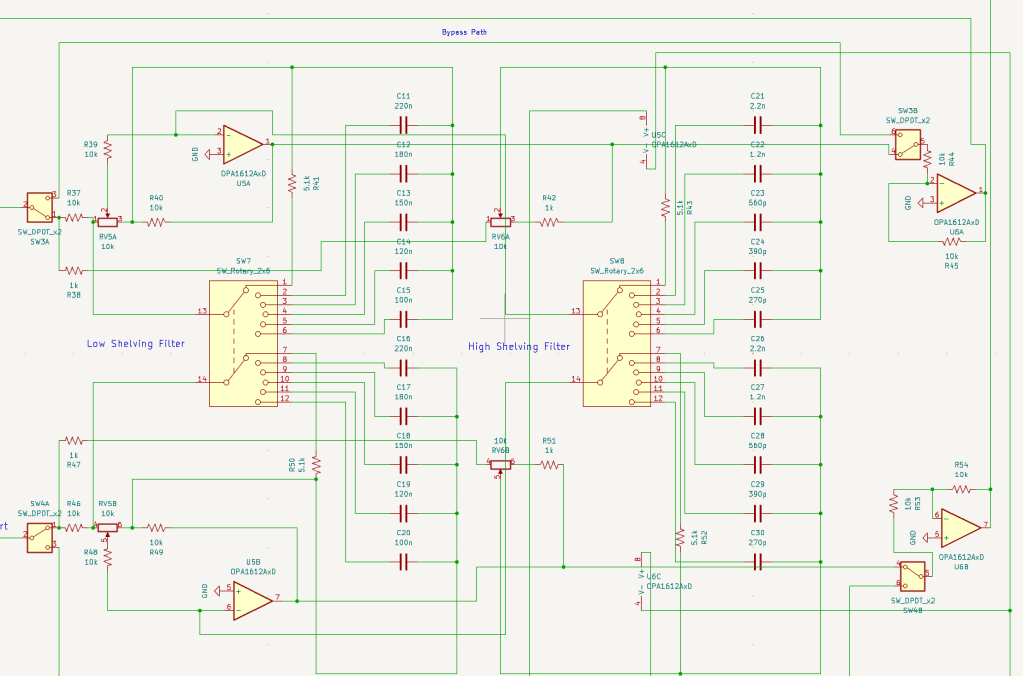
The EQ design is straightforward, consisting of two sections: Low and High. While the gain is continuously adjustable, I made the frequency switchable using rotary switches, allowing for precise and repeatable settings.

Baxandall EQ circuits are quite simple and well-documented, so you can easily find various schematics online to use as a reference.


Input & Output Parts
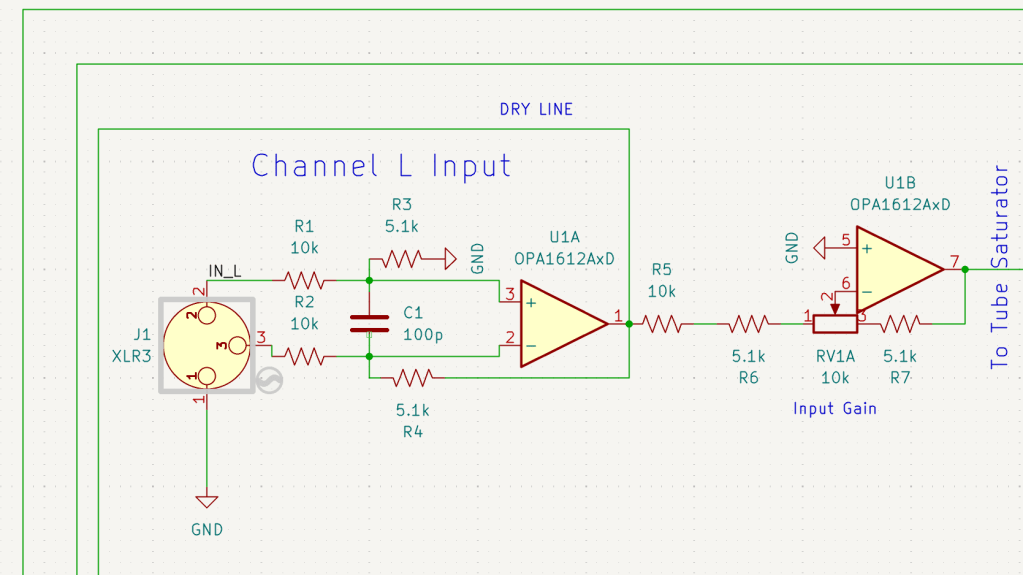
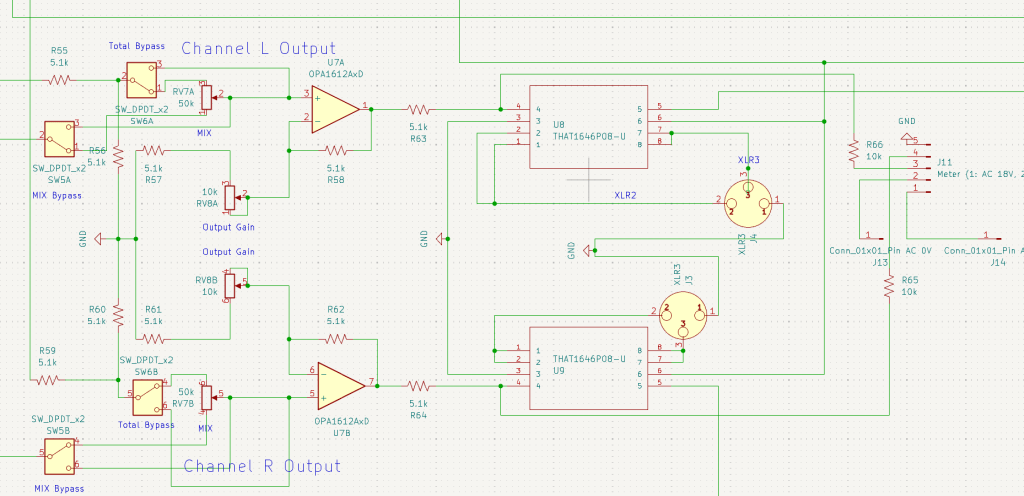
The input stage was simple enough, but the output stage was a total ambush. I wanted to include a Mix knob, a Mix Bypass switch, a Total Bypass switch, and an Output Gain knob. Trying to integrate all these features into the signal path turned into a bit of a mess!

After completing the overall design, I realized a crucial detail: every single stage had to be in the same phase! If the phases didn’t match, the Mix knob would be useless. So, I had to go back and triple-check the phase of every section after all the work was seemingly ‘done.’ I’ll talk more about this in my next post about the simulation process.


Power Parts
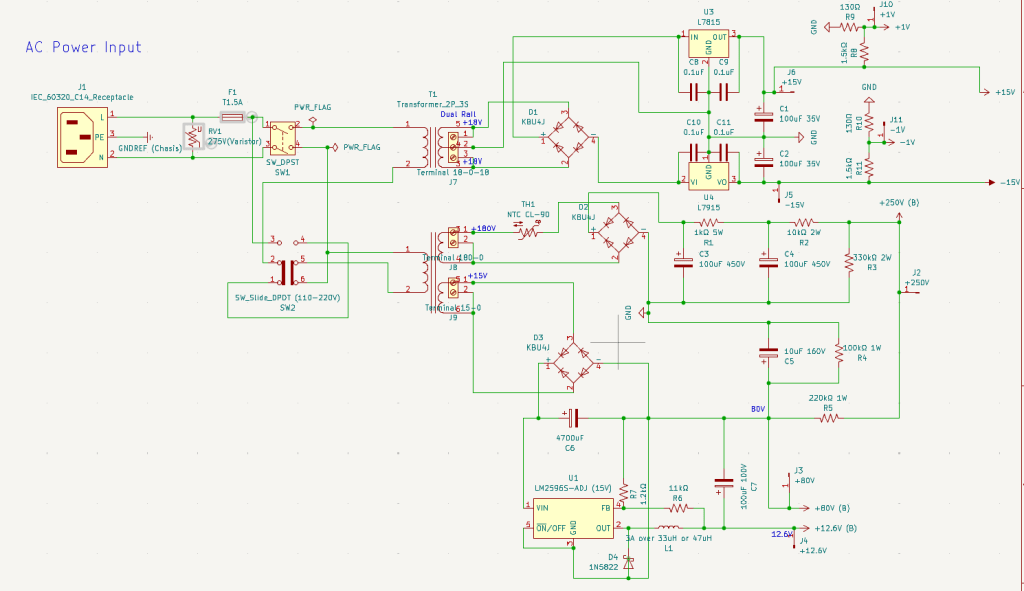
To ensure this hardware works in various environments, I included an adjustable voltage switch(220V-110V) in the power circuit. Since the design requires multiple voltage rails—250V, ±15V, +80V, +12.6V, and ±1V—I had to use a complex, custom-spec toroidal transformer. Managing all these different power requirements in one unit was quite a challenge!

Heat dissipation was a major concern for this build. I basically tortured Gemini with endless questions, forcing it to crunch the numbers until I was sure every component could handle the thermal load.

I’d like to dive deeper into the phase issues and buffers that need to be considered in the simulation, but it would make this post way too long. So, I’ll cover those in the next one.

See you then!

Heritage Audio HA73EQX2 Microphone Preamplifier Review

Hello! This is Jooyoung Kim, a mixing engineer and music producer.

I already had the HA73EQ and was very impressed with it. Thus, I decided to expand to a dual-channel setup. As a result, I sold it and bought the HA73EQX2 last September, and I think now is a good time to write a review.


Technical Observations

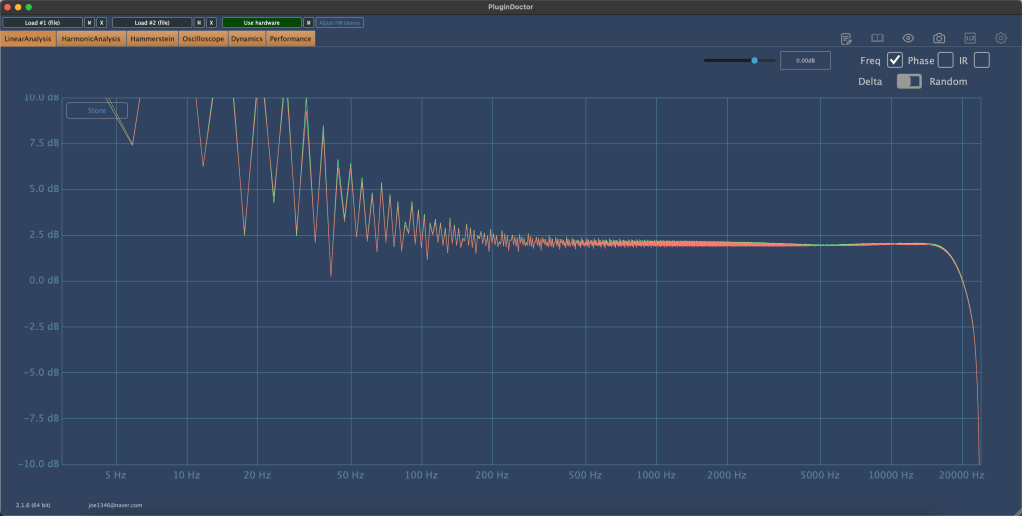
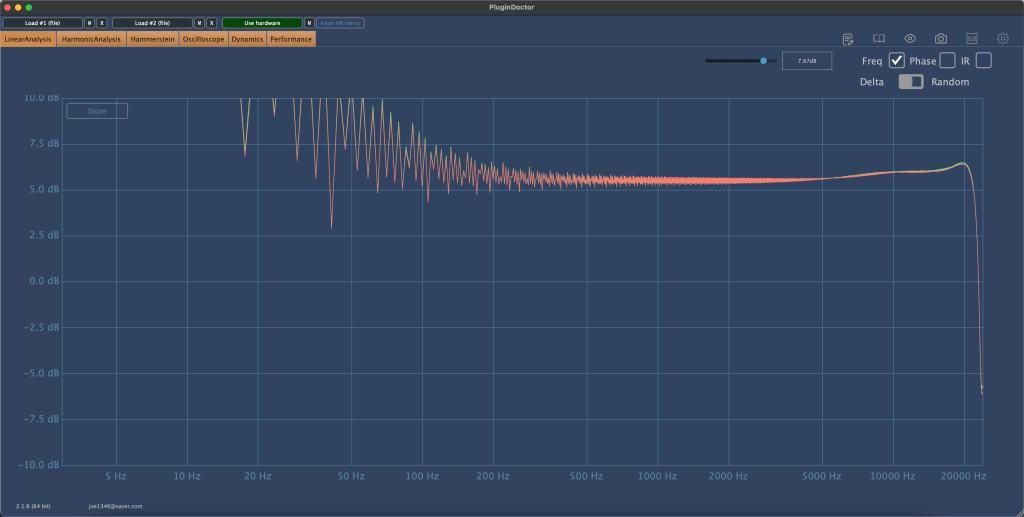
First, at the same value of each parameter, both channels have subtly different frequency responses. The responses seemed quite similar, but they were adjusted to match each other.

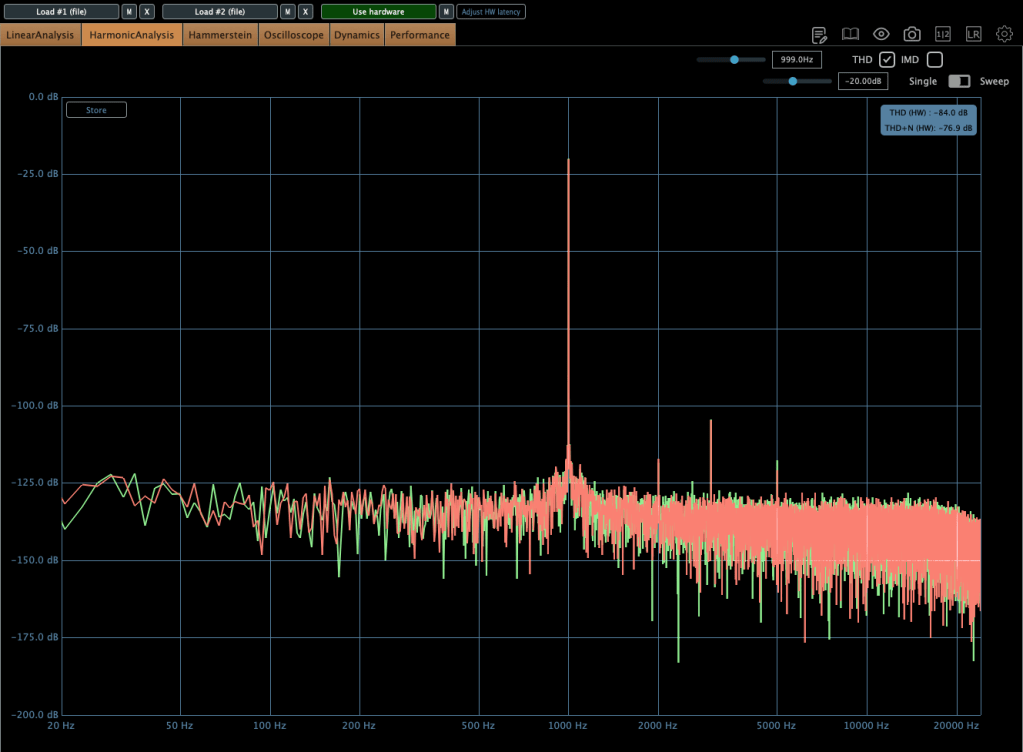
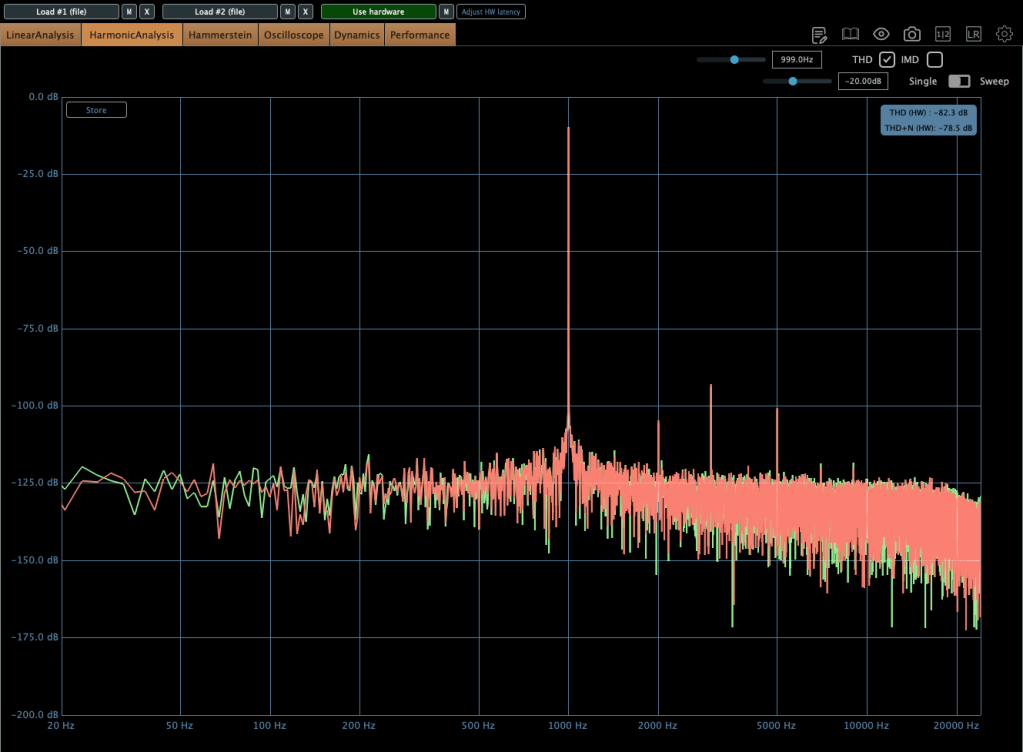
Harmonic distortions are not excessive, but they are enough to emphasize sounds.

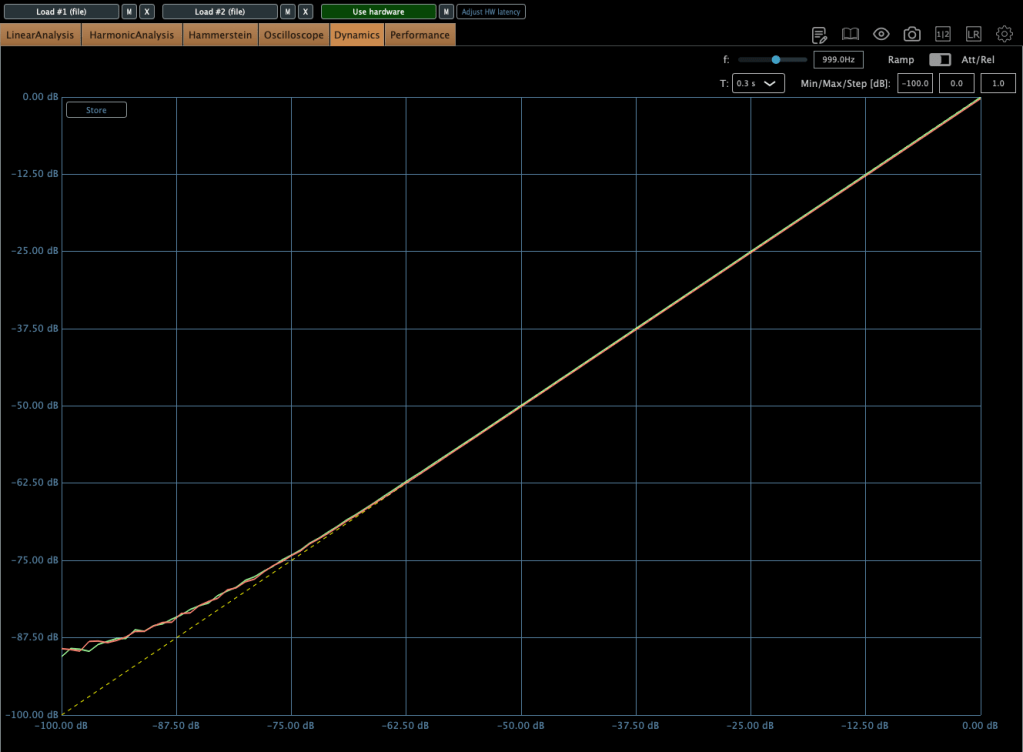
There is no compression in any amplitudes, and there are only very subtle changes at the transients in the audio sources.

I cannot fully explain how the character sounds based on the measurements. So, If I had to describe it, the HA73EQX2 ‘pushes’ the source, bringing the soundstage noticeably more forward.

I have experience with the original Neve 1073, and its “pushing” feel is similar to that of the HA73EQX2. Having worked with original Neve 1073s, I found this ‘forward’ character to be similar.

However, when I adjust it on the mix bus, it has too many harmonics… So I think I’ll use it to enhance each source that has weak harmonics and textures.


Final Thought

It’s a really great choice at a reasonable cost.

Honestly, the Neve 1073DPX is too expensive and doesn’t sound like the original. From this perspective, the Heritage Audio’s HA73EQX2 can be a great alternative. I might sound like a promoter, but after five years with Heritage Audio gear, I can genuinely recommend this preamp to anyone.

Thanks for reading, and I’ll see you in the next post!

Types and connections of patchbays, configuration of the system

This article was written on July 17, 2023. It is different from my current audio system, but I translated it and wrote it because I thought it would be helpful in planning the patch bay. Good luck!

Hello, I’m Jooyoung Kim, an engineer and music producer.

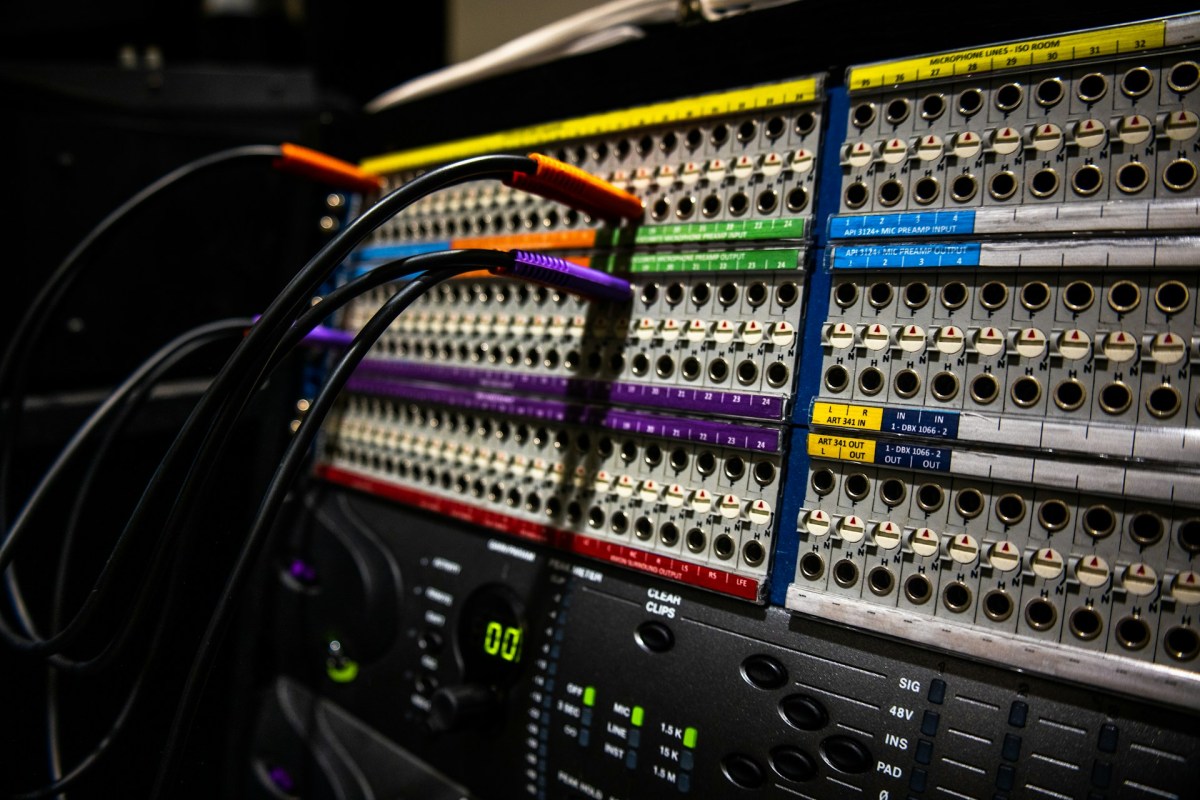
As musicians and engineers accumulate more hardware equipment, they often consider adding a patch bay to their setup. Today, I’d like to discuss patch bays and their usage. Let’s dive in!

Types of Patch Bays

There are various standards for patch bays, primarily categorized based on connector types:

  1. TRS
  2. XLR
  3. Bantam (TT)

You’re likely familiar with TRS and XLR connectors, but Bantam might be new to you. Due to its smaller size, Bantam connectors are commonly used in 1U patch bays, which can accommodate up to 96 holes.

However, TRS patch bays can have up to 48 holes and XLR patch bays can have up to 16 holes.

TRS and Bantam patch bays are further categorized based on internal connection methods:

  1. Normal (Full-Normal)
  2. Half-Normal
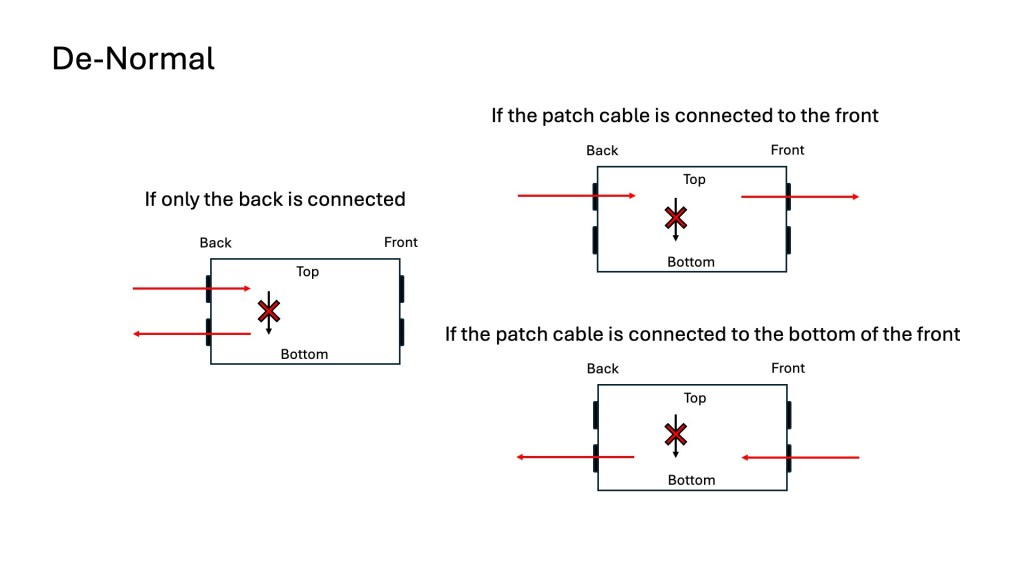
  3. De-Normal (Non-Normal/Thru)

Once you understand these, it becomes straightforward:

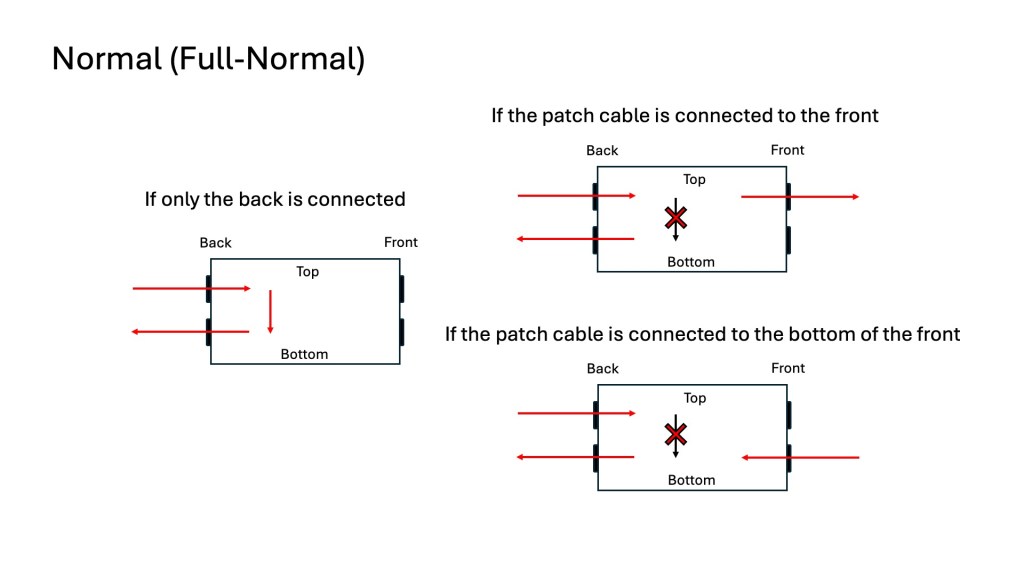
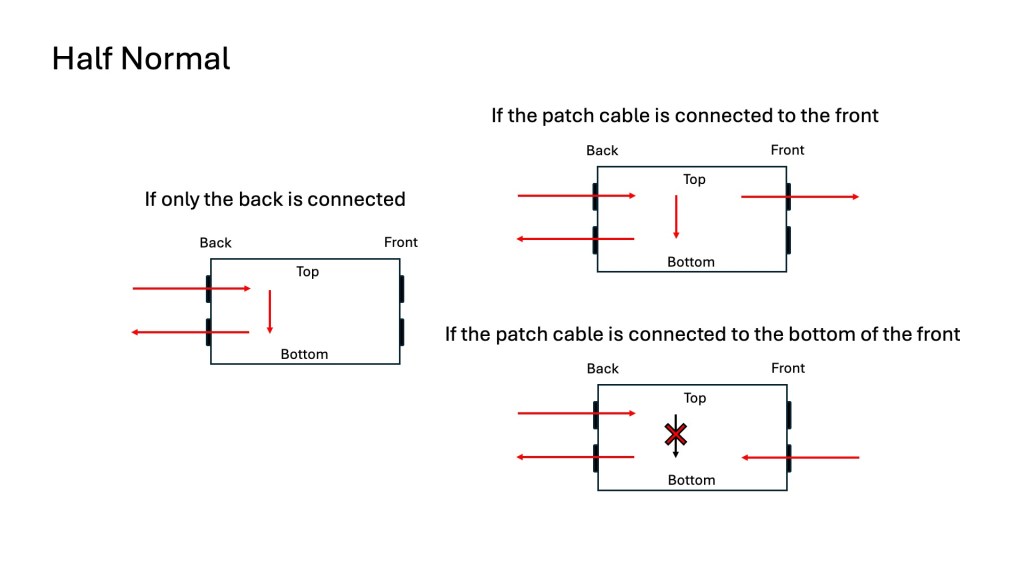
Normal (Full-Normal): The rear signal is connected without plugging in a cable at the front. Plugging in a front cable disconnects the rear connection.

Half-Normal: Like Full-Normal, but plugging in a front cable splits the signal for parallel processing.

De-Normal (Non-Normal/Thru): I opted for a patch bay that supports all three modes, even though I primarily use Full-Normal.

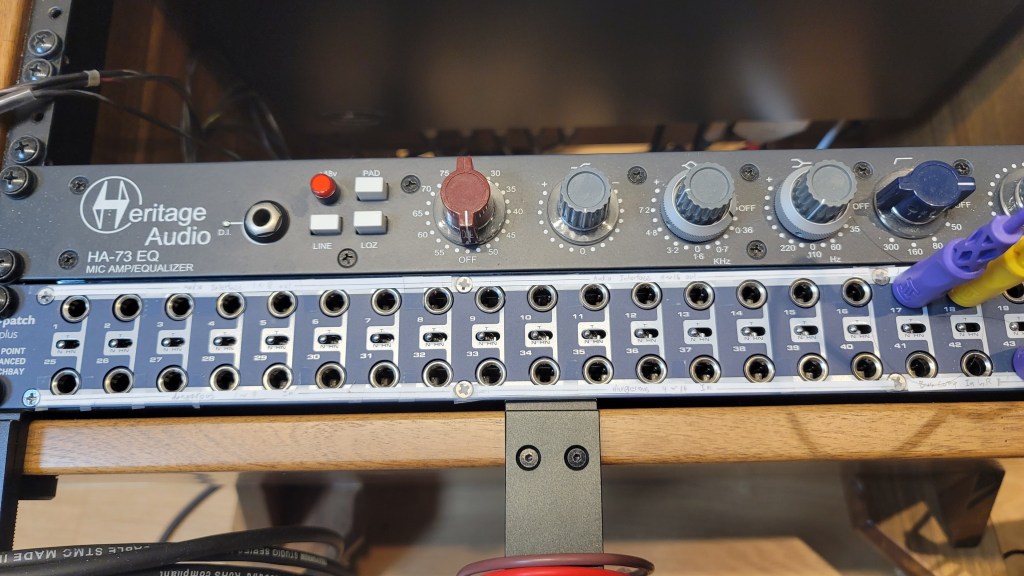
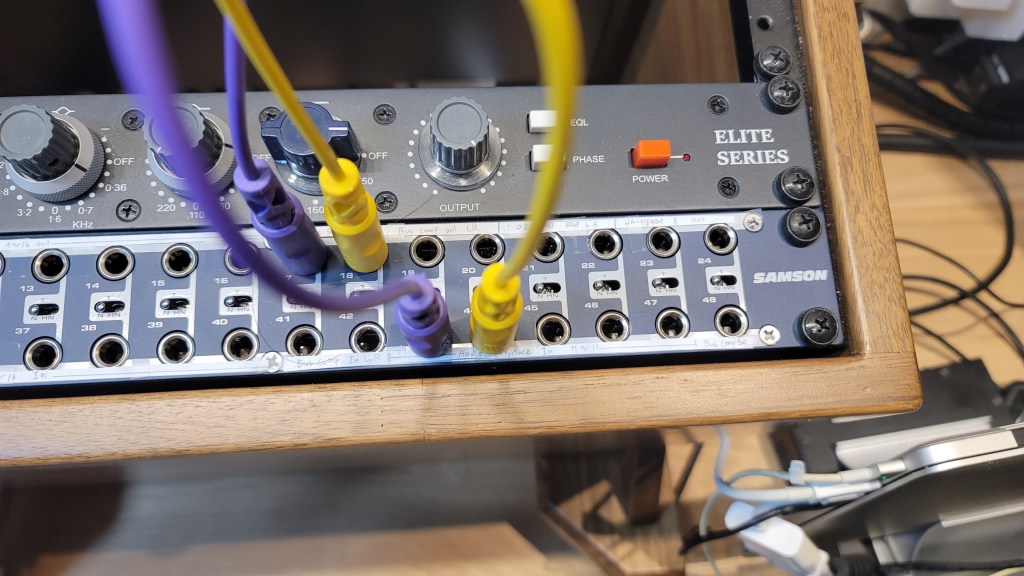
I bought Samson S-Patch: It supports all three modes, but labeling can be tricky due to the narrow spacing.

Configuring Your Patch Bay

Knowing the types of patch bays, the next step is planning your setup. Begin by listing the In/Out of your equipment. Here’s an example with my gear:

EquipmentInOut
Orion Studio Synergy Core12Line Out 16 /
Monitor Out 4
Dangerous 2Bus16Main Out 2 /
Monitor Out 2
Heritage Audio HA73EQ
(Mic Pre)
0 (Mic In not considered)1
OZ design OZ-2200
(Mic Pre)
0 (Mic In not considered)2
Bus CompressorLine In 2 / Side Chain 12

Prioritize your connections:

  • Out on top, In on the bottom for signal flow from top to bottom in Full and Half-Normal patch bays.
  • Begin with the equipment with the most Ins and Outs.

Although there are some limitations, like not fully utilizing some of Antelope’s Ins and the mic preamps’ Line Ins, this setup is efficient without wasting patch bay channels. For mic preamp Line Ins, external cable connections can be made as needed.

And label your patch bay accurately. You can find companies that print labels, but they may charge high shipping fees. Alternatively, you can cut paper strips for labeling.

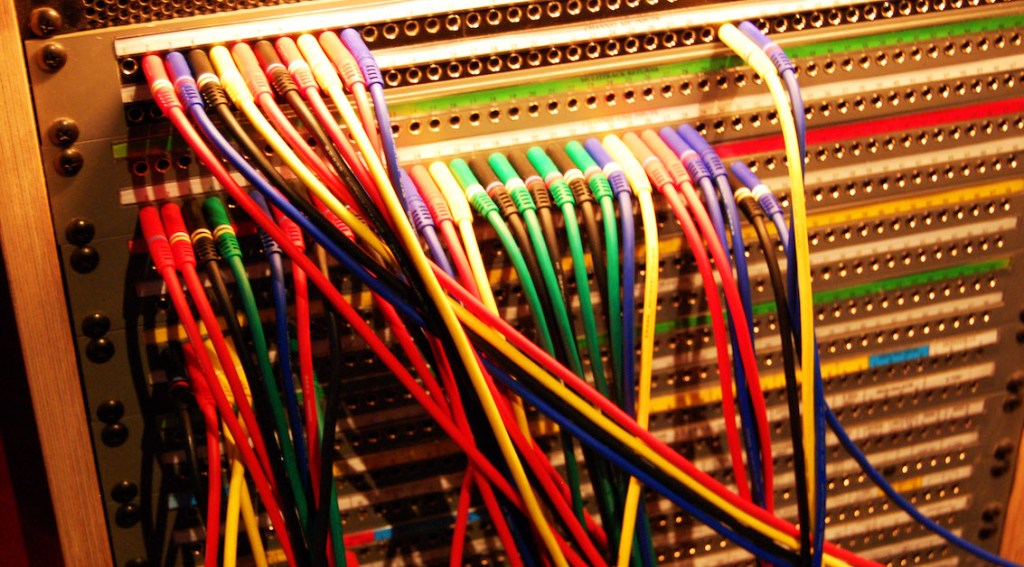
I purchased an 8-pack TRS patch cable bundle from Hosa, available at an affordable price on Amazon.

With this setup, your patch bay-based system configuration is complete. While my setup focuses on mixing hardware, those using hardware synthesizers can also benefit from a patch bay to enhance their workflow and creativity.

I hope this information is helpful to all music enthusiasts. See you in the next post!

Neve 33609 Compressor Story

Hello, this is engineer, music producer Jooyoung Kim.

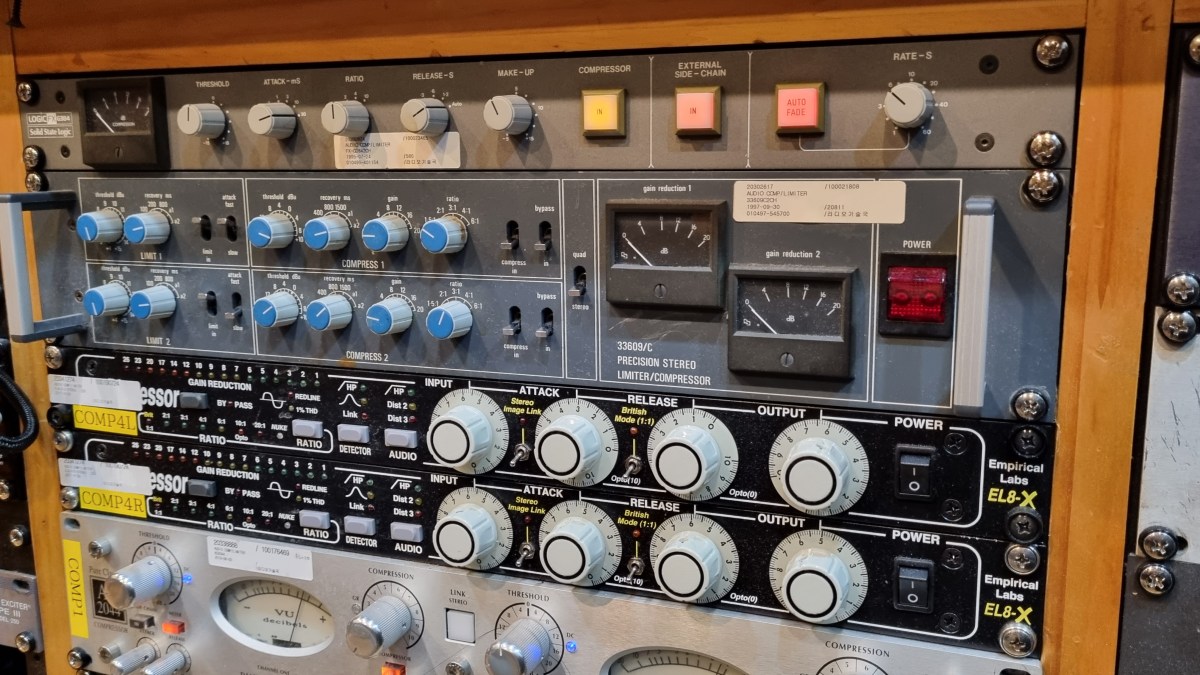
Recently, I saw a Neve 33609 C hardware compressor listed for 7500$ on a second-hand trading site. Since I often use the plugin version, I was tempted to buy it, which led me to share some thoughts about the 33609 on my blog.

The 33609 is widely used as a master or bus compressor. There are five versions: the original 33609, and the C, J, JD, and N versions.

https://vintageking.com/blog/2016/06/neve-33609-compressor

You can find detailed differences between these versions in the link above. Here’s a brief summary:

  1. Original 33609: A rack-mounted version of the Class A/B 2264, 32264, and 33314 (broadcast version) compressor/limiter console modules.
  2. 33609/C: This version replaces the original’s Maranair/St. Ives transformers with Belclere ones, improves the power supply, and swaps the Discrete BA440 circuits with BA640 ICs.
  3. 33609/J: Introduced in response to high demand from Japan after the C version was discontinued. It uses the same BA640 ICs as the C version, though many preferred the original Discrete BA440 circuits.
  4. 33609/JD: Created to satisfy those preferring the Discrete BA440 circuits, denoted by the ‘D’ in JD.
  5. 33609/N: The current version, featuring custom-made transformers from Maranair, closely resembling the original 33609 transformers. It includes a switchable Attack Fast/Slow option not found in other versions and retains the Discrete BA440 circuits like the JD version.

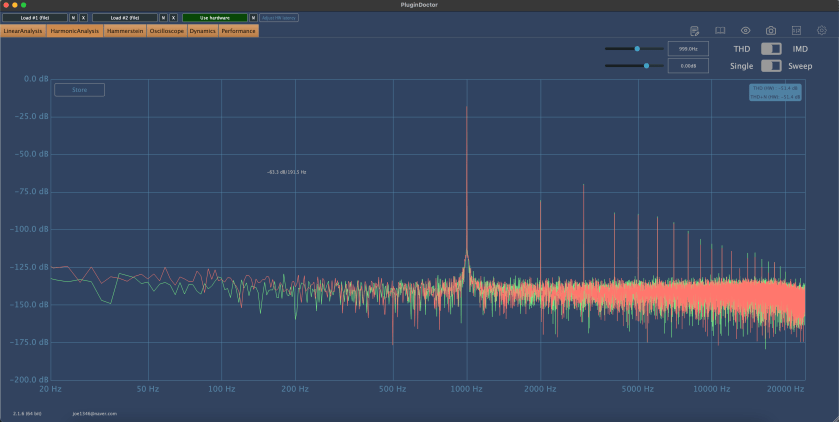
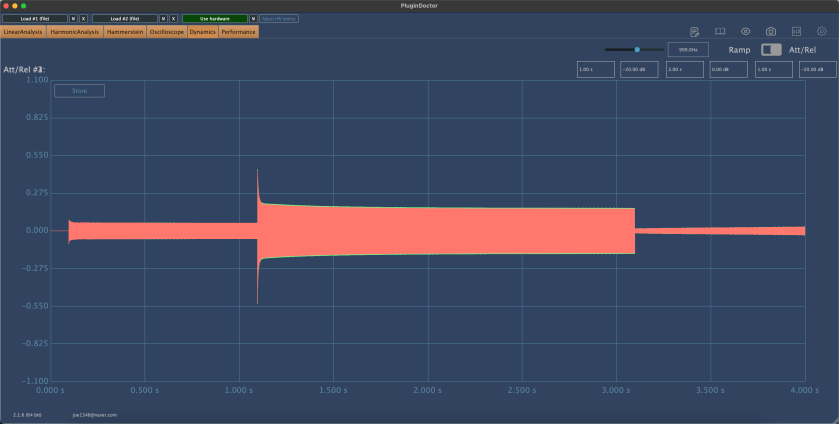
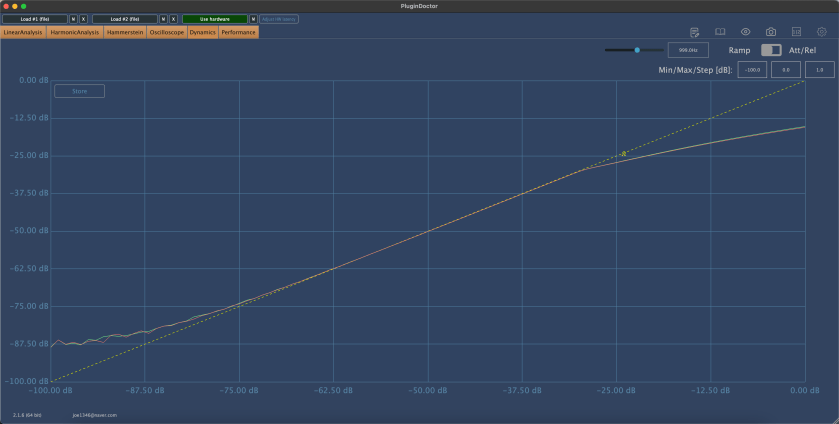
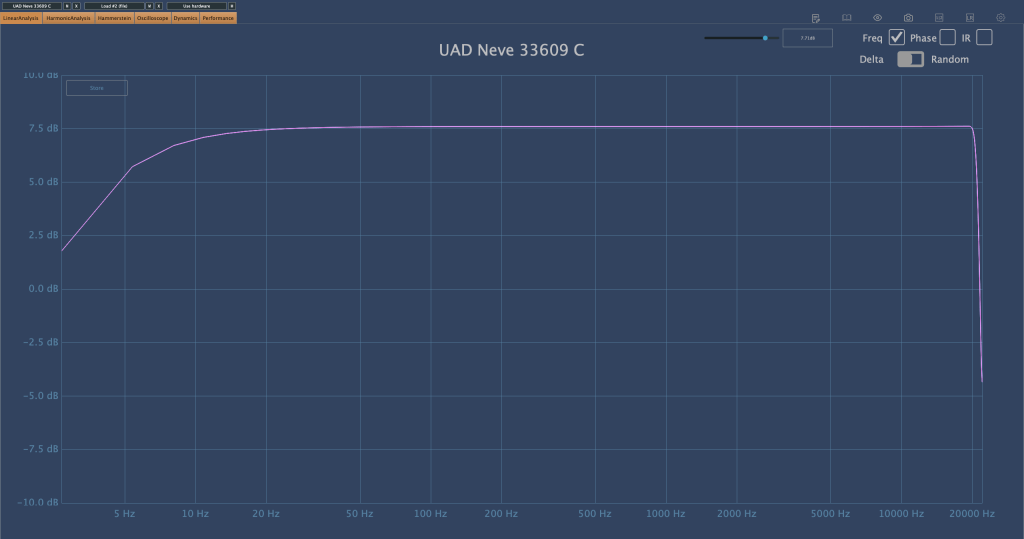
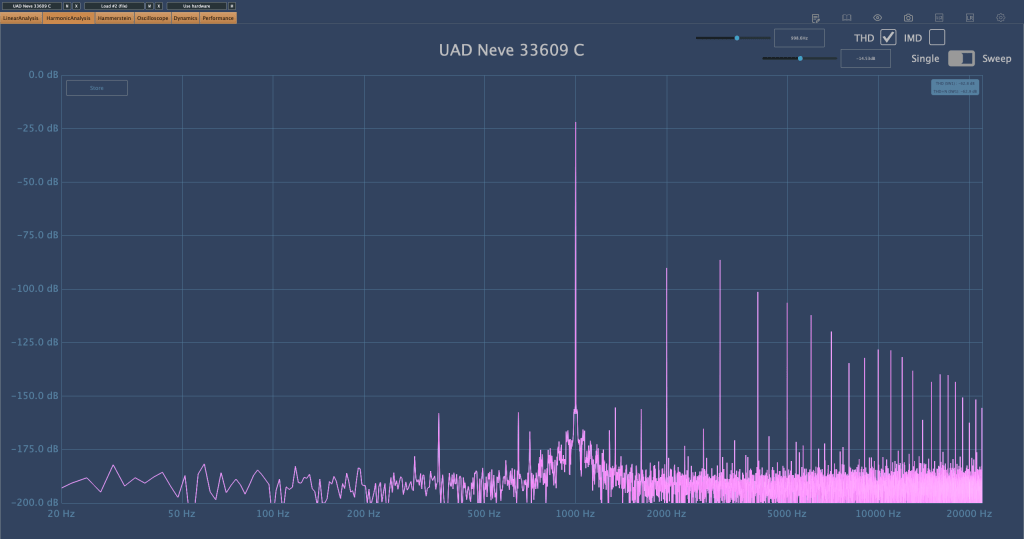
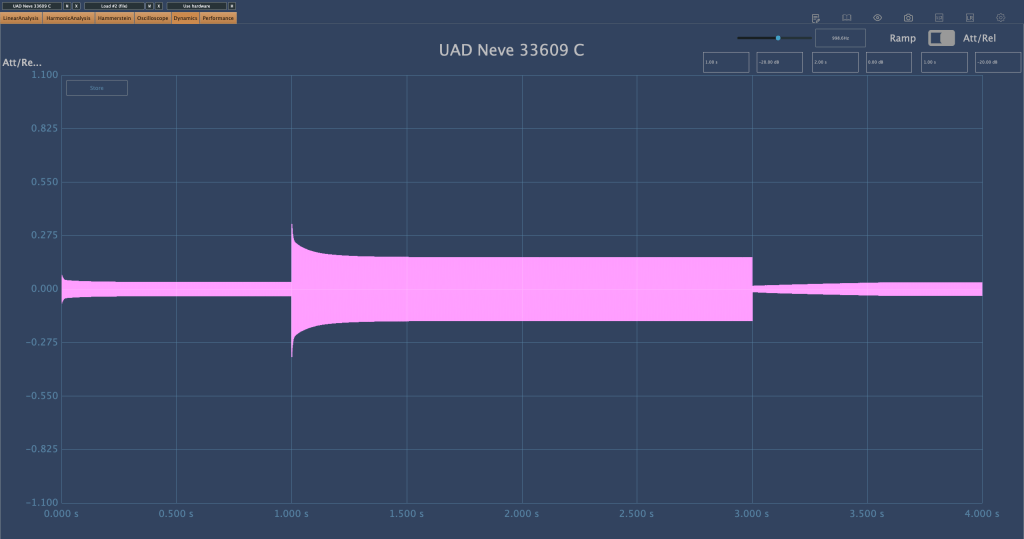
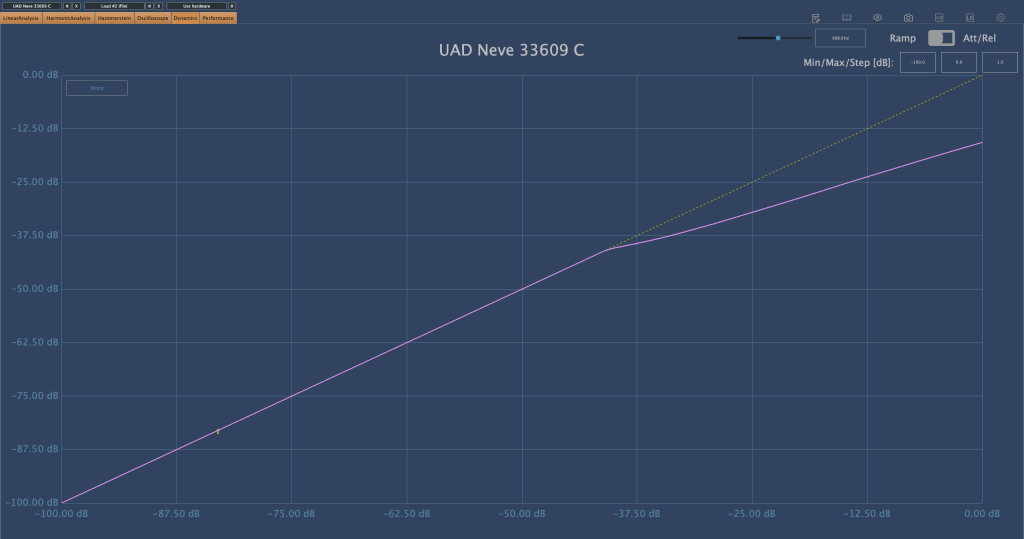
While working at a studio, I measured the 33609/C hardware with a plugin doctor program. Unfortunately, I don’t remember the exact settings used, but:

  1. The Frequency Response (FR) graph was likely tested to see how the input values affect the output.
  2. The Harmonic Distortion (HD) graph probably measured how the harmonic content changes with different threshold settings.
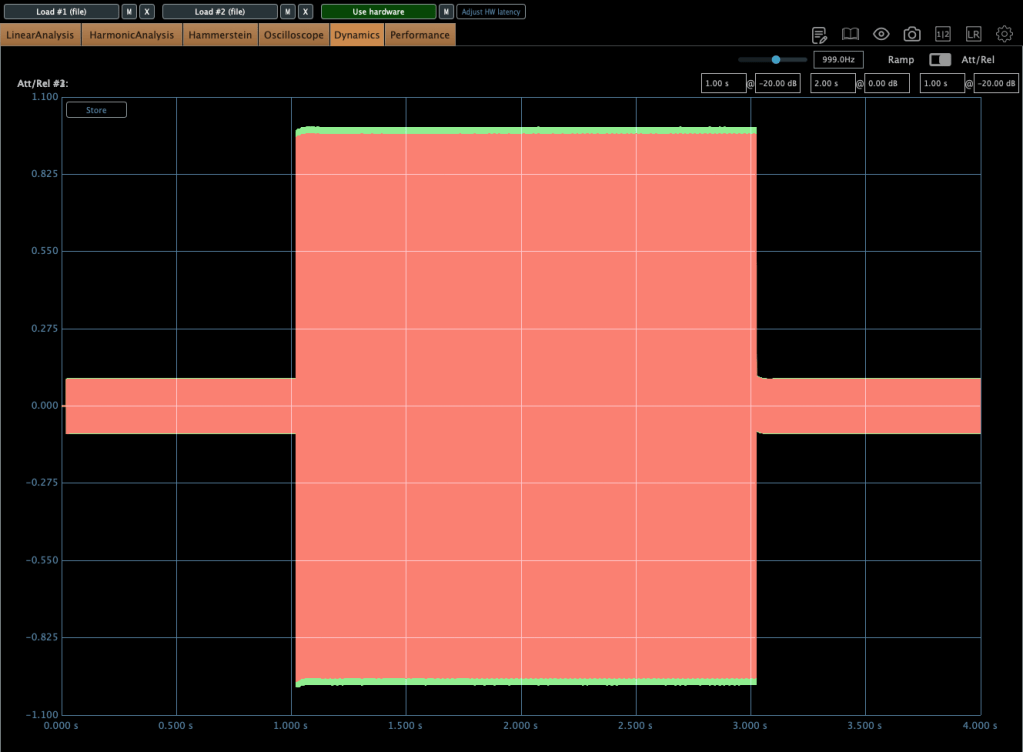
  3. The Attack/Release Oscillator might have been used to observe how the release values change between Auto1 and Auto2 settings.
  4. The Ratio Compression graph was likely used to check for the presence of a knee.

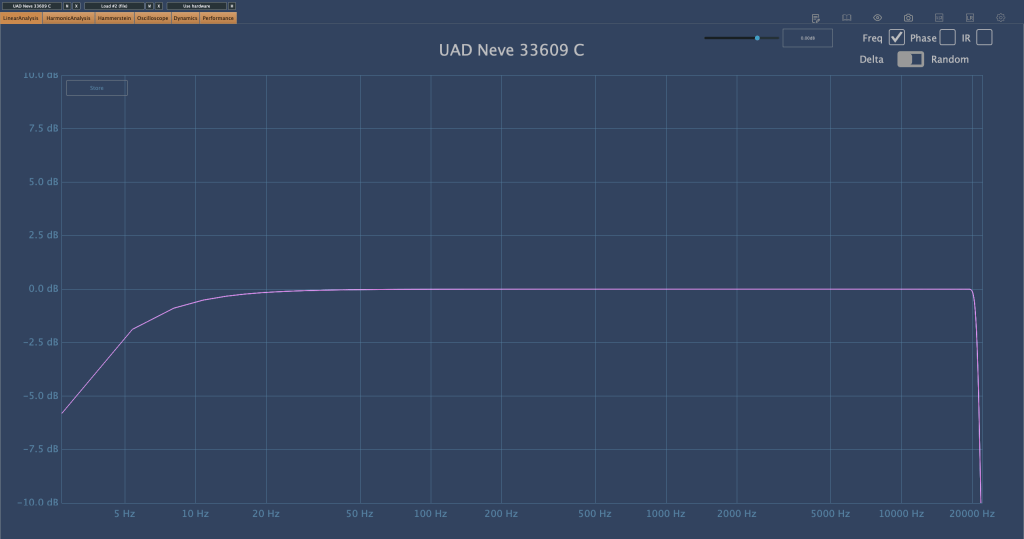
This is the UAD 33609/C plugin. It looks a bit different, partly due to the screen size.

Although I’d love to share more insights, I haven’t had much hands-on experience with the 33609/C hardware, so I can only show you these measurements…😢

There are so many things I want to buy. Even if I can’t afford the 33609, I’d love to get a diode bridge compressor similar to it, and an SSL 4000-style compressor. I’ve already found a potential SSL 4000-style compressor, so I might buy that soon. As for the 33609, maybe when I earn more money…

Both compressors are ones I frequently use in my mixes, and having the hardware would be incredibly useful. The SSL is clean, while the 33609 has a nice coloration.

Lately, I’ve also been eyeing a tube preamp that’s been on my mind constantly…haha. I wish I could just buy all the gear I want.

See you in the next post! 🙂